chocolate and caramel with the daring bakers
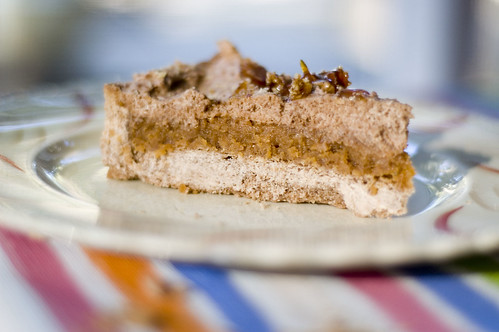
It's that time of the month again...and no, I don't mean THAT time (or at least, if I did, I wouldn't post about it here), rather, the time where the exact same identical recipe starts suspiciously popping up on blogs around the globe.
Oh yeah. It's time for Daring Bakers.
This month's recipe was a very fun Milk Chocolate Caramel Tart. I was super stoked to make it, because I don't often stretch my baking boundaries, and since this recipe was incorporating caramel (woohoo!) AND chocolate, I didn't see how it could possibly not be awesome. Well, read on....
Milk Chocolate and Caramel Tart
Daring Bakers - August
This tart starts with pastry. I freaking hate pastry.
Chocolate Shortbread Pastry
Note: The Chocolate Shortbread pastry can make 3 tart shells.
Preparation time: 10 minutes
Refrigeration: overnight
To make 3 tart shells: 9 ½ inches (24 cm) square
or 10 inches (26 cm round)
Ingredients:
1 cup (250g ) unsalted butter, softened
1 cup plus 2 tablespoons (150 g) confectioners’ sugar
½ cup (50 g) ground hazelnuts
2 level teaspoons (5 g) ground cinnamon
2 eggs
4 ½ cups (400 g) cake flour
2 ½ teaspoons (10 g) baking powder
1 ½ tablespoons (10 g) cocoa powder
A day ahead
1. In a mixing bowl of a food processor, cream the butter. (Leslie's Note - this is totally and completely different from any other pastry recipe I've made....they usually call for uber cold butter, so it stays in little bits and makes things flakey. This is strange)
2. Add the confectioners’ sugar, the ground hazelnuts, and the cinnamon, and mix together. This part I can totally do. Doesn't it look nice?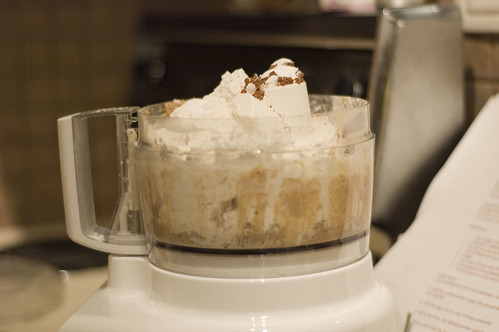
3. Add the eggs, one by one, mixing constantly
4. Sift in the flour, the baking powder, and the cocoa powder, and mix well.
5. Form a ball with the dough, cover in plastic wrap, and chill overnight.
So I made a big ole ball outta the pastry. And it felt kinda strange. Almost plastic-like. This should have been another clue.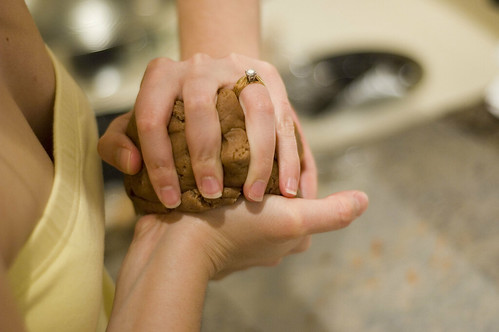
Milk Chocolate and Caramel Tart
Preparation time: 40 minutes
Baking Time: 30 minutes
Refrigeration time: 1 hour
Ingredients:
½ lb (250 g) chocolate shortbread pastry (see recipe above)
1 ½ cups (300 g) granulated sugar
1 cup (250 g) heavy cream (30-40 percent butterfat) or crème fraiche
¼ cup (50 g) butter
2 whole eggs
1 egg yolk
2 ½ tablespoons (15 g) flour
1 ¼ cups (300 g) whipping cream
½ lb (250 g) milk chocolate
1. Preheat oven to 325 °F (160 °C).
2. Line the baking pan with the chocolate shortbread pastry and bake blind for 15 minutes.
So I had a little fun with this simple little step. Witness.....I rolled out the pastry and it looked just about perfect (especially considering that it was I who was doing this....and I hate making pastry...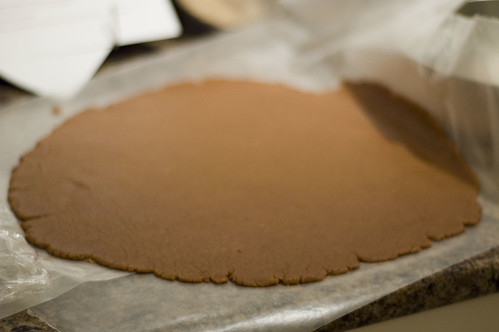
So then, culinary genius that I am, I decided to just pick the whole thing up on the waxed paper and toss it in the pan. I didn't want it to stretch and break while I was lifting it, so I figured this would minimize the whole stretchy misshapen pastry issue. Luckly, hubs was on hand to snap away. Witness again.....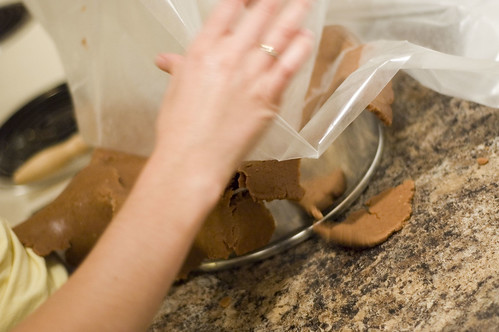
No, thine eyes do not deceive thee. That really is the pastry utterly and completely disintegrating. Don't worry, there's an even better picture...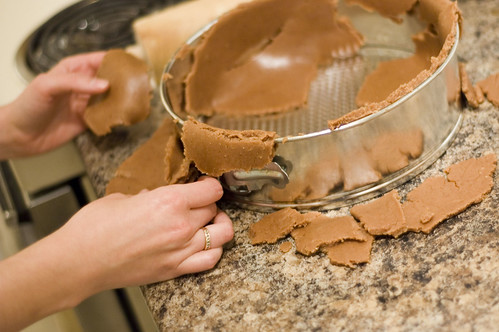
Oh yeah. It was bad. I think it just *might* be worse than the whole charred shortbread incident...not sure though....
At any rate, I eventually squashed it into the pan, and came up with this: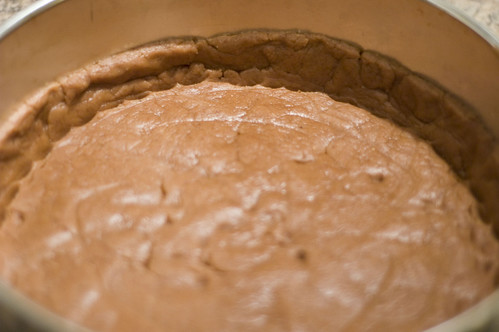
Clearly, not that pretty, a little thick and clumsy, but WHATEVER. At least it's one congruous mass, which is more than we can say for the rolled out version, eh? I lined the pastry shell with foil and weighted it down with uncooked brown rice to keep it from puffing. The bottom line is that this pastry recipe sucks....it's not chocolatey enough to be chocolate and the cinnamon needs to be BANISHED. Blech.
3. In a saucepan, caramelize 1 cup (200 g) granulated sugar using the dry method until it turns a golden caramel color. Incorporate the heavy cream or crème fraiche and then add butter. Mix thoroughly. Set aside to cool.
This recipe writer is a total minimalist. The "dry" method means that you are basically heating a pan full of sugar and crossing all the extremities that it doesn't ignite.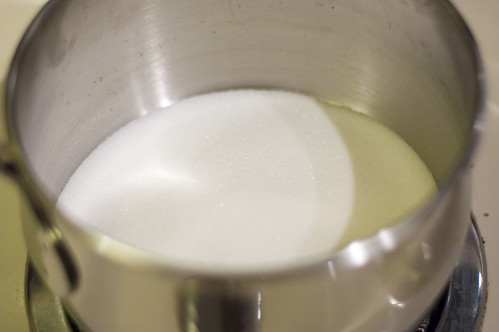
The jury seems to be out on whether one should or should not touch the caramel while it brown...I couldn't resist, because I was nervous that the bottom parts would scorch and burn before the top had even melted. So ended up with this: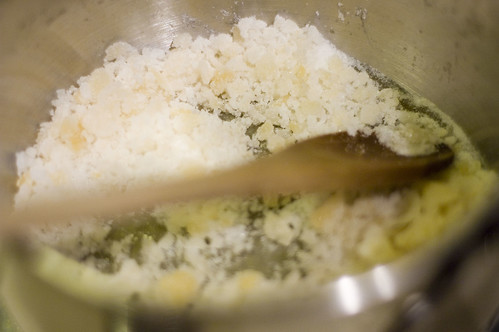
Meh. It eventually melted and didn't explode, much to my elation. Woot for that. Thankfully I had been warned about the thermodynamics that would ensue with the next step. Cold whipping cream and bubbling hot caramel make for explosive bedfellows, so I thankfully used a large enough pot to contain all the excitement. I was still completely freaked out though, so that's my ugly oven mitt you see blurred in the foreground.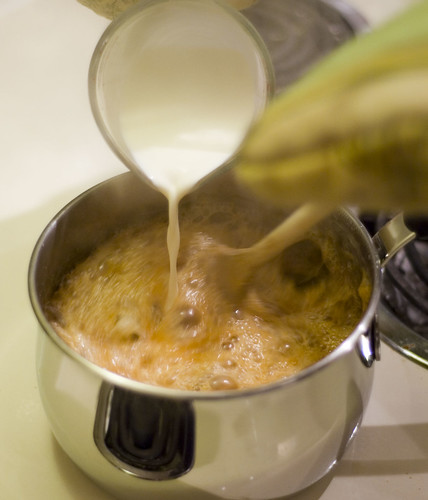
At this point (once it all calmed down), it was totally one of the best things I've ever tasted in my life. I would willingly eat it with a spoon. OMG. GOOD.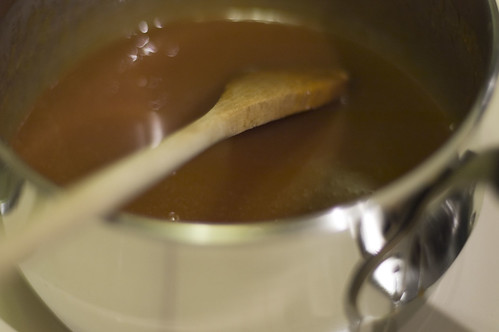
4. In a mixing bowl, beat the whole eggs with the extra egg yolk, then incorporate the flour.
5. Pour this into the cream-caramel mixture and mix thoroughly.
This part was relatively straighforward. No further drama.
6. Spread it out in the tart shell and bake for 15 minutes. Remove from oven and allow to cool.
I'm not sure if it was really supposed to be spreading consistency, because mine was very much a pouring kinda mixture. But it looked nice.
Though it didn't set up until about 30 minutes in the oven.
7. Prepare the milk chocolate mousse: beat the whipping cream until stiff. Melt the milk chocolate in the microwave or in a bain-marie, and fold it gently into the whipped cream.
So I totally ate at least 100g of milk chocolate at this step. I'm normally a dark chocolate whore, but this stuff just beckoned me with its creamy goodness. It's pretty easy to prepare. I melted the chocolate in the micro:
And folded it into the cream. It ended up a touch grainy, but is anyone seriously going to complain about milk chocolate grains in the midst of billowy clouds of whipping cream? If they do, send them my way....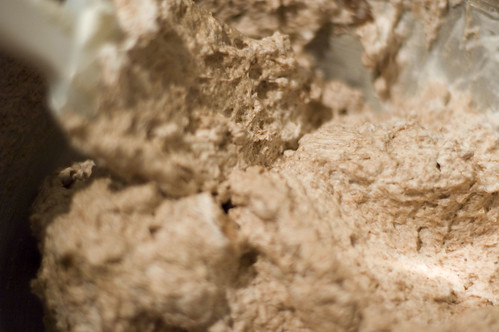
8. Pour the chocolate mousse over the cooled caramel mixture, smoothing it with a spatula. Chill for one hour in the refrigerator.
This step makes me seriously wonder if buddy who wrote this recipe f'ed up his verbs. I POURED the caramel into the pan, but I definitely had to SPREAD the mousse. Mmmmmmmmmmmmmm.....mousse......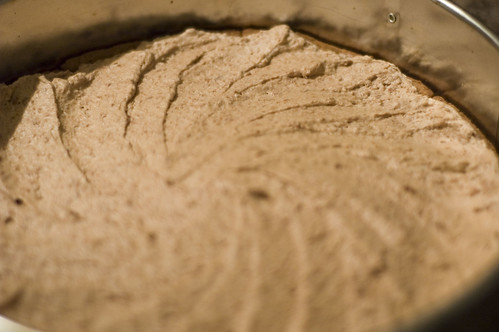
Thrilled with my handiwork and subsequent kitchen goddess status, I experimented with the ultra narrow depth of field in my new lens...yeah I know...overkill.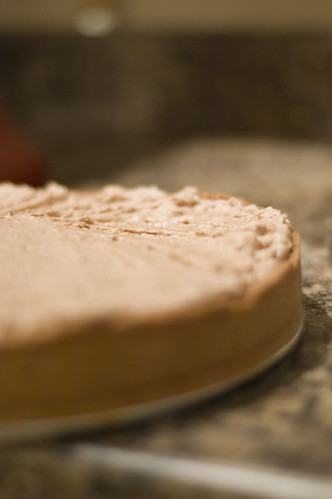
Caramel Fragments:
Melt ½ cup (100g) granulated sugar in a saucepan until it reaches an amber color. Pour it onto waxed paper laid out on a flat surface. Leave to cool. Break it into small fragments and stick them lightly into the top of the tart.
I had a little fun with this step. I used some of my leftover ground hazelnuts to make some of my caramel into a sort of hazelnut brittle. It was darn good.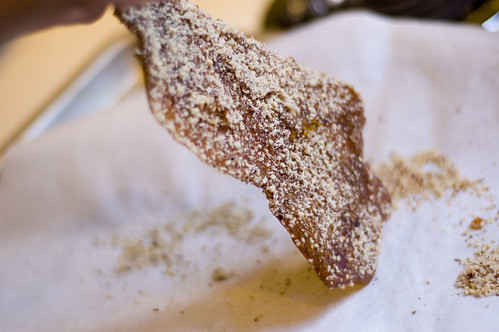
I also had fun with the regular caramel (which made cooler shapes):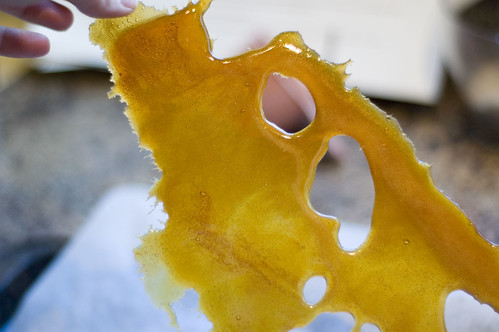
And bashing it all up with a meat mallet was surprisingly therapeutic (I learned the hard way last time that you don't mess with caramelized sugar....)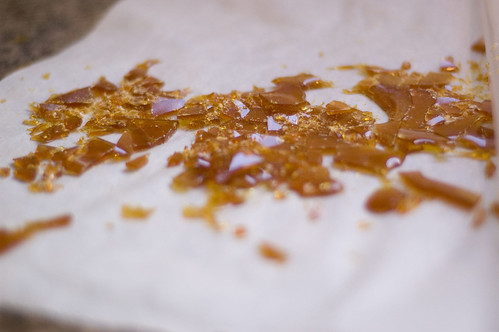
Of course, like last time I did the DB challenge, this one was also to survive a 200 km trek (different place this time), so I packed it up to go!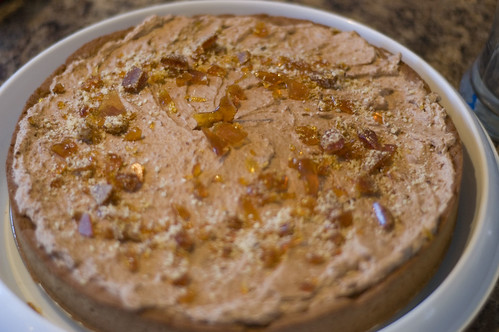
Under the cottage country setting sun, a few rays splashed their way across my cake, further melting the top sugary layer.....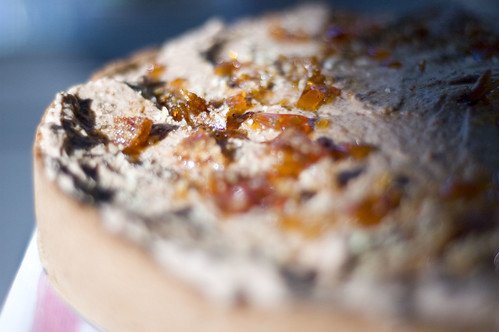
The Verdict:
The components of this cake are interesting. I will NEVER EVER EVER EVER AS LONG AS I LIVE be making that crust again. I hated working with it, and worse, I despised the cinnamon. It was WAY too strong and out of place.
That said, I loved the caramel filling. It was amazing. It was like eating a werthers, except I wasn't wondering how its creamy goodness had been made indefinitely shelf stable. I would make the filling again, in a regular pâte sucrée, and top with whipped cream. And it would make me a hero to whoever ate it.
Last, the milk chocolate mousse was yummy, but I personally found it was lost in this recipe. Don't get me wrong, I scooped it out of the bowl like chocolate was going out of style and I just found the last sale, but it's relatively sweet and not super chocolatey, so it wasn't enough to stand up to the assertive cinnamon and caramel flavours. It would also be good in its own tart, or as a filling in a really decadent chocolate cake.
And I totally want that caramel filling again right now.
Thanks for reading and be sure to check out what the other daring bakers created at the blogroll: http://daringbakersblogroll.blogspot.com/
Can't wait to see what next month's challenge is!


50 comments:
What a great idea to use the leftover hazelnuts. I love your photos, everything looks so good. The caramel was my fav part too. Yum!
Nicely done Leslie! I love your writeup and how you took pics at every step. The tart was rather delicious wasn't it?! Can I be naughty and say I like your 'gratuitous boob pic'? HeHeHe..
Well done again!!! :)
I agree... hubby was extra nice to us by showing some boob!
Kee'em coming!
Bah. Keep the comments clean guys - my MOM reads this. :p
How typical!! One thinks the tart is the star here and the guys only see the boobs! Leslie - I giggled all the way at your write up. Give your hubs a hug from me for taking those cool pics! You did an awesome job on the challenge Bravo!
i agree with you about loving that caramel filling! your step-by-step photos are the best!
The picture of the finished product was enough to send me desperately to the fridge for some chocolate! lol Looks darn good! :) Will try that mousse and caramel filling for sure! Although I'm not sure I get completely how to make it, but it sounds good enough to try it out! lol
Awesome job! United we stand in our hate for the shell! I'll fight you over that bowl of caramel anytime, claws and tines out!
Why yes, your crust did rebel against you. My caramel rebelled against me. All in a days work :)
Great job.
Wonderful pictures. Your efforts were worth it, I loved the way your layers looked!
I agree with you, the crust was my least favorite since it kept on tearing apart. Loved the way you posted the pictures...well done!
Well done Leslie, you overcame your problems and made a lovely tart :) Love your caramel cat (well I think it looks like a cat anyway!).
Hey, the dough wasn't so bad, was it? Well, it was a bit difficult to work with, perhaps, but I thought it tasted lovely and cinnamony. Your end result looks pretty - well done!
I was too disheartened to photograph my attempt at lining my springform pan. But let's just say that your attempt was infinitely better than mine. I didn't like the crust recipe either.
Haha - I love the photos, especially the one of the pastry. I didn't even try rolling mine out, there was NO way that could have worked with my supersoft dough.
Love the series of photos! I was so impressed with how well you rolled the crust out and then I dissolved into giggles when I saw it break apart. Great job with the tart.
Oooh, I do love your idea of the hazelnuts mixed in the sugar at the end for a type of brittle! I agree that this crust (food processor -- huh?) was strange. But shortbread is. And try pressing the crust instead of rolling it. Seriously. Your story of that crust in those photos is priceless. And look how gorgeous it all turned out! I'll have to sign my huzbink up for photos next time sans buzooms.=)
I'm sorry to hear you had trouble with the crust - I didn't and being a cinnamon freak it was right up my alley.
Your tart looks fantastic, Leslie, and I too found the caramel mixture pretty addictive. :)
I love, love, love your step by step pictures and commentary. Your tart looks great! Fantastic job! xo
I am told the dessert is delicious!You did an excellent job with photos of your progress at every step. I am trying to cut back on sweets so simply just drool over all the Daring Baker's triumphs. They will have to remain on the page unless..unless of course I invite friends for dinner...then I make dessert!!!
The exact same thing happened to my crust!!! Your finished product looks good, even if you didn't like it. I didn't enjoy it either...
LOL... my shortbread fell apart, too but I pressed it into place. Your's turned out scrummy looking!!! (that is a good thing, btw...) I love all your pics and the way you wrote it all up. Very enjoyable reading!
OMG I've got tears!! THAT was hysterical. ;)
The picture of you stirring the caramel while pouring in the cream with those HUGE oven mits just sent me over the edge - thank you! I needed that. :D
A beautiful tart and a job so well done!
xoxo
I loved seeing your photos of the whole process - that's dedication! Really gorgeous tart!
Hee! Very funny. Hazelnut brittle! Very clever.
I thought using warm butter was wierd too. Then I forgot to add the eggs...
Your tart is beautiful and I'm envious that your caramel worked so easily, but gald for you. The dough is actually quite good as a base for bar cookies, without the cinnamon. Love the way you decorated your tart with the caramel...both kinds, right?
You had me laughing so hard! I love your write up! Thanks for giving us a great story. And yeah, I'll fight you for that caramel. Gawd, it is so good!
ha! i agree! the caramel was to die for, but the mouse was sub-par. and the tart shell, i dunno, too dry? too many ingredients {hazelnuts & cinnamon?!}
but your tart looks beautiful, and your documentation of the whole experience is great!
Leslie,
I love how you photo document everything! Your tart looks tremendous!
I agree that the mousse got lost in the tart in between the crust and caramel. Advice, although you did not ask, when I make dry caramel, I use a large saucepan, shallow type so the sugar is in a very thin layer and it does not clump up. You did an amazig job and I loved reading about your account after each step. I love the quality of your pictures!
love the step by step. glad you like the tart, I do too!
Love all the photos. My tart crust crumbled too, it was pretty frustrating. I couldn't resist stirring the sugar and it clumped up on me too.
Loved your post, as always. The hazelnut brittle was a brilliant idea. I never think of these things.
Excellent write up and pics Leslie. As ever you made me laugh out loud!
Wow - you rival that crazy Pioneer Woman with your step by step pictures. Fantastic job.
Too funny! I am so glad we cleared up what time of the month it is (hehe). I love your unabashed approach. I agree the recipe left me wondering "what?" Your photos are great and your tart looks great. I liked your idea of coating the caramel with the hazelnuts. Wendy
Who knew reading a baking blog could be dangerous while drinking water? I too marveled at the smoothness of the crust on the waxed paper and collapsed into laughter at what happened to it. The third picture, with the crust in flat pieces, is something I can relate to with this recipe.
Thanks for such an entertaining entry, and it looks like it worked out for you!
Wasn't that caramel just divine?! I had a bit left and spooned it all straight from the pot into my mouth.
Hahaha thank you for a great laugh in the telling of your tale! It was better than the book I am reading!
Great work on the tart, and I'm with you on the crust!
Heh, the depth of field in that picture is a little short, but I'm impressed by your dual decorations, both hazelnut and plain. Best of luck if you give it another try!
Well yes I have just about the same photo of that crust on my blog! But I liked the cinnamon! And like you I loved the caramel!
I'm envious of the way you got your pastry to look like pastry before being chilled. Mine turned out like thick buttercream! Finished tart looks great though, Have to admit im a cinnamon adict though :)
Looks so lovel!
Well done! I had huge issues with the tart shell as well. But you persevered! Looks lovely!
I loved making the caramel too. Your tart looks wonderful.
+1 for boobs!
Wow Leslie... I love the way your photographic essay sets *clear* expectations for anyone who wants to tackle this. (and I will certainly learn from your challenges and successes during my belated attempt with this one).
And what *better* arsenal for facing THAT time of month than sugar, chocolate, and copious amounts of dairy fat? :)
Oh, and I totally missed the boob thing reflected in the comments?!? :)
WHAT A RIOT!! Your blow by blow pictures could have been the whole post but your narrative was great!! I'm like you, I don't think I'll be making this one again anytime soon because I'm not a huge caramel with milk chocolate fan. Great job on hanging in there.
Well, it looks gorgeous! (thumbs up on stumble upon!) Hey, I didn't notice any boob until I read the comments... now I have to go back and look for boob!
From one "not martha" to another, you did a wonderful job and the kitchen didn't completely implode. So, kudos to you ;-)
Post a Comment