Photobucket - Video and Image Hosting

Saturday, April 30, 2011

melty savoury goodness - tuna melts

Pin It Now!

DSC_8875

I may occasionally have the palate of a pre-schooler, but I just absolutely love tuna melts. It's one of my favourite treats to make - the perfect lunch for a rainy afternoon, or a quick easy dinner on a day when I don't feel like cooking.

One of my favourite things about these sandwiches is they are super versatile and forgiving; you can make them work no matter what you have in the house. As long as you have bread + tuna + cheese, you can probably figure something out.

DSC_8878

I like to add some saltiness and crunch to mine, so I tend to put in whatever chopped up veggies I can wrangle up (in this case, gherkins and onion, on other cases, celery, green pepper, shallots, sundried tomatoes, capers). And last, you just need some sort of binding agent. I usually use a mixture of light miracle whip and dijon mustard, but I've done it with yogourt, sour cream and even a simple vinaigrette. So you really can always figure something out.

You can whip these sandwiches together in about 10 minutes. Do it now, and thank me later.

easy-peasy tuna melts
(can be infinitely varied to suit your needs and audience)
DSC_8876

3 English muffins (my favourite bread...buns and sliced bread work too)

2 cans low-salt light tuna
1/3 c finely chopped onion (or shallot)
1/3 c finely chopped pickles (or other veggies --> celery, green pepper, sundried tomato, etc)
3 T light miracle whip
2 T dijon mustard
pepper

DSC_8872

cheese (I think I used cheddar and parmesan, but any cheese that melts reasonably well will work)

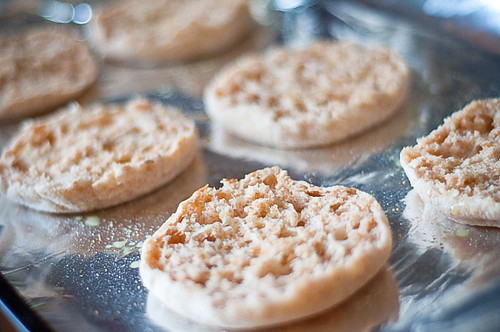
1. Spread your English muffins out on a foil-lined baking sheet (there will inevitably be cheese melting carnage...save yourself the scrubbing!). Preheat your broiler.

DSC_8871

2. Toast the English muffins under the broiler (about 6 inches from the heat source) for 2 minutes or so. Keep a close watch on them!

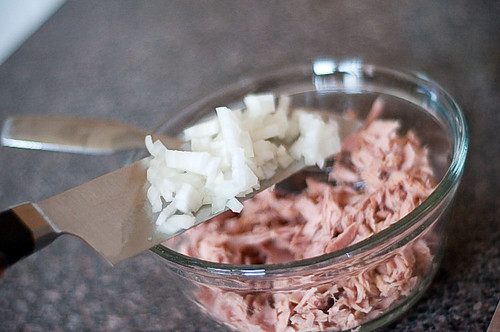
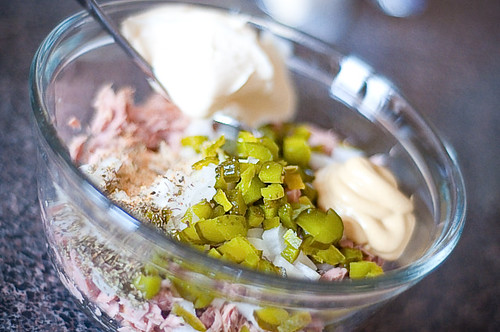
3. Meanwhile, combine the tuna salad ingredients. Taste - and season accordingly. If the mix is too dry to hold together, add a little more miracle whip/dijon.

DSC_8873

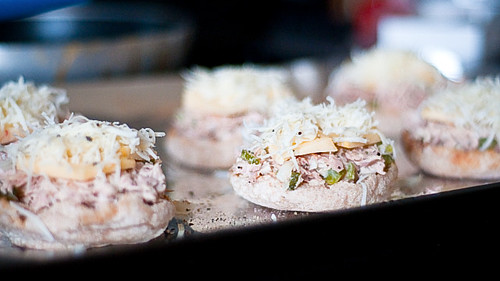
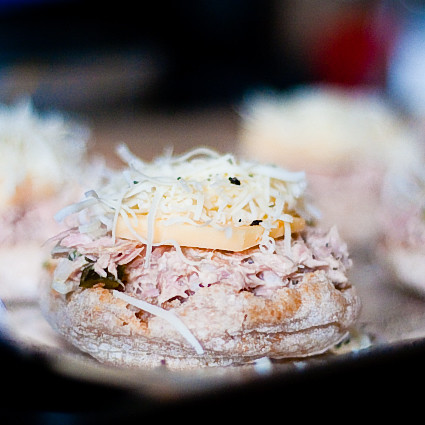
4. Top each toasted English muffin with tuna salad mix (I like to heap mine pretty generously, so two cans seems to be about perfect for six English muffin halves).

5. Top with cheese - I used slices of cheddar and grated parmesan. Any mix of grated/sliced would work.

DSC_8874

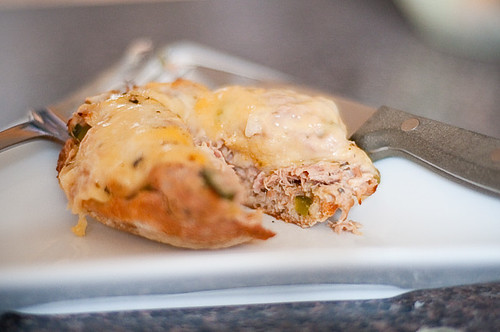
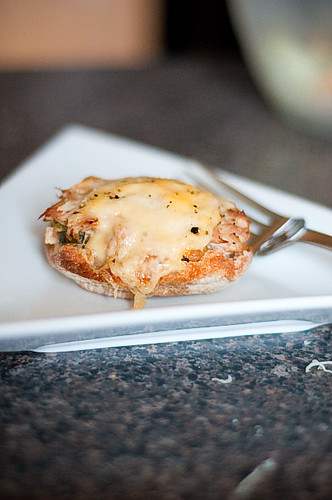
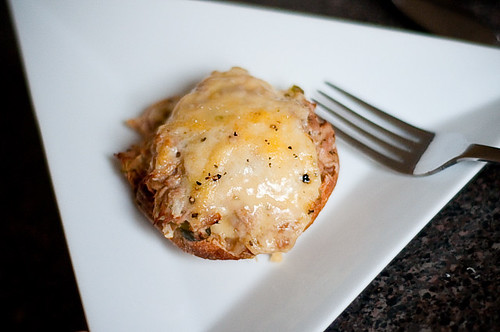
6. Cook under broiler for 3-4 minutes (checking every minute) until cheese is nice and melted and slightly brown.

7. Let cool slightly.

Enjoy! OMNOMNOMNOMNOM. These are so yummy. Very retro, very easy to make and just a fabulous lunch.

DSC_8877


Wednesday, April 27, 2011

some housekeeping...

Pin It Now!

...and goodness knows, my house could use it!

You may have noticed a few changes around here lately...part of the problem of starting your blog in 2006, is that in 2011....it looks like you have a blog from 2006. :p

Now, I'm no designer, and I certainly am not about to hire one, so you'll just have to deal with my little tweaks as I bring this blog up to date....so here's what's goin' on:

1) I changed the colour scheme (a couple of weeks ago). No more burgundy. I'm sure your burning eyeballs are thanking me.

2) I've added some easy options for you to subscribe. In addition to Google Friend Connect, I've also added RSS and email subscriptions via feedburner. (second widget from the top right). Now you don't have to remember to go through your bookmarks and physically come to the site - you can get new post notifications right in your email inbox.

3) I've started adding printable versions of my recipes. It's not fancy, like you'll see over at some other blogs, or on the pro-cooking sites, but if you want a photo-free, quick black and white print, it should do the trick.

4) New email address - leslie at definitelynotmartha dot com (sorry, gotta make the spammers work if they're going to invade my inbox). Hate mail, love letters, recipe ideas, whatever - I'm happy to hear it and I do my best to respond (I usually do!). If I don't respond, it's not because I'm a stuck-up diva...it's mostly because trying to balance full-time work, part-time work, parenthood, wifedom and blogging sometimes leave me in a bit of a tizzy. No hard feelings?

5) As the new email address indicates, I've got my own domain now! You can change your bookmarks to http://definitelynotmartha.com . Eventually this change will be reflected in the address bar, but I'm just not enough of a tech genius to make it happen quickly.

6) I briefly pondered adding a 'jump' to my post, but a short-lived poll overwhelmingly showed that readers do not like this. I don't like it either. So I won't be doing it. BUT, in order for the homepage to be a little less pic-heavy, I'm shortening it to five posts instead of 10. *I* don't need the jump, because one thing that won't be changing is that I still don't run ads on my blog. Unless I miraculously become so super famous that it would be ridiculous not to have ads, I'm just not willing to do it for a teeny amount of income that would just mess up my taxes. I hate forms and I hate taxes and I also hate ads. So none of that here.

7) Comment moderation - not on new posts, but I've had to add this to older posts (older than a month, right now) because I kept getting aphrodisiac-hawking douchebags filling the comments with spammy linky garbage. I won't censor anything but spam, and I do try to moderate one or twice a day, so there isn't a long wait to be part of a discussion. I do get emails of comments on my old posts, so if you have a question, don't hesitate to ask!

8) Layout....this will slowly evolve soon. I'm going to have to enlist hubs' help because my crowning design achievement was figuring out how to make my main column 500 pixels wide to accommodate my photos. I want to add a third column, but this has thus far eluded me. Stay tuned.

Anyway, feel free to check out the new feed features, print new recipes (eventually I would like to add printable versions of the older recipes, but oy...that's a big laborious job....).

So there you have it. Oh, also I ordered pizza for dinner tonight. Cooking fail. :p

Monday, April 25, 2011

brunch: sweet, savoury, rich and healthy

Pin It Now!

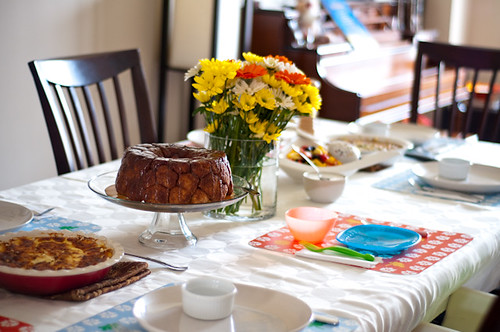
To me, sweet, savoury, rich and healthy are the essential building blocks of a delicious brunch. I really love making brunch, because it gives you the chance to something a sweet and indulgent (like cinnamon buns, pastries, scones, croissants) and balance it with savoury flavours, either healthful (slimmed-down broccoli cheddar quiche) or not so much... (quiche lorraine). I like to finish brunch with a nice fruit salad.
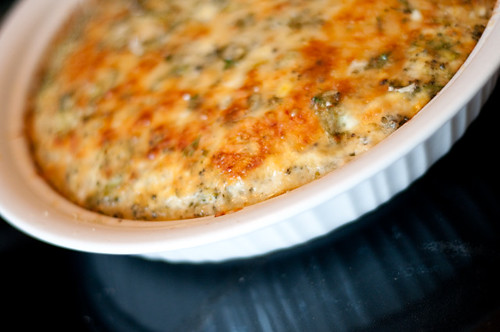

For my morning-after Easter brunch, I had the challenge of having made a (last-minute) big dinner the night before, so I didn't have any time to prep anything in advance. I chose everything in the menu because it could be thrown together relatively quickly, and would also hold quite well.

I'm a huge fan of quiche and strata-type dishes because you can mix them together in advance, bake them, and then they stay good for quite a while. I actually will sometimes mix one up at the beginning of the week and then nuke it for a quick breakfast later on. When it comes to quiche, I am utterly and completely sold on the crustless variety. It's not just because I am really terrible at making pastry, but I find that I like the filling SO much better and the crust really doesn't bring anything to the table (refined flour, fat and salt...none of which we really need). I prefer to limit my indulgence to the filling. :)

DSC_9205

These types of dishes are also great because you can really make them super healthy, or make them more indulgent. For this brunch, I decided to make a broccoli cheddar crustless quiche. This was a healthier recipe from Cooking Light, though I didn't really follow it to the letter (I don't believe in throwing out egg yolks!). For the more indulgent recipe, I found an absolutely exquisite crustless quiche lorraine recipe on epicurious. I do recommend a couple of tweaks, as I found the resulting quiche could have benefited from an extra egg (it was a little watery....but still yummy).

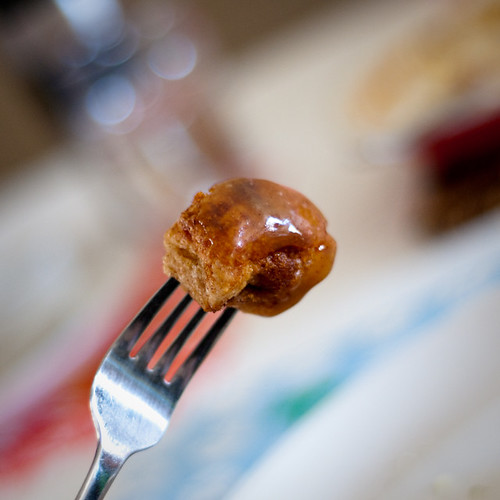
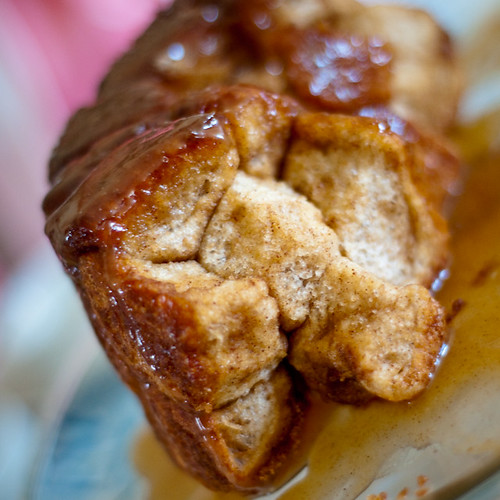
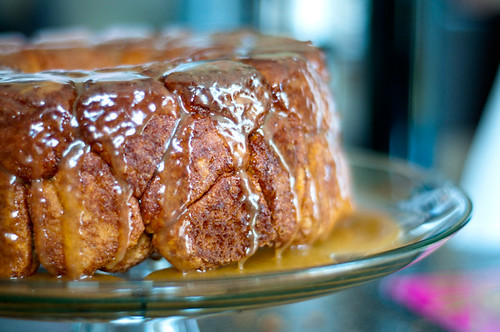
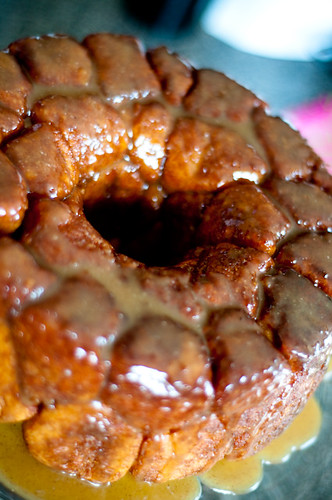
The sweetness of the meal came from what one of my guests dubbed "the love-child of a timbit and a cinnamon bun" - monkey bread with caramel glaze.

DSC_9217

I've been hearing about monkey bread for a few months now, and it seems this 50s mainstay has made a comeback of late. I couldn't find a recipe that was quite what I wanted, so I've taken inspiration from a few different versions and come up with my own - a half-whole wheat, spiced version covered in an exquisite caramel glaze (the glaze being a last minute addition because I felt the bread looked a little drier).

DSC_9214

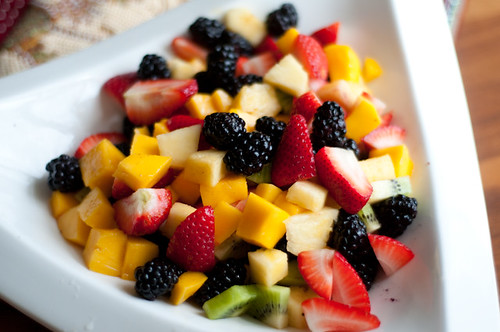
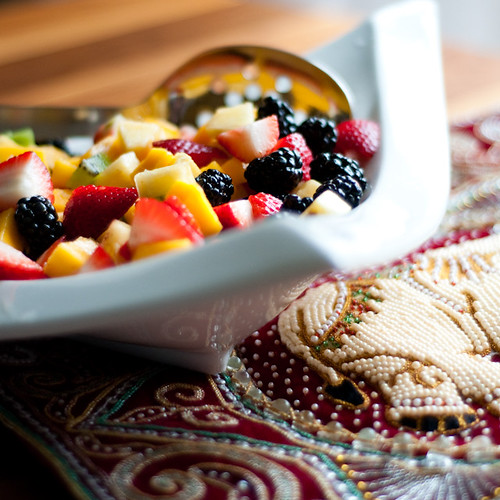
To round out the meal, I served a tropical fruit salad - the key to a pretty fruit salad (rather than a sad-looking bowl of browned apples and squashed bananas) is to try to include fruits in bright colours, and make sure they won't brown (apples and pears brown quickly. I hate bananas and find they overpower fruit salads, so I never use them). Oranges work well, as long as you're willing to take the time to suprême them. Nobody likes an errant membrane in their fruit salad. Blech. I have a tropical fruit weakness, which is, I realize, TERRIBLE for my carbon footprint....

tropical fruit salad
DSC_9177

1 mango, diced
1 kiwi, diced
1/4 pineapple, diced
2 cups diced strawberries
1 cup blackberries

1. Chop fruit.

2. Combine. No need to add anything more. This is a delicious, healthy addition to any meal.

DSC_9166

Crustless Broccoli and Cheese Quiche
DSC_9179

2 teaspoons olive oil
1/2 cup vertically sliced onion
1 garlic clove, minced
5 cups broccoli florets
Cooking spray
1 1/4 cups 1% low-fat milk
1 cup (4 ounces) shredded cheddar cheese
2 tablespoons chopped fresh parsley
2 teaspoons Dijon mustard
1/2 teaspoon salt
1/4 teaspoon freshly ground black pepper
4 large eggs lightly beaten
1 tablespoon grated fresh Parmesan cheese

Preparation

1. Preheat oven to 350°.

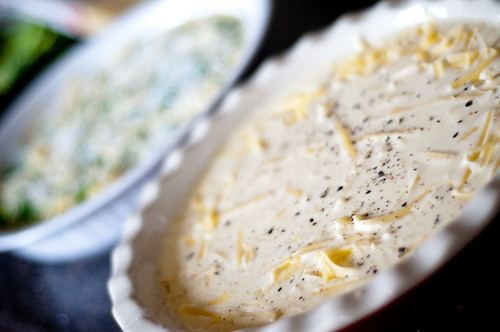
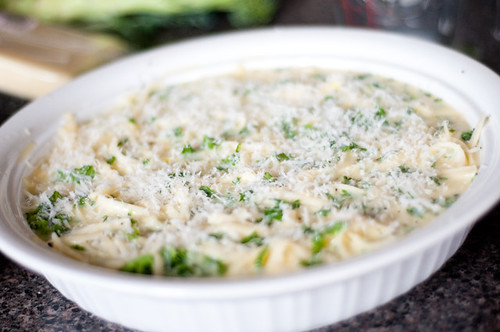
2. Heat oil in a large nonstick skillet over medium-high heat. Add onion and garlic; sauté 1 1/2 minutes. Add broccoli; sauté 1 minute. Spread broccoli mixture into a 9-inch pie plate coated with cooking spray. Combine milk and next 8 ingredients (milk through eggs) in a large bowl. Pour milk mixture over broccoli mixture; sprinkle with Parmesan.
DSC_9157

3. Bake at 350° for 40 minutes or until top is golden and a knife inserted in center comes out clean; let stand 5 minutes.

This quiche is very tasty and super easy to throw together. I cut mine into eight pieces, because I was serving two quiches to seven guests (this way, everyone can have a piece of each!). If it's all you're serving, you'd probably want to cut in six pieces.

Crustless Quiche Lorraine

Makes 4-6 servings
Active Time: 10 min
Total Time: 30 min (not including cooling)

1 1/2 tablespoons fine dry plain bread crumbs
1 cup chopped onions
1 cup diced cooked ham (1/4 pound)
1 tablespoon unsalted butter
1 (8-ounce) package shredded Swiss cheese (2 cups)
5 large eggs (original recipe calls for four...use five!!!!)
1 cup heavy cream
1 cup whole milk

1. Preheat oven to 350°F with rack in middle.

2. Butter 9-10 inch pie plate/quiche dish, then sprinkle all over with bread crumbs.

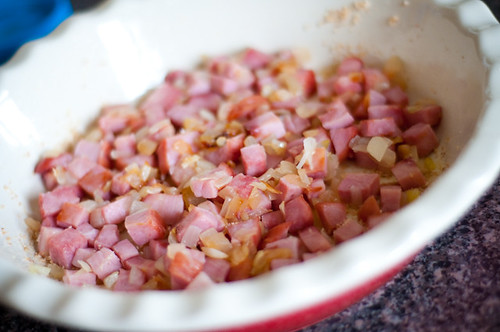
3. Cook onions with ham in butter in a skillet over medium-high heat, stirring occasionally, until pale golden, about 5 minutes. Spread in dish, then evenly sprinkle cheese on top.

DSC_9155

4. Whisk together eggs, cream, milk, and 1/2 teaspoon pepper and pour over cheese.

DSC_9156

Bake until top is golden and custard is set in center, 35-40 minutes***

5. Cool slightly before cutting into wedges.

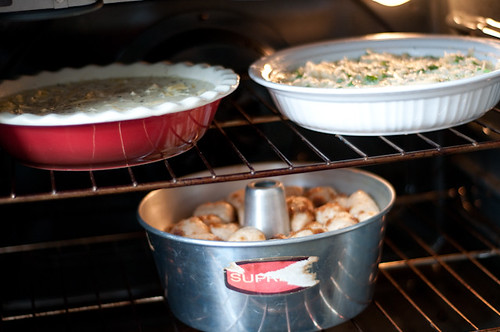
***Note that the initial recipe called for cooking at 425F for 20-25 minutes. I had two other things to bake that necessitated a 350F oven, so I just modified. I liked the results. Also, I love the convection function on my oven - even with two quiches and a batch of monkey bread, everything ended up evenly and perfectly cooked. Score!

DSC_9162

half whole-wheat monkey bread with the ultimate salted caramel glaze

dough:
**you could substitute any dough - frozen, refrigerated, or any dough recipe of your choosing
1 1/2 c all purpose/bread flour
1 1/2 c whole wheat flour
1 package quick yeast (2 1/4 teaspoons)
2 t pumpkin pie spice (or combo of cinnamon/cloves/allspice/ginger)
1/2 c milk
1/2 c water
4 T sugar
1 T oil
1 egg
1/2 t salt

1. In a stand mixer, combine flours, yeast, pie spice and salt.

2. In a small saucepan (or in the microwave) heat milk, water, oil and sugar until a thermometer reads 110-120F (warm but not burning) and sugar is dissolved.

3. Add milk mixture and the egg to the flours and process with dough hook (or stir with strong arm!). Once everything is all combined, you should have a soft dough - it should be a tiny bit sticky, but not ridiculously so. If there is too much flour, add a little more milk. If the dough is a liquid, sticky mess (more likely), add more flour, about 2 T at a time. Knead/process dough for a couple of minutes.

4. Transfer dough to an oiled bowl, turn to cover with oil. Cover bowl tightly with plastic wrap and place somewhere warm to rise for an hour. I like to put mine in the oven with the light on. Out of the way, and nice and warm.

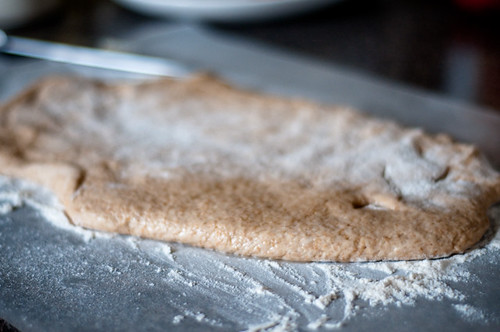
5. Sprinkle work surface with flour (I like to cover mine with waxed paper so I'm not stuck scrubbing dough bits off the counter). Spread dough out into a large rectangle.
DSC_9137

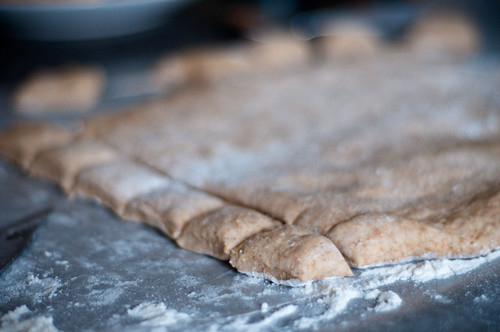
6. Cut into 70-ish pieces - about 1 inch diameter...this is not an exact science though.

DSC_9139

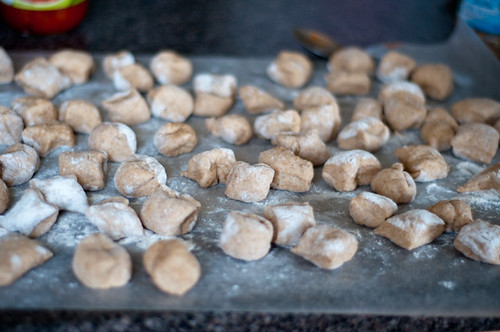
I just use a butcher knife. I leave my pieces mostly rectangular...you could try to make them more ball-like, but if you just plump the sides of the dough rectangles, they get round enough for me.

DSC_9140

glaze for dough balls
1/2 cup butter (unsalted), melted and cool enough to get your fingers in.
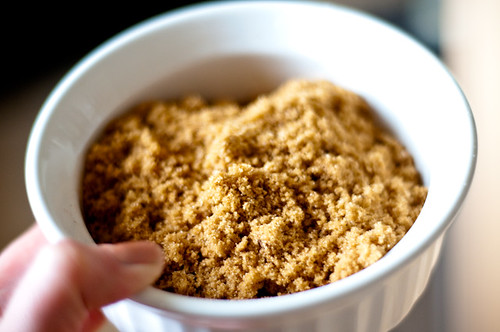
1 1/2 c brown sugar (I used dark brown)
2 t cinnamon

1. Combine sugar and cinnamon. Take a tube/bundt pan and butter/grease it.

DSC_9138

2. Dip each dough ball into butter. Let excess run off (you can try using a fork for this...it's a messy process no matter how you do it.

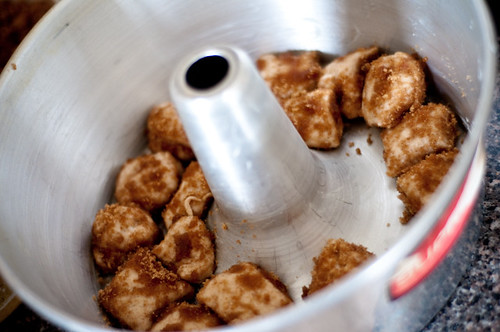
3. Cover dough in brown sugar/cinnamon mixture. Place in tube pan. Continue. I found that most of the way through, my brown sugar was reduced to a buttery paste. Whatever. It still worked.

DSC_9148

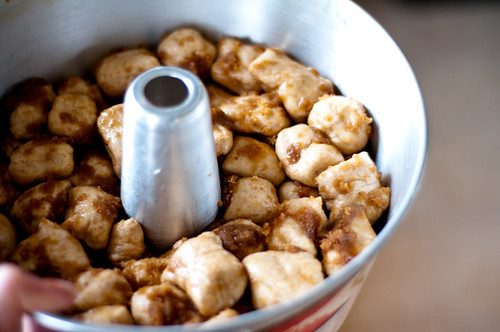
4. Continue layering dough balls around your tube pan until you run out.

DSC_9153

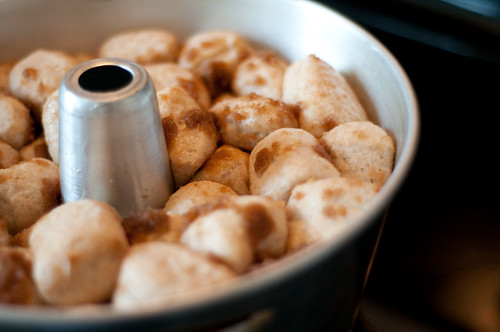
Cover tightly with plastic wrap and let rise for another hour.

DSC_9158

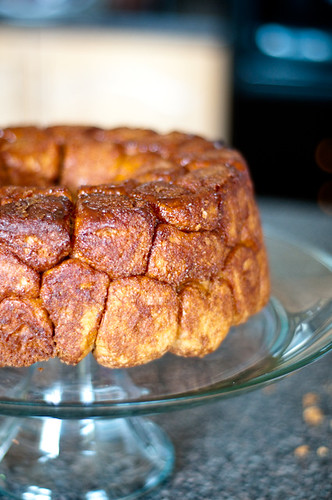
5. If your monkey bread was rising in the oven, remove from oven. Preheat oven to 350F. Remove plastic wrap. Bake 35ish minutes at 350F. Let sit in pan for five minutes, and then remove from pan.

At this point, I was pretty pleased with myself, but thought that the resulting monkey bread looked less gooey and more dry than I wanted. This is where the ultimate glaze comes in.....

DSC_9182

ultimate salted caramel glaze
1/4 cup butter (salted or not)
1/4 c dark brown sugar, packed
1/4 c white sugar
1/2 c whipping cream
(1/4 t sea salt, if using unsalted butter)
1 t cinnamon

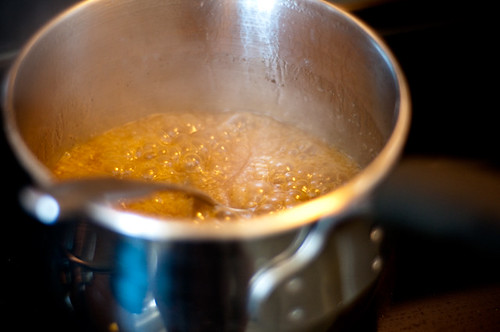
1. In a sauce pan, melt the butter with the two sugars. Bring to a boil and let the sugars dissolve.

2. Add the whipping cream (there will be serious bubbles going on). Cook together. Add cinnamon and salt (if needed) and continue cooking until thickened slightly.

DSC_9183

3. Remove from heat and let cool for five minutes. Slowly pour over still-warm (but not too hot) monkey bread.

DSC_9184

This is the ultimate. I would be lying if I said that six people did not polish this off in one fell swoop. It's really freaking good. Like my guest said - love child of a timbit and a cinnamon bun. MAKE IT NOW.

DSC_9196

You know what would also be good though? A savoury version, with herbed dough, dipped in garlic butter, then rolled in parmesan. And served with either a marinara sauce, or an herbed garlic butter glaze. The mind, it boggles, and the possibilities are infinite.

Sunday, April 24, 2011

i feel like a round stuffed easter egg

Pin It Now!

DSC_9066
When I spent Thursday evening loafing instead of grocery shopping and menu planning (which, ofcourse, relegated me to spending Good Friday doing nothing, because grocery stores, etc. are not open on Good Friday)....I didn't really have high expectations of the food this weekend.

For Easter, we were entertaining hubs' parents, as well as hubs' sister and her hubs (and newborn! yep, the same newborn who was the subject of much merriment back in Feb). It wasn't really a full house, but I still wanted to have some fun with the menu and put on a good spread.

After some brainstorming Friday night, and some frantic (and crazy) grocery shopping on Saturday....I didn't even get down to cooking/starting ANYTHING until 1 pm. If you're at all familiar with my modus operandi, this is not normal. I like to be prepping the day before. Not midday the day of.

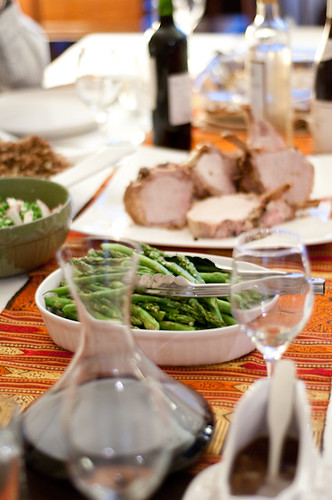
I had decided on an Easter dinner menu of crown roast of pork with onion stuffing, (because it makes sense to cook 10 lbs of meat for 7 people...), potato gratin, anise-roasted asparagus and pea salad with feta and spinach. Dessert was a three-nut maple tart with maple cream.

When tackling a menu like this, it's really important to have a plan. When you make your list of recipes, at the same time, note a few things:

1. Where the recipes are (i.e., epicurious, cookbook, magazine). Make sure to note page numbers and issue numbers (for print) or to create a favourites bookmark folder (for online). This will avoid last minute panic.

2. After choosing your recipe, carefully read through each recipe. Make a categorized grocery list (i.e., sort by produce, deli, dairy, meat, grocery).

3. While making your grocery list, make note of all components that need to be made (i.e., for a salad, you need to prep veggies and make dressing. For a tart, you need to make crust, make filling and bake). While noting all of these components, make sure you write down baking times (i.e., make pork - 3 hours oven, make tart crush - 30 min rest, 30 min oven).

4. Make a game plan. I take a look at my component list (i.e., the dressings, crusts, seasonings, dishes) and figure out what HAS to be done (i.e., pork need to go into oven by four, in order to serve dinner at 7:30), and what needs to work around that (i.e., tart needs to bake before pork...MUST FINISH TART BY 4). From here, I am able to make a 'work order'. In this dinner, I started by making tart crust. While the crust was resting, I made the pork stuffing. While the crust baked I made the tart filling. While the tart baked, I prepped the pork. While the pork baked, I made the potato gratin. Things like veggies can (and are usually best) be left to the last minute.

5. It seems a little haphazard, but I find that having a plan makes me feel more confident and ready to get a meal (and a complicated one like this) on the table on time. I also find that having a list of components is SUPER helpful when you have family coming, because you can assign and eager, early and willing family member to a component (i.e., make salad dressing, prep asparagus, chop onions, make breadcrumbs). I wouldn't do that for a fancy dinner party, but we all know it's different and more casual with (most?) families.

Dinner was on the table by 7:45. Not bad for making a tart, a roast, stuffing, gravy, potato gratin, roasted asparagus and a salad. And entertaining. And having fun. :)

I rocked it out pretty good...not gonna lie.

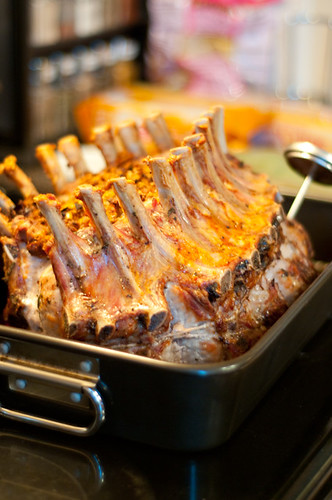
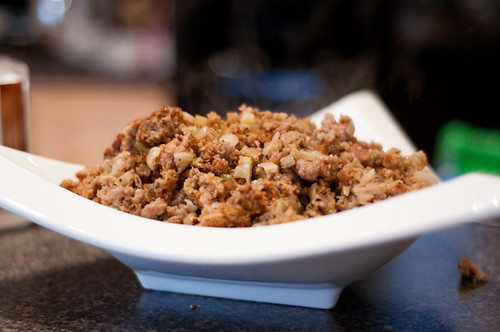
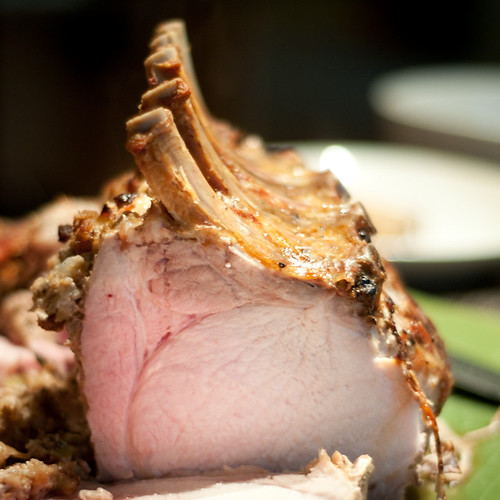
crown roast of pork with onion and bread-crumb stuffing
DSC_9051


Yield: Makes 10 to 12 servings
Active Time: 1 1/2 hr
Total Time: 4 1/4 hr

For stuffing
2 lb onions, finely chopped (6 cups)
2 1/2 teaspoons salt
1 1/2 sticks (3/4 cup) unsalted butter
2 tablespoons chopped fresh sage
1 tablespoon chopped fresh marjoram (dried is fine)
1 teaspoon black pepper
1 1/2 tablespoons cider vinegar
1/2 cup dry white wine
1 (1-lb) piece fresh Pullman loaf, pain de mie, or country loaf, cut into 1-inch cubes, then pulsed to coarse crumbs in a food processor (I used a multi-grain wheat country loaf)
3/4 lb sausage (something garlicky)
1 cup finely chopped celery

For roast
1 teaspoon finely chopped fresh sage
1 teaspoon finely chopped fresh marjoram or thyme (dried = fine)
2 teaspoons salt
1/2 teaspoon black pepper
1 (9- to 10-lb) crown roast of pork, rib ends frenched (so my butcher, whom I love dearly, did not to the best job on this part....it ended up looking fine in the end!)
1 1/2 cups water

For sauce
1/2 cup dry white wine
1 1/2 cups reduced-sodium chicken broth
2 teaspoons cornstarch, dissolved in 2 tablespoons water
2 tablespoons cold unsalted butter

Special equipment: an instant-read thermometer

Make stuffing:
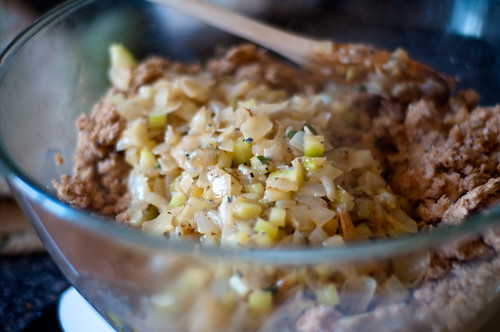
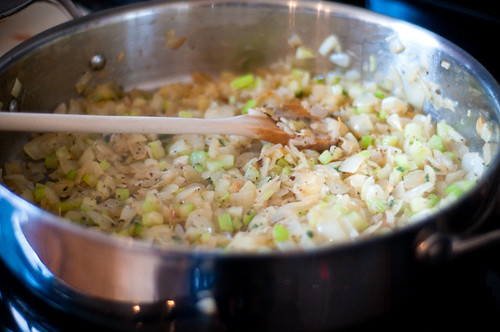
1. Cook onions with 1 1/2 teaspoons salt in 3/4 stick butter in a 12-inch heavy skillet over moderate heat, covered, stirring occasionally, until tender, about 10 minutes. Add celery and continue to cook, uncovered, stirring frequently, until onions are pale golden, about 10 minutes more. Add sage, marjoram, and pepper and cook, stirring, 5 minutes. Add vinegar and wine and boil, stirring occasionally, until liquid is evaporated, then remove from heat.
DSC_9018

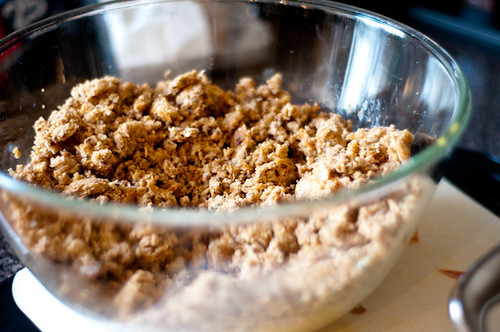
2. Melt the remaining 3/4 stick of butter and pour over bread crumbs. Remove sausage from casings, break apart, and cook in a skillet over medium heat until nicely browned.

DSC_9019

3. Reserve 1 cup onion mixture, covered and chilled, for sauce. Transfer remaining mixture to a large bowl and combine with crumbs.

DSC_9024

Cook roast and stuffing:

1. Put 1 oven rack in lower third of oven and another on bottom of oven and preheat oven to 350°F.

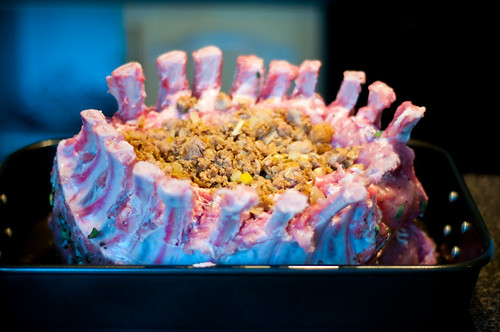
2. Stir together sage, marjoram, salt, and pepper in a small bowl, then rub over outside and bottom of roast. Put roast in a small flameproof roasting pan and mound 2 cups stuffing loosely in center, then add water (I used chicken brown) to pan. Transfer remaining stuffing to a buttered 2-quart baking dish and chill until ready to bake.

DSC_9031

3. Roast pork in lower third of oven, covering stuffing and tips of ribs with a sheet of foil after about 30 minutes and adding more water if pan becomes dry, until thermometer inserted 2 inches into center of meat (do not touch bones) registers 155°F, 2 1/4 to 2 3/4 hours total. (If your guests are skittish about pink pork, as mine were, you'll want to cook your roast to a point where a thermometer inserted in the thinner side of the roast reads closer to 170F. The thicker side of the roast will still be juicy and delicious, but this way, you have some classically 'well-done' (*cough* overdone *cough*) pork for the squeamish. That said, pink pork is fine to eat.

Transfer pork to a platter and let stand 30 minutes. Bake stuffing for 30-45 minutes, until heated through (as long as your sausage is well-cooked, you don't need to worry about reaching a certain temperature for this dish).

DSC_9064

****NOTE: If you've let your pork rest, and you've cut into it and are completely skeeved by pinkness, just pan-sear the dinosaur-sized pork chops to your desired doneness, in a bit of olive oil and butter. But I swear, pink pork is deeeeeelish. Just don't serve it to the immuno-compromised (young kids, pregnant women, etc.).

Make sauce while pork stands:
1. Transfer pan juices from roasting pan to a gravy separator or a glass measure and skim off fat.

2. Straddle roasting pan across 2 burners, then add wine to pan and boil over high heat, stirring and scraping up brown bits, until reduced by about half, about 5 minutes. Add reserved onion mixture, broth, pan juices, and any juices on platter from roast and bring to a simmer. Restir cornstarch mixture and add to pan, whisking, then simmer 2 minutes. Add butter and swirl pan until incorporated. Season with salt and pepper.

DSC_9055

Carve pork and serve with stuffing and sauce.

DSC_9053

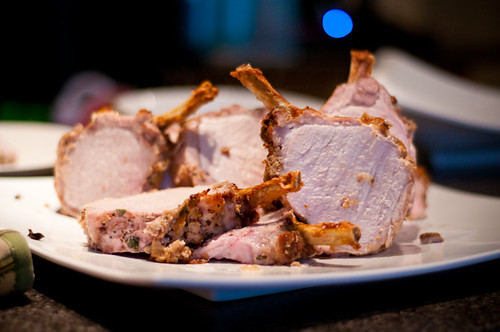
This is pretty good. Like I said, I found that parts of mine were (to my taste) overdone and a little dry, but parts will still juicy and delicious...so there's a little something for everyone with this dish. When in doubt, take some advice from my employer and get thyself a digital food thermometer and know how to use it.

Potato Gratin
from the Spring 2011 edition of Food and Drink - will be online in a month or two here: http://www.lcbo.com/fooddrink/index.shtml

1/2 c milk
1 c whipping cream
4 cloves garlic, sliced
1 t dried thyme
1 T chopped fresh rosemary
2 lbs potatoes peeled and thinly sliced - mandoline = your friend
salt and pepper
1/2 c (or more, mebbe) grated parmesan

1. Preheat oven to 400F.

2. Combine milk, cream, garlic, thyme and rosemary in a wide pot over medium heat and bring to a boil. Remove from heat. Add potatoes and stir together. Season well with salt and pepper.

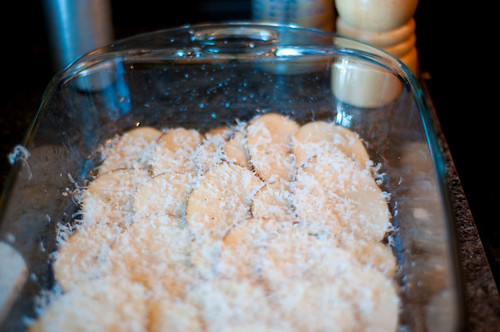
3. Grease a gratin dish large enough to hold the potatoes (I increase the potato amount, so I just used a 9x13). Arrange a layer of potato slices in your dish. Cover with a thin layer of parmesan. Repeat until you run out of potatoes, adding some fresh grated parmesan between each layer.

4. Pour remaining liquid over top. Add more parmesan.

DSC_9029

5. Bake for 50 minutes- 1 hour, until potatoes are tender and liquid is absorbed.

This is basically potatoes alfredo.....and it's pretty tasty. I think I would almost like it more with only milk, because I felt like the cream was just over the top. Not that that's a bad thing....BTW, I made mine in advance, and some of the raw potatoes were exposed to the air for a while...they got a little dark, and this is a bit unattractive. :p It's not harmful though...just a little ugly.

I'm not going to post the recipes for my sides, because you can get them both on epicurious. They were yummy though, and provided some great colour and nutritional balance to the meal.
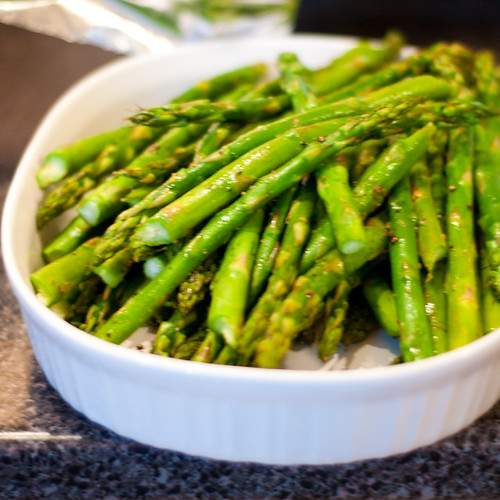
Roasted Asparagus with Anise Seeds
DSC_9061

(only change I made is that I didn't cut my asparagus up)

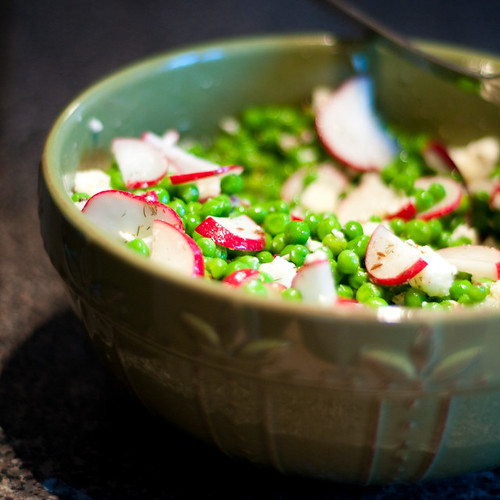
Pea Salad with Radishes and Feta Cheese
DSC_9041-2

(only change I made is to use caraway in lieu of cumin because I had a cumin-hating guest). Also, I did not have pea tendrils...not really sure where to find them).

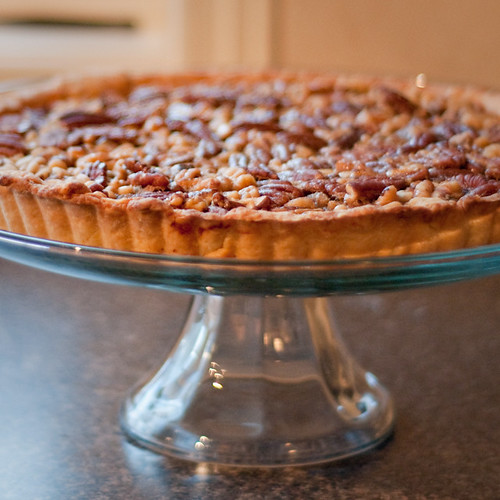
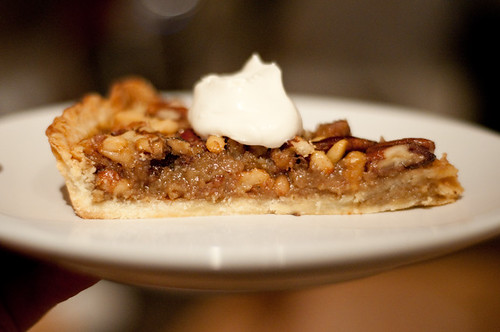
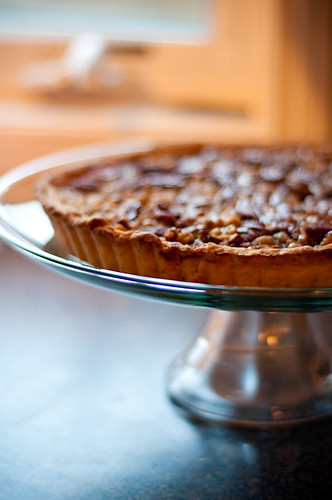
And for the finale, I made this delicious and sophisticated take on a pecan pie - a three-nut maple tart from the Spring 2011 issue of Food and Drink. I liked the incorporation of the pine nuts, and this gave me a great opportunity to showcase some of my uncle's amazing maple syrup (it is SO flavourful).

As tarts go, this is not complicated. There is pastry...which I hate making....but this one turned out not too horrific.). The filling is very easy - toast (and don't burn) nuts, and top with a maple-egg filling. YUM. If you have nut/caramel/buttertart lovers, this is great.

Three Nut Pie with Maple Cream
from Spring 2011 Food and Drink (should be online in a month here: http://www.lcbo.com/fooddrink/index.shtml )
DSC_9042

CRUST:
1 1/2 c flour (I used cake and pastry)
2 T granulated sugar
1/2 c COLD butter, cut into cubes
1 egg
1 t vanilla
1/4 t salt
ice water

FILLING:
1 cup pecan halves
1 cup walnut halves
1/3 c pine nuts
3 eggs
3/4 c maple syrup (DO NOT USE FAKE STUFF. JUST DON'T. IF YOU DO, I WILL NOT BE YOUR FRIEND. EVER.)
1/3 c packed brown sugar or maple sugar
2 T butter, melted
2 t vanilla

MAPLE CREAM:
1/2 c whipping cream
1-2 T maple syrup

Make pastry:
1. Combine flour and sugar in food processor. Add in butter. Pulse a couple of times. Whisk together egg and vanilla in a measuring cup. Add enough ice water to make 1/2 c.

2. Drizzle egg mixture over flour. Process until it forms a ball.

3. Shape ball into a disc. Wrap in plastic wrap. Freeze for 15 minutes (or refrigerate for 30....I was in a hurry!).

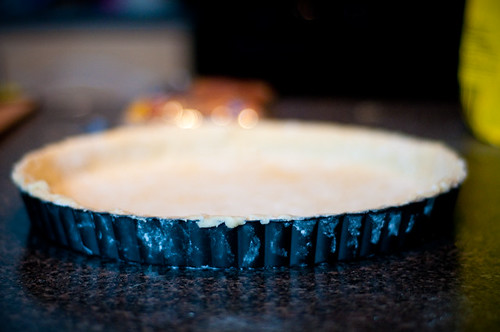
4. Roll pastry out on a lightly floured surface (I like wax paper because it is cheap and stuff doesn't stick to it. I only own one tart pan - 11 inches. The initial recipe is for a 10-inch pan, but the crust was just fine for 11 inches, and I just increased the nuts a bit. Roll the pastry to fit your tart pan. Press into pan, trim edges and prick lightly with a fork. Freeze for 15 minutes. This is probably one of my better pastry efforts. Yes, I am aware it still looks like poop. :p

DSC_9021

5. Preheat oven to 375F. Line tart shell with foil, and fill with rice/beans (or pastry weights) to weigh pastry down. Place a baking sheet on the bottom rack in the oven, and bake the tart shell on the midde rack for 15-20 minutes, or until edges are dry.

6. Remove paper and bake for 5-10 minutes more, until starting to turn golden brown and firm. Let cool (but leave oven on).

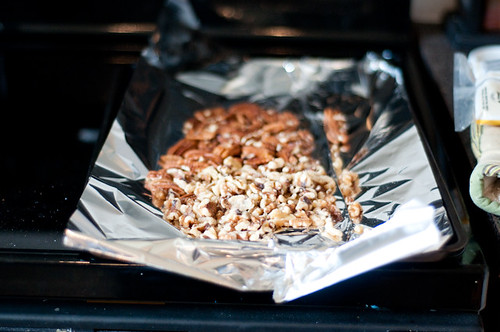
7. Spread pecans and walnuts on a rimmed baking sheet and toast for 3 minutes. Add pine nuts and stir. Toast for 3 more minutes. You could try to brown them a little more, but they will burn SUPER quickly...so I wouldn't. Scatter slightly-cooled toasty nuts in the baked tart shell.
DSC_9016

8. Reduce oven temperature to 325F.

9. Whisk eggs, syrup, sugar, butter and vanilla until well-blended. Pour over nuts. For expediency and sanity's sakes, place your tart pan on a foil-lined pizza pan. Mine did not really leak, but tart pans can and DO leak, and you really don't want a burnt maple mess on the bottom of your oven. Bake for 30 minutes, until filling is puffed in the centre and just set around the edges.

DSC_9044-2

10. Just before serving, whip cream in a chilled bowl until soft peaks form. Add in syrup. Serve with tart.

DSC_9083

Yummy. This would be a great fall recipe, but maple syrup is a spring thing, so I'm calling spring on it. A great finish to a delectable meal.


Tuesday, April 19, 2011

pork and muffins. not at the same time.

Pin It Now!

DSC_8962

In terms of food budgeting, today was medium.

It was GOOD because I brought and English muffin and toasted it at work (and topped with some peanut butter, which I keep in a jar at my desk. And which I do not ever eat with a spoon.)

Okay, that last sentence was a lie. :p I don't do it often though. And I don't double dip.

It was also good, because I brought my lunch and ate all of it. But then I was staaaaaarving partway through the afternoon. And when I reached into my lunch bag to grab the apple I totally thought I had brought....I came up empty-handed.

So of course I ended up at the caf and bought a boiled egg (0.55), a piece of cheese (1.00) and a medium coffee (1.50). Meh. It wasn't the craziest of snacks, but when I think that I can buy a DOZEN eggs for $3 (and water is almost free), I feel like a bit of a heel.
To be fair though, there was a strong possibility of going out for lunch, and I didn't go for it.

But Hubs is rubbing in the fact that not only did he not spend any extra $$ on food today, but he didn't really do so last week either. Meh. :p
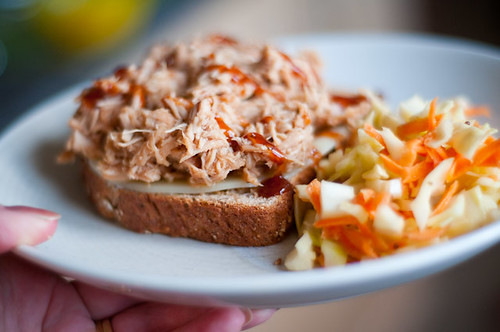
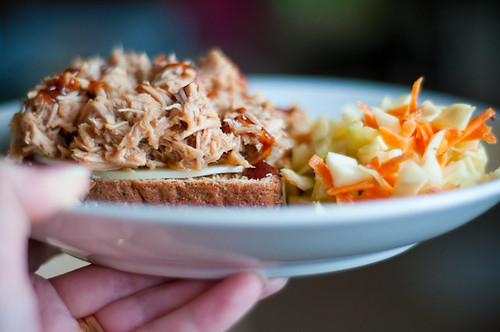
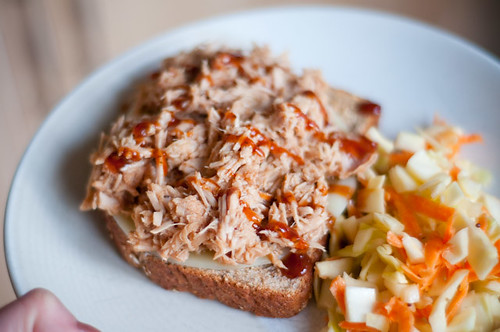
In terms of cooking, the planned meal for tonight was pulled pork on multi-grain toast with provolone, accompanied with a quick coleslaw. I really did a lot of mods to the pulled-pork recipe, so I can't fairly evaluate the Clean Eating version. But my version was good. And super easy.
Slow-cooker pulled pork with toast and coleslaw

1.5 pounds pork (I used a centre-cut roast - you could use tenderloin, chops, or a more traditional cut like shoulder or butt)
1 cup broth
sea salt, black pepper and thyme

1. In the morning, put the pork in the slow cooker on low. Put it fat side up, to keep it moist. The fat will render slightly during cooking and keep the pork from drying out. Pour broth around the pork, and sprinkle with salt, black pepper and a good bit of thyme.
(sorry, no pics...was too crazy with Monday morning madness to take photos)

2. When you get home, take the pork out of the slow cooker (I used a 2.5 qt cooker. This recipe is best suited to a small slow cooker. If you don't have a slow cooker, you could braise the meat in the oven - at about 275F - for 4ish hours). Don't try to quick cook your pork, or it won't shred.

My pork cooked from 8 am to 6 pm. This worked for me. The fat had rendered a little bit, but when I took the pork out, I was actually able to scrape most of the fat off. It's win-win, because, as mentioned, the fat keeps the meat moist, but then you can scrape it off, so you aren't stuck eating it.

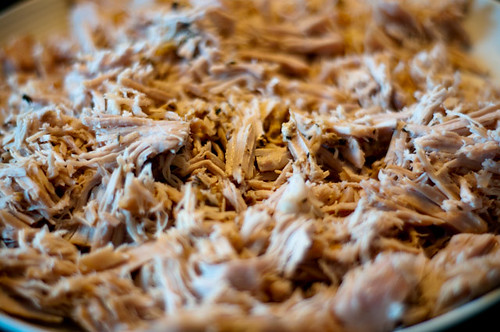
3. Shred the pork with two forks. If it doesn't shred, you've probably either a) cooked it not long enough, or b) cooked it at too high a temperature. DO NOT COOK ON HIGH.

DSC_8957

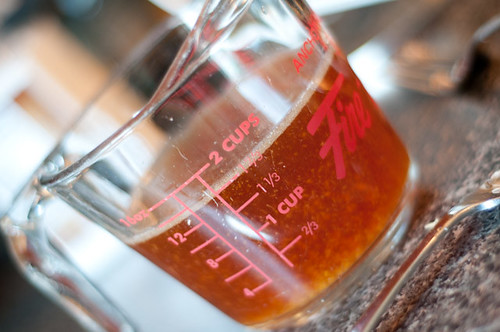
4. Strain the juices from the slow cooker. If there is fat, skim it off the top. You can see here that there was very little fat in mine. ***I'm assuming that if you read my blog, you're probably trying to eat healthy. If I am mistaken, leave the fat in. It will only make things better. ;)

DSC_8958

5. Pour the juices in a pan, and boil to reduce by half. I added about 3 T cider vinegar, 1/4 c of sherry (it was hanging out in the cupboard...nobody here drinks that crap). I also added about 1/2 t chipotle powder, to add spice and smoke.

6. Mix the juices with the shredded pork. Taste. This is a pretty 'clean' version --> in order to be to your taste, you may need to add some sweetness (ketchup, bbq sauce, honey), some acidity (vinegar), some salt (worcestershire sauce, salt), or some heat (sri racha, cayenne). I added a little bbq sauce, and then drizzled some over top of our sammies.

Coleslaw

DSC_8965

1/4 head of cabbage, chopped
1 large carrot, grated
1 tiny onion, chopped
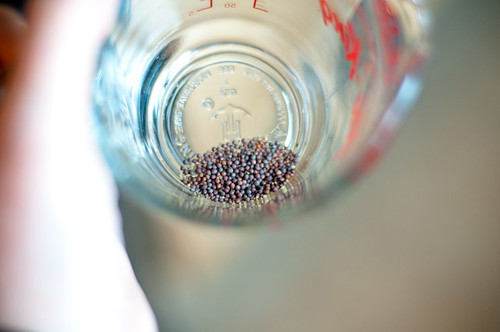
1/2 t mustard seeds
1/2 t celery seeds
2 T cider vinegar
1 T dijon mustard
1 T olive oil

1. Mix cabbage, carrot and onion.

2. Make dressing from mustard seeds, celery seeds (you can omit these if you don't have 'em), cider vinegar, dijon mustard and olive oil.

DSC_8960

3. Toss dressing with veggies. Taste and adjust accordingly (again, this is a clean recipe; you may be used to something sweeter and/or saltier).

Sammiches

DSC_8967

multi-grain bread
reduced-fat provolone cheese slices
pulled pork
coleslaw

1. Toast bread. Top with cheese slice while still hot. Top with approximately 3 oz of pulled pork. Serve with coleslaw. I drizzled mine with bbq sauce.

Voila. This was awesome. Hubs devoured his (and then ate a plate of just pork, mixed with bbq sauce and sri racha). Lil Z thought it rocked and pounded it back.


After dinner, I cleaned up (unplanned visitors coming tomorrow) and then had to re-jig the week's menu. We're going to have company tomorrow, so rather than serve the ginger chicken soup (which only serves four and would be tight, leaving us with no lunches for Wednesday), I'm going to make a shrimp pasta carbonara dish. I have loads of frozen shrimp, a pound of bacon and some pasta. I think I"ll do a creamy sauce using shallots, garlic, evaporated skim milk and fresh-grated parmesan. It may end up short on veggies, but I think it will be good. And it will keep me on budget. :)

Last, I mixed up a batch of muffins. YES, in case you were wondering I did spend my entire evening physically in the kitchen tonight. I don't mind....it's one of my favourite places. Plus, hubs is monopolizing the TV (playoff hockey, *sigh*) so it's not like I have anything better to do anyway. :p

These muffins are from the April/May 2011 issue of Clean Eating. Pretty straightforward to make. I made a couple of modifications (shown in brackets).

Mango Spice Muffins
from April/May 2011 issue of Clean Eating

2 c whole wheat flour
1/2 c evaporated cane juice (or sugar...they are essentially the same)
2 t baking powder
1/2 t baking soda
1 t ground ginger
1/4 t ground cloves
1/2 t sea salt
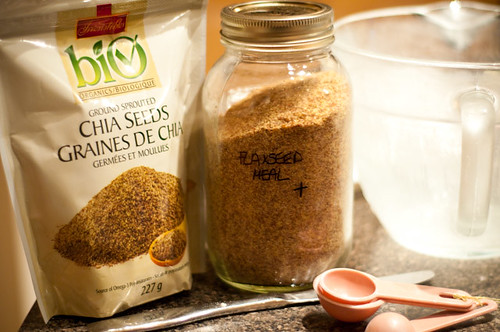
(2 T ground chia seeds (optional - they have fibre and omega 3s. I decided to add some))
(2 T ground flax seeds)

DSC_8978


1 egg
1/4 c oil (I used canola, CE recommends safflower)
1 c nonfat greek yogourt (I used non-fat regular yogourt that was 1 week past its due date. It smelled fine...)
1/3 c milk (1/2 c milk if using the flax and/or chia as they soak up liquid)
1 t vanilla

1 large mango, peeled and cut into 1/4 inch dice. Mine actually made about 1 1/4 c, just like the recipe said it would. (For anyone who does not know how to wrangle a mango, I've posted a how-to for you)
1/4 c raisins (I used walnuts instead. Lil Z gobbled all of my raisins)

2 T unsweetened flaked/shredded coconut

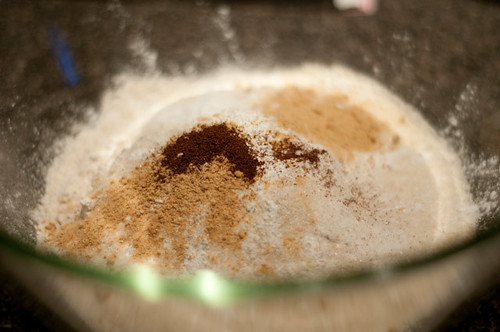
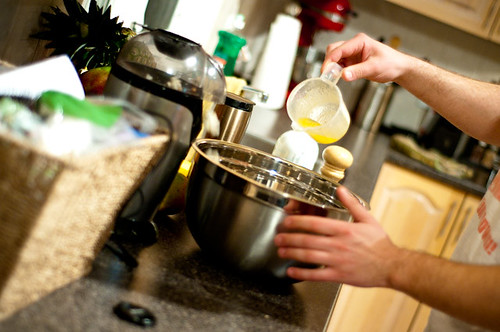
1. Preheat oven to 375F. Line a muffin tin with papers (or spray if you are a masochist, and enjoy scouring muffin tins). In a large bowl, whisk together flour, cane juice, baking powder, baking soda, ginger, cloves and salt (and chia/flax). In a separate large bowl, beat egg. Add oil, yogourt, milk and vanilla. Whisk to combine.

Dry ingredients:
DSC_8976

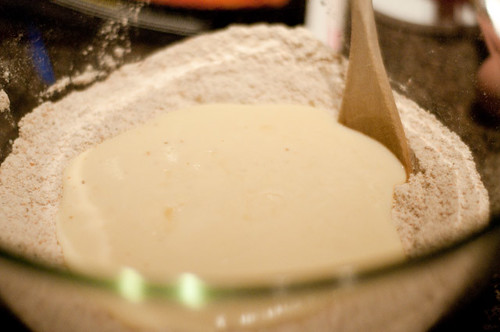
2. Add wet ingredients to dry ingredients and stir gently until flour is moist.

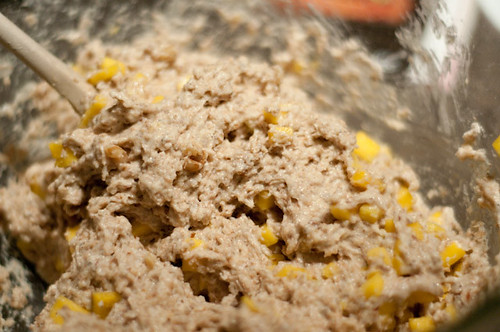
DSC_8985

Fold in mango and raisins walnuts.

DSC_8986

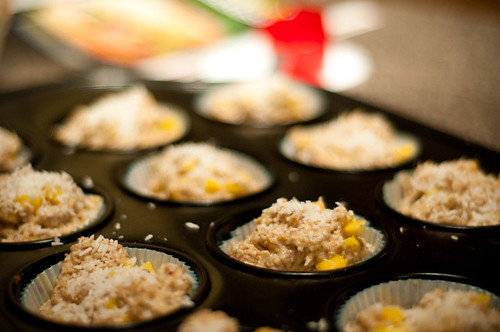
Spoon batter evenly into prepared muffin cups and sprinkle each muffin with 1/2 t coconut.

DSC_8987

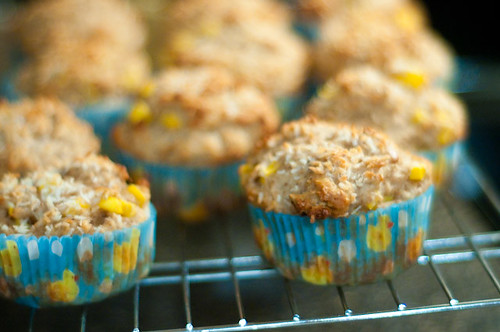
3. Bake until edges are light golden brown and a tester comes out clean when inserted into the centre of a muffin...about 16-18 minutes. Let cool in pan for five minutes and then transfer to a cooling rack.

DSC_8990

Voila! Brekkie for the next couple of days. The rubber duckies are a bonus. ;)

Last, I wanted to leave you with a cheap night-time snack idea. Hubs is pretty much the king of night-time snacking...and going out to pick up a $3 bag of chips at the local convenience store/pharmacy can really add up. One thing that we've found awesome for those late night cravings (besides willpower....) is popcorn. Not the scary orange microwaved sludge, but simple air-popped popcorn with a bit of butter and salt. I have also been known to mist my popcorn with a bit of canola in a pinch. This is super tasty because it's all natural (no weird chemicals) and you can control how much salt and butter you end up putting on your popcorn. Popped corn is also a good source of fibre, and you can get kernels for dirt-cheap at bulk stores. Here is hubs in action.....

DSC_9009

So that's my day. And now it's really late, so I'm out. Thanks for reading!


Related Posts with Thumbnails