Photobucket - Video and Image Hosting
Showing posts with label chicken. Show all posts

Tuesday, October 07, 2014

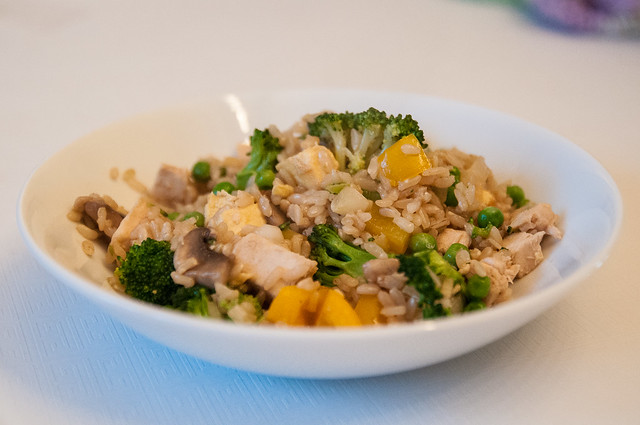
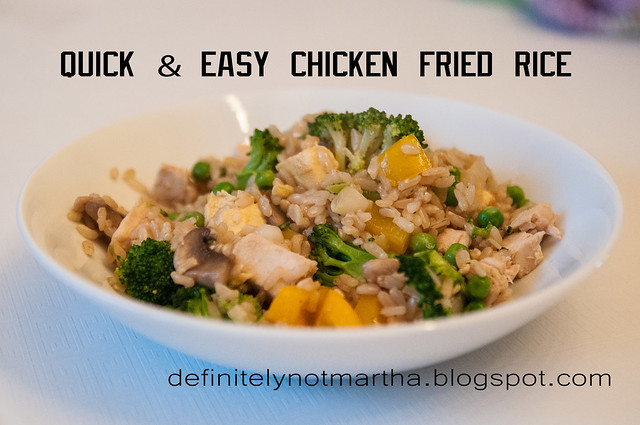
quick and easy chicken fried rice

Pin It Now!

Fried rice is a staple meal in our family - whether I make it with turkey, chicken, egg, pork, tofu, etc., it's a relatively healthy meal that is a real hit with the whole family (mind you, the kids will still sometimes pick out the various aspects they dislike).

quick and easy chicken fried rice

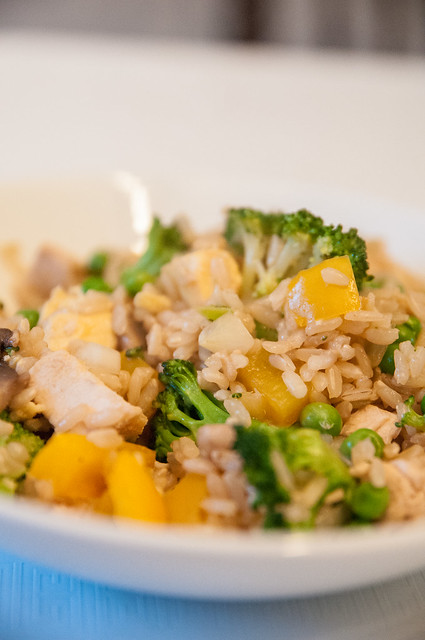
I love making this whenever I have any sort of leftover protein (roast chicken in this case, but I most often make it with leftover turkey), but the beauty of this type of meal is that you can make it work with almost anything that you have on hand.  I like to make mine a bit healthier by using brown rice, and packing it full of vegetables.  I also love putting egg in it, so as long as I have eggs on hand, that's what I do.

quick and easy chicken fried rice

If you're smart and organized (i.e., all the things I'm not), you can make your rice in advance (and even freeze it) and I'm told fried rice is better that way.  And I'm sure purists would be appalled at my use of brown rice, but I like to add a little fibre in wherever I can sneak it.

quick and easy chicken fried rice

This particular time, I used this Planet Rice sprouted brown rice I picked up at Costco a while back.  I like that it cooks in 25 minutes (rather than 45 for traditional brown rice).  As long as you start the rice first, you can get this on the table in about 30 minutes or so.

quick and easy chicken fried rice

quick and easy chicken fried rice

quick and easy chicken fried rice

2 c uncooked brown rice (cook according to package directions)

1.5 T canola oil
1.5 T sesame oil

3 eggs, lightly beaten

1 onion, chopped
2 cloves garlic, chopped
1 T ginger, minced/grated
200 g mushrooms, roughly chopped
1 yellow pepper, chopped
1 large head broccoli, chopped in small pieces (I had a few smaller heads)
1 c frozen peas
2-3 c chopped chicken (or turkey or tofu or whatever)
1/4 c soy sauce, divided

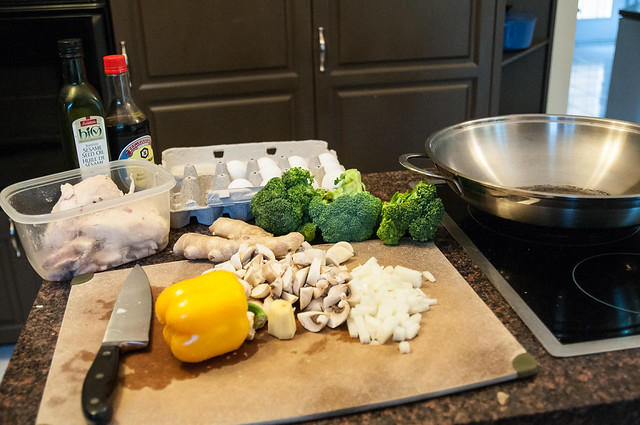
1. Start the rice.  I recommend a rice cooker, if you have one. Start chopping your veggies.

2. Take your largest saute pan or wok (I have a huge 15" wok from Cool Kitchen Pro, which is fantastic), and heat it over medium heat.

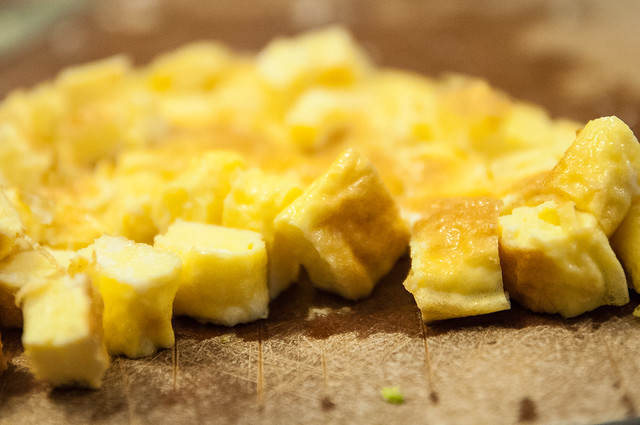
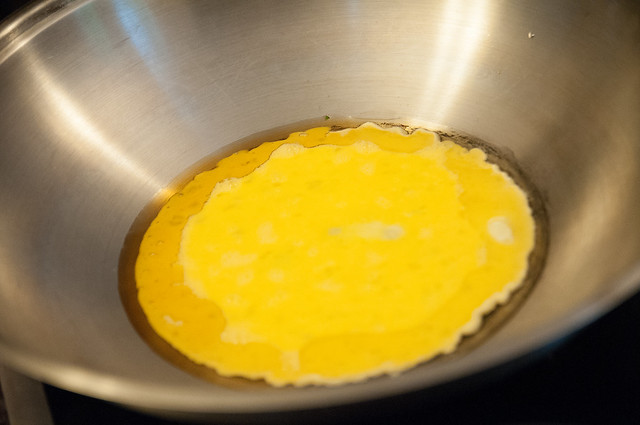
3. Add the oil, let it heat until shimmering (but not smoking), and then add the eggs.  You could scramble the egg, but I usually just let it cook in an omelette and chop it up later.

quick and easy chicken fried rice

4. Flip the omelette, cook until just done, then remove the egg from heat and set aside.  You should still have plenty of oil in your pan (if you don't, then add a splash more).

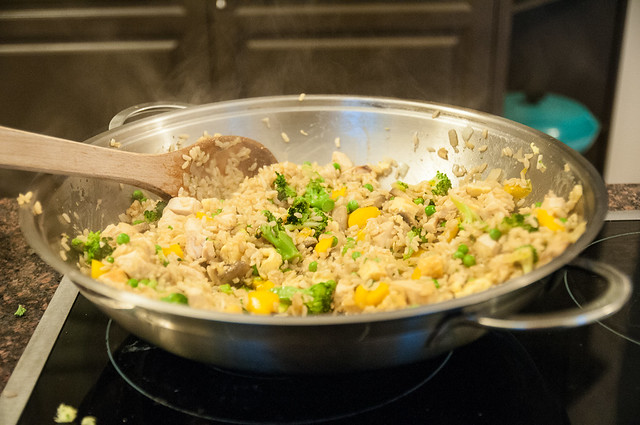
5. Add the vegetables (minus the peas) to the pan, and stir-fry for a few minutes, until they are lightly done.  Add the chicken and the frozen peas, and cook 1-2 minutes more.

6. In terms of adding soy sauce, I find it easiest to add some to the chicken/veggies and some to the rice, and then combining them together.  So do that.  Or you can dump everything in together and stir.  It's not rocket science, but it is pretty delicious.

This makes 6-7 servings.  It served our family of four, plus two lunches, plus another large container full.  You can stretch it a bit more by adding more rice (2.5 cups instead of 2, or even 3 cups if you wanted), but as I said, I like to keep it packed with veggies to keep it from being too carb-heavy a meal.

Enjoy!

  quick and easy chicken fried rice

Tuesday, April 15, 2014

greek-ish phyllo chicken pie

Pin It Now!

Sometimes you come across a dish that is so pretty and so appealing that you just have to make it.

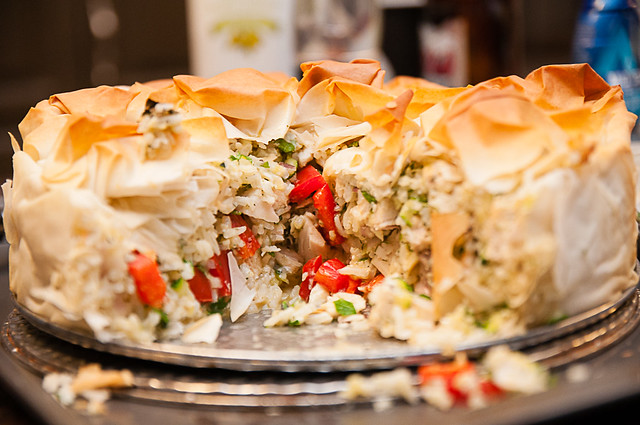
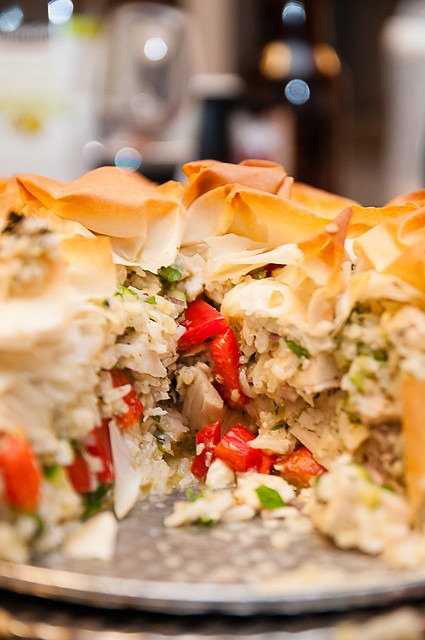
chicken and rice pie with phyllo This was one of those times.  I came across this spanakopita pie on the Steven and Chris website and it was just too beautiful not to attempt.  Of course, it would have been helpful if I had planned a little better and, you know, actually bought all the groceries needed.

But hey, necessity is the mother of invention, and I think my modified version turned out really well!

Just one note - I didn't find that 1 hr at 350F was enough to get the phyllo truly cooked, so I'd up the temperature to 375F (just use foil on top to keep the top from browning too much). You can see my pastry is a bit anemic here - I think an increase of temperature would do the trick for sure!

chicken and rice pie with phyllo - see how I should have baked it longer/at a higher temp?

This recipe is great because it's an all-in-one dinner and looks so pretty.  Mine didn't stay together quite as well as I would have liked, but I think that too would be rectified by both longer baking and longer resting, so I've adjusted the instructions accordingly.  This is a bit labour-intensive - even with having the chicken pre-cooked, and the rice pre-cooked, it took about 45 minutes to put together, and then an hour to bake.  So learn from my fail and don't try this on a weeknight.  :p  Otherwise you may or may not have to feed your hangry kids grilled cheese while the delicious dinner (which they then won't eat) ends up eaten only by you.  Did I mention this serves like 10 people? omnomnom, indeed.

greek-ish phyllo chicken pie
Makes 10 to 12 servings

chicken, rice and vegetable phyllo pie

2 ½ cups  cooked long grain rice (about 1 cup uncooked rice)
1 ½ lbs (750 g) cooked skinless, boneless chicken breasts or skinless boneless thighs, or a combination of both (I cooked some chicken the day before in the slow cooker, but whatever your favourite cooking method is would work - grilled, poached, etc.)
1 grated zucchini
1 chopped red pepper
1/2 c crumbled feta cheese
1 c grated aged cheddar
1T dried dill
¼ cup finely chopped fresh parsley
1 minced shallot
1 crushed clove garlic
3 large eggs
½ tsp salt
1 tsp freshly ground pepper
12 sheets phyllo pastry, thawed according to package instructions
¼  cup olive oil Directions

1. Preheat oven to 375F.

2. Oil a 9 inch (23 cm) spring form pan with oil and set aside. 

3. Place cooked rice into a large mixing bowl. Cut chicken into small bite size pieces and add to rice.

4. Grate zucchini and chop red pepper.  Add them, along with feta, cheddar, dill, parsley, shallot and garlic, to the chicken and rice.  Stir together.

5.  In a small bowl, whisk together the 3 eggs with the salt and pepper. Add eggs into bowl with rice mixture. Mix ingredients together until evenly combined. Set aside.

6.  Lay the thawed phyllo out onto a clean surface. Lightly brush one sheet with oil, on one side only.

7. Place phyllo sheet, oil side up, in prepared spring form pan so that one end is inside the pan (try to cover as much of the base as possible). The rest of the phyllo sheet will be hanging over, and outside the rim of the pan. Repeat this step 7 more times, rotating the pan a bit each time, so that you end up with 8 layers of phyllo lining the the pan, and so that the entire edge of the pan has phyllo pastry hanging over, and outside the rim of the pan

8. Before filling the pie, lift the overhanging edges and fold them into the pan, all around, so that you are creating a layered pastry lined wall of the pie. Press the pastry firmly into the sides of the pan to give the shell structure.

9. Turn rice and chicken mixture into pie shell.  Brush the remaining phyllo, one sheet at a time, with oil. Rip (or cut) each sheet into 4 pieces and gently crumple the pieces into a very loose ball. One by one, place the scrunched phyllo balls on top of the filling to cover the whole pie. Lightly brush the top with the remaining oil. Place a piece of foil over the pan.

10. Bake for 45 minutes. Remove foil and bake for 15 minutes more, or until the top is golden. Remove to a rack to cool slightly before releasing spring form ring. Serve in a platter. Use a sharp knife to cut into wedges.

I just loved how this looked in the pan, and the taste was great too!

Monday, January 06, 2014

anachronistic potluck goodies - smoke salmon tart, buffalo chicken dip and salads

Pin It Now!

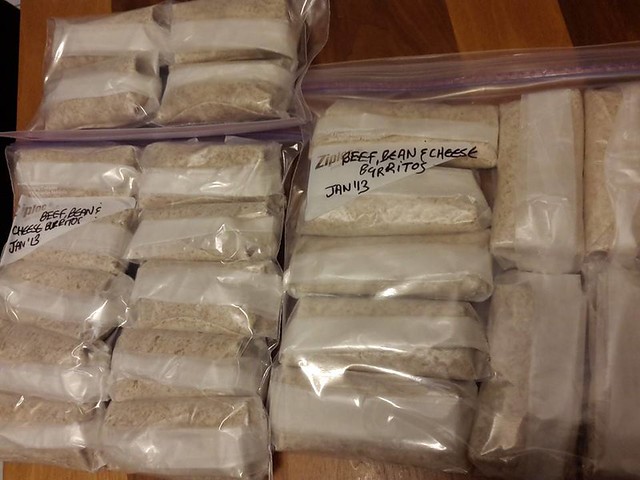
I made a batch of freezer burritos today, and was all proud of myself, so I uploaded a pic to my facebook page....and a friend promptly pointed out that I'd labeled them all with January 2013.  *facepalm*

freezer burritos

In the spirit of going back in time, let's go back a few weeks to the holidays (or really, it could be going forward in time to your next potluck), as I have a few recipes to share that are great for potlucks of all sorts.

I will shamelessly admit that I like to bring the dish that everyone wants the recipe for.  I like cooking, I try to make food that's appealing, so I score it as a win every time someone genuinely likes my food enough to want to know how to make it themselves.  And I always share the recipe.

But with that said, there are varying types of potlucks and varying types of audiences.  Except for the smoked salmon tart, which is probably best at a potluck where you KNOW at least a couple of people like smoked salmon, I do think most of these dishes will work for most potlucks, and while we all love baked brie and nacho dip, somebody else always brings those things.  So here are a few alternatives to spice things up and broaden the potluck horizons.

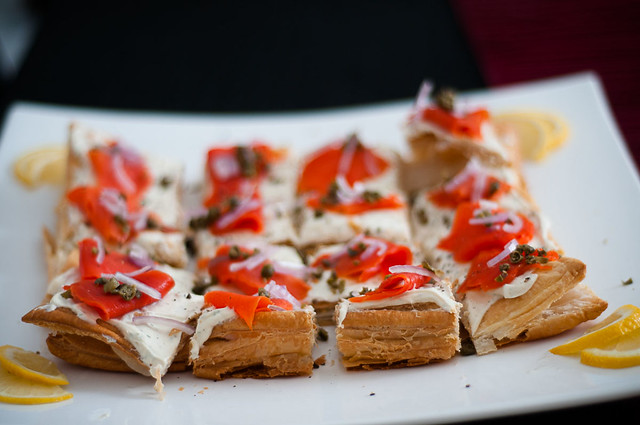
smoked salmon puff pastry tart

Without fail, one of the recipes I get asked for most often is this buffalo chicken dip.  It's not pretty, so I didn't take a photo of my own, though I have shamelessly stolen the one below from the Frank's website (because it's also not my recipe - it's theirs).  This dip is creamy, spicy and filling.  People just gobble it up.  It's also completely and utterly terrible for you, so eat sparingly.


Photo credit: Frank's

Buffalo Chicken Dip
delicious buffalo chicken dip!


photo and recipe credit: Frank's, with a few mods


1 pkg. cream cheese, softened
1/2 cup Frank's red hot sauce
1/2 cup ranch dressing
 2 cups chopped/shredded cooked chicken.
1/2 cup finely shredded aged cheddar

1. Preheat oven to 350°F.

2. Combine all ingredients in a 1-quart baking dish.

3. Bake 20 min. or until mixture is heated through; stir. Serve with crackers or vegetables. (I like it with tortilla chips).

To continue in the appetizer vein, a favourite thing for me to make is this smoked salmon tart.  It looks beautiful and fancy, and the best part is that the actual labour involved is relatively low.  It's not fussy to make.  This is ALWAYS a hit with the smoked salmon lovers, and always avoided by everybody else.

But that's okay, because it means more delicious smoked salmon for me.

Smoked Salmon Tart
smoked salmon puff pastry tart

1 sheet pre-rolled puff pastry (check label - I like PC brand because it is pre-rolled AND made with some real butter - if you don't get pre-rolled, you'll have to give it a go yourself and it could end up not as nicely shaped)
1/2 c high quality sour cream (high fat, and also check the label for stabilizers like carageenan and guar gum - avoid these for the nicest quality and find one that just contains milk/cream and bacterial cultures)
1/2 package cream cheese
1 T dijon mustard
1 clove minced/crushed garlic
dill (fresh or dried - about 2 T/ 2 t respectively)
salt, pepper
4 oz pre-sliced smoked salmon
1 shallot, thinly sliced
2-3 T capers, roughly chopped (otherwise they roll off)
fresh cracked black pepper
lemon slices

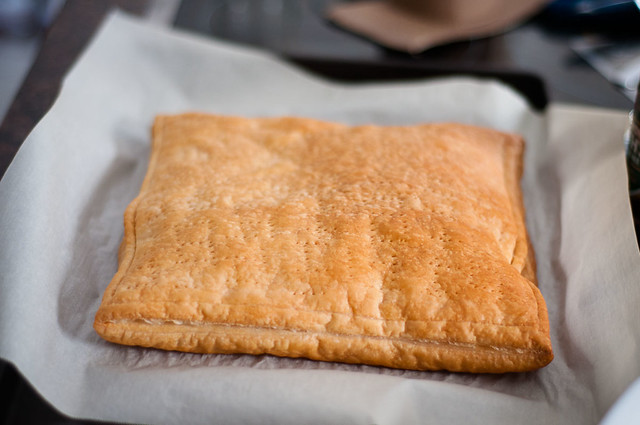
1. Preheat oven to 400 F.  Bake puff pastry sheet for about 20-24 minutes, or until it is nicely golden brown.  You could try pricking it with a fork and scoring it at the edge to keep it from rising, but as you can see, that is a bit of an exercise in futility.  :p

smoked salmon puff pastry tart

2. Let puff pastry cool, and in the meantime, combine the sour cream, cream cheese, mustard, dill, garlic and a bit of salt and pepper.  Once the pastry is cool, spread the cream cheese/sour cream mixture.

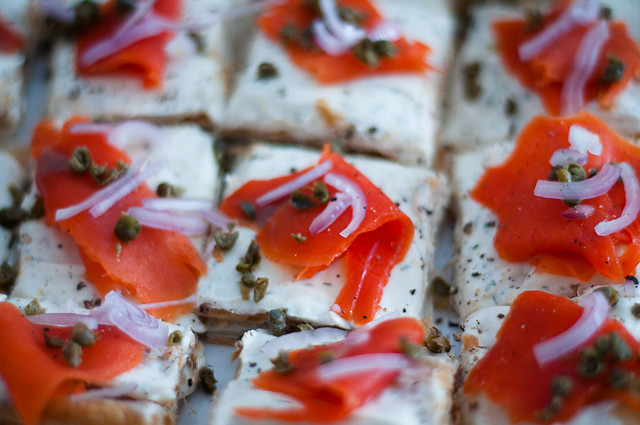
3. In terms of presentation, I find it easiest to slice the tart at this point (on a cutting board because it makes a big crumby mess) and carefully transfer the pieces to your serving platter.  I think it slices best into 16 pieces, but you could go smaller (25 pieces) or bigger (9 pieces) depending on the size of your group and how much they like smoked salmon.  Top each slice with a piece of smoked salmon and decorate with slices of shallot, capers and fresh cracked pepper.  Adorn the platter with lemon slices.  Done.

And doesn't it look pretty?

smoked salmon puff pastry tart

My last couple of recipes to share are salads - these recipes are both big crowd pleasers and hold well for a day or two - they are great for picnics or barbecue type potlucks.

The first is a recipe for a kale, wild rice, pomegranate and feta salad that I take ZERO credit for - it's from Lindsay at Pinch of Yum, but I can say that I've made it three times in the last month (pomegranates are in season!) and it's been a hit every time.  I love the texture contrast between the pomegranate, kale, wild rice and nuts, and the salty touches of feta are perfect.  I use pecans in this recipe, because that's usually what I have around the house, and I don't sauté the onion for the dressing (mostly due to laziness). I'm not going to re-post here, because I don't have a lot to add, but look how beautiful it is (and her photos are gorgeous, as you can see here):

gorgeous salad from Pinch of Yum
photo credit: Pinch of Yum

So that's why you should make it.

Last thing I'm sharing is a VERY simple recipe for greek pasta salad - I love this one because it's ever so slightly outside the yucky mayo pasta salad box, and pretty much everyone will try it and enjoy it.  This comes together really quickly and makes a good-sized batch, so it's great for a crowd.  I usually just purchase greek salad dressing (I love Farm Boy's), but you could use your personal favourite greek dressing recipe as well (I love the FB one because the ingredient list is so short that it's pretty much the same as homemade!).

Quick Greek Pasta Salad
greek pasta salad
1 lb box pasta (penne, fusilli, corkscrews or bowties work well)
1 large green pepper
1 large red pepper
1 cucumber
1 small red onion (if it's really pungent, go easy on the onion)
2 cups small tomatoes (grape/cherry - leave them whole if you want your salad to have shelf-life, as cut tomatoes go mushy)
1 cup kalamata olives
200 g crumbled feta (give or take)
1.5 cups greek salad dressing (give or take)

1. Cook pasta according to instructions for al dente.  When the pasta is cooked, rinse it repeatedly in cold water until it is cool and the sticky starch is gone.

2. Chop the peppers, cucumber and onion to bite-sized pieces.

3. Combine the cooled pasta with the chopped vegetables, tomatoes, olives, feta and salad dressing.

And you're done.  It's that easy.  Amounts on this are very forgiving - if you have more or less of a given ingredient, it will still be great (case in point, I was SUPER short on olives for this batch and it was still a hit!).

Anyway, I know this wasn't the most focused post, but hopefully you've got a few ideas now for potlucks (or even just lunches, because these salads are EPIC).

Cheers and thanks for reading!


Sunday, October 13, 2013

Thanksgiving mini-feast

Pin It Now!

I was *supposed* to be off the hook this year for Thanksgiving dinner.  We were supposed to be visiting hubs' parents, and enjoying a delicious turkey that I didn't cook.

Thanksgiving deliciousness

Best laid plans and all that.

The smallest mini-foodie came down with a yucky cold, and mini-foodie one soon followed, so we decided to keep our germs to ourselves and have a low-key family Thanksgiving weekend.

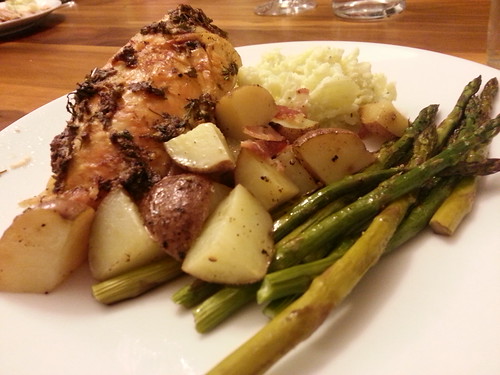
Since I cooked a turkey last weekend, I decided to opt for chicken this weekend.  When I thawed my chicken, I noticed an intriguing recipe on the package (Roasted Caesar Chicken), so I decided to give it a try.  It was relatively simple and the taste was fantastic.  Definitely not the kind of recipe I would have expected on a package.

I tried to find it online, but I couldn't, which is what drove me to post this.  Because something this yum needs to be shared.  I served it with cauliflower puree (head of steam cauliflower blended with boursin), roasted asparagus, and a pumpkin-pecan flaugnarde, which is basically a pumpkin custard.  Simple and delish.


Caesar Roasted Chicken
roasted caesar chicken

1 chicken (4-5 lbs)
5 slices bacon
1 lemon, quarted (but zest it first)
4 cloves garlic
salt, pepper

lemon zest of one lemon
1/3 c finely-chopped parsley
1/4 c finely-grated parmesan
3 cloves garlic
1 T  olive oil

2 lbs chopped potatoes (bite-size pieces)
2 T olive oil
salt, pepper

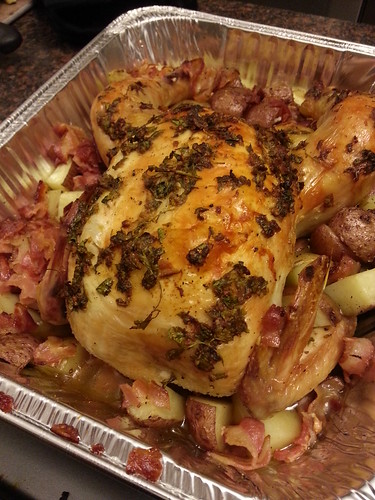
1. Preheat oven to 375F.  Place chicken in a roasting pan (I used a disposable one because I am laaaazy).  Season the chicken, inside and out, with salt and pepper.  Place the quartered lemon and 4 cloves of garlic inside, then drape the slices of bacon over top.  Roast for 40 minutes, until the bacon is close to crispy.

2. Meanwhile, combine the lemon zest, parsley, parmesan, garlic and olive oil.  Chop the potatoes and toss them with olive oil, salt and pepper.

3. Remove the chicken from the oven, remove the bacon, chop it up, and set aside. Take the lemon-parsley-parm mixture and spread it over the chicken.  It's awkward, but do it.  Arrance the potatoes around the chicken.  Return to the oven for 1 hour more - potatoes should be tender, and chicken should be fully-cooked.  About ten minutes before time is up, add the bacon back in with the potatoes.  Double-check the internal temp of the chicken before removing (should be 74C).  Let the chicken rest for 10 minutes before carving.  Enjoy!

(sorry the pics are mediocre - I used hubs' phone, which is better than mine, but still no DSLR. ;) )

Hope everyone had a great Thanksgiving with delicious meals and wonderful times with family and friends.

Friday, September 28, 2012

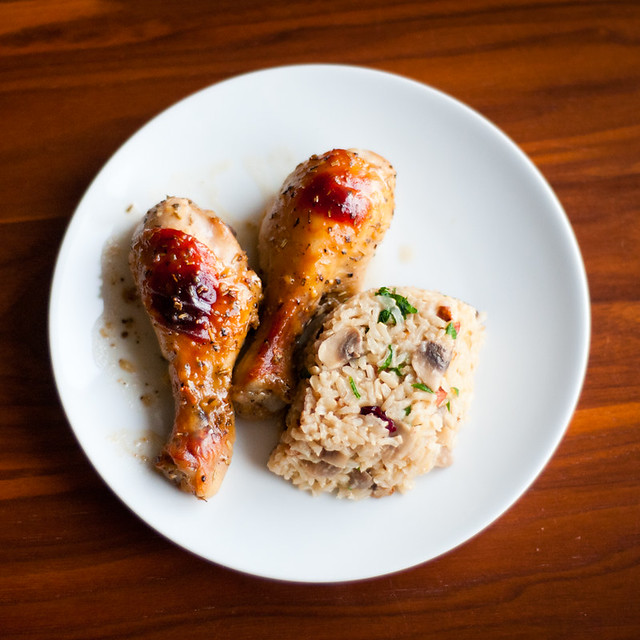
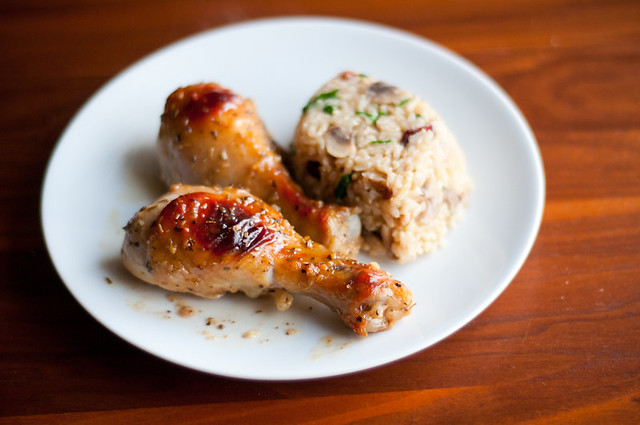
chicken drumsticks & rice pilaf

Pin It Now!

honey mustard chicken drumsticks with brown rice pilaf

Yesterday was meet the teacher (again, still in shock my little mini foodie is big enough to be in SCHOOL - egads!)...so I wanted something quick and tasty for dinner.

Hubs and I (and lil Z) all love chicken drumsticks.  They are super tasty, always nice and moist, and I love the fact that you can almost always get a wicked sale on them.  When I'm feeling less lazy, I skin them, but because of the later start to dinner tonight, I didn't bother.  Besides, I (not-so-secretly) love crispy skin.

Lil Z loves them too, because they are easy to pick up and eat right off the bone.

Another reason I love serving them is that I think it's important for kids to know where their food comes from.  I think that kids should know that chicken comes from an actual chicken; drumsticks help illustrate that because I can show Z a picture of a chicken and tell her about what part we're eating.  If all you ever serve is boneless, skinless cuts, it's hard for kids to picture what you're actually eating.  Whole chicken is even better for this.  I digress.

One cookbook I can always rely on for quick and relatively healthy recipes is Eat, Shrink and Be Merry.  So I opted for a quick honey-mustard chicken drumstick recipe and a brown rice pilaf.  Rice is a bit of a picky dish for me; whenever I try to make it on the stovetop, I end up with a hot gluey mess and a burnt pot.

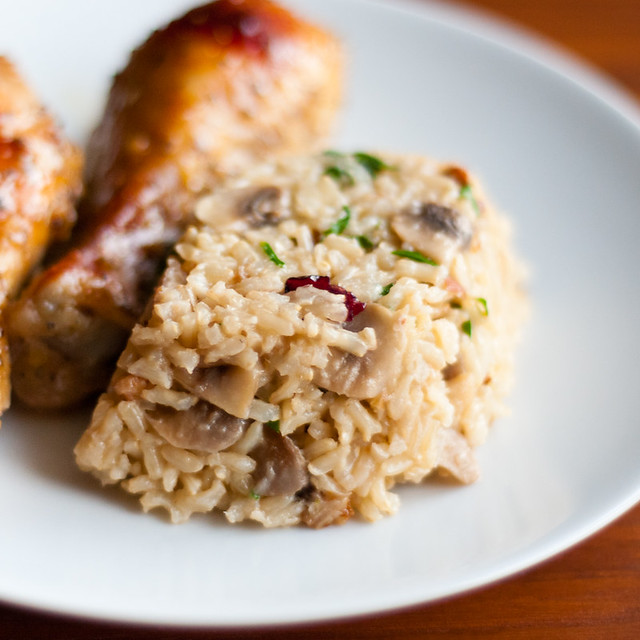
I like to start my pilaf on the stove, and finish it in the rice cooker.  Works beautifully every time!

honey-mustard chicken drumsticks
stolen and lightly modified from Eat Shrink & Be Merry
honey mustard chicken drumsticks with brown rice pilaf

12 skinless chicken drumsticks (can also use with-skin)
1/4 c honey
2 T cider vinegar
2 T dijon mustard
1 t garlic
1 t herbes de provence
pepper

1. Preheat oven to 400F.  Spray a 9x13 baking dish with cooking spray.  Arrange drumsticks in a single layer, keeping the bone toward the centre, and the meaty parts on the outside (it will cook better this way).

2. Whisk together honey, vinegar, dijon, garlic, herbes de provence and pepper.  Pour evenly over chicken pieces.  Bake for 20 minutes.  Remove pan from oven and baste chicken with sauce.  Baste every 10 minutes until chicken has cooked for about 45-50 minutes (use a thermometer to be sure --> 75C).  I like to use a standard turkey baster rather than a brush as I find you can build up the glaze a bit better that way.

3. Serve, spooning remaining sauce over chicken.

So, once you've got the chicken in the oven, you can start the rice.

brown rice pilaf with cranberries and nuts
stolen and lightly modified from Eat Shrink & Be Merry
honey mustard chicken drumsticks with brown rice pilaf

1 T olive oil
2 cups chopped mushrooms
1 cup minced onion
1 clove minced garlic
1 cup brown rice
2 cups broth
1/4 c each dried cranberries and chopped nuts (I used pecans and almonds)
2 T fresh parsley

1. Heat olive oil in a medium, non-stick pan over medium-high heat.  Add mushrooms, onions and garlic.  Cook and stir until vegetables begin to soften (3 mins or so).

2. Stir in rice, cook about 1 more minute, until rice is translucent. (at this point, you can add broth and cook in a pot, but I use a rice cooker).  Take mushroom/rice mixture and put in a rice cooker.  Add broth.  Let the rice maker do its magic (it will take about 40 minutes).

3.  Once the rice is cooked, stir in cranberries, nuts and parsley.

Tuesday, September 25, 2012

quick and easy - the bbq chicken pasta edition

Pin It Now!

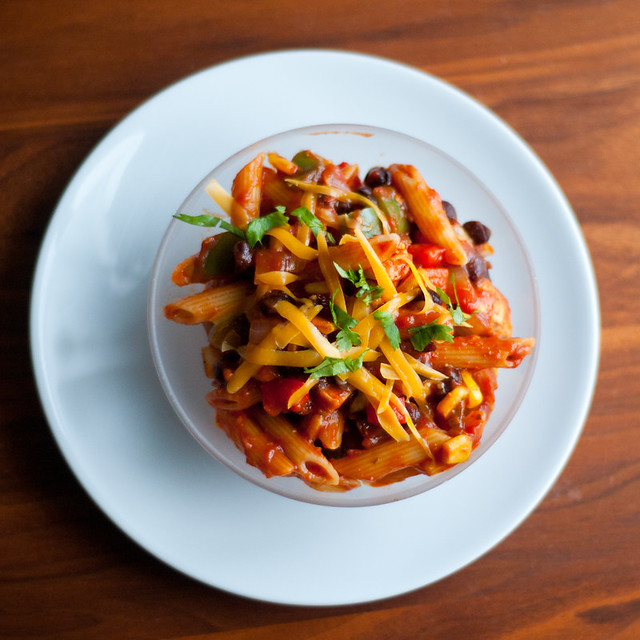
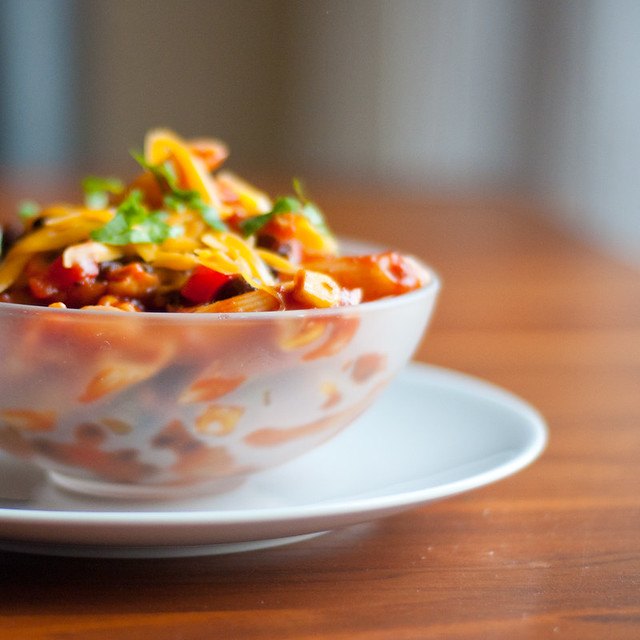
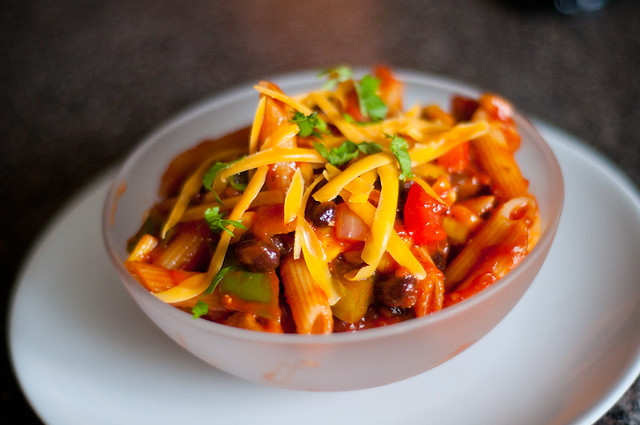
bbq chicken pasta bowl

The tiniest person in my house turned six months old today.  It's crazy to think how quickly time flies.  While I write this, she is happily bouncing up and down in her Jolly Jumper, watching me type and giggling away.  Have you seen those things?  I want one.

But I digress.

Last night, I was going out for Indian food with a few friends, and so I wanted something quick and easy to make for hubs and Little Z.  I also wanted it to make copious amounts of leftovers, so we'd all have something for lunch today too.

I was flipping through books/websites, and then I decided that I'd create a sort of BBQ chicken pasta dish.  Kind of along the idea of a bbq chicken pizza, except in pasta form.  I'd say it was pretty successful, and hit all the right notes (as in, easy, fast, made a lot), but the one thing that was missing was smokiness, and I think that's because I didn't use the most appropriate kind of bbq sauce.  I just used a chicken&rib sauce thta had a lot of sweetness, but none of the smokey/hickory flavour that was needed.  So if you make this, be sure to use a smokey bbq sauce, and you won't regret it.

bbq black bean & chicken pasta bowl
bbq chicken pasta bowl

1 T olive oil
1 lb chicken breast, diced
(montreal steak spice)
1 onion, diced
1 red pepper, diced
1 green pepper, diced
1 large clove garlic, minced
1 can black beans, drained and rinsed
1 cup frozen corn (or fresh or canned)
1 T chili powder
1 can spaghetti sauce (use a fairly plain sauce)
3/4 c bbq sauce (I suggest a smokey one --> look for hickory or mesquite)
1 box of pasta (I used penne; I think wagon wheels would be so cute for this dish though)

Garnish:
grated cheddar
minced cilantro

1. Heat large pasta pot full of water.

bbq chicken pasta bowl

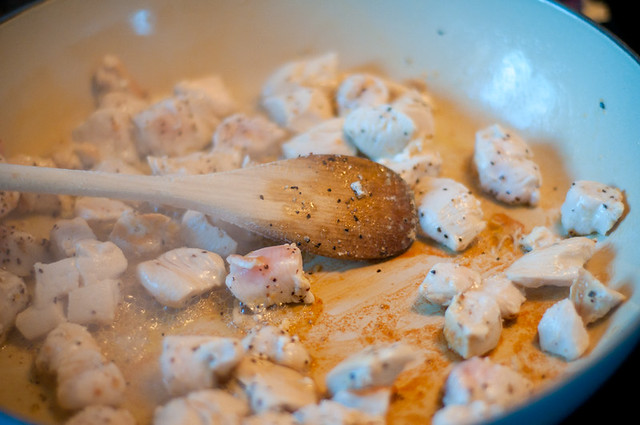
2. While water is heating, in a large, deep skillet, sauté chicken in olive oil over medium heat, until cooked through, sprinkle with a bit of montreal steak spice, if you have it).  Remove chicken from skillet.

bbq chicken pasta bowl

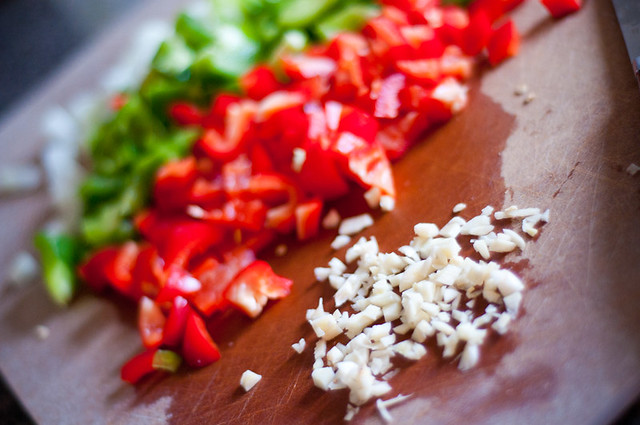
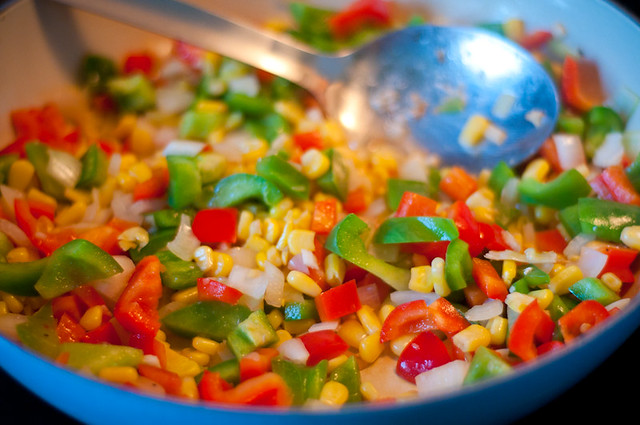
3. To skillet (don't bother to clean it), add a touch more olive oil, then add onion, red pepper, green pepper and garlic.  Saute until veggies are softened (about 5-6 mins).  Add black beans and corn.  Saute a couple more minutes, until corn is heated through.  Stir in chili powder.

bbq chicken pasta bowl

4. By this point, your pasta water is probably boiling.  Add about 1 T salt (optional), and then cook pasta according to directions.  Penne takes 11 minutes.

5. Meanwhile, add spaghetti sauce and bbq sauce to veggie mixture.  Stir.  Return chicken to skillet, stir and turn heat down to low and let simmer while pasta cooks (otherwise you will have exploding tomato sauce all over your stove).

6. Drain pasta, but do not rinse.  Return pasta to pasta pot.  Dump skillet contents in.  Combine.

7. Serve, topped with cheddar and cilantro.

Easy-peasy and pretty delicious.  But like I said, go for a smokey bbq sauce!

bbq chicken pasta bowl

Saturday, April 09, 2011

eat your leafy greens, dammit

Pin It Now!

spinach

I can't even count the number of times I've read/heard the phrase "eat more dark green leafy vegetables."

It's everywhere. They form part of Canada's Food Guide. My favourite magazine, Clean Eating, is always touting their benefits. Most lists of so-called 'superfoods' (in quotation marks because this is not a licensed or regulated term, so always take it with a grain of salt) have spinach featured pretty prominently too.

It's a good thing.

BUT, there are a few issues that can come up with spinach (and other leafy greens).

First off, when eaten raw, it's hard to eat enough of these vegetables to really benefit from their nutrients. For example, 1 cup of raw spinach has 7 calories, 1 g fibre. It's a great source of Vitamin A (56% daily value) and Vitamin K (181% daily value). That's pretty good. When you compare with 1 cup of cooked spinach, you get 41 calories, 4 g fibre, 5 g protein (who knew???), and the news gets better with some of the other nutrients - 24% daily value for calcium, 36% daily value for iron [make sure you consume with a vitamin C source to optimize your absorption]. PLUS, 1 cup of cooked spinach is a pretty good sized serving. You won't feel at all satisfied with 1 cup of raw spinach, but the same size serving of cooked spinach will definitely help fill you up.

My other problem with spinach is that I end up buying a big plastic tub of it, and if I'm not cooking it, it ends up going bad, because we can't get through it quick enough. Cooking decreases spinach's volume by nearly 90%, so if you have slightly-sketchy spinach, just cook 'er up, eat it and you're good.

And this brings me to my last point about why cooked spinach is better...y'all might think that processed hamburgers might be one of the number one sources for e.coli....but spinach has also been the source of a surprising number of outbreaks. There are some tips here on how to safely handle spinach, but the reality is that you can't wash off e.coli. You can kill it by cooking though.

One other quick tip about spinach - it has been named as one of the 'dirty dozen' most contaminated vegetables. So if you can find organic spinach, it's probably a better choice. You can see the whole list of the most and least contaminated veg/fruit on the Organic.org website. Just something to think about.

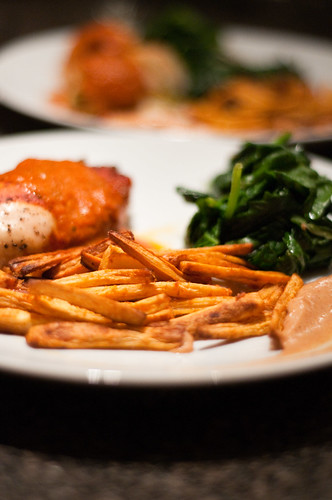
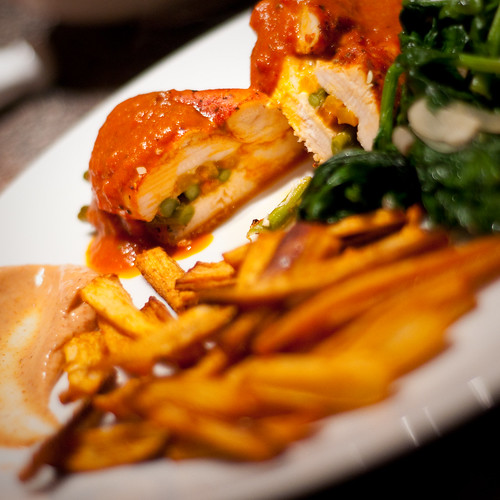
So....now that we've got all of the pleasantries (???) out of the way, let me tell you about dinner. Hubs and I didn't end up eating until 11 last night (Lil Z got some leftover beef stew, made from this Clean Eating recipe). I had *thought* we would be eating around 10, so my chicken was a little dry, and my parsnips a little tough....but they were still tasty, and the recipes are absolutely yummy, so I'm sharing, even though you can clearly see the dried-out execution of the meal on the plates (pics don't lie).

Just don't trust your hubs when he says he'll be home from hockey at 9:45. ;)

This chicken recipe is from (surprise, surprise) Clean Eating. A couple of small mods due to availability, but overall, the taste is great. I think the roasted pepper sauce would be amazing on pasta.

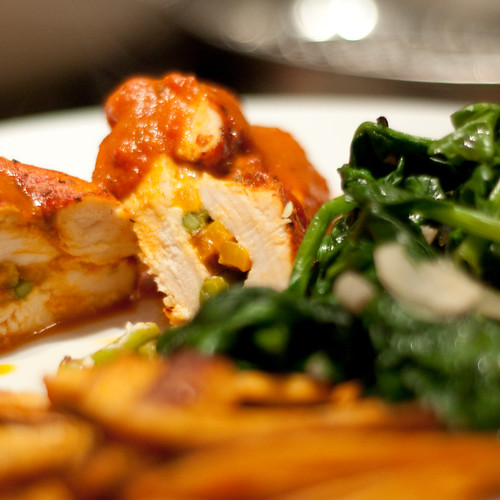
stuffed chicken with spicy roasted red pepper sauce
serves 2 (I made 3....this easily scales up)
stuffed chicken, parsnip fries and spinach

3 red bell peppers (mine were very small, so I added a yellow and orange for good measure)
1 T olive oil
1 T balsamic vinegar
1 c low-sodium chicken broth (I absolutely love the Kitchen Basics no-sodium-added one)
2-3 cloves garlic, chopped
1/4-1/2 jalapeno pepper (I just used a good pinch of red pepper flakes)
1/2 t italian seasoning (I used herbes de provence)
sea salt and black pepper, to taste

2 boneless, skinless chicken breasts
2 T goat cheese (didn't have any and I hate it...I used finely grated 3 year-aged cheddar...next time I'll go for light laughing cow because it doesn't melt out of the chicken!)
2 asparagus spears per chicken breast, trimmed

1. Preheat broiler. Cut peppers in half, and arrange, cut side down, on a baking sheet.

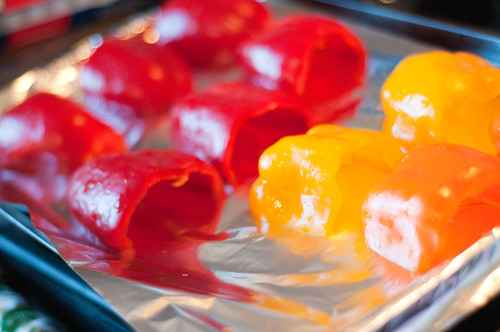
ready to get burnt....

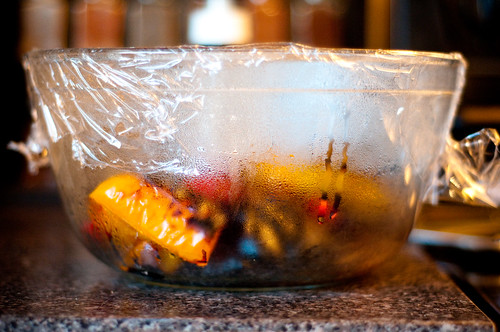
Place as close to the broiler as you can (don't be scared!). Broil for 10-ish minutes. You want them completely burnt. Start checking after 7 minutes. Once they start smoking, then they are probably ready. Immediately put them in a bowl and cover with plastic wrap. Let them steam themselves for about 10 minutes....this makes it easier to remove the skin. (NOTE: if you don't burn the heck of the peppers, the skin will be near-impossible to remove and you will hate me. So burn the peppers, k?).

steaming pile of peppers

2. Once the peppers are cool enough to handle, remove the skin. It's okay if there's still a little black on 'em though. That makes it yummier. (NOTE: If you are lucky enough to have a gas stove, you can do this stove top. Or you can do it on the bbq. Or you can use jarred peppers....really doesn't matter to me!).

3. Take 2-3 peppers and put them in the blender (as mentioned, my peppers were small, so I used 3 small peppers in the sauce. If yours are big, you'll only need two). At any rate, keep one pepper behind to use to stuff your chicken.

4. In the blender, add the oil, vinegar, broth, garlic and hot pepper. Blend until smooth. Put sauce in a small sauce pan over medium-low heat, add italian seasoning and black pepper (and salt to taste) and cook for about 10 minutes. This will take the edge off your raw garlic.

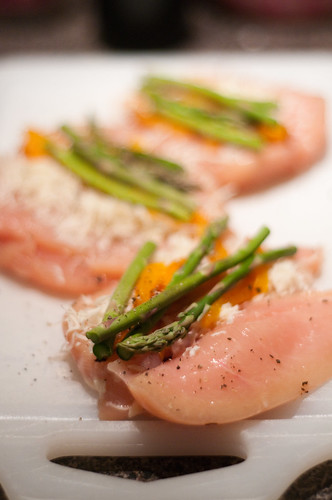
5. Meanwhile, lay the chicken on a cutting board. Using a sharp knife and with the palm of 1 hand holding the chicken, cut each breast in half horizontally (knife should be parallel to cutting board), so it opens like a book. Lay chicken breasts open and spread cheese onto half of each breast. Add asparagus spears, as well as red pepper strips. I used 2 spears per breast, along with 3-4 pepper strips. Close chicken by folding top half back over, sandwiching filling.

the lazy-man's way of stuffing chicken breasts

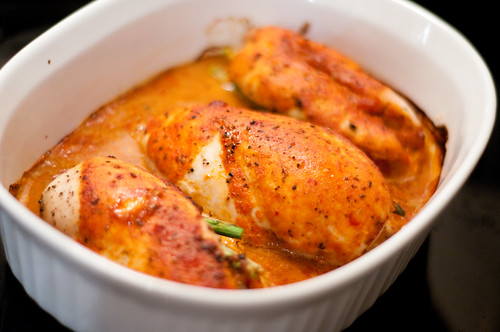
6. Carefully transfer stuffed chicken breasts to casserole dish. Pour about 1/2 c roasted red pepper sauce over chicken breasts and bake for 35-40 minutes (at about 375F) until chicken is cooked through. (I turned my oven waaaay down once I learned of hubs' tardiness, but mine still dried out, so check your chicken after 35 minutes and go from there).

cooked stuffed chicken

7. Serve chicken, and pour additional warm red pepper sauce over chicken.

Clean Eating nutritional info (per 1 breast and 1/4 cup sauce) - 323 calories, 13 g fat, 16 g carbs, 5 g fibre, 10 g sugar, 34g protein, 512 mg sodium, 77 mg cholesterol.

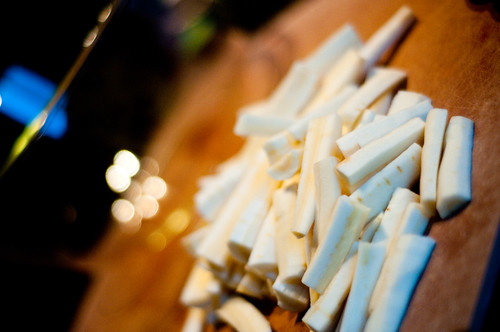
I served this chicken with spiced parsnip fries. Parsnips are one of the most under-appreciated veggies. I think they are SO delicious...and this is one of my favourite ways to cook them. It's easy and you can serve it as a side dish, or as an appetizer (they always disappear). My mom first made this recipe for my brothers and I when we were teenagers, and I'm pretty sure it lasted about 2 minutes on the table. It's really that good.

spiced parsnip fries
stuffed chicken, parsnip fries and spinach

1 lb parsnips
2 T canola oil
1 T thai red curry paste

1/2 c light sour cream
2 T indian curry paste

1. Preheat oven to 350F. Peel parsnips and slice into 'fries.'

white, virginal parsnips

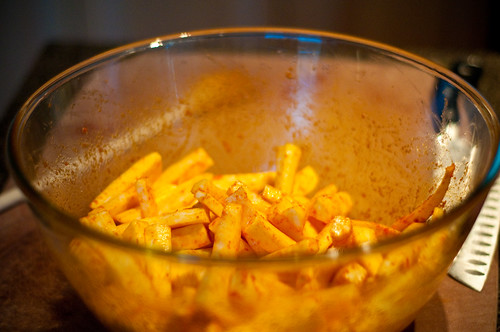
2. In a large bowl, use a whisk to blend the curry paste into the canola oil (the whisk is really the only way to get the dense curry paste to blend into the oil. This stuff is killer spicy, so you don't want clumps).

3. Bake parsnip fries for about 50 minutes, turning once. I like to put mine on parchment paper, because a) they don't stick, and b) I can toss it and I don't have to scrub a pan.

curry covered parsnips

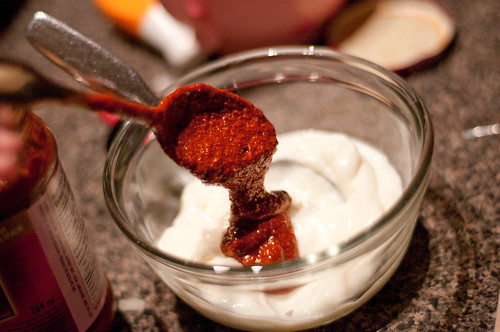
4. In the meantime, combine the curry paste and light sour cream. You can use any kind of curry paste - I used tikka this time, but I've used mild, hot, vindaloo...even curry powder, garlic and honey in a pinch.

sour cream and curry paste

5. Enjoy. Again, my fries are a little dried out and tough because of the extra 45 minutes in the oven. They are still yummy, but definitely better when you don't get a jaw workout eating them. :)

But hey, that's how you know this blog is real, right?

Last, here is the spinach recipe. This one is from Clean Eating and is deeelish.

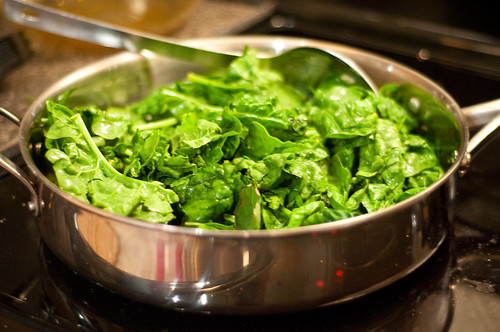
garlicky spinach

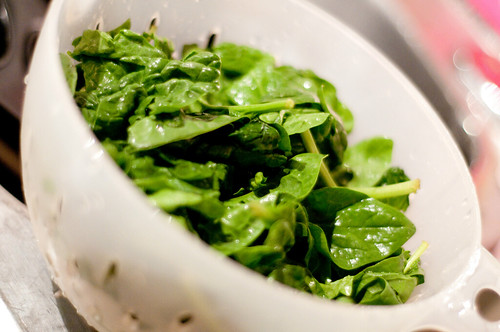
don't forget to wash your spinach

2 t olive oil
1/2 cup chopped onion
4 cloves garlic, minced (I used my slicer because it's fun and I like it)
12-oz spinach (300g or so)
1 cup basil leaves
pinch sea salt, black pepper

1. Heat a large sauté pan. Add oil, let oil heat up. Add garlic and onion and sauté until very slightly browned. Add spinach, basil, salt and pepper and toss for 2 mins (until spinach is wilted).

Voila. There you have it. This was a really yummy way to make spinach - the basil really brightened up the flavour and I'd highly recommend it. OMNOMNOM.

As a minor administrative note, I noticed that I've been getting some spam comments on the older blog posts....so I've instituted comment moderation on all posts older than a month. I'm not trying to censor anyone, I just don't really want my blog to become a spam haven....so if you comment that a 'recipe looks tasty,' but you link to a website hawking fake handbags or counterfeit viagra....sorry, that's not gonna happen. ;)

Other than that though...I do live and breathe for comments and feedback. :)

stuffed chicken, parsnip fries and spinach

Thanks for reading!


Monday, July 19, 2010

something simple and delicious for a sunday night

Pin It Now!
I'll apologize in advance because I don't have step-by-step photos of this dinner. I didn't initially set out to blog it, as it was just supposed to be something quick and easy to finish off the week. But once I sat down to eat it, I immediately stopped hubs from digging in and went to grab the camera. It's pretty, it's simple and it was one of those rare dishes that manages to taste both good and virtuous at the same time. The initial inspiration came from Clean Eating (another plug for that magazine and no, they don't pay me), but as I'd used up some of the ingredients earlier in the week, I had to improvise a little bit.


DSC_0156

chickpea & coloured-carrot asparagus couscous
*first change - hubs roasted my coloured carrots alongside his buffalo steak on saturday night. I had asparagus, so that's what I used.

1 T olive oil
4 medium assorted carrots (or 1 bunch asparagus)
1 t curry powder
juice of 1/2 lemon (make sure you zest the lemon before you juice it, as you'll need the zest for the other recipe)
1 c low-sodium vegetable broth
1 cup uncooked whole-wheat couscous
1 can rinsed chickpeas
fresh parsley

1. In a medium pot, heat oil over medium heat. Add carrots asparagus and curry and cook for 2 minutes.

2. Add lemon juice and broth and bring to a boil. Add couscous, remove from heat, stir and cover.

3. Fluff with a fork, then stir in chickpeas and parsley. Voila. Done.

meanwhile..... (basically, once the couscous is in the broth), make this....

chicken almondine with lemon green beans

1/4 c sliver unsalted almonds, toasted, divided (note: I was too lazy to toast mine. so sue me. It was still good and my house didn't smell like burnt nuts)
1 T whole wheat flour
1/4 t spanish paprika (I didn't know what type they meant - I used 1/8 t cheap paprika, and 1/8 t bittersweet smoked paprika. it worked).
4 boneless, skinless chicken breasts, pounded to 1/2-inch thickness (I actually used two largish breasts and cut them into three pieces each....the couscous/chickpea side is so substantial, you really don't need to add much, if any meat to it)
1 lb green yellow beans (it's what they had at the market)
zest of one lemon
juice of 1/2 lemon

1. Grind 1/8 cup almonds to a powder using your chopping device of choice (or a mortar and pestle).

2. Combine ground almonds, flour, paprika, salt and pepper. Dredge chicken breasts in this mixture and set aside (I just put them all in a container and gave it a shake. Like shake'n bake, except without hydrogenated oil, sodium silicoaluminate or maltodextrin....

3. Heat a large skillet, if it's non-stick, spray with cooking spray (if it's stainless steel like mine, use enough oil to just coat the bottom of the pan or you WILL regret it). Sauté chicken for 3ish minutes per side, or until cooked through. Remove from heat.

4. Cook the beans to desired doneness (I use a microwave because it's fast, but you could also blanch/steam/boil them). Then toss with lemon zest and juice, salt and pepper.

5. To serve, sprinkle remaining almond slivers over chicken.

A couple of tasting notes on this recipe - the chicken was outstanding. I'm not sure how much of it was the almond/paprika coating, or how much of it was that I used organic, locally-raised chicken. Whatever. It was really good. Don't go cheap on your chicken breasts here, because it's SO much better with good chicken. The other thing is that the beans were AWESOME. I've always been a bit meh on lemon beans because I find the acidity of the lemon juice really just makes it sour....but zest. Man, this has opened my eyes to a whole new world of possibility. The little bits of zest on the beans were like delicious little non-sour lemon explosions in your mouth. It was delicious.

Anyway, if you're bored, this is good. You should make it. It's simple and it's healthy and best of all, it easily serves six hungry people (with just two chicken breasts) and has left me with a bevy of leftovers for delicious lunches. YUM.

Sunday, June 13, 2010

fresh, fast and local(?) on a saturday night

Pin It Now!

I'm intrigued by the idea of a 20 minute supper every night....intrigued but not yet convinced.


DSC_6905

I'm not saying that you should slave away for 2+ hours just to put a decent meal on the table, but I also have a hard time accepting the value proposition of a recipe that promises dinner in 15-20 minutes, but involves 15 minutes of cooking time. Unless you are a super-star chef with the world's most organized kitchen (and that excludes like 99.9% of us), you probably can't get everything prepped for a recipe in 5 minutes.

That said, when a friend posted this recipe on facebook, I thought I would try it anyway....even though I changed it up a bit (so it took quite a bit longer than 20 minutes), I think it's a good recipe. Plus, I loved the fact that it called for maple syrup, as my uncle just dropped off a big jug of this year's batch. It's deliciously thick and dark and flavourful. So I thought this would be a good way to try out a more savoury use of maple (as opposed to me either drowning my french toast, or just plain eating it out of a bowl, both of which I have been known to do).

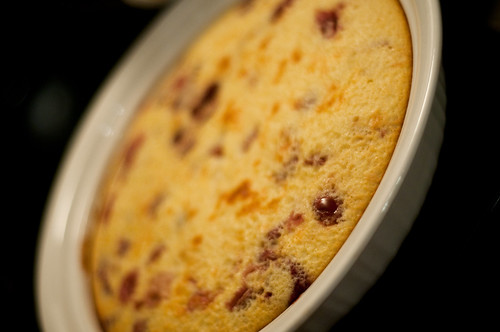
Anyway....I figured that with a fairly richly-flavoured meal, it would be best to pair it with a light dessert. And since it's the time of year when we're just starting to see shoots and starts of local produce, I decided to make a clafoutis (it also helps that a friend had me over for dinner earlier in the week and made a delicious blueberry version, which reawakened my love for this ultra-simple dessert). I've made clafoutis before, and I pretty much used the same recipe this time, except I made it with cherries (not local....they weren't the best cherries ever so I thought they might be improved by baking in a vanilla custard pancake). I kept my local strawberries for noshing instead.

I'm going to repost the clafoutis recipe because I think it's totally underrated and super delicious. Plus, I think I've got the baking time mastered now. As much as I LOVE my copy of how to cook everything, I think Mark Bittman brutally underestimates the amount of time it takes to bake.

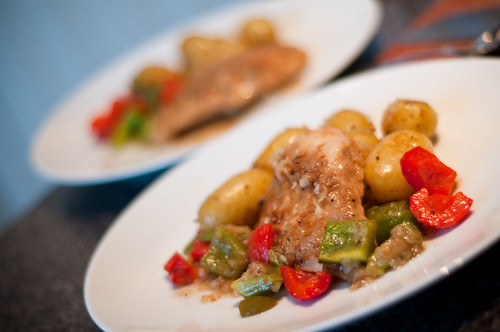
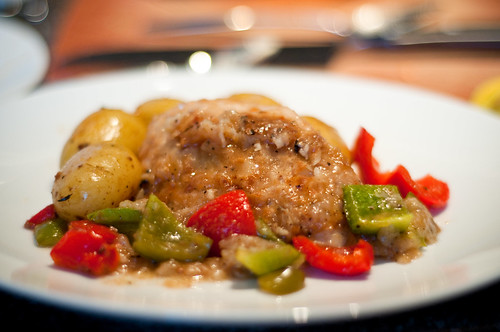
Maple Roast Chicken and Peppers with Thyme New Potatoes - stolen and lightly adapted from 20 Minute Supper Club

1/3 c maple syrup
3 T cider vinegar
1 t minced garlic
1/4 t sea salt
1/4 t black pepper
pinch red pepper flakes
(1/3 c marsala --> it was just sitting around, so I added it in!)

4 boneless chicken breasts (I had three monster-sized ones, so I sliced them to make 6 pieces of chicken)
2 bell peppers, cut into 1 inch pieces
1 lb small new potatoes
1 T unsalted butter
2 t fresh thyme (I used dried...I don't think it's worth it to buy fresh...dried thyme is fine)
1 t grainy old-style mustard

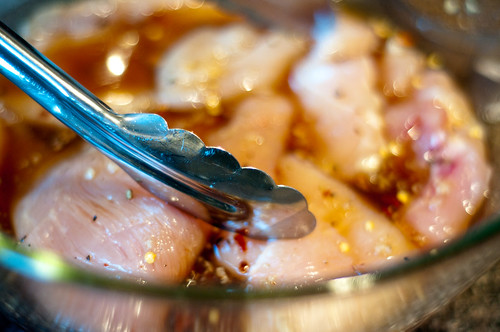
1. In a bowl, combine the first six ingredients (and the marsala, if you're using it). Add the chicken and let marinate for a while (I recommend an hour or two, if you have the time).
DSC_6887

2. Preheat oven to 425F.
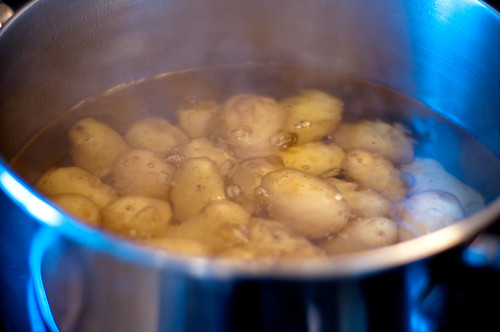
3. Add potatoes to a large pot of salted water and bring to a boil. Cook until tender when pierced with a knife (20ish minutes, unless they are really tiny). Drain well and toss with butter, mustard and thyme. Keep warm and set aside.
DSC_6894

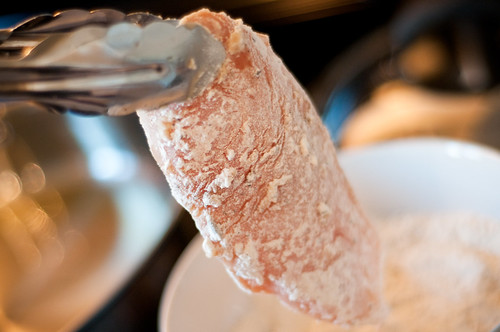
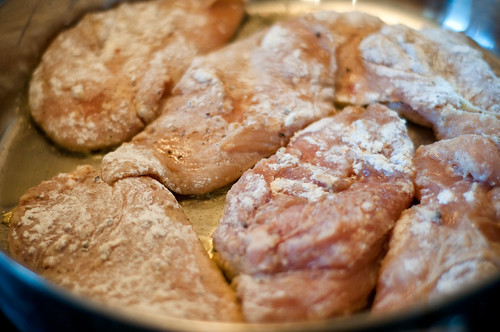
4. Meanwhile, heat an oven-safe frying pan****(see below for instructions on how not to eff this up with a stainless steel pan). I thought the chicken would benefit from being dredged in seasoned flour....so I mixed together about 1/2 c flour, 1 t ground mustard, 1 t garlic salt and pepper. I lifted the chicken pieces out of their marinade, let them drip and then dredged them and plopped them in my hot, oiled pan.
DSC_6892

DSC_6893

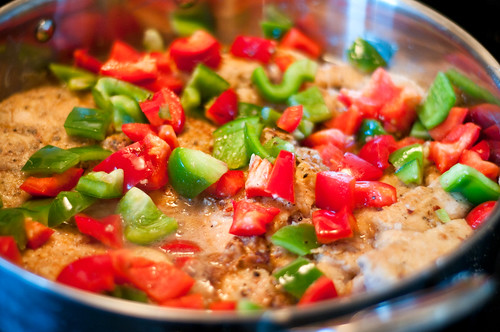
5. Cook until they are a bit brown (3-4 minutes) and then flip. Once you flip, add the maple mixture and peppers. Bring to a boil (it is a chicken marinade after all...you don't want a side of salmonella with your dinner).
DSC_6895

6. Pop the skillet into the oven (uncovered). Let bake for about 12-15 minutes.
DSC_6903

Enjoy!

**** I am the recent, but very proud owner of a very heavy stainless steel pan. We have decided to try to minimize our use of (and exposure to) non-stick cookware (read more here). BUT, the whole reason that non-stick pans have become so popular is that it takes a little bit of know-how to cook with stainless steel. SO....if you're going this route (though I also highly recommend cast iron; it's less touchy, but it is reactive, and that can cause problems if you use a lot of lemons or tomatoes...but I digress)....anyway, if you're going to go this route, this is what you can do to save yourself a lot of scrubbing and frustration:

1. Heat a dry, clean pan over medium heat.
2. After a few minutes (unless you have a gas stove, in which case, check quicker), flick a bit of water at the pan. If it bounces/evaporates immediately, go to step three. If not, wait another minute or two and try again.
3. Add your oil. You have to use a reasonable amount of oil with a stainless pan....cooking spray won't cut it. You need *just* enough to very thinly cover the bottom (about 1.5 T will do it). Let it get hot (the surface will shimmer, and the oil will become very thin, runny).
4. NOW add your food.

If you follow these steps, you shouldn't have any problems. If you skip them and get impatient, your food will stick. And then it will suck to be whoever is on KP.

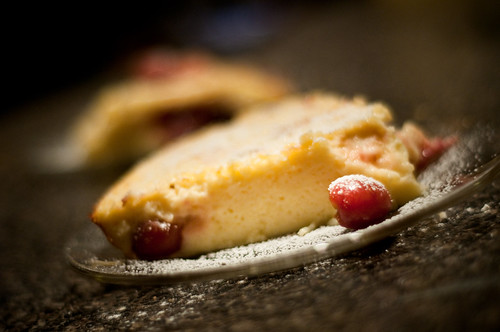
Cherry Clafoutis - from Mark Bittman's How to Cook Everything
DSC_6935

3 cups cherries
3 eggs
1/2 sugar (I use vanilla sugar)
1/3 c flour
3/4 c milk
3/4 c THICK yogourt - I used Phoenicia non-fat. It is deliciously rich and tangy.
pinch sea salt
1 t vanilla

1. Preheat oven to 350F.
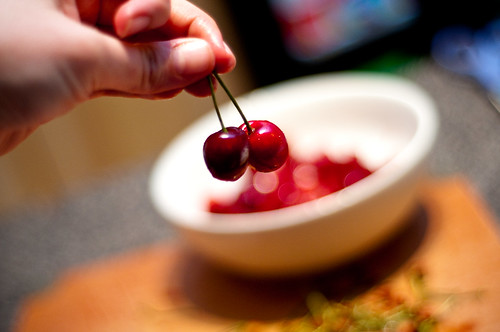
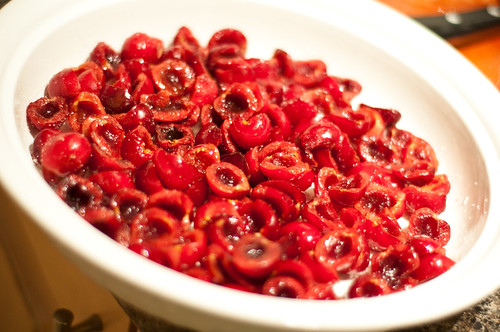
2. Prep your cherries...basically, you'll need to pop them (hahaha... :p ) with the side of a broad knife. Don't to it too enthusiastically or they will spray everywhere. (note to self: lesson learned). Once you've lightly crushed them, you should easily be able to open them and take the pit out. It will turn your hands and nails a rather objectionable nasty colour. But such is life. I like to toss them in a bit of vanilla sugar, especially as my cherries were not very sweet.
DSC_6908

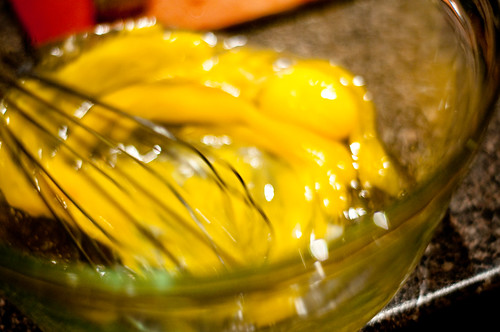
3. In a bowl, whisk the heck out of your three eggs. You want them to be a bit foamy.
DSC_6915

4. Add the sugar and whisk some more (again, you want it to be thick and foamy).
5. Add flour. Repeat.
6. Add the milk, yogourt, salt and vanilla. Whisk until smooth.
7. Take some butter and grease your pan. Sprinkle the pan with about 1T sugar, toss it around, and dump out the excess.
8. Spread the cherries in the bottom of the pan.
DSC_6912

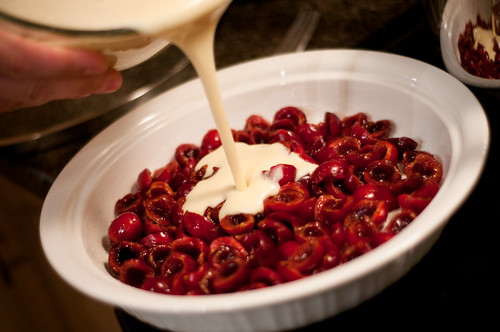
9. Pour the batter over the cherries.
DSC_6924

Bake for 35-40 minutes. The edges will be brown and the middle should be *almost* set. Let it sit for a few minutes, and you will have the easiest, most delicious dessert you can make with fruit.

DSC_6932

Related Posts with Thumbnails