Photobucket - Video and Image Hosting
Showing posts with label dessert. Show all posts

Tuesday, February 10, 2015

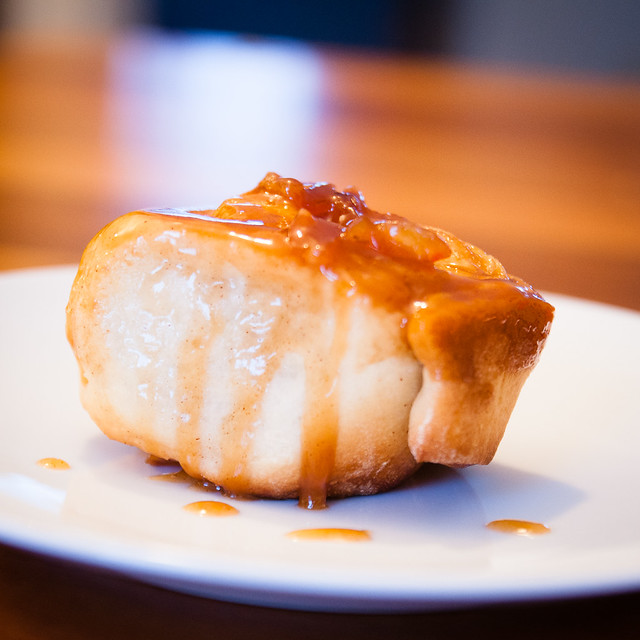
tarte tatin rolls (aka "cinnamon roll goes to France, forgoes cinnamon")

Pin It Now!

I LOVE cinnamon rolls.  Since I was a child, a delicious cinnamon roll has been one of my absolute favourite treats.  Our local bakery used to make the most wonderful yeasty, squishy and delicious cinnamon rolls that were just dripping with cinnamon and caramelized sugar.
DSC_1409

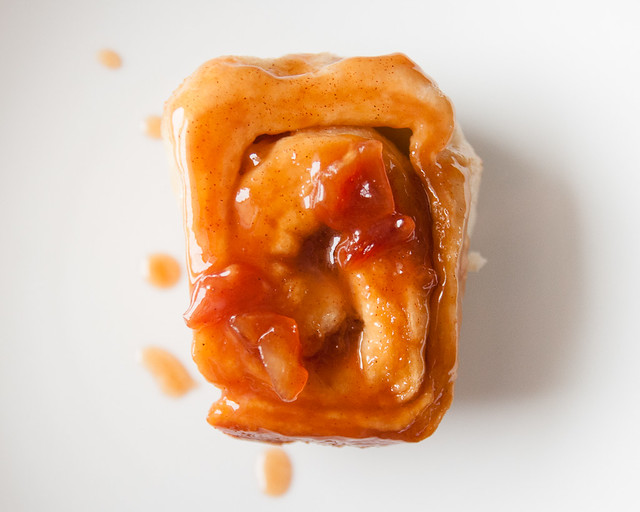
Before I get you too excited....this is *not* the roll of my childhood.  There are a million cinnamon roll recipes out there already (including on this blog), so I wanted to show you something a bit different.  Something that actually doesn't have a ton of cinnamon, but that does have a ton of rich, caramelized buttery-delicious flavour. And squishy yummy dough.
tarte tatin 'un-cinnamon' rolls

I took my inspiration from the classic French tarte tatin (also a recipe on this blog that you can check out).  Tarte tatin has NO cinnamon, and is made from a delicious combination of caramelized sugar, butter and apples, topped with pastry, then inverted for serving.  It's delicious, but messy to make, and there is always the risk that your inverting goes awry.

tarte tatin 'un-cinnamon' rolls

I had neighbours coming over for coffee, so I wanted something a little less risky, and a little more homey.

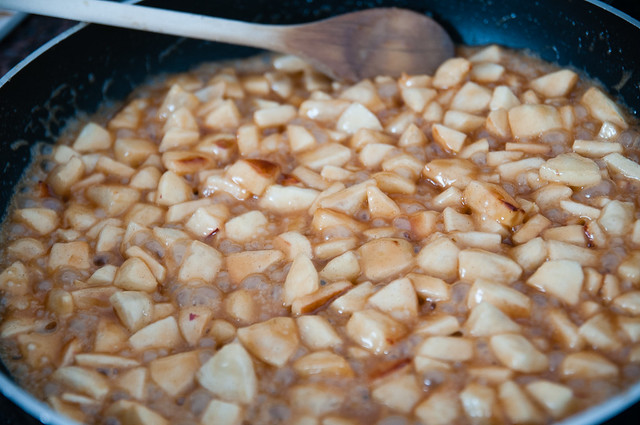
I thought the caramelized apple flavour would translate well to cinnamon rolls.  I did include a little bit of cinnamon because I find that a little bit brings out the apple flavour really nicely.  BUT, I didn't go crazy with tons of cinnamon, as I wanted those caramel and butter flavours to come through.  Despite what a lot of recipes will tell you, there is a big difference between a brown sugar flavour and a true caramel flavour.  Caramel that's made from white sugar being brought almost to the point of being burnt just has a more interesting flavour to me (not to say that brown sugar is bad....because it isn't), but I really love a good, bold caramel sauce made from an actual caramelization process.
tarte tatin 'un-cinnamon' rolls

The other aspect of this recipe I wanted to talk about was the dough.  I personally think that a simpler, yeastier dough makes the best cinnamon rolls (no eggs, no butter).  I see a lot of recipes out there that use all sorts of ingredients in the dough, but after trying a bunch of them, I definitely fall in the camp that a more traditional yeast dough is better.  It stretches and squishes rather than flaking like a biscuit dough.  This dough is sweetened, but you could easily omit most of the sugar and use the dough for something else.  I like to use my KitchenAid to mix mine, but a food processor or your hands will also work just as well.
tarte tatin 'un-cinnamon' rolls

I've made this twice now and I'm pretty confident in saying that you'll love it if you try making it too.  This is a longer project to make, and a bit more fussy than typical cinnamon rolls, but I swear it's worth the effort.  You can also make the dough the day before and refrigerate it after the first rise and it will be fine (the batch pictured is made from the refrigerated dough).

A few notes on the making of these rolls.....

1. Bruised apples are fine.  It's a good way to use up apples that maybe aren't quite so beautiful to eat alone. BTW, this is what happens when you let your two year old carry the apples.
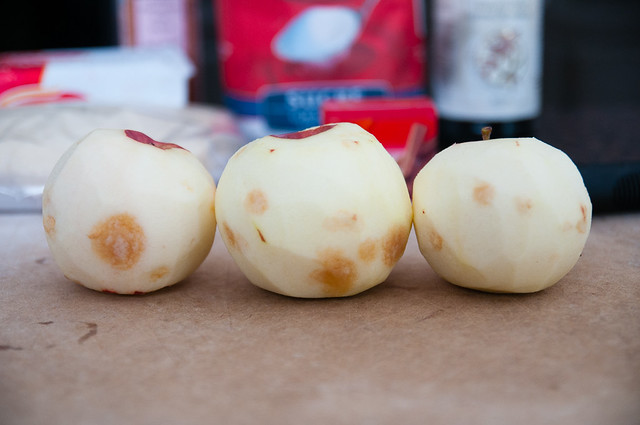
tarte tatin 'un-cinnamon' rolls

2. If you are impatient like me, the snow works really well for cooking down hot filling.  There is a small upside to -15C.  Bonus points if you spot me in my fancy jammies in the reflection.  ;)
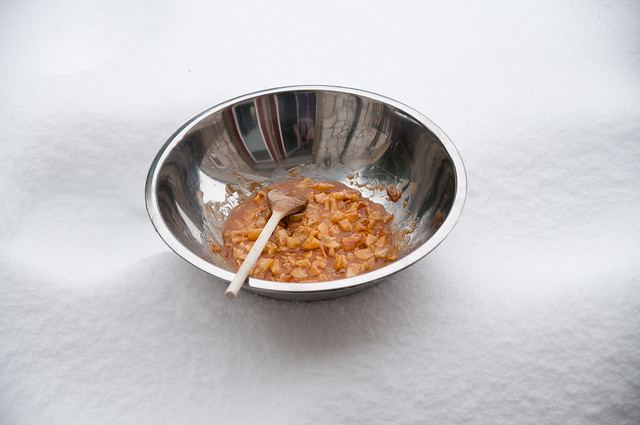
tarte tatin 'un-cinnamon' rolls

3. In terms of cutting cinnamon rolls, I find it easiest to cut the log in quarters, and then cut each quarter in thirds.
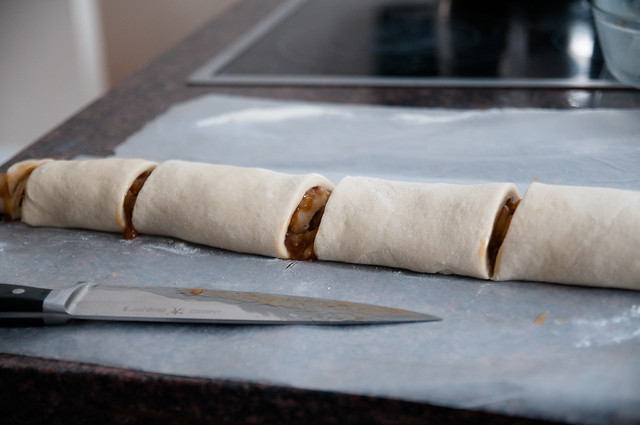
tarte tatin 'un-cinnamon' rolls

4. This is not to say that they end up all the same size (they totally don't).  I'm okay with this....it means variety in serving size for the various members of the family.  ;)  It also means I won't be becoming a pastry chef any time soon.
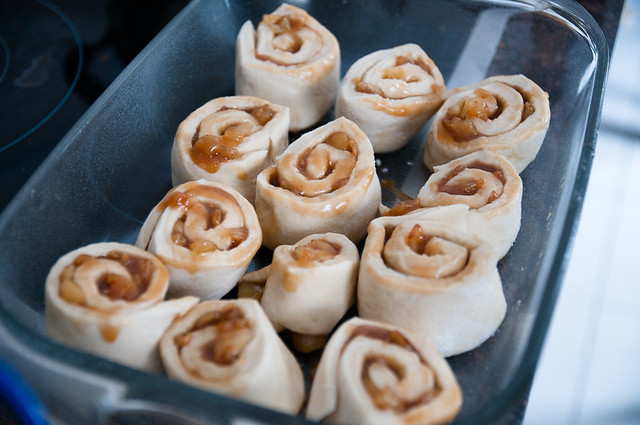
tarte tatin 'un-cinnamon' rolls

Tarte Tatin Rolls
makes 12 plus one extra dough ball to be use as you see fit
DSC_1393

dough 
(basically Amish White Bread --> note that this recipe makes twice as much as you need.  It will probably work if you halve it, but I haven't tested that!)
2 c. warm water
2/3 c white sugar
1.5 T quick rise yeast
1.5 t salt
1/4 T neutral vegetable oil (like canola)
1 t vanilla
6 cups all-purpose or bread flour (bread is best, but AP will work just fine)

1. Combine water, sugar, yeast, salt, oil, vanilla and 2-3 c of flour (you can do this in a mixer with a dough hook on speed 2, in a food processor with dough attachment, or in a large bowl with a spoon).

2. 1 cup at a time, add remaining flour.  Keep mixing until all flour is combined, then mix/process/knead for 4-5 minutes.  You want a really nice uniform, stiff dough.

3. Oil a large bowl, place the dough in it, cover it, and let it rise somewhere warm for about 1 hour (I like to use my oven with just the light on, because my house is cool.  Make sure you don't turn the oven on while the dough is still inside....).

4. After first rise, punch down the dough (i.e., squish out the excess air) and divide it in two even-ish pieces.  At this point, you can freeze or refrigerate one of them, or you can double the filling recipe below to make two pans.

filling
(I recommend making this while the dough rises, because then you'll have some time for it to cool, and you won't be forced to put your filling outside in the snow like I was)
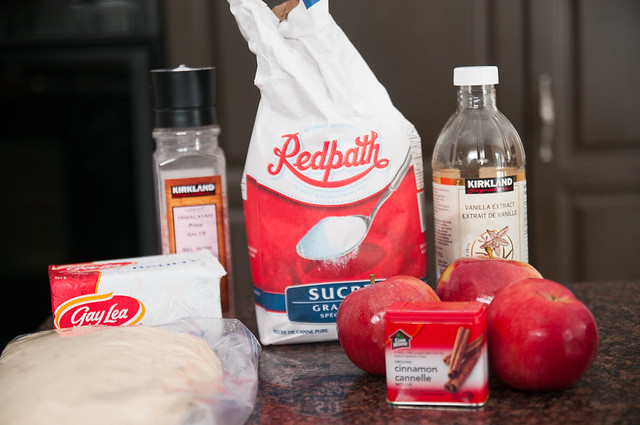
3 medium/large apples (I used idareds....you'll want to use an apple that can hold its shape)
1/3 c butter (if butter is not salted, add a good pinch of sea salt)
1 c white sugar
1 T vanilla
1/4 t cinnamon (yes, you read that right)

1. Peel the apples and chop them pretty finely.  The pieces need to fit easily inside the rolls, so you don't want big chunks of apple.

2. Preheat a large skillet over medium/medium-high heat.  Add sugar, butter and apples and stir to combine.  I started the sugar while I was still chopping my apples, so some of my sugar browned a bit early.

You'll want to keep stirring every minute or two.  I recommend not adding the cinnamon right away, because the cinnamon can mask your ability to figure out when the apples start to caramelize.  What's going to happen now is that your apples will cook, give off water, the sugar will melt and the butter will combine together.  What you need to wait for are those first little wisps of smoke that tell you that the sugar is caramelizing.

So keep stirring every minute or two, stay close, and watch for the magic to happen (will probably take about 10-12 minutes).  There will be a slight bitter aroma once the sugar caramelizes.  As soon as you detect this, give the pan a stir, turn off the heat and remove the pan from the heat.  Stir in the cinnamon.  Then wait a minute or two, then stir in the vanilla (the boiling hot caramel mixture can cause the vanilla to spatter, so let it cool a little bit).

3. Cool the filling down.  If you find that the filling is really thick, you can stir in a little bit of cream to loosen it up.  You don't want it to be super runny though, because you need it to mostly stay *in* the rolls.   The consistency of jam is ideal.

to make rolls:
butter for brushing dough (about 1/4 c)
2 T brown sugar
flour for dusting

1. Prepare your surface with a small dusting of flour, take half of your dough and roll it out in a rectangular-ish shape.  I try to make it as even as I can, but as mentioned, I'm no pastry chef.  I like to cover my work surface with wax paper because it can help with rolling up the dough.  You want the dough to be relatively thin (1/3 inch or so, but don't sweat it too much), and the rectangle should be about 12x20 inches, give or take. TIP: If you find your dough difficult to roll out, take a break.  This will allow the gluten to relax and if you wait 5-10 minutes, you should have an easier time of getting the dough to stretch to the desired size.

2. Brush the dough with melted butter (make sure to reserve some butter for brushing the rolls once they are cut), sprinkle the brown sugar over it.

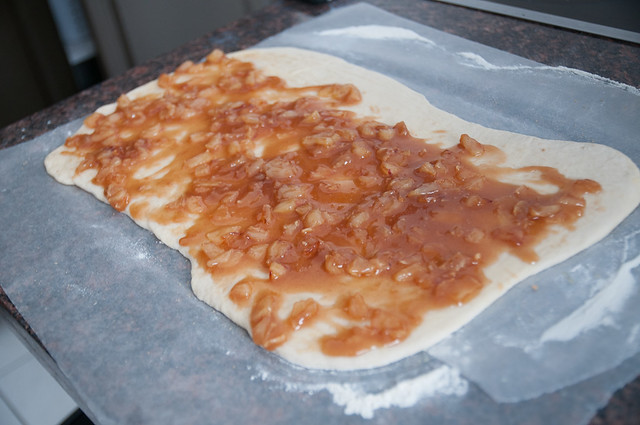
3. Spread your cooled filling on top of the dough, leaving a 2-inch border on one of the LONG edges.
tarte tatin 'un-cinnamon' rolls

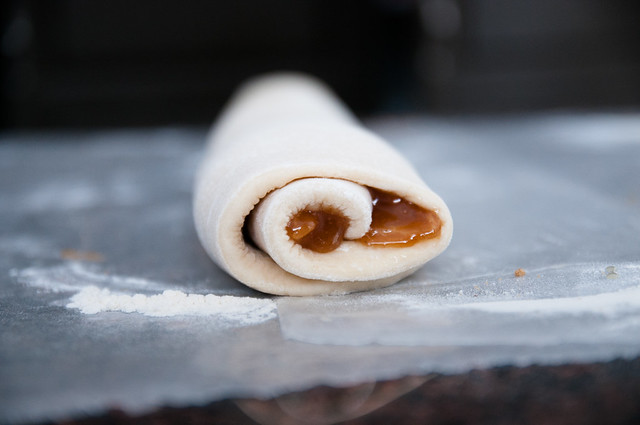
4. Start rolling your dough up from the long edge (where you DIDN'T leave the border) and do your best to pinch the dough closed.  Don't sweat it if doesn't seal perfectly.

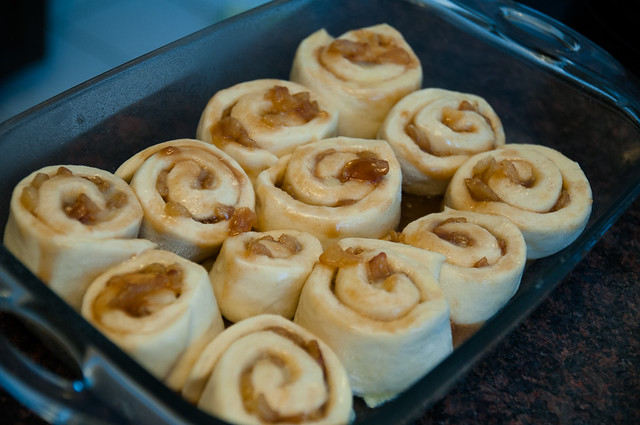
5. With your sharpest knife, cut the dough into 12 even-ish parts (see tip above).  Some filling may leak out.  Don't sweat it.  You might also find it a bit difficult to cut through the filling if it is hardening.  Don't sweat it - do your best.  Transfer the rolls as best you can to a greased 9x13 pan.  If they open up a bit, don't worry as they will rise and fill in the gaps.

6. Lightly brush the tops and sides of the rolls with the last of the butter (brushing the sides makes it easier to separate the cooked rolls).

7. If any of the caramel has leaked onto your prep surface, drizzle it on top of the rolls.  Because caramel.

8.  Cover with plastic wrap and let rise for about 30 minutes.  They will get a bit bigger, but don't be alarmed if they are still on the small side.
tarte tatin 'un-cinnamon' rolls

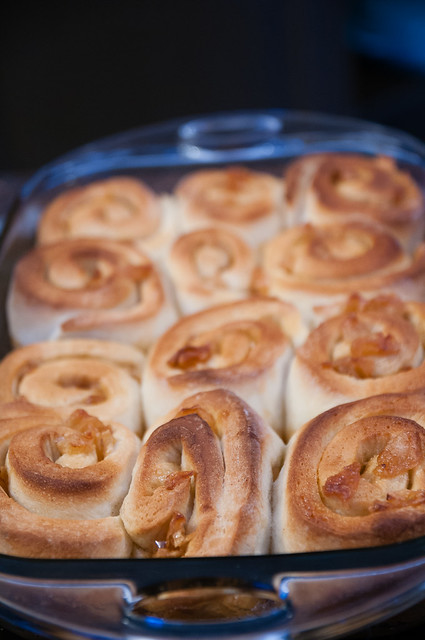
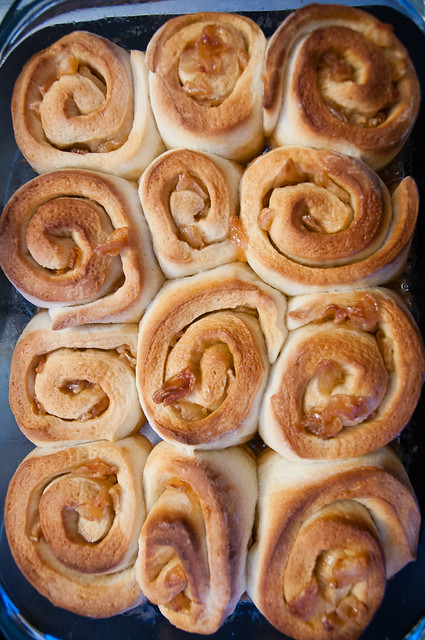
9. Preheat oven to 375F.  Bake rolls for 25-30 minutes (I found 30 was best), until they are golden brown on top.
tarte tatin 'un-cinnamon' rolls

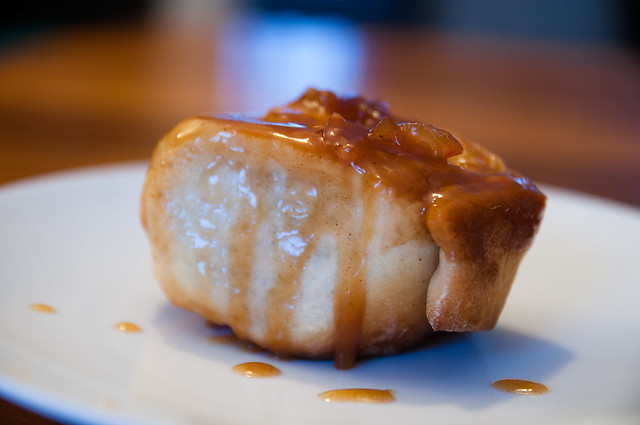
10.  Serve each roll inverted (you could invert the entire tray if you felt ambitious....I didn't).
tarte tatin 'un-cinnamon' rolls

11.  Enjoy the most delicious, caramel, appley, buttery taste you've ever had.

I know the instructions sound ridiculously long - it's really not a difficult thing to make.  They just take a while and are best suited to a lazy weekend afternoon. And seriously. They are SO GOOD.
 tarte tatin 'un-cinnamon' rolls

Thursday, October 09, 2014

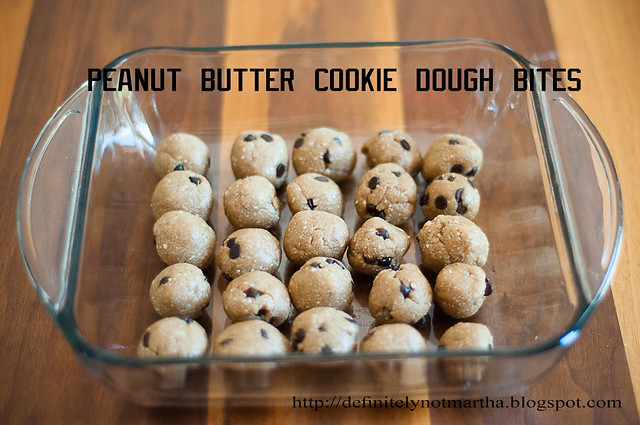
peanut butter cookie dough bites from Oh She Glows

Pin It Now!

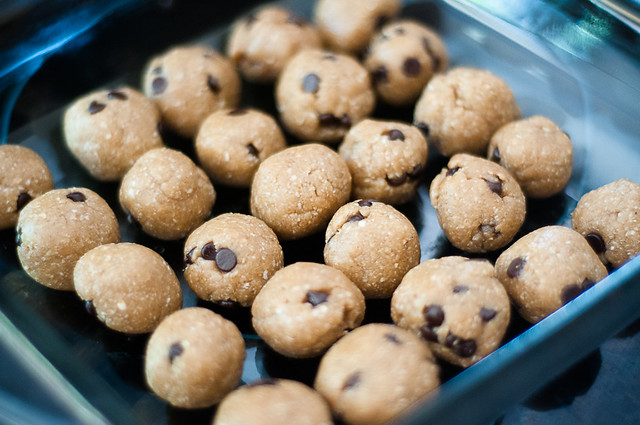
Ever since I discovered these chocolate chip cookie dough bites, I have been hooked on the concept.  These things are so simple to make (essentially, drop everything in a food processor, combine, mix in some chocolate chips, then roll), and they are incredibly delicious.

vegan peanut butter cookie dough balls

And when you look at the ingredient list, you can actually feel pretty good about enjoying a ball or two with your afternoon coffee - the perfect little pick-me-up to get you through to dinner.

vegan peanut butter cookie dough balls

This recipe is not my own (though I did change the method a bit due to my laziness) - it actually comes from the Oh She Glows cookbook, which is a fantastic book from one of my favourite bloggers.  I am normally hesitant to add to my already too-extensive cookbook collection (especially when the internet is rife with recipes), but I received this one as a birthday gift.

And I have to say, it's an awesome addition that deserves every to be on every shelf.  I've tried quite a few recipes (tex-mex casserole and glo bars) and they have all been fantastic.

These cookie dough bites were a HUGE hit with my mini-foodies and with me too.  Delicious flavour and a wonderful treat to have with an afternoon coffee.

peanut butter cookie dough bites
(from Oh She Glows cookbook; method modified due to laziness)

peanut butter cookie dough bites
1 1/2 cups rolled oats
2 T coconut oil, melted
2 T smooth natural peanut butter
1/4 cup maple syrup
1 t vanilla extract
 1/2 cup almond meal
 1/4 tsp sea salt
 2 tbsp dark chocolate chips

1. Blend the oats in a food processor until they have a flour-like consistency.

2. Add the coconut oil, peanut butter, maple syrup, vanilla, almond meal and salt, and process until the mixture is combined (you don't have to go crazy to make it perfect - just get it to combine.

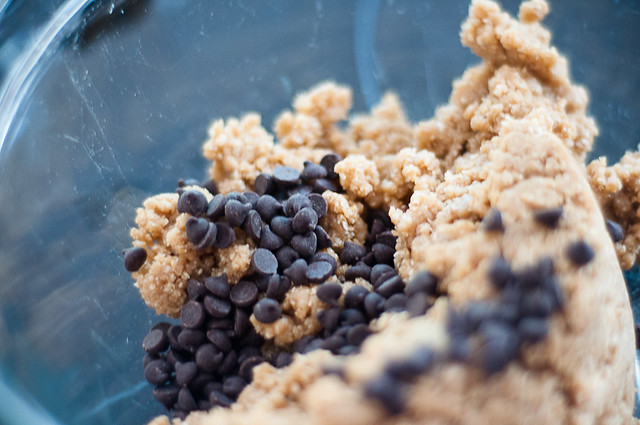
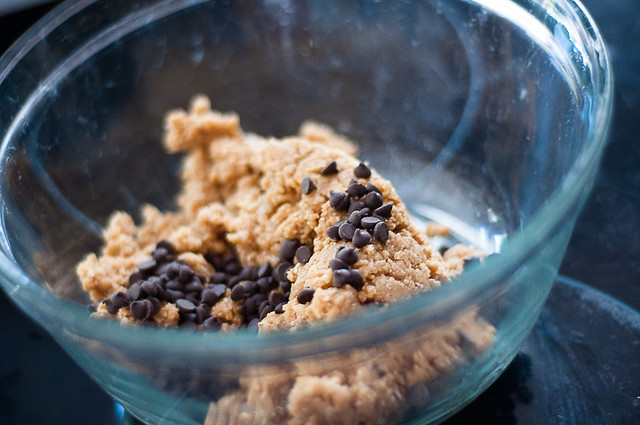
3. Scrape the batter out of the food processor and into a bowl, then add the chocolate chips. Fold them in to combine.

vegan peanut butter cookie dough balls

4. Roll into balls (I made mine smaller and it made about 25).  Freeze bites for 5-10 minutes (until firm) and store in the fridge.  You can store in the freezer, but they are a bit hard to eat.

So yummy!!!!!!


Sunday, August 24, 2014

seasonal peaches are the best

Pin It Now!

Juicy, delicious Ontario peaches are yet another reason that I just love summer.  There is nothing else that compares to the amazing flavour, and the sensation of the juices just running down your chin and arm while you eat it.

Peaches are one of the few fruits that I 100% refuse to buy out of season.  I've grown to accept the mediocre California strawberries that we get (obviously still not as good as fresh local ones, but hey, in February, I will take what I can get).  I just don't have this acceptance for peaches.  They must be local(ish) - technically, no one in my area actually can grow peaches because I guess it's too cold.  But Niagara peaches are awesome.

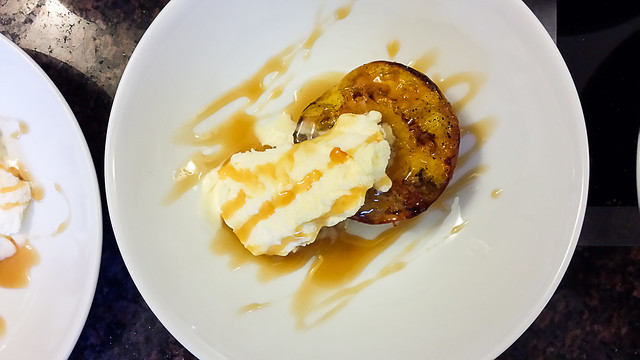
All that to say, when I can get delicious local peaches, I pounce on them.  I like to keep things simple, and this is a great way to have an amazing (and quick!) dessert.

Grilling peaches introduces a really sophisticated flavour note, and it makes the whole thing look a lot fancier than it really is.  I made the caramel sauce myself, but if you didn't want to, you could definitely purchase a good quality one from a store...though you should totally try making it, because it's quite simple, once you get the sugar caramelized.

grilled peaches with crown royal caramel and ice cream
grilled niagara peach with vanilla ice cream and crown royal caramel sauce

CARAMEL:
1/4 c water
1 c sugar
1/2 c cream (I used half and half)
sea salt
2 T crown royal

6 peaches
vanilla ice cream

1. Make your caramel in advance - put 1 c sugar in a medium/large pot (it will bubble up a lot, later, when you add the cream).  Add the 1/4 c water.  Don't touch it or stir it.  Just turn the burner to medium and watch.  It will likely take about 10 minutes (possibly more?), but the sugar will melt, it will all start to boil, and then all the water will evaporate, and eventually, it will start to turn brown.  You want to let it get pretty brown, for a more flavourful caramel, but you have to watch things closely, because it can burn and that is crappy.  I was a bit of a chicken, so my caramel isn't as brown as I would have liked.  But it was still good.

2. Once the sugar mixture has browned, remove it from heat, stand back, and carefully pour in the cream.  It will bubble up like crazy.  That's okay.  Once it calms down, add a good sprinkle of sea salt and the crown royal, and then stir.  Stir until it all comes together, and then let it cool.  You should probably taste it too.  Because caramel.

3. Halve the peaches and remove their pits.  Hopefully this goes better for you than it did for me.  I crushed a couple of mine trying to get the darn pits out.  Still tasted good.

4. Preheat the grill, brush a bit of a neutral oil (canola/grapeseed/peanut) on the peaches, and grill them, cut site down, for about 7-9 minutes.  You want a tiny bit of a char, and to allow some of the smokiness to flavour them.

5.  Serve the peaches topped with a scoop of ice cream and a good drizzle of caramel.  This was soooooooooo good!

Monday, July 21, 2014

rustic mixed summer fruit crumble

Pin It Now!

A few weeks ago, a sale on cherries (and over enthusiasm on my part) left me with a bit of a surplus that needed to be used up.  There are so many ways that you can use cherries, but when you combine my laziness with my love of flavour, I don't think you can beat a crumble/crisp.  It's rustic and simple, comes together quickly and makes for a really tasty dessert (or breakfast!).

I won't try to fool you into thinking this is health food (because it's not), but I like to use whole food/whole grain ingredients as much as I can and I think the whole grains really give a nice hearty balance with the fruit.

Because this was a recipe I came up with on the fly, I used some frozen fruit, but fresh would likely be better.  And the pictures are terrible because I took them on the phone.  But whatever...I figured the internet needed to have this dessert recipe.  Especially now that cherries are coming into season.


rustic mixed summer fruit crumble

6 cups fruit (can be made with any combination of summer fruits - peaches, apricots, nectarines, berries, etc.)

2 T corn starch

1/3 c brown sugar (not necessary with ripe fruit)

mixed summer fruit crumble

topping:

1/2 c spelt flour (could use whole wheat or just substitute more oatmeal)

1/2 c chopped walnuts (or other nuts)

1/2 c oats

1/2 unsweetened flaked coconut

1/2 c brown sugar 

1/2 c melted butter (ideally salted; if not salted, add a couple of pinches of salt)

1. Preheat oven to 400F.

2. Spray/oil/butter a 9x9 baking dish.  Put the fruit directly in the dish, then scatter over the 1/3 c brown sugar and cornstarch.  Mix a bit to combine (if your fruit is really ripe, you can maybe skip the sugar, but I liked the level of sweetness this provided). BTW, if you don't have a cherry pitter (which I don't), I find that the easiest way to pit cherries is to squish them a bit with a knife until you feel them give a bit (squish away from yourself so you don't stain your clothes!), then you can cut around the pit and it will pop out easily.  Your kitchen will still look like a murder scene, but it's easier than trying to just dig out the pits.  

mixed summer fruit crumble

3. Combine the topping ingredients - I like to use melted butter because I'm lazy and it's easier to mix in.  You could take the long way around and cut the butter into the dry ingredients, but I wouldn't bother. ;)  Sprinkle/spread the topping over the fruit.  It doesn't have to be perfect.  Squish it down a bit, but don't fuss too much.

4. Bake for about 30-35 minutes (keep an eye on your topping so it doesn't burn).

mixed summer fruit crumble

This is so delicious - it's pretty juicy when it comes out of the oven and would be AMAZING over vanilla ice cream, but it does firm up the next day and the leftovers make for a delicious breakfast.  As a bonus, using nuts in the topping means that the topping retains its crunch.And yes, I do fully realize that my oven needs cleaning. :p


Tuesday, May 20, 2014

2-ingredient nutella popsicles

Pin It Now!

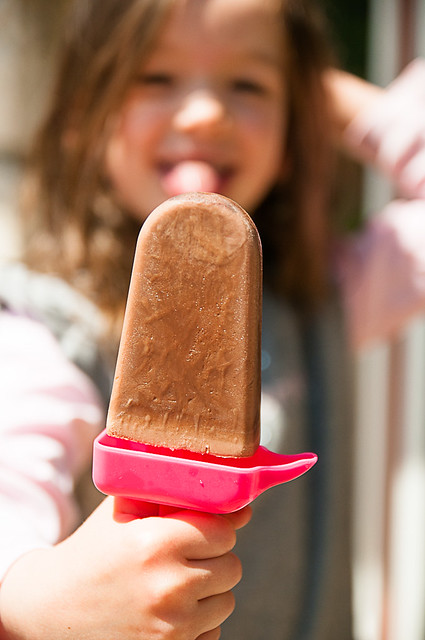
Do you remember being a kid, and going to the ice cream cart (or corner store/camp store) and looking over the enticing array of popsicles in the freezer?  I remember them all - from the tart and tangy rocket, to the rich (and oh-so-expensive) drumstick....but my favourite was pretty much always the fudgesicle.  It was chocolatey and cold and just....perfection.  There was truly nothing better on a hot summer day, especially after an afternoon spent at the beach, biking or playing in the sun.

nutella peanut butter popsicles

I can only hope to foster those warm and fun kinds of memories in my kids too.  

nutella peanut butter popsicles

We just had a near-idyllic long weekend.  And it was perfect in that we really didn't do much of anything - the kids played, the weather held up wonderfully...there was a lot of sand and sidewalk chalk and BBQ food, eaten al fresco.  In short....perfect.

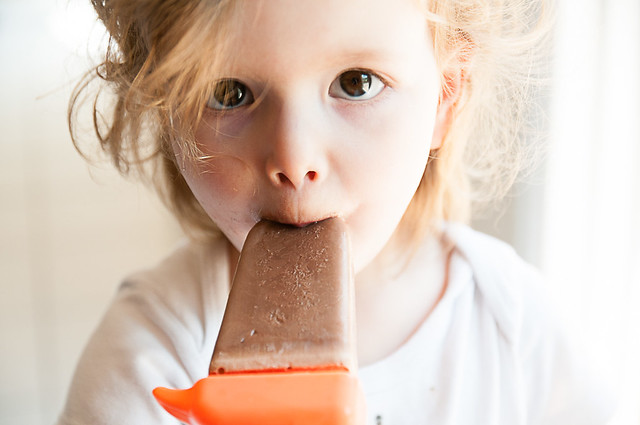
nutella peanut butter popsicles

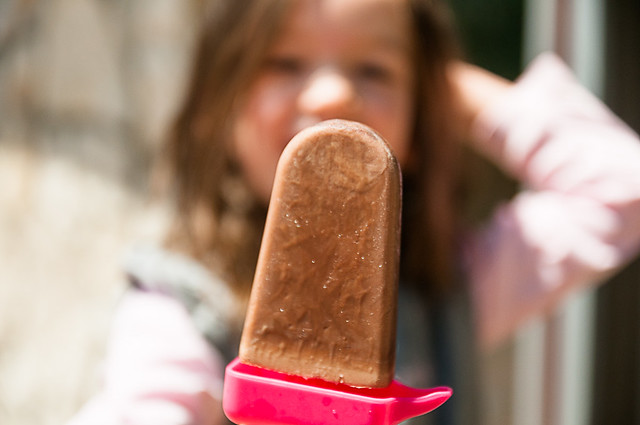
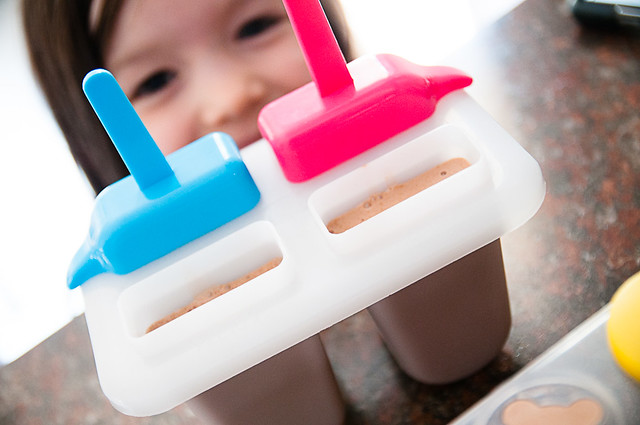
I came across this recipe last year (from a site that is now defunct, which is a TRAGEDY), and I'm telling you, if you don't have a popsicle mold, NOW is the time to get one.  This is not the homemade popsicle of your memories (i.e., a frozen solid block of juice).  THIS, friends, is pretty much like a fudgesicle.  It's rich and creamy and chocolatey and delicious.   Any popsicle mold will do - I have a snazzier one (pictured) that makes larger popsicles and has a little trough to help you sip up the melted bits.  I also have a cheaper one that makes rocket-shaped pops and is actually way better sized for kids (these ones are a little too big and result in colossal mess of melted chocolate stickyness).

nutella peanut butter popsicles

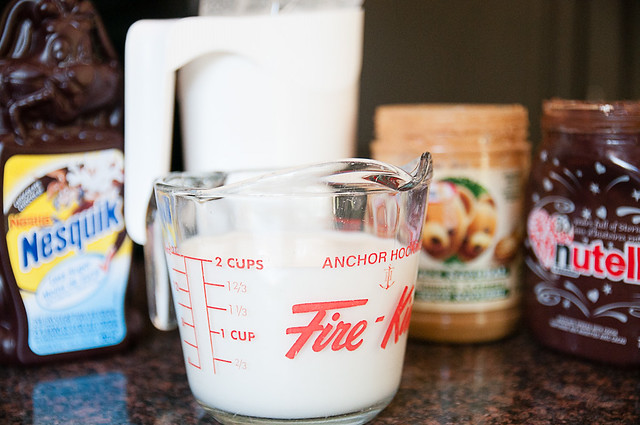
I love just how simple this is, and the results are so TOTALLY worth it.  All you need is nutella and milk.  I usually only buy nutella to use in recipes, so when I checked (because I'm a super pro-star at advance prep), I was actually a bit short of nutella (I was making a double batch).  I just added some natural peanut butter and chocolate syrup to make up the correct amount.  This isn't health food - it's pure summer fun.

nutella peanut butter popsicles

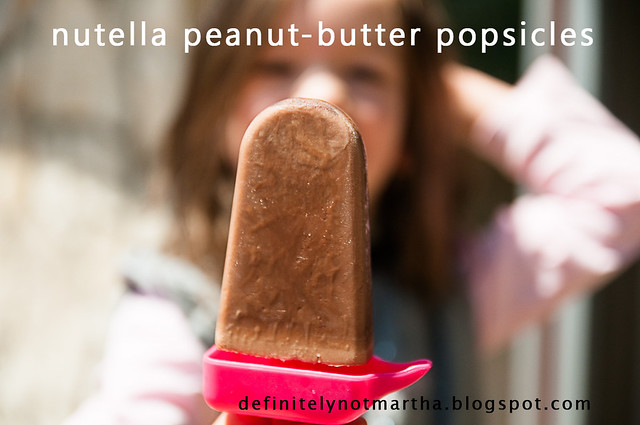
So what I photographed and what I'm telling you to make are not exactly the same thing this time, because of the aforementioned peanut butter and chocolate syrup substitution.  But I will say, this sub totally worked and the peanut butter/chocolate/nutella combo was just as good as the pure nutella version.  One caveat - the longer you leave these, the icier they get.  They are best the first day frozen (i.e., after a few hours), because they have the BEST fudgey texture then.  They are still totally good for a few days after, but I would recommend eating them sooner rather than later.  Besides, once you have one, you likely will keep on going.  ;)  They are that good!

nutella peanut butter popsicles


2-ingredient nutella fudgesicles
(makes 4 large popsicles or 8 small - large popsicles pictured)
nutella-peanut butter popsicles

1/3 c nutella (or use less nutella and make up the difference with peanut butter and a touch of chocolate syrup)
1 c milk

1. Blend nutella with milk (I use a standard blender, but an immersion blender, magic bullet, food processor, or even good ole elbow grease would work - I'd recommend softening the nutella if you're doing it by hand!)

2. Pour into molds and freeze until frozen.

3. If you're reading this and are sad that you don't have popsicle molds....>GO GET SOME!!!!  I have a set from the dollar store that is great!  Just do it!  Or use cups and coffee stirrers.  Whatever it takes to get you a nutella popsicle.....just do that.  And thank me later.

Tuesday, October 09, 2012

caramel date cake with pecans

Pin It Now!

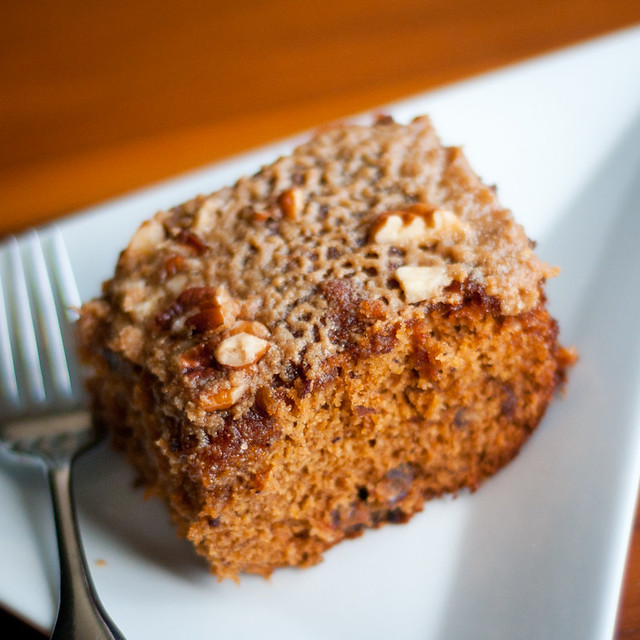
caramel-date cake with pecans

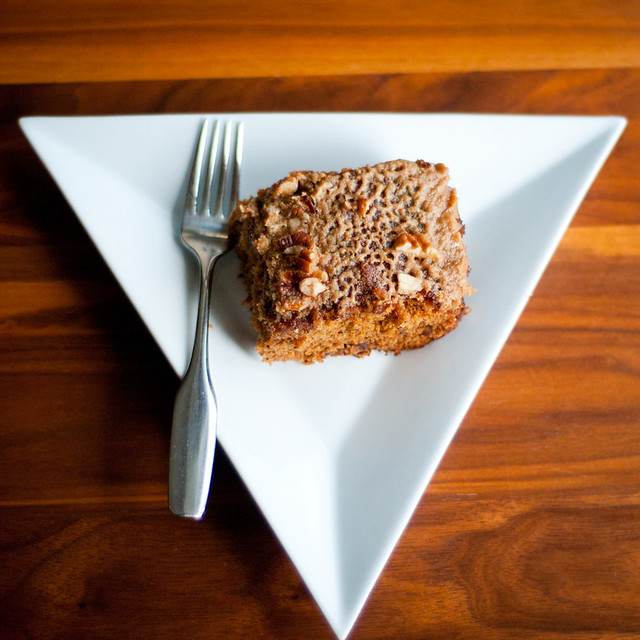
I'm not sure if I'm doing something wrong, but this cake is always ugly.  I've made it four times now, and every time I think....man, this is uuuuuuuuuuggggly....but it's so delicious, and it smells so incredible that I keep making it.

And I still don't like dates.  I still think they look like cockroaches and completely refuse to eat them in an un-baked, un-chopped state.  They aren't quite as bad when they are chopped.

caramel-date cake with pecans

Anyway, I got this recipe from a great cookbook called Quinoa 365 (fabulous, fabulous, fabulous...loads of recipes including whole quinoa, quinoa flakes and quinoa flour; I've tried many of them and they've all been really good).  However, in reading my recipe, you'll notice that I don't make it with quinoa flour...not that it isn't good that way (I've made it with the flour before and it turned out exactly the same), it's just that I have a really hard time finding quinoa flour in stores, and it's been a while since I made a Bulk Barn run to stock up on it.  SO, rest assured, you can make this recipe with or without the quinoa flour.

But you really should make it; it comes together quite quickly, and despite its humble appearance, you could serve it to anyone, and they would be suitably impressed by the flavour.  AND, there's no reason that you could just keep the caramel sauce separate and pour it over the served pieces of cake, but I like the all-in-one factor of this dish.  And you really don't notice the bits of dates in the finished product.

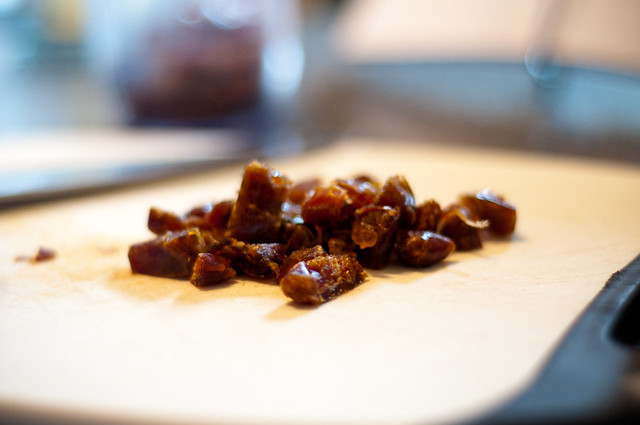
Last, make sure you buy pitted dates.  1 3/4 c of chopped dates doesn't seem like a whole lot until you have to pit each and every one of them.  Then it seems like waaaay too many dates.

caramel date cake with pecans
stolen and slightly modified from Quinoa 365
caramel-date cake with pecans


cake:
1 3/4 c chopped pitted dates
1 c boiling water
1 3/4 c all-purpose flour (OR 1 c AP flour, 3/4 c quinoa flour)
2 t baking powder
1 t baking soda
1/2 t salt
1/2 c butter, softened
1 c packed dark brown sugar
2 large eggs
1/2 t vanilla

topping:
3/4 c 18% cream
1 c packed dark brown sugar
1/3 c butter
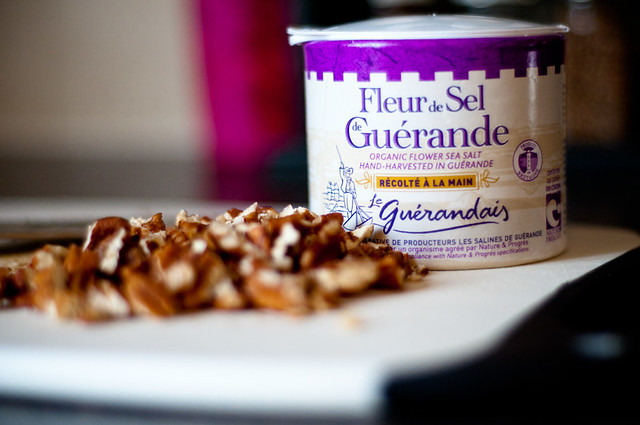
1/2 c chopped pecans
fleur de sel/coarse salt

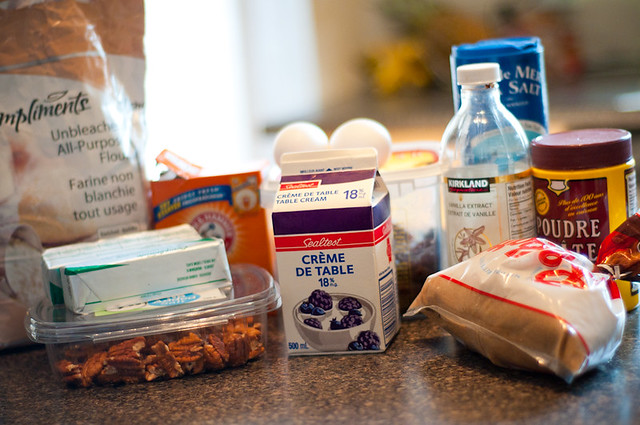
1. Preheat the oven to 350F.  Grease a 9-inch square baking pan.  Get all your ingredients ready.

caramel-date cake with pecans

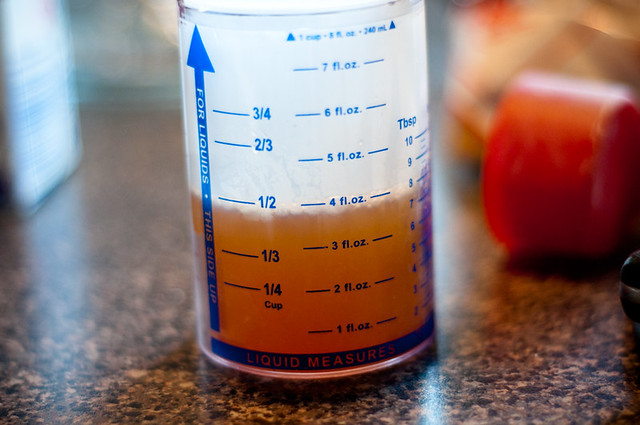
2. In a medium bowl (I use a 2-cup liquid measure), combine the dates and boiling water and set aside so the dates absorb the water.  NOTE: Depending on how soft/fresh your dates are, they probably won't absorb all the water.  What I do, is pour off the excess water into a little pitcher.  If, upon mixing the dates into the cake, I feel the batter is really dry, I'll add some of this excess water.

3. In a medium bowl, combine the flour, baking powder and baking soda.

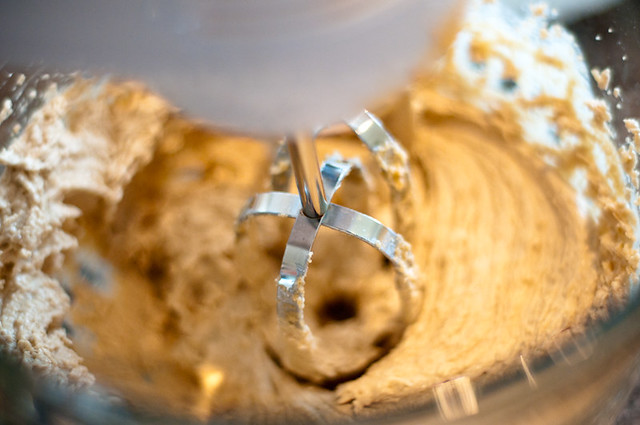
4. Cream the butter in a large bowl (ideally with an electric mixer; handheld is perfect for this).  Add the brown sugar and cream until fluffy.  Add the eggs & vanilla and beat well.  Add the flour mixture and continue to mix until well-blended (a couple of minutes).

caramel-date cake with pecans

5. Fold in the (lightly strained) dates.  You can see I had about 4 oz of the liquid left, because my dates were really soft and fresh.

caramel-date cake with pecans

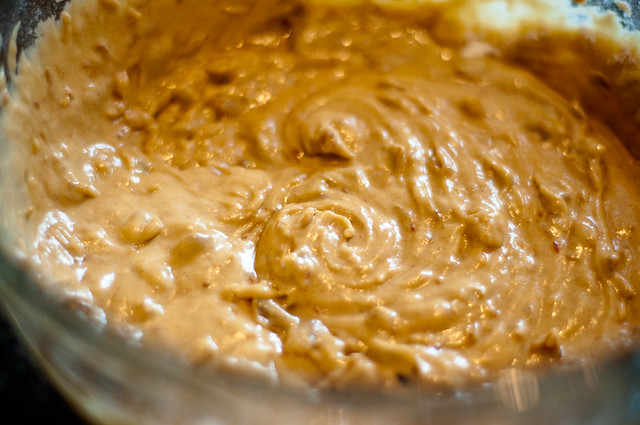
Your final batter consistency should be thick, but not dry (if it's pulling away from the sides of your bowl, like a muffin batter, then it's too dry; add some of the water).  It should be liquid, but definitely not thin or soupy.  This s what mine looked like, for reference.  Pour the batter into the pan.  Bake for 30 minutes.

caramel-date cake with pecans

6.  Meanwhile, combine the cream, sugar and butter in a medium saucepan over high heat and bring to a boil.  Reduce the heat to medium low and stir constantly (or not so constantly, lol), until the mixture is a thick caramel sauce; about 15-20 minutes.

7.  Remove the cake from the oven and pour the caramel sauce over top.  Sprinkle with chopped pecans and fleur de sel (just a bit!).

caramel-date cake with pecans

Bake for an additional five minutes.  Cut into 9 pieces and serve warm.  It's so sweet and caramelly and delicious.

And also kind of ugly.

caramel-date cake with pecans


Tuesday, September 18, 2012

pumpkin and coconut got together and it was very very good

Pin It Now!


DSC_6031

We had a frost warning a couple of days ago, and it's currently pouring rain.  

So I guess that means it’s time to break out those rich, delicious and comforting fall flavours – spice, pumpkin, rich stews and braises.  YUM.  I’ve got a few things in the freezer that are begging to be braised.  Can’t wait.

One of the fall flavours I like most is pumpkin.  I freaking looooooooove pumpkin pie (it’s a borderline obsessive relationship, much to the dismay of hubs, who thinks it’s gross).  Clearly he is wrong.

Anyway…I was browsing through the latest issue of Food&Drink (free magazine put out by Ontario’s LCBO).  Eventually, the recipes do appear online in the rather cryptic F&Ddatabase, but not usually for a couple of months.  So I just have to share this recipe with you, because if you don’t have this magazine, you just shouldn’t have to wait that long to make this.  ;)

Imagine a torrid culinary affair between pumpkin pie and coconut cream pie.  This is their love child.  Delicious and delicate pumpkin-coconut cream phyllo tartlets.  It’s so light and so amazing….the buttery browned phyllo just crackles apart with every bite, and the creamy pumpkin-coconut filling spills out, topped with lightly-sweetened whipped cream and the slightest touch of toasted coconut.

DSC_6039

Be still my heart.

I had never made tarts with phyllo before, but I’ll absolutely be doing it again.  I’ve written COUNTLESS times just how much I hate working with pastry dough, and while you can buy tart shells, these cute little phyllo guys are super easy, impossible to screw up, and they look and taste phenomenal.  Even better, hubs had made tourtiere phyllo triangles over the weekend and I had precisely 5 sheets of phyllo left. 

I found the pumpkin filling to be a bit runnier than I would have liked.  I might increase the cornstarch a touch (maybe a ½ T) and cook just a bit longer.  I was expecting more of a pudding consistency, rather than a sauce.  This dessert can easily be made in advance (case in point: I made these yesterday and took pics today; the crust was just as explosively flakey, and the only casualty was that my whipped cream wasn’t holding its shape as well today).  The only caveat is that they must be assembled at the last minute.  But if you have the tart shells ready to go, it just takes a few minutes to spoon in the filling, pipe/spoon the cream and sprinkle the coconut.  

This recipe makes 12, but if you’re serving it as your only dessert, I expect most people would eat two, so I would consider that it serves 6.  The only change I made to the recipe was to add about ¾ t of pumpkin pie spice.  I really wanted the pumpkin pie idea to come through more strongly; I think the spice made the dessert, so I would suggest you do that same.  ;)

pumpkin-coconut cream tartlets
stolen from the Autumn 2012 issue of Food&Drink
DSC_6015

FILLING
2 eggs
6 T granulated sugar
2 T cornstarch (consider adding an extra 1/2T)
1 can (400 mL) coconut milk
1 T unsalted butter
½ t vanilla
Pinch of salt
½ c pumpkin puree
¾ t pumpkin pie spice (or combination of ½ t cinnamon, and 1/8 t each cloves and nutmeg)

PASTRY
5 sheets of phyllo pastry, thawed
¼ c unsalted butter, melted (and slightly cooled)
2 T granulated sugar

TOPPINGS
2 T unsweetened coconut
1 c whipping cream
1 t granulated sugar
¼ t coconut extract (not necessary, but adds to the coconut flavour)

1. To prepare filling, whisk eggs with 3 T sugar and pumpkin pie spice in a medium bowl.

2. In a small saucepan, whisk remaining 3 T sugar with cornstarch.  Slowly whisk in coconut milk until evenly mixed.  Set over medium heat.  Bring to a simmer, whisking occasionally (I would bring it to a gentle boil).

3. Very, very slowly, pour some of the hot coconut mixture into the eggs, while furiously whisking (this tempers the eggs so you don’t end up with scrambled eggs).  Once you’ve poured about half the coconut stuff in, take the egg/coconut mixture, and whisk it BACK into your coconut pot.  Set back over medium heat.  Whisk until it comes to a simmer and thickens a bit.

4. Remove from heat.  Whisk in butter, vanilla and salt, then pumpkin puree, until evenly mixed.  Pour into a bowl and press plastic wrap onto surface.  Refrigerate until chilled.

5. To prepare pastry, preheat oven to 325F.  Grease a 12-cup muffin pan.  Unroll phyllo onto counter.  

6. Cover with damp kitchen towel.  Carefully remove one sheet to counter and recover stack of pastry with towel.  Lightly brush single sheet of pastry with butter.  Sprinkle with about 1 t of sugar.  Top with another sheet of phyllo (try to line up edges).  Repeat until you’ve used all sheets of phyllo.  Cut into 12 even squares (I used a fancy pastry cutter, but a pizza cutter works great, as will a sharp knife).

7. Press squares into muffin tin.  Bake in centre of oven for 10-12 minutes, or until golden (after 10 minutes, I turned the temp up to 400F and cooked another 2, because I wanted mine nice and toasted; watch closely though because burnt phyllo is bad news!).  Remove to  a rack and cool completely.

8. Toast your coconut (I toasted mine in a dry frying pan; you could use the oven as well).  Again, watch closely because it will go from toasted to burnt very quickly.  Let cool. 

9. Beat whipping cream until soft peaks form.  Add sugar and coconut extract, then continue to whip for stiff peaks.

10. To assemble, spoon filling into each cup.  Top with cream.  Sprinkle with coconut.  Serve immediately.


Because I had so much pumpkin left after this was done, I also made some pumpkin muffins.  

DSC_6049

Check out this tasty pumpking-gingerbread muffin recipe from the Paleo Mom.  They aren’t overly sweet and fit the bill perfectly for Lil Z’s school snack – nut-free, healthy and yummy.

Sunday, January 22, 2012

winter seafood dinner party

Pin It Now!

Before I get into this dinner party menu, just wanted to show you my snazzy new facebook page - just adding another way for you to keep up. I also add some content on there that you don't get on the blog or via twitter. More snark and links and that kind of thing. So it's toooooooooooootally worth liking. :)

I'll apologize in advance for the cruddiness of these photos - my camera battery (all four camera batteries, actually....) was, of course, toast when I went to take prep pictures (so there are none of those). And that's when the light was actually good.

So unfortunately, these pics are a result of overhead kitchen light. But I swear the food is just as delicious as normal, so read on......

I was having some friends over for dinner, and I wasn't really sure what to make - the only restrictions I had were no peanuts, and that one of the diners was not a fan of big bloody masses of meat. Fine by me anyway, as I'm pretty sure I'm supposed to be steering clear of steak tartare these days.

So I went with a seafood theme, and tried to stay a little bit seasonal (not that you can really eat *seasonal* food in Ottawa in January...).

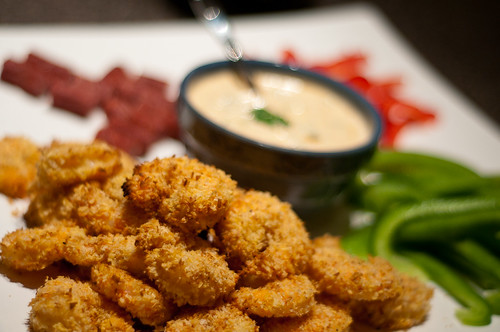
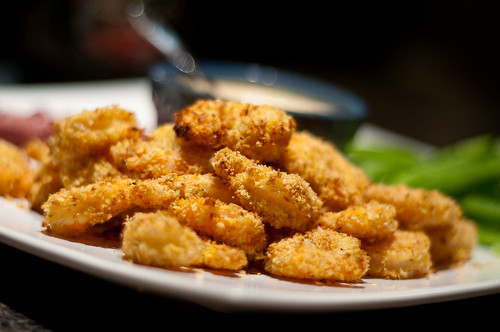
For an appetizer, I opted to make some coconut shrimp - I was inspired from a recipe in the Kraft What's Cooking holiday magazine (I know...heinous, but I was inspired, what can I say?). So I took out the Shake and Bake, and the pre-made sauce, and made my own version with panko and a sour cream sauce. It was really delicious, but the shrimp are best right out of the oven, so they are nice and crispy.

oven-baked coconut shrimp with curry dip

I did find that the panko adhered well and really gave a nice crunch to the shrimp, which is unusual in a non-deep-fried appie. I served these with some venison pepperettes (courtesy of my bro), and some red and green pepper strips. I like to keep appetizers relatively light, and not too filling, because I just want to get people geared up for some gooooood eatin' later in the evening.

Coconut-Panko Shrimp
makes about two dozen
oven-baked coconut shrimp with curry dip

1 lb large shrimp (26/lb), peeled and deveined. Take off the tails, nobody eats them and they leave a mess
1 cup flaked unsweetened coconut, toasted (toast in a frying pan for 5-6 minutes on medium, stirring often and watching like a hawk)
1 cup panko
1 t curry powder
1 t garlic powder
dash cayenne pepper
salt and pepper
1 egg, beaten

1/2 c low-fat sour cream
2 T indian curry paste
1/4 c chopped cilantro

1. (If you are baking right after assembling, preheat your oven to 400F).

2. Combine coconut, panko and seasonings in a shallow bowl.

3. Dip shrimp in egg (I actually just tossed the whole batch of shrimp in with the egg because I'm lazy like that).

4. Coat shrimp in coconut-panko mixture until evenly coated. TIP: have one 'wet hand' and one 'dry hand' - use one hand to grab the slimy eggy shrimp and use the other to help toss/pretty the coating mixture. The coating will adhere better and you won't end up covered in eggy coconut goo.

5. Lay each shrimp on a baking sheet. Don't let them touch. I baked mine on a silpat.

6. Bake at 400F for 10-12 minutes. Mine were perfect after 10 minutes (just pick one and cut through to make sure it's pink and opaque the whole way through).

7. While shrimp is baking, mix together sour cream, curry paste and cilantro.

Enjoy! It's awesome and pretty easy to put together.

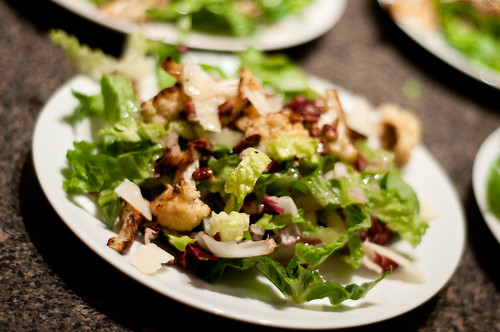
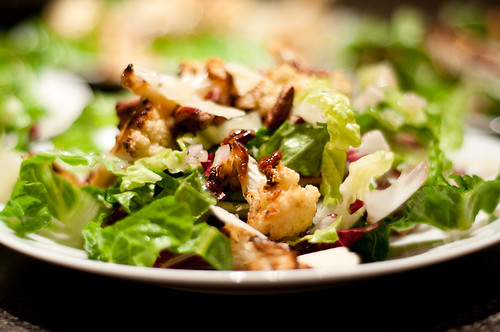
I came across a really intriguing roasted cauliflower salad recipe on epicurious, and pretty much followed the recipe exactly (though I halved it because it was a huuuuuuuuuuuuge recipe).

radicchio salad with roasted cauliflower and pecans

Half of the recipe was just about perfect for 6 appetizer servings. I'm sharing my version below, but I've linked to the original. I figure most people are likely to need 4-6 servings of salad, rather than 12ish.

You can do all of the components in advance (i.e., the cauliflower, chopping the lettuce). I dressed each salad individually and this worked well.

Roasted Cauliflower and Radicchio Salad
stolen and slightly modified from epicurious
radicchio salad with roasted cauliflower and pecans

1 small head cauliflower cut into 1-inch-wide florets
1/2 cup plus 1 tablespoon extra-virgin olive oil
3/4 teaspoon salt
1/4 teaspoon black pepper
1/4 cup white-wine vinegar
1 1/2 tablespoons finely chopped shallot
9 large leaves of romaine, cut crosswise into 1/4-inch-wide strips
1 small head radicchio, cut crosswise into 1/4-inch-wide strips
3/4 cup loosely packed fresh flat-leaf parsley leaves
1/2 cup toasted pecans, coarsely chopped
parmesan cheese for grating on top

1. Put oven rack in middle position and preheat oven to 450°F.

2. Toss cauliflower with 1/4 cup oil, 1/2 teaspoon salt, and 1/8 teaspoon pepper in a large bowl. Spread in 1 layer in a shallow baking pan (1 inch deep) and roast, turning over with tongs halfway through roasting, until tender and golden brown, 25 to 30 minutes total. Cool in pan on a rack, then transfer to large bowl.

3. Whisk together vinegar, shallot, remaining 1/4 teaspoon salt, and remaining 1/8 teaspoon pepper in a small bowl, then add remaining 5 tablespoons oil in a slow stream, whisking until emulsified. (FYI - this does not emulsify...just whisk before drizzling)

4. Add romaine, radicchio, parsley and dressing to cauliflower and toss to coat. Season with salt and pepper and sprinkle with nuts and parmesan.

I loved the richness of the nuts and cheese with the deep roasted flavour of the cauliflower. The acidity of the dressing really made it fabulous. Great salad. It's a bit labour-intensive, but I think it's wonderful for fall/winter and would make a great meal with a grilled chicken breast or something.

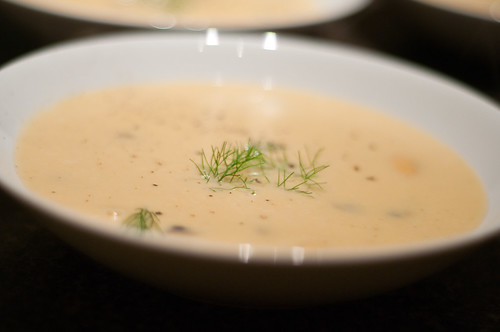
For soup, I went back to seafood.....I've made this mussel-fennel bisque before. I'm not going to re-post the recipe here, because I make it pretty much EXACTLY as written.

mussel-fennel bisque

The only changes I recommend is just including all of the fennel in the soup itself, and skipping the browned fennel cubes (too much work). I think you could also reduce the cream by half. The seafood broth with rice is so rich on its own that I don't think 1 c of heavy cream is fully necessary. It's so yummy though. I love this soup. It's rich and delicious and really just the perfect seafoody-indulgence. With bread and salad, it would make a great meal.

For the main, I had some salmon hanging around in my freezer and so that's where I started. I ended up with another epicurious winner, this salmon fillet recipe with a creamy horseradish sauce. I just made a few small changes (I baked my salmon at 400F for 12 minutes, because I"m lazy and because my bbq is under about a metre of snow and ice. Baking is great for dinner parties, because you just pop the dish in the oven, and then go back to your guests - no fuss! I marinated the salmon for about two hours, which was great.

salmon with basil-horseradish sauce and squash with mint leaves and pepitas

I can also attest that the leftovers are PHENOMENAL made into a salmon salad - I just combined my leftover salmon with the leftover sauce, added some minced onion/green pepper/celery and it was perfection in a sammich. YUM. I'd make this again - it's super easy and quick to come together and the sauce was delicious.

I served the salmon with this butternut squash dish - it's simple squash wedges, roasted in olive oil, salt and pepper, and drizzled with balsamic vinegar, sprinkled with pepitas and mint. It was a simple dish, but I really liked it as well. I think the serving estimate is a bit low (4 people ate most of the squash), but I also baked my squash over an hour to get it nice and soft and caramelized.

That said, I have a squash PSA. WEAR GLOVES WHEN CHOPPING BUTTERNUT SQUASH. The internets have not come to a consensus on why this is, but with some squash and some people, skin will react. After I chopped the squash, the fingers on my right hand started feeling numb. Then they started feeling tight. And swollen. It really kinda freaked me out. And then the skin that was feeling tight cracked in about a million places (sorry, I know that's gross). It seems it's like some sort of chemical coming from the squash that did it to me. Anyway, the moral of the story is....wear your damn gloves when you chop that squash. And then you can avoid freaking out about your bizarre reaction. #learnfrommyfail

Last, I wanted to finish with something pretty simple, and on the lighter side of desserts. I've made passionfruit pavlova before, so I just made a variation of it this time and it was sooooooooo fabulous.

pavlova with coconut yogurt and mango-passionfruit coulis

I followed a different meringue recipe this time, and I think the oven temperature was too high....my meringues really did brown quite a bit. But they were still yummy, so I don't think it was a big deal. Also, rather than filling with whipped cream, I opted to fill with the most decadently delicious coconut yogurt in the world. Even at nearly 10% fat, I figured it was a lighter choice than the 35% whipping cream. And man, it's sooooooooooo good. Instead of a simple passionfruit drizzle, I added some pureed mango (just 3/4 of a large mango, a bit of superfine sugar, and a splash of water, pureed together) to amp up the volume. Passionfruits are $3/each and don't really give a whole lotta pulp each. It was a great balance and the tropical flavour of the passionfruit really came through nicely. I would make this again and again. Perfect easy dessert.

So that's my menu....I wanted to keep it on the simpler side, and not ultra-indulgent. I thought it balanced really well and the flavours were really good. YUM. Any of these recipes would be great as part of another menu as well.

Thanks for reading - and don't forget to check out DNM on facebook!

Related Posts with Thumbnails