Photobucket - Video and Image Hosting

Sunday, December 09, 2012

mushroom pizza bianca (for the late-night munchies)

Pin It Now!

mushroom pizza bianca

I was hungry last night.  Usually when this happens, hubs will jet out and grab a snack (usually terrible for us) or we'll even cave and order in.  But something stopped me from doing that last night, and I'm super stoked about it.

One of my favourite shows on the Food Network is Chopped - I love the creativity the chefs have when they are confronted with an odd conglomeration of ingredients that don't really go together.  Now, I'm not going to say that this snack was Chopped-worthy, because there's nothing really odd in it, but I'm happy with what I came up with and it's DELICIOUS.  It's pretty quick to whip together as a late night snack (like 25 minutes start to finish; definitely faster than delivery!), but it would also be great sliced small as an appetizer, or alongside a green salad and/or soup as a light meal.

Essentially, all you need is some sort of flatbread (I had crappy white tortillas), some vegetables that you like (I had mushrooms and vidalia onion, along with garlic), something to make a sauce (sour cream and dijon), some cheese (cheddar and parmigiano) and then something green to cut through the richness (I had minced parsley, but arugula or any other leafy dark green would be great).

Sorry for the shite pictures - in a perfect world, the cheese would also be more brown, but the edges were starting to smoke, so I had to get it out of the oven before it set off the fire alarm and woke up the kids!

late-night mushroom pizza bianca
mushroom pizza bianca

2-3 flatbreads (tortillas or pitas)
3-4 cups chopped mushrooms (could also use zucchini, eggplant, roasted peppers, artichokes, etc.)
1/2 small onion, diced
2 garlic cloves, chopped
2 T butter
salt, pepper
1/3 c red wine (or other booze - white wine, sherry, marsala, or half this amount of brandy or cognac)
1/2 c good sour cream (look at the ingredient list - it should just be cream and bacterial culture.  If there's other stabilizers, it's bleh.  I like Western Dairy brand and I use light)
1/4 c dijon mustard
2 cups grated cheese (aged cheddar, gruyere, emmenthal are all great choices)
parmigiano-reggiano cheese
1/4 c minced flat-leaf parsley

1. Put flatbreads in oven.  Turn it to 400F.  Let cook for approximately 6-10 minutes, until they are crispy, slightly toasted and not burnt (just check on it every couple of minutes).

2. Meanwhile, melt butter in a large skillet.  Add onions, garlic and mushrooms, cook over medium-high heat until mushrooms have released most of their liquid and have browned a bit.  Deglaze the pan with red wine, and let wine evaporate pretty much completely.  Season with salt and pepper.

3. Take your toasted flatbreads and put them on a foil-lined baking sheet (seriously, who wants to scrub burnt-on cheese???  not me!).  In the centre of each, add a large dollop of sour cream and a medium-dollop of dijon (I like mine with almost as much dijon as sour cream, for a bit of bite).  Use a silicone brush or a spoon to spread it all around.

4. Turn on the broiler.  Add mushrooms over flatbread (just divide the mushrooms according to how many flatbreads you have).  Sprinkle with cheese, then grate some parmigiano overtop.  Broil for just under 2 minutes (mine started to burn at the edges after about 1min45s.  As always with broiling any sort of bread, keep a very close eye on it because it will burn quickly.

5.  Once cooked, sprinkle with minced parsley, cut into wedges and enjoy.

I had no intentions of blogging this, but it was seriously just SO yummy that I had to snap a crappy picture and share it anyway.  Totally making this again.

In other news, I've had a recent spate of success with some delicious pumpkin recipes.  I can HIGHLY recommend this pumpkin-gingerbread loaf with spiced buttercream, as well as this pumpkin mac&cheese (weird but good, I swear), and concluding the trifecta of pumpkin with pumpkin pie french toast (like this recipe, except using more milk, and only 5 pieces of bread).  Bonus: you can make all of the recipes with just one big-ass can of pumpkin.  Thanks for reading!

Tuesday, November 13, 2012

maple-mustard salmon with roasted cauliflower, brussels sprouts and mushrooms

Pin It Now!

maple-mustard salmon with roasted cauliflower, brussels sprouts and mushrooms

When I started making this dinner, I didn't think it was going to be BAD, but I have to say that it completely surpassed my expectations with just how freaking delicious it was.  Sunday was grocery day (always my favourite day; I consider it like a weekly shopping free-for-all), and I picked up a big side of salmon (yum!). I also picked up what seems like a metric ton of veggies and fruits.  I was flipping through a couple of recipe books, and came upon a recipe for roasted cauliflower with shitake mushrooms in Clean Start, and I knew I"d found the inspiration I needed.  I changed up the method and seasoning a bit, and I had cremini mushrooms instead of shitakes, but the combination is fabulous.  On its own, this is a great vegan dish that would be a great accompaniment to something like a quinoa bowl, or a risotto-type dish.  And I don't even really like brussels sprouts.  I loved how all of the vegetables gained a nice caramelized sweetness, and the umami meatiness of the mushrooms was the perfect textural contrast.

With my salmon, I did a really simple maple-mustard sauce.  I just love this flavour profile with salmon.  Since salmon is so rich and fatty, I really like the acidity of the mustard, paired with the sweetness of the maple syrup.  You could also be lazy and use a commercial honey mustard, but I tend to find most of those REALLY sweet and lacking in flavour.  This way you get the acidic bite of a dijon, the al dente bursts of a grainy mustard, with a garlicky wallop of flavour.  Fresh herbs (like dill or even basil) would be great in this, but dried dill was pretty wonderful too.  You could use this sauce on pretty much any other protein/vegetable, or even as a dipping sauce for chicken or veggies (though maybe tone down the garlic if it's not going to be cooked).

I served these two dishes with a fresh green salad, topped with my favourite store-bought dressing, Farm Boy's Lemon Garlic (love it because the ingredient list is lemon juice, olive oil, salt, pepper, garlic.  That's it.  Can't beat that!).

roasted cauliflower, mushrooms and brussels sprouts
inspired and adapted from Clean Start
maple-mustard salmon with roasted cauliflower, brussels sprouts and mushrooms

1 head cauliflower
12 large brussels sprouts (or 18 small)
1/2 pound mushrooms (about 225 g)
2 minced cloves of garlic
2-3 T extra-virgin olive oil
1 T herbes de provence (or other herb seasoning of your choice)
coarse sea salt (about 1 t), black pepper

1. Preheat oven to 400F.

2. In the bottom of a large bowl, combine olive oil, salt, herbes, garlic and pepper.

maple-mustard salmon with roasted cauliflower, brussels sprouts and mushrooms

3.  Chop the cauliflower into bite-size florets.  Put in bowl.  Coarsely chop mushrooms (I had big ones and cut them in 6-8 pieces).  Quarter brussels sprouts (or halve if they aren't big).

4. Toss all vegetables in the oil mixture; stir until everything is coated.

maple-mustard salmon with roasted cauliflower, brussels sprouts and mushrooms

5. Spread out on a baking sheet (I like to use parchment paper so nothing sticks AND I don't have to wash my baking sheets.  It's win-win.).  Roast for 20 minutes.  Stir and re-distribute.  Roast for another 20 minutes, or until tender.

maple-mustard salmon with roasted cauliflower, brussels sprouts and mushrooms

maple-mustard garlic salmon
maple-mustard salmon with roasted cauliflower, brussels sprouts and mushrooms

6 4-oz (125 g) salmon fillets, skin removed
3 T dijon mustard
2 T grainy mustard/moutarde à l'ancienne
2 T maple syrup
2 cloves garlic, minced
1 T dried dill (seems like a lot, but it's mild, I swear)
pinch salt, fresh ground pepper

1. Cut salmon/prep salmon how you like it (this would also work with salmon steaks, bbq salmon, cedar plank salmon, etc.).  Preheat oven to 400F (or bbq; it's up to you).

2.  In a small bowl, combine mustards, maple syrup, garlic, dill, salt and pepper.  Taste (you might like it more mustardy, or sweeter, so this is your chance to adjust it to your liking).

maple-mustard salmon with roasted cauliflower, brussels sprouts and mushrooms

3. Place salmon fillets in a 13x9 glass dish (or a baking sheet, or whatever you have).  Put a little bit of the mustard mixture on each fillet (about one teaspoon), spread around.  Flip the fillets over, and divvy the rest of the sauce up over the fillets.

maple-mustard salmon with roasted cauliflower, brussels sprouts and mushrooms

4. Bake at 400F for 10-20 minutes, depending on thickness (mine were quite thick and took 18 minutes).  Start checking at 10 minutes, especially if your fillets are thin.  Salmon is done when it flakes apart easily and is opaque all the way through.  I don't like mine overcooked and would prefer to err on the side of slightly undercooked, but this is a matter of personal preference/comfort.

This is so good.

And on a quick technical note, apologies for the weird looking photos.  Hubs re-installed windows and has not yet installed Lightroom.  I am super Photoshop challenged, so did the best I could to hack away at the processing on these photos, but they still look weird.  For this, I apologize.  Thanks for reading!

maple-mustard salmon with roasted cauliflower, brussels sprouts and mushrooms

What's your favourite fall vegetable recipe?  I have a ton of other veggies to use up (asparagus, fennel, chard, beans, spinach, etc.)

Wednesday, October 24, 2012

cozy, hearty soup & salad

Pin It Now!

hearty minestrone with buttermilk ranch salad

When it comes to cooking and meal planning, I take inspiration from a huge variety of sources, influences and cuisines.  I like to mix it up.  Sometimes we eat a lot of meat.  Sometimes no meat.  Sometimes complicated.  Sometimes simple.  Sometimes spicy.  Sometimes herbacious.  Sometimes sweet.  Sometimes salty.  The way I see it, the world is a giant smorgasbord of inspirational deliciousness, and I want to help myself to the best.  ;)

Not that I'm selfish or anything.

One of my go-to sites for the last 10 years has been epicurious.com; epi was doing social media and web 2.0 before any of us even knew what that was.  When I first discovered them (and I've been saving recipes since 2001 on there), I loved it because I could see feedback from other people who'd made the recipe (i.e., they allowed comments; nobody else was doing this back then).  I could see reviews from people who'd made the recipe, and best of all, I could save everything in my own personalized recipe box.

Now, pretty much every site (including this one, naturally), allows comments.  And with Pinterest, we've pretty much eliminated the need for a site-specific recipe box (though I will continue to use epicurious!).  And there are hundreds of thousands of blogs and cooking websites out there.  And with this overwhelming amount of choice, it can actually be a bit intimidating to start a recipe search.

So with that in mind, and despite all this endless choice, sometimes I still retreat to my trusty cookbook shelf.  It's not a huge shelf, and I don't let just anyone have shelf space, but I have a few tried and true cookbooks that I keep around because they are fabulous.

One such pair is Clean Food and Clean Start (Terry Walters).  These are seasonally-based vegan cookbooks using natural, healthy ingredients.  First, I love the covers (which is shallow, I wholeheartedly admit, and it looks like the revised edition of Clean Food has a photographic cover, rather than the solid green cover with the half-jacket of the original edition, but the originals are pretty and I like them).  I also love the seasonal approach to cooking, using what's best from each season.  These aren't generally the recipes I serve to guests, as they do tend to have that distinctive wholesome flavour that is not necessarily universally enjoyed (but I love).  Anyway, bottom line, before I ramble too much more, these are great cookbooks for when you want to feel good about what you're eating.

And after a weekend of endless treats and sweets, I really felt like we needed to step back a bit and enjoy something healthy and wholesome.  But still tasty.  ;)

So I took inspiration from the hearty minestrone recipe in Clean Start, and went from there.  My version was not vegetarian/vegan, because I used a combination of chicken/beef broth (it's what I had).  Obviously, this is a very simple substitution.  I used different beans, because I have a massive container of 9-bean mix that I got from Costco.  I just soaked them the night before and let them bubble away for about an hour during the afternoon.  Nothing wrong with canned beans either though.  ;)  1.5 cups of bean mix made about 4.5 cups of cooked beans.

hearty minestrone with buttermilk ranch salad

And my salad dressing is not vegan either, but it's really darn good, so you should make it.  I have a hard time with bottled dressings now; I do generally keep a bottle or two in my fridge for when I'm feeling really lazy, but I find the saltiness and added flavourings are just overpowering.  Nothing like the pure deliciousness of homemade salad dressings, bright and fresh with herbs and garlic.  Also, I had buttermilk that needed using up, so this homemade buttermilk ranch dressing was a great way to do that.

hearty minestrone soup
inspired, but modified due to circumstances, from Clean Start; don't be afraid to modify based on what you have available!)
hearty minestrone with buttermilk ranch salad

1 medium yellow onion, diced
(3 stalks celery, diced) --> I was out!
1 T olive oil
3 carrots, sliced
3 cups chopped tomatoes (I drained a can and chopped those)
4.5 cups beans (chickpeas, kidney, black beans, etc. --> this is about 3 cans)
1 head broccoli with stems, chopped
1.5 cups chopped green beans (I was out; I chopped up some bok choy instead; any green would work!)
5 cups stock
1 T balsamic vinegar
2 t herbes de provence (or a mixture of fresh herbs, if you have them!)
1 bay leaf
salt, pepper to taste

1. In a big soup pot, sauté onion, celery and carrot of medium heat, about 5 minutes.

hearty minestrone with buttermilk ranch salad

2. Add tomatoes, beans, broccoli, stock, green beans/greens, balsamic vinegar, bay leaf and herbes de provence.  And lots of pepper.

hearty minestrone with buttermilk ranch salad

3.  Bring to a boil, reduce heat, cover and simmer about 30 minutes (until carrots/celery are done).  Remove from heat, discard bay leaf and season to taste with salt and pepper.

Serves 8.

buttermilk ranch dressing
hearty minestrone with buttermilk ranch salad

2 green onions, chopped
2 T fresh basil
1 t dried dill
2 T lemon juice
2 T dijon mustard
1 T olive oil
2 cloves garlic
1/2 t salt, pepper to taste
1/3 c mayonnaise
1/3 c miracle whip/whipped salad dressing (if you only have mayo, use all mayo, but add about 1 t sugar and 1 t vinegar)
1/3 c greek yogourt
1/2 c buttermilk

1.  In a food processor/immersion blender, combine the onions, basil, dill, lejon juice, dijon, olive oil, garlic, salt and pepper.  Process until relatively smooth.

hearty minestrone with buttermilk ranch salad

2. Add mayo, miracle whip, greek yogourt and buttermilk. Process again.  Taste, and use on salad, or as a dip.  It's super yummy!  I had mine on a mâche mix, but it would be good on anything.  The recipe makes about 2 cups.

Hubs and Lil Z had theirs with garlic toast (SO EASY - make toast, rub with fresh cut garlic.  Voila.  Garlic toast.), but I just stuck with the soup and salad.  It was hearty and filling and I'm very stoked to eat more of it for my lunch today.

hearty minestrone with buttermilk ranch salad

Monday, October 15, 2012

i forgot how much i love having dinner parties

Pin It Now!

when in doubt add more bacon

Before we had kids, hubs and I used to host dinner parties pretty often; not monthly, but probably at least every couple of months, we'd have people over for a nice fancy dinner party.

Since we and others we know have started having babies, that has fallen a bit to the wayside; part of it is that I'm a little too tired and short on time to host, part of it is that my dinner parties don't tend to be so kid-friendly.  Now, it's not that I think kids won't eat the food, it's just that the timing of a four-five course meal is not a reasonable amount of time for a kid to sit still or keep out of trouble (Z would happily gobble all of this food), and they tend to go too late for kids.

Anyway, my solution is that I invite people over close to bedtime, so Lil Z and Lil R can charm my guests for an hour (okay, maybe they just annoy them, lol), partake in appetizers (only Z; R is too little!), and then be whisked off to bed.

It works quite well.

And this time, I was extra excited, because I wasn't navigating a long list of food restrictions.  I've posted in my Dinner Party 101 series before that catering to your guests is key to having a good dinner party, and I do maintain that stance BUT it's always nice when the guests just come with an enthusiasm for food in general.  :)  And wine, but we'll get to that later.

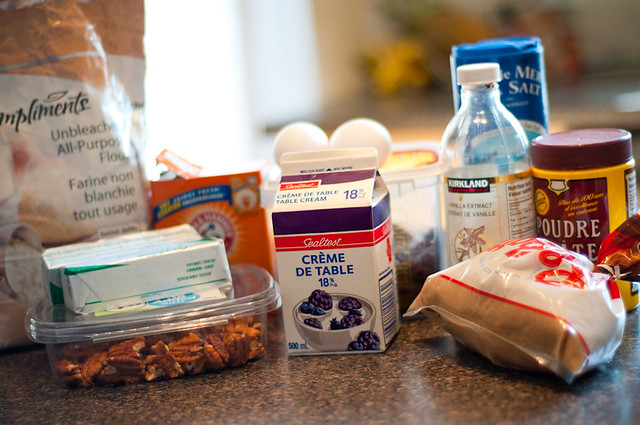
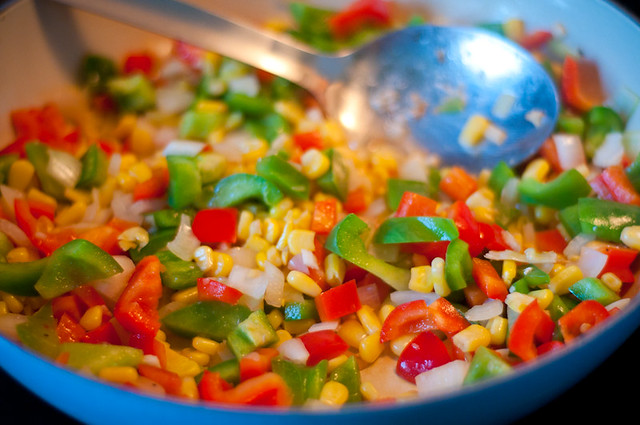
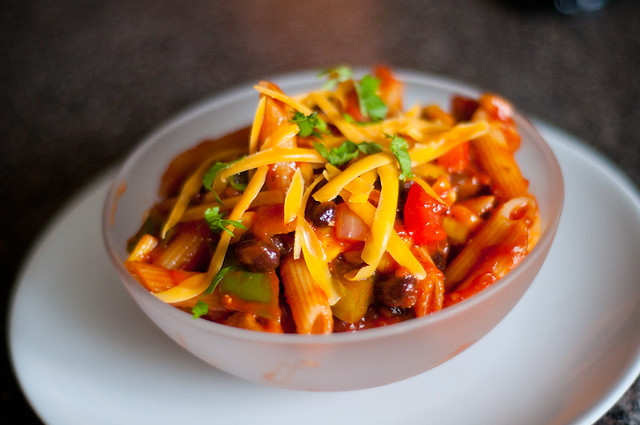
So going back to how I plan a party (and I'm going to apologize in advance for the shoddy quality/quantity of the photos; I was having too much fun and kept forgetting, and then I maybe had too much wine and lost most of my ability to photograph.   These pics are so terrible, I'm not sure they add anything to the post, but hey, it's what I've got.

I don't have a photo of the actual caramelized onion, bacon and gruyère dip, but this is what the dish looked like at the end.  I think it speaks for itself.

dinner party!

For me, the key to having fun and relaxing and enjoying is that I like to have pretty much everything done in advance.  I don't want to be fussing over things while all the fun happens out in the dining room.  So I don't tend to serve things like seared scallops, risotto, etc., that require too much last minute energy.

Here's my menu - and I'll go into the how-to in a minute.  The recipes without a link (i.e., the original ones) are posted at the bottom of this post.

Appetizer - caramelized onion, bacon and gruyère dip, served with endive and cucumber slices
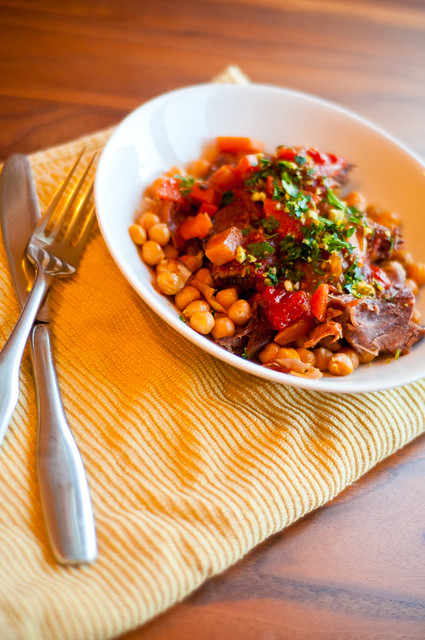
First course - thai green curry mussels served in a coconut broth, with 5-minute no-knead bread
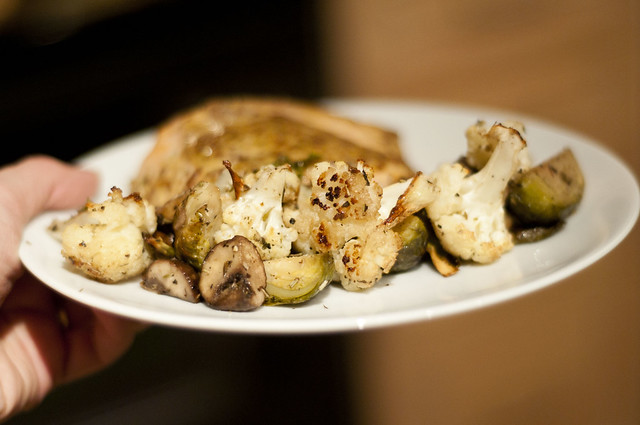
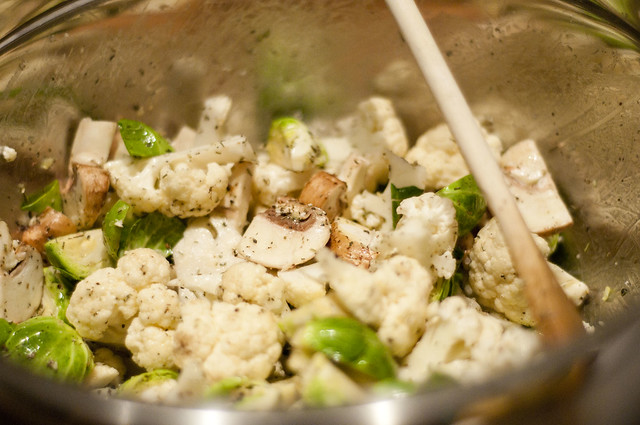
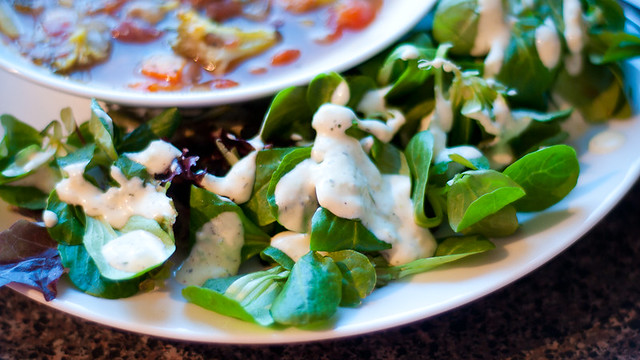
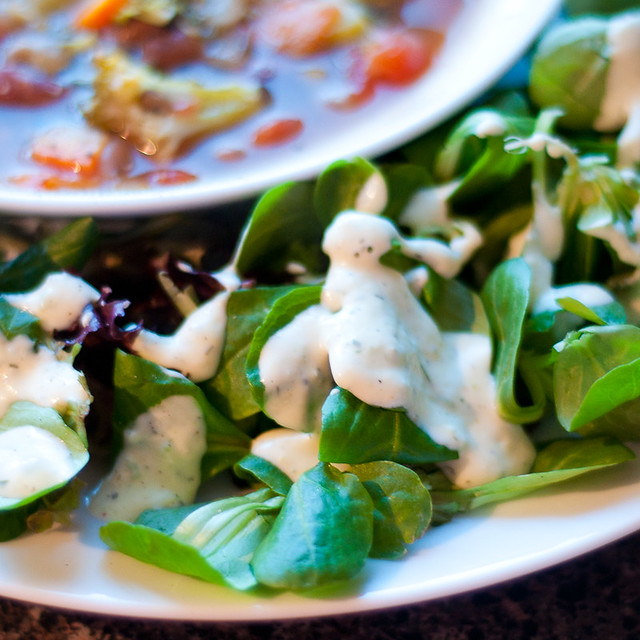
Salad - spinach, red onion slivers, parmesan shards, pear slices and toasted pecans with a simple balsamic vinaigrette
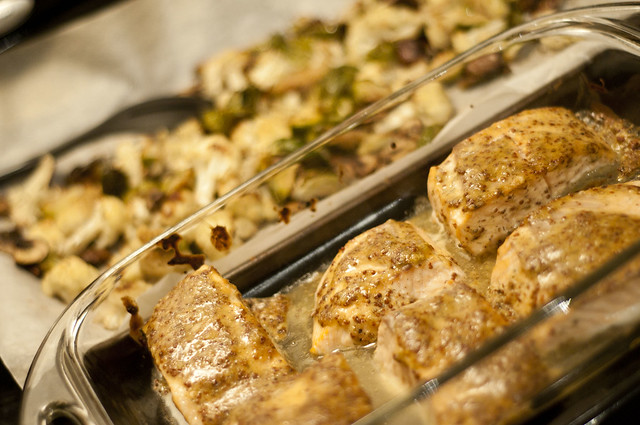
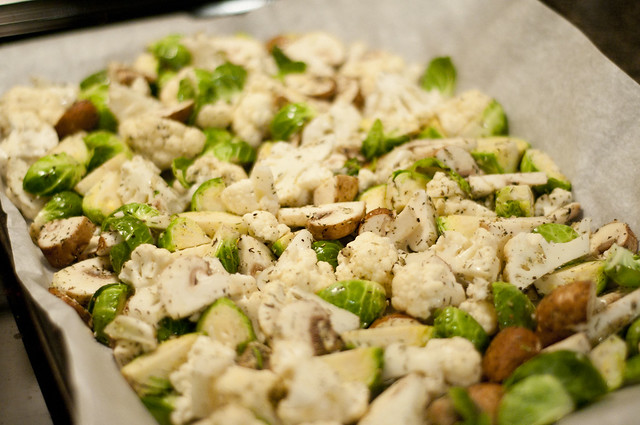
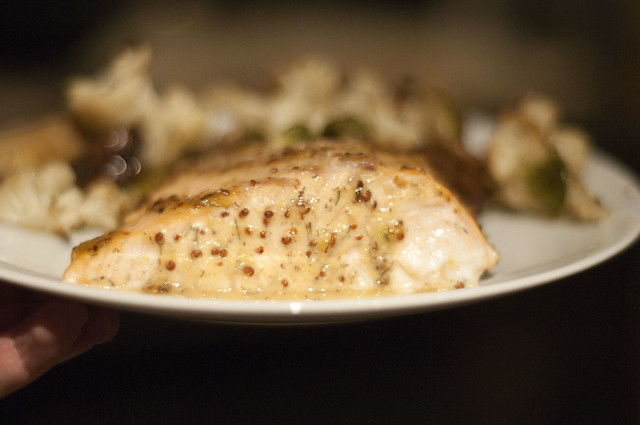
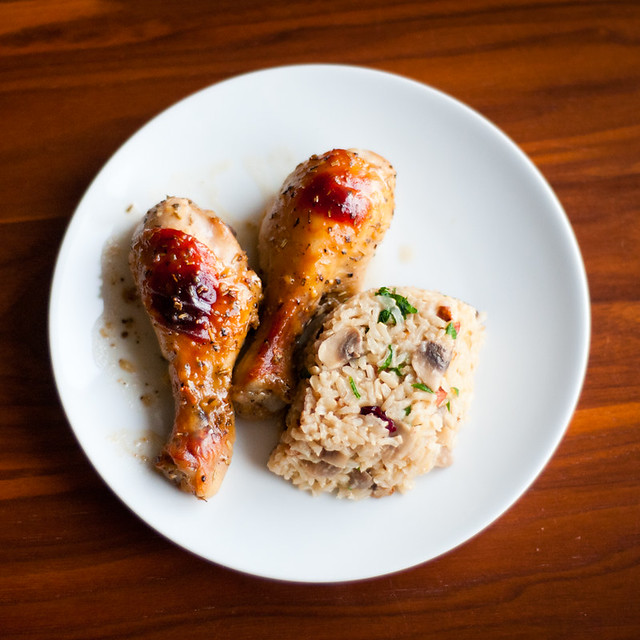
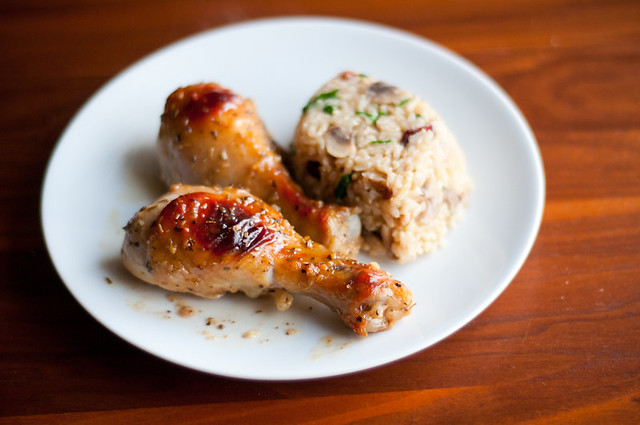
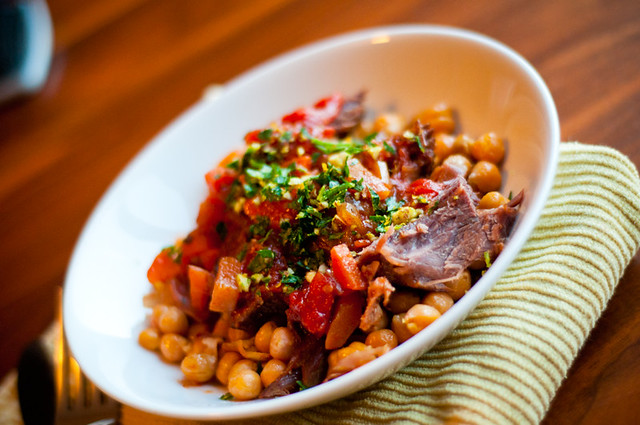
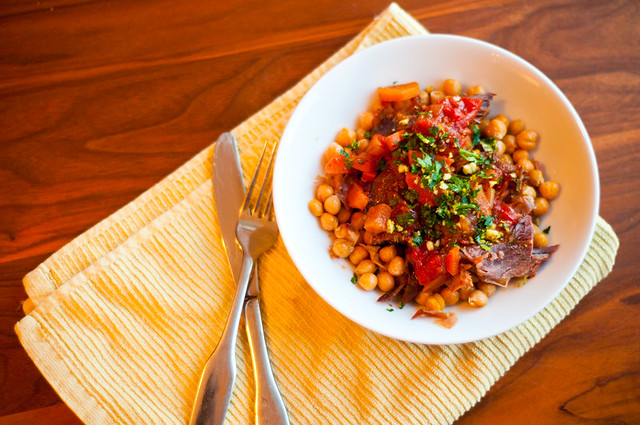
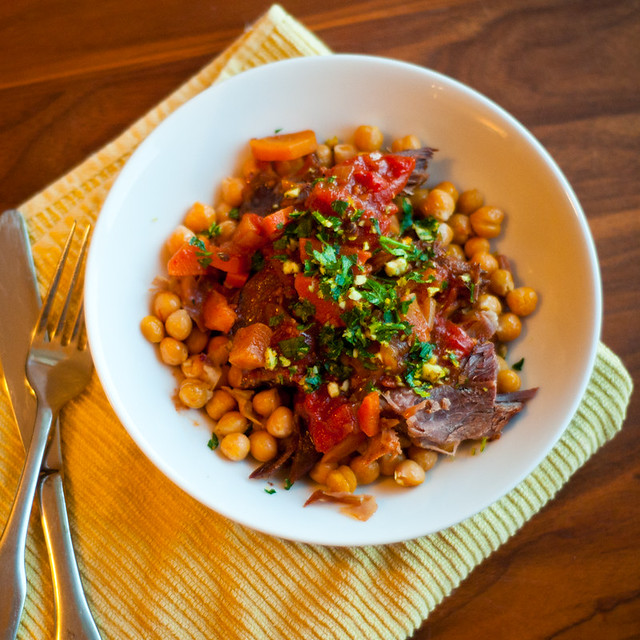
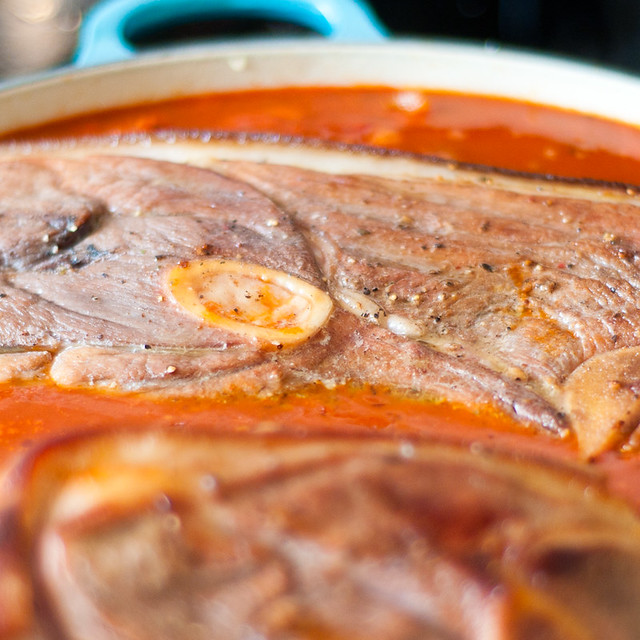
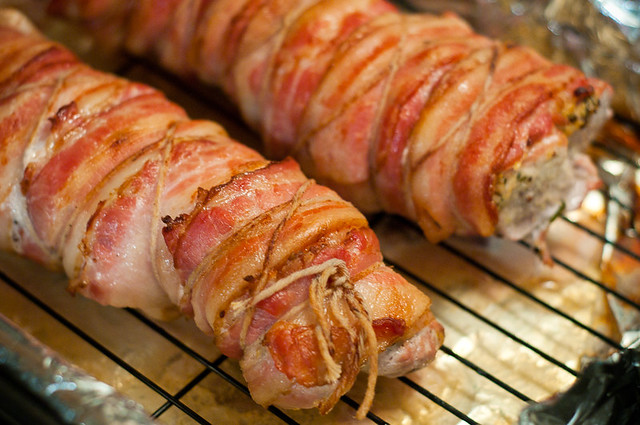
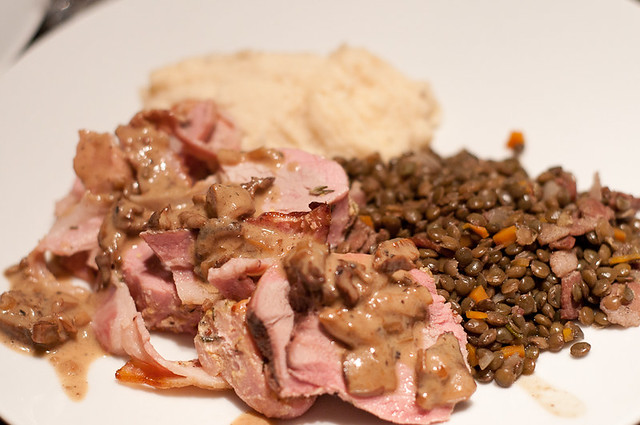
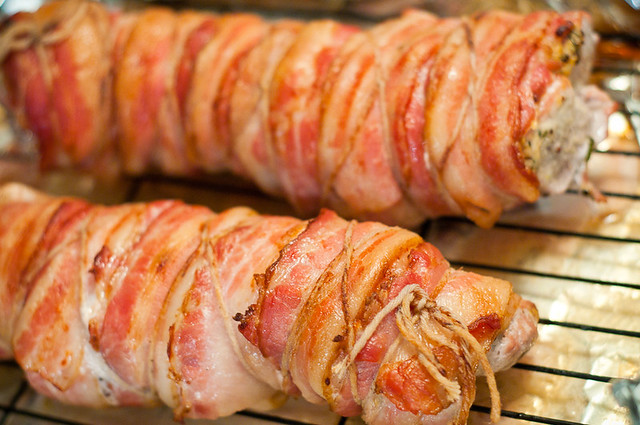
Main - bacon-wrapped pork tenderloin with a wild mushroom sauce (recipes below), served with pureed celery root and bacon-braised french lentils
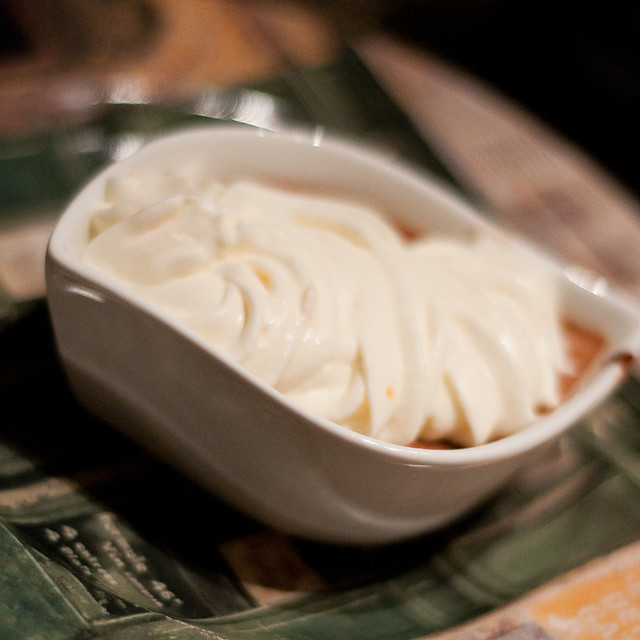
Dessert - chocolate pots de creme with an orange whipped cream (1 c whipping cream, 3 T icing sugar, zest of one orange)

I'm not gonna lie, it was pretty darn good.  So what I do with a menu like this is that I break it down into components, and I write myself a schedule for those components, and cross things off my list as I go.

So here was my list:
FRIDAY:
- mix together bread
- make dip
- prep endive and cucumber
- prep celery root puree
- prep lentils
- make pots de crème

SATURDAY:
- bake bread
- prep pork, make sauce for pork
- clean and pick through mussels, mise en place for sauce ingredients
- whip cream
- toast pecans
- make salad vinaigrette

See?  Not so hard when you break it down.

Then, I have a little schedule for myself.  For this dinner, it went something like this (all times approximate and very, very flexible)

7: 00 - bake dip, put cucumber and endive on platter

7:30 - guests arrive - set out platter, serve drinks

8:00 - (kids off to bed!) preheat stove, cook mussels;  While mussels are cooking (they take 8 minutes), shove pork in oven, put celery root in microwave to reheat, and put lentils on the stove on very low heat to reheat (this is about 3 minutes worth of work)

8:15 - mussels served with bread.  and more drinks.

8:45 - prep salad (assemble components, drizzle dressing).  Check temperature of pork (needs to register 145F in the thickest part; use the oven timer and just check every 10 minutes.  Remove from oven and let it rest once it gets to the right temperature).  About 5 minutes in the kitchen.  Serve salad.  With more drinks.

9:15 - While pork is resting, reheat the celery root in the microwave.  Slice pork and serve with sauce (takes 2 seconds on the stove to reheat), celery and lentils.  About 5 minutes in the kitchen.  And more drinks.

dinner party!

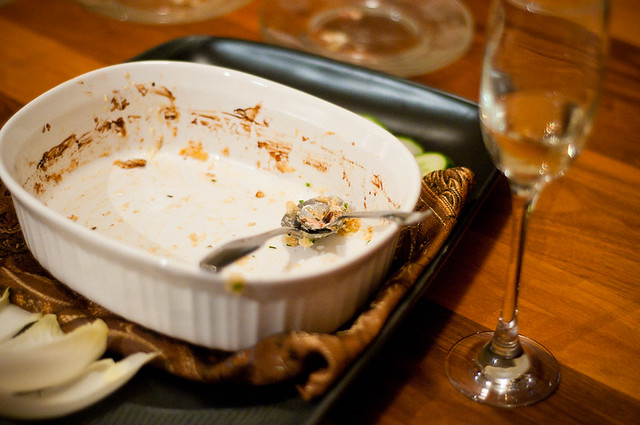
(much wine and conversation ensues)

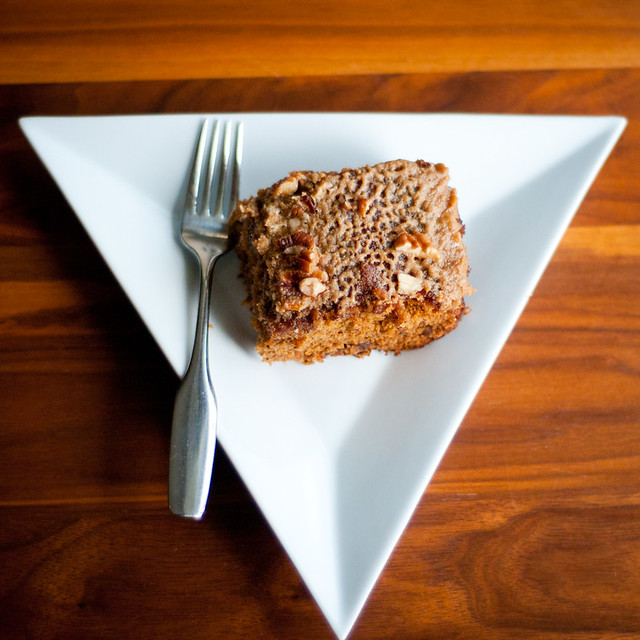
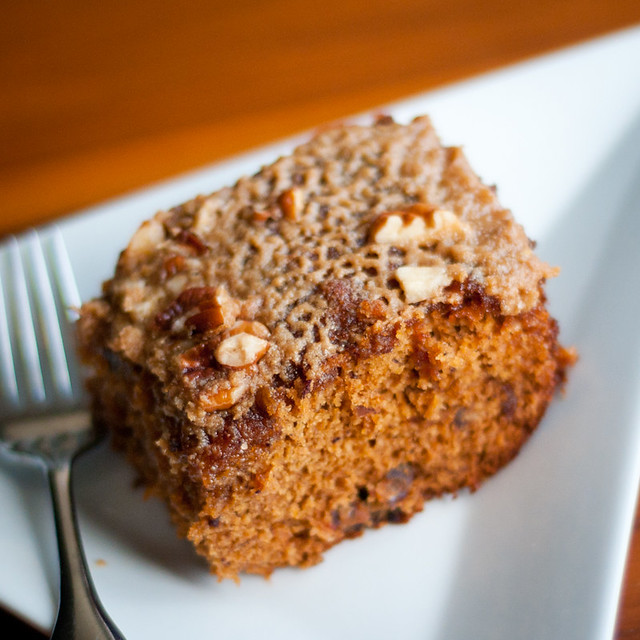
whenever seems appropriate - serve dessert with coffee and digestifs, if desired.  We served dessert at 1 am.  ;)  Pots de crème (or any other custard-type dessert) is great because you just take it out of the fridge and top it with whipped cream.  Again, only about 5 minutes in the kitchen.  They are yummy, but this photo is so blurry, you can barely tell what it is!

dinner party!

When we have dinner parties, I'm in charge of food, and hubs is in charge of drinks; i.e., keeping the water pitcher filled, and keeping the wine flowing (and possibly policing if someone is driving, but thankfully our guests cabbed it so we didn't have to worry about that).  This division of labour works well for us, because it means that one person isn't constantly in the kitchen; you alternate a bit.

Anyway, I will say that a great time was had by all, and leave you with the wisdom that while it might SEEM like a good idea to stay up and drink wine until 3:30 am, it seems like a much less good idea at 7 am when the kids are up for the day.

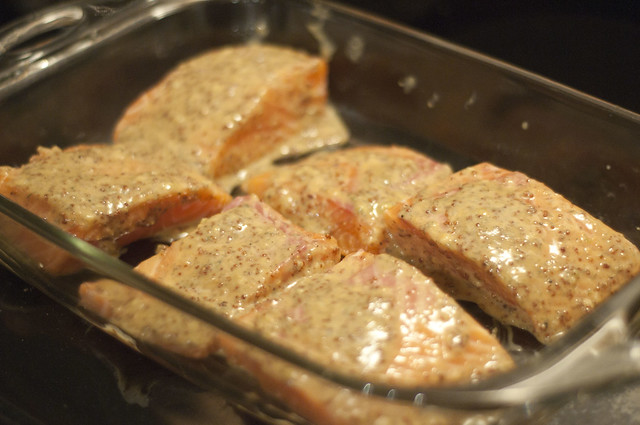
bacon-wrapped pork tenderloin with mushroom sauce
dinner party!

pork
2 pork tenderloins
1 package of bacon (14 slices)
1 T olive oil
1 T dijon mustard
1 T grainy mustard
1 T dark brown sugar
1 T bbq sauce
2 cloves minced garlic
1 T minced rosemary
1 t dried thyme
salt, pepper

1. Whisk together olive oil, mustards, sugar, bbq sauce, garlic, and spices.

2. On a platter/cutting board, arrange the bacon so there are 2 sets of 7 slices side-by-side, to wrap around your pork.

3. Place a tenderloin on in the middle of the bacon (so the slices can wrap around the pork).  Smear half of the olive oil/mustard mixture on each pork tenderloin (while it's on the bacon).

4. Wrap the bacon around the pork, and then secure with kitchen twine.  You could probably also just cook it seam side down if you didn't have kitchen twine.

5. Let marinate for a few hours.

6. To cook - preheat oven to 425F.  Put pork in oven (I put mine in a rack in a pan, so the bacon fat could drip.  I also put 1 cup of water in the pan, so I wouldn't have to smell burning bacon fat as it dripped onto the pan).  Clean up is easier if you line the pan with foil.  ;)

7.  Cook for about 35-45 minutes, until the thickest part of the pork measures at least 145F (you can go as high as 160F and it will still be pretty moist).  Let rest for at least 10 minutes.  Remove twine, slice and serve.

mushroom sauce
1 package dried wild mushrooms (about 14g)
1 cup boiling water
2 T butter
1/4 c minced shallot
1/2 c sherry/marsala (sweetish fortified wine)
LOTS of pepper, some salt
3/4 c whipping cream

1. Reconstitute the mushrooms in the boiling water (you may need more than 1 cup; this is fine).  Let them soak for about 15-20 minutes.  Strain, but keep the soaking liquid.  Chop the mushrooms.

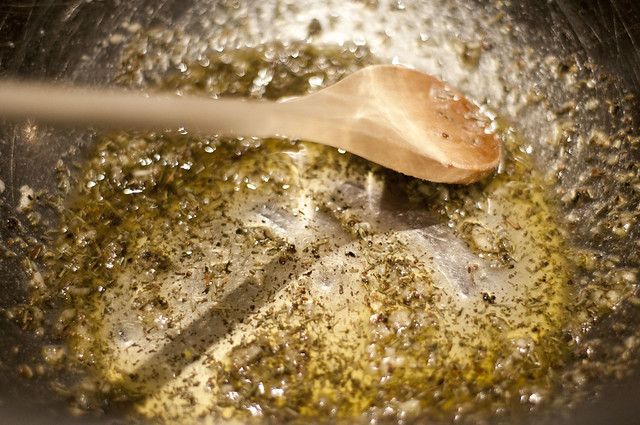
2. Heat a pot over medium-high heat.  Add butter, and before the butter burns (but after it browns), add shallots.  Sauté for 2-3 minutes.  Add chopped mushrooms, saute until most of the liquid is out of the mushrooms and things are starting to stick/brown a bit.  Add the sherry/marsala.  Let it reduce until it's almost evaporated.  Add the soaking liquid.  Turn heat to high.  Once the liquid has reduced to about half of what it was, add a ton of fresh-ground pepper, and the whipping cream.  Keep the heat high until the liquid is  reduced to about 1/4 of what it was before, and it nice and thick.  The key to a recipe like this is having the patience to wait until the liquids thicken.  It takes forever, so I like to do it in advance.  The result is a rich, creamy, concentrated sauce and this particular sauce is delicious on almost anything - mashed potatoes, chicken, steak, pork, rice, etc.  It's yummy, and it's also vegetarian and gluten-free. I make this up in advance and just reheat before serving.

Thanks for reading and sorry for the shoddy pics.  Maybe next time, a little less wine and a little more focus, huh?


Tuesday, October 09, 2012

caramel date cake with pecans

Pin It Now!

caramel-date cake with pecans

I'm not sure if I'm doing something wrong, but this cake is always ugly.  I've made it four times now, and every time I think....man, this is uuuuuuuuuuggggly....but it's so delicious, and it smells so incredible that I keep making it.

And I still don't like dates.  I still think they look like cockroaches and completely refuse to eat them in an un-baked, un-chopped state.  They aren't quite as bad when they are chopped.

caramel-date cake with pecans

Anyway, I got this recipe from a great cookbook called Quinoa 365 (fabulous, fabulous, fabulous...loads of recipes including whole quinoa, quinoa flakes and quinoa flour; I've tried many of them and they've all been really good).  However, in reading my recipe, you'll notice that I don't make it with quinoa flour...not that it isn't good that way (I've made it with the flour before and it turned out exactly the same), it's just that I have a really hard time finding quinoa flour in stores, and it's been a while since I made a Bulk Barn run to stock up on it.  SO, rest assured, you can make this recipe with or without the quinoa flour.

But you really should make it; it comes together quite quickly, and despite its humble appearance, you could serve it to anyone, and they would be suitably impressed by the flavour.  AND, there's no reason that you could just keep the caramel sauce separate and pour it over the served pieces of cake, but I like the all-in-one factor of this dish.  And you really don't notice the bits of dates in the finished product.

Last, make sure you buy pitted dates.  1 3/4 c of chopped dates doesn't seem like a whole lot until you have to pit each and every one of them.  Then it seems like waaaay too many dates.

caramel date cake with pecans
stolen and slightly modified from Quinoa 365
caramel-date cake with pecans


cake:
1 3/4 c chopped pitted dates
1 c boiling water
1 3/4 c all-purpose flour (OR 1 c AP flour, 3/4 c quinoa flour)
2 t baking powder
1 t baking soda
1/2 t salt
1/2 c butter, softened
1 c packed dark brown sugar
2 large eggs
1/2 t vanilla

topping:
3/4 c 18% cream
1 c packed dark brown sugar
1/3 c butter
1/2 c chopped pecans
fleur de sel/coarse salt

1. Preheat the oven to 350F.  Grease a 9-inch square baking pan.  Get all your ingredients ready.

caramel-date cake with pecans

2. In a medium bowl (I use a 2-cup liquid measure), combine the dates and boiling water and set aside so the dates absorb the water.  NOTE: Depending on how soft/fresh your dates are, they probably won't absorb all the water.  What I do, is pour off the excess water into a little pitcher.  If, upon mixing the dates into the cake, I feel the batter is really dry, I'll add some of this excess water.

3. In a medium bowl, combine the flour, baking powder and baking soda.

4. Cream the butter in a large bowl (ideally with an electric mixer; handheld is perfect for this).  Add the brown sugar and cream until fluffy.  Add the eggs & vanilla and beat well.  Add the flour mixture and continue to mix until well-blended (a couple of minutes).

caramel-date cake with pecans

5. Fold in the (lightly strained) dates.  You can see I had about 4 oz of the liquid left, because my dates were really soft and fresh.

caramel-date cake with pecans

Your final batter consistency should be thick, but not dry (if it's pulling away from the sides of your bowl, like a muffin batter, then it's too dry; add some of the water).  It should be liquid, but definitely not thin or soupy.  This s what mine looked like, for reference.  Pour the batter into the pan.  Bake for 30 minutes.

caramel-date cake with pecans

6.  Meanwhile, combine the cream, sugar and butter in a medium saucepan over high heat and bring to a boil.  Reduce the heat to medium low and stir constantly (or not so constantly, lol), until the mixture is a thick caramel sauce; about 15-20 minutes.

7.  Remove the cake from the oven and pour the caramel sauce over top.  Sprinkle with chopped pecans and fleur de sel (just a bit!).

caramel-date cake with pecans

Bake for an additional five minutes.  Cut into 9 pieces and serve warm.  It's so sweet and caramelly and delicious.

And also kind of ugly.

caramel-date cake with pecans


Monday, October 01, 2012

everybody should meal plan

Pin It Now!

meal planning

I remember my first exposure to meal planning.  I was 13, and had a pretty sweet after-school gig sitting for a couple of younger kids in my neighbourhood.  All I had to do was get off the bus with them, and we played games and read books until their parents got home an hour or so later.  Easy peasy.

On the fridge of this family, there was a laminated menu indicating what dinner would be had on what night.  It was the same every week (i.e., chicken tuesday, taco wednesday, etc.).

This seemed weird to me.  I couldn't imagine wanting to eat the same thing week after week after week. So I always thought THAT was what meal planning was.  That it wouldn't allow any spontaneity and that it meant one would be doomed to endless repetition of the same dreary old things.  Totally not my thing.

And now of course, we have all of these blogs and planning websites telling us we can cook once a month and then take a break from the kitchen.  I'll be honest, those sites kinda scare me, with their uber-organized alpha personalities cooking up 20 lbs of ground beef and chopping 50 lb of vegetables when they return from the grocery store, all to end up in an endless sea of labelled and vacuum-sealed ziploc (yes, I exaggerate).  That's not my thing either.

So with trial and error over the last few years, I've got *my* way of meal planning.  It's low-key, it's flexible, and it works, regardless of how simple or complex you want your meals to be.

First, I check the freezer to see if there's stuff I'd like to use up.  This week, I decided I wanted to use up osso buco, stewing beef, chicken, and some of my Supperworks order.  In my fridge, I had kale that needed to be used, along with leeks, and in the pantry I have squash and potatoes that I should get to.

So I came up with this:
Sunday - osso buco served with potato-leek puree and steamed broccoli
Monday - roasted garlic and pumpkin soup with kale caesar salad
Tuesday - chicken lettuce wraps
Wednesday - beef tagine with squash and couscous (I initially was thinking of Korean beef, but the flavour profile was too similar to the lettuce wraps!)
Thursday - vegetarian stuffed peppers from Supperworks
Friday - fend for yourself/leftovers

This is the plan.  I also write down WHERE the recipe is, so I can remember later.  I will probably switch at least one of these nights around, possibly not get to one of them, but at least I have a plan.  This makes it easy to, the night before, grab whatever I need from the freezer.  In fact, right now, I'm thinking I might make beef lettuce wraps instead of chicken, because I have already-ground beef, whereas I would have to grind the chicken myself....

I absolutely LOVE Pinterest for pinning stuff that looks intriguing.  I try to make sure that the text of my pin has some of the recipe keywords, and then I'll just go to my food board, and use the find function to browse through recipes containing my main ingredients (i.e., chicken, pasta, kale, etc.).  You should totally follow me on Pinterest.

Once I've got my recipes, I systematically write down the ingredients I need (and group by section of the grocery store --> produce, grocery, dairy, bakery), then I check the flyer of my local store to see what's on sale, and add things like fruits and veggies and staples to the list (for example, pineapple was 3/$5, so we got pineapple this week).

I also usually write down one baking-type recipe so I have muffins or something like them to put in Lil Z's school snack (whole wheat pumpkin spice latte muffins this week.  I also made these AMAZING lemon-coconut raw bites.  I'm scheming as to how I can make them nut-free so Z could take them to school....I'm thinking pepitas and shelled sunflower seeds...).

And voila.  It takes about 20-25 minutes over a nice cup of coffee and then I have a plan for the week.  And it's different every week; no boring, no repetition, no huge amounts of advance prep.  Don't get me wrong, I admire those who do all that prep, but I frankly don't have my schmidt together to do that when I get home from the store.  I also don't plan for lunches, because I eat leftover dinner from the night before for lunch.  Or, because I'm on mat leave, I'll just have something like a tuna sandwich, or eggs.  I keep it simple.

You could make it even simpler - there are meal planning companies like the Fresh 20 that will email you meal plans every week for a small fee.  I don't need this now, but I love the idea for when I go back to work.  I'm particularly intrigued by this company because it's only 20 ingredients, and it's all natural, whole foods.  If anyone has tried it, I'd love to hear your feedback.

Oh, and the cool meal-planning notepad?  You can find it here.  I love it!  Not necessary, but cute, and it makes me feel all organized.

Edited to add - you can also get the notepad at Chapters (I've seen it in-store as well).  For Canadian readers, this is probably way cheaper when you take shipping into account.

Anyway, that's how I do it.  And there's no reason you couldn't recycle plans; it's just not my style.  Hope you find it helpful!

Friday, September 28, 2012

chicken drumsticks & rice pilaf

Pin It Now!

honey mustard chicken drumsticks with brown rice pilaf

Yesterday was meet the teacher (again, still in shock my little mini foodie is big enough to be in SCHOOL - egads!)...so I wanted something quick and tasty for dinner.

Hubs and I (and lil Z) all love chicken drumsticks.  They are super tasty, always nice and moist, and I love the fact that you can almost always get a wicked sale on them.  When I'm feeling less lazy, I skin them, but because of the later start to dinner tonight, I didn't bother.  Besides, I (not-so-secretly) love crispy skin.

Lil Z loves them too, because they are easy to pick up and eat right off the bone.

Another reason I love serving them is that I think it's important for kids to know where their food comes from.  I think that kids should know that chicken comes from an actual chicken; drumsticks help illustrate that because I can show Z a picture of a chicken and tell her about what part we're eating.  If all you ever serve is boneless, skinless cuts, it's hard for kids to picture what you're actually eating.  Whole chicken is even better for this.  I digress.

One cookbook I can always rely on for quick and relatively healthy recipes is Eat, Shrink and Be Merry.  So I opted for a quick honey-mustard chicken drumstick recipe and a brown rice pilaf.  Rice is a bit of a picky dish for me; whenever I try to make it on the stovetop, I end up with a hot gluey mess and a burnt pot.

I like to start my pilaf on the stove, and finish it in the rice cooker.  Works beautifully every time!

honey-mustard chicken drumsticks
stolen and lightly modified from Eat Shrink & Be Merry
honey mustard chicken drumsticks with brown rice pilaf

12 skinless chicken drumsticks (can also use with-skin)
1/4 c honey
2 T cider vinegar
2 T dijon mustard
1 t garlic
1 t herbes de provence
pepper

1. Preheat oven to 400F.  Spray a 9x13 baking dish with cooking spray.  Arrange drumsticks in a single layer, keeping the bone toward the centre, and the meaty parts on the outside (it will cook better this way).

2. Whisk together honey, vinegar, dijon, garlic, herbes de provence and pepper.  Pour evenly over chicken pieces.  Bake for 20 minutes.  Remove pan from oven and baste chicken with sauce.  Baste every 10 minutes until chicken has cooked for about 45-50 minutes (use a thermometer to be sure --> 75C).  I like to use a standard turkey baster rather than a brush as I find you can build up the glaze a bit better that way.

3. Serve, spooning remaining sauce over chicken.

So, once you've got the chicken in the oven, you can start the rice.

brown rice pilaf with cranberries and nuts
stolen and lightly modified from Eat Shrink & Be Merry
honey mustard chicken drumsticks with brown rice pilaf

1 T olive oil
2 cups chopped mushrooms
1 cup minced onion
1 clove minced garlic
1 cup brown rice
2 cups broth
1/4 c each dried cranberries and chopped nuts (I used pecans and almonds)
2 T fresh parsley

1. Heat olive oil in a medium, non-stick pan over medium-high heat.  Add mushrooms, onions and garlic.  Cook and stir until vegetables begin to soften (3 mins or so).

2. Stir in rice, cook about 1 more minute, until rice is translucent. (at this point, you can add broth and cook in a pot, but I use a rice cooker).  Take mushroom/rice mixture and put in a rice cooker.  Add broth.  Let the rice maker do its magic (it will take about 40 minutes).

3.  Once the rice is cooked, stir in cranberries, nuts and parsley.

Wednesday, September 26, 2012

ENDED: GIVEAWAY: KitchenAid Artisan Stand Mixer

Pin It Now!

I'm totally stoked about this.

You guys all know that I don't have advertising on my blog (partially laziness, and partially that I don't really want your visits to the site interrupted with endless ads that may or may not be interesting and/or relevant).  And I don't normally do giveaways, because most of the possibilities tend to be for odd new products that I personally would never use.  I don't really want to use my blog to sell other people's stuff.

BUT, there are a few products that I totally love, and when I'm lucky enough to hear from one of them, I need to pass on that love.

I've never made any secret about my love for my KitchenAid mixer.  A stand mixer obviously isn't a necessity, but there are SO MANY recipes that are made infinitely easier through its use --> meringues, whipped cream, breads, swiss meringue buttercream, even mashed potatoes.  I love mine; I posted my first ode to it just over five years ago and it's been serving me well ever since.

look!  two new toys at once!

So when the folks at KitchenAid (or specifically at their PR firm) asked me if I wanted to give away a stand mixer to my readers....ummmmm...OBVIOUSLY I do.

So here's the deal, first, I've got to restrict this to Canadian residents (or people who know people with a Canadian address).  I know I've got a lot of US readers, so I'll keep an eye out for something for you guys.

Now, what you have to do (and you'll see it below in the Rafflecopter widget), is first go to http://www.kitchenaidcolourology.ca/ - there, they have a quiz, so you can determine "your KitchenAid Colour Personality" (their words, not mine).  After you do the quiz, you need to comment and let me know your "true colour."  I got boysenberry, which is GORGEOUS (I really just want to be able to have all 26 colours because they are soooooo pretty).  My stand mixer is Empire Red, which is also pretty.  ;)

As a bonus entry, if you already like Definitely Not Martha on Facebook, or if you are willing to like DNM on FB, then you can have two chances.

Giveaway runs until 12:01 AM on October 9th./// This giveaway is now over.  Thanks to all who entered!

a Rafflecopter giveaway

Good luck and I'm super excited to be able to do this!  For the winner, Rafflecopter will have your email address, so I will email you once the winner is selected to get further information.  And in theory, you will get to pick the colour as well!

*** Giveaway ended!  Thanks so all who entered! ***


Tuesday, September 25, 2012

quick and easy - the bbq chicken pasta edition

Pin It Now!

bbq chicken pasta bowl

The tiniest person in my house turned six months old today.  It's crazy to think how quickly time flies.  While I write this, she is happily bouncing up and down in her Jolly Jumper, watching me type and giggling away.  Have you seen those things?  I want one.

But I digress.

Last night, I was going out for Indian food with a few friends, and so I wanted something quick and easy to make for hubs and Little Z.  I also wanted it to make copious amounts of leftovers, so we'd all have something for lunch today too.

I was flipping through books/websites, and then I decided that I'd create a sort of BBQ chicken pasta dish.  Kind of along the idea of a bbq chicken pizza, except in pasta form.  I'd say it was pretty successful, and hit all the right notes (as in, easy, fast, made a lot), but the one thing that was missing was smokiness, and I think that's because I didn't use the most appropriate kind of bbq sauce.  I just used a chicken&rib sauce thta had a lot of sweetness, but none of the smokey/hickory flavour that was needed.  So if you make this, be sure to use a smokey bbq sauce, and you won't regret it.

bbq black bean & chicken pasta bowl
bbq chicken pasta bowl

1 T olive oil
1 lb chicken breast, diced
(montreal steak spice)
1 onion, diced
1 red pepper, diced
1 green pepper, diced
1 large clove garlic, minced
1 can black beans, drained and rinsed
1 cup frozen corn (or fresh or canned)
1 T chili powder
1 can spaghetti sauce (use a fairly plain sauce)
3/4 c bbq sauce (I suggest a smokey one --> look for hickory or mesquite)
1 box of pasta (I used penne; I think wagon wheels would be so cute for this dish though)

Garnish:
grated cheddar
minced cilantro

1. Heat large pasta pot full of water.

bbq chicken pasta bowl

2. While water is heating, in a large, deep skillet, sauté chicken in olive oil over medium heat, until cooked through, sprinkle with a bit of montreal steak spice, if you have it).  Remove chicken from skillet.

bbq chicken pasta bowl

3. To skillet (don't bother to clean it), add a touch more olive oil, then add onion, red pepper, green pepper and garlic.  Saute until veggies are softened (about 5-6 mins).  Add black beans and corn.  Saute a couple more minutes, until corn is heated through.  Stir in chili powder.

bbq chicken pasta bowl

4. By this point, your pasta water is probably boiling.  Add about 1 T salt (optional), and then cook pasta according to directions.  Penne takes 11 minutes.

5. Meanwhile, add spaghetti sauce and bbq sauce to veggie mixture.  Stir.  Return chicken to skillet, stir and turn heat down to low and let simmer while pasta cooks (otherwise you will have exploding tomato sauce all over your stove).

6. Drain pasta, but do not rinse.  Return pasta to pasta pot.  Dump skillet contents in.  Combine.

7. Serve, topped with cheddar and cilantro.

Easy-peasy and pretty delicious.  But like I said, go for a smokey bbq sauce!

bbq chicken pasta bowl

Monday, September 24, 2012

spain in a bowl

Pin It Now!

spanish pork braise with saffron chickpeas

When I was coming up with a title for this post, I vascillated between spain in a bowl and adventures in charcuterie.  I opted for the former, primarily because the adventures in charcuterie were not entirely my own, AND I was so excited by this dish (and also the charcuterie) that I wanted to make sure more people read the post.  I figured a lot of people would be put off by the idea of making their own ham.

So I'll preface the recipe by saying that you could make this with ANY ham or pork.  Good quality is better, but with all the delicious seasoning, even with run of the mill ham, I think it would still be pretty awesome (though probably salty; definitely go easy on the salt).

spanish pork braise with saffron chickpeas

The road that led us to our ham (and BACON!)-making adventures did not come altogether honestly.  Frankly, last year, we ordered 1/4 pig from a local farmer.  And the pork has been delicious, but we were left with a number of cuts (side pork, ham hocks, ham steaks, ham roasts) where we weren't really sure what to do.  They were uncured/brined and unsmoked, so we decided that they needed some sort of processing to get them to a point where we would want to eat them.  Hubs is braver than I in this respect, so he just bit the bullet and brined them for a few days (fairly simple brine - salt, sugar, bay leaves, spices, etc.).  And a kind foodie co-worker of his smoked them for us.

The result?  Meat that makes your house smell like a firepit.  It's epic.

So aside from a decent stockpile of bacon, I also had this large slab of 'ham steak' (bone-in) and a couple of ham hocks.  I wasn't really sure what to do with it, but I came across this recipe on epicurious, and I thought it sounded like a great place to start.

And it was.  I will say that the dish was probably improved by the sheer deliciousness of my ham, but the flavours are so rich and wonderful.  This is a three-part dish, definitely something you'd want to make on a weekend.  I'd definitely serve this to guests, though I'd have to make sure they were non-picky meat-eaters. The ham was braised in a smokey, rich tomato broth with a touch of sherry, served over chickpeas sauteed with saffron, garlic and minced prosciutto, and topped with an almond-orange-parsley gremolata.  I loved it.

spanish ham braise with saffron chickpeas and gremolata
stolen and modified from epicurious.com
spanish pork braise with saffron chickpeas

Pork
1 large good-quality ham steak (2-3 inches thick); you could also use chunks of ham, chunks of pork, etc.)
1 ham hock (optional)
2 tablespoons extra-virgin olive oil
2 large carrots, chopped
1 large onion, chopped
5 large garlic cloves, chopped
1 tablespoon chopped fresh thyme (or 1 t dried)
1 28-ounce can plum tomatoes in juice, tomatoes coarsely chopped
2 cups low-salt chicken broth (if using salty ham, consider either water or unsalted broth)
1 cup medium-dry Sherry
3 dried ancho chiles,* halved, stemmed, seeded (I just used about 1 t of ancho chile powder; you could use a bit of cayenne or skip this)
2 tablespoons tomato paste
1 tablespoon chili powder
1 tablespoon Spanish sweet paprika (pimenton dulce --> I used smoked sweet paprika) or Hungarian sweet paprika
2 teaspoons ground cumin
1 teaspoon ground coriander

Chickpeas:
2 tablespoons extra-virgin olive oil
2 15 1/2-ounce cans garbanzo beans (chickpeas), drained
1 large garlic clove, minced
Large pinch of saffron threads
2 thin prosciutto slices, finely chopped

Gremolata
1/4 cup finely chopped fresh Italian parsley
1/4 cup chopped toasted almonds
1 tablespoon grated orange peel

For pork:
1. Preheat oven to 250°F. Sprinkle ham/pork shanks and ham hock, if using, with salt and pepper (TIP: if using commercial ham, no salt; it's salty enough!).

2. Heat oil in heavy wide pot over medium-high heat. Working in batches, sauté ham and hock until brown, about 5-6 minutes per batch; transfer to platter/plate.

spanish pork braise with saffron chickpeas

3. Add carrots, onion, garlic, and thyme to pot. Sauté until onion softens, about 5 minutes.

4. Add coarsely chopped tomatoes with juice, broth, Sherry, chiles, tomato paste, chili powder, paprika, cumin, and coriander. Bring to boil, scraping up browned bits from pan bottom.

5. Return ham and hock, if using, to pot. Return to boil. Cover pot and place in oven. Braise until ham is tender, about 3-4 hours (note: if using commercial ham, yours will be tender from the get-go; so you can just cook for about 1-2 hours). Tilt pot; carefully spoon off all fat.

spanish pork braise with saffron chickpeas

6. Simmer pork uncovered over medium heat until sauce thickens to desired consistency, about 8 minutes. Season with salt and pepper (it probably won't need more)

For chickpeas & gremolata:
1. While pork/ham is reducing on the stove-top, make garbanzo beans and gremolata: Heat oil in medium skillet over medium-low heat. Add chickpeas, garlic, and saffron and prosciutto. Sauté until heated through, about 5 minutes. Sprinkle beans with salt and pepper (I found the canned beans and prosciutto had enough salt on their own).

spanish pork braise with saffron chickpeas

2. Mix parsley, almonds, and orange peel in small bowl for gremolata; I'm lazy, I did mine all in the food processor.

spanish pork braise with saffron chickpeas

To serve:
Place chickpeas in bottom of shallow bowl.  Top with chunk of ham/pork, spoon sauce over top and sprinkle with gremolata.

I just love the contrast in richness in this dish - rich, meaty pork, luscious saffron chickpeas, and then the bright crunch of the gremolata.  It smells like Spain and I think it's a pretty fabulous tribute to Spanish cooking.

spanish pork braise with saffron chickpeas

Related Posts with Thumbnails