Photobucket - Video and Image Hosting
Showing posts with label cheese. Show all posts

Monday, January 16, 2017

why you need halloumi (cheese) in your life

Pin It Now!

If you enjoy cheese in any way, shape or form, you need halloumi in your life.

Image may contain: food
Salad topped with pan-fried halloumi and pesto dressing.  Tasted even better than it looks.
Halloumi hails from Cyprus and is a semi-hard, unripened, brined cheese.  It's typically made from a mixture of sheep and goat milk, but most of what I find here in Canada is made from cow's milk.  What sets halloumi apart from other cheese is it's uniquely high melting point.  It can be fried, or grilled without melting, and the cow's milk cheese I buy here is basically like a slightly firmer cheese curd.

It's salty, mild and delicious.

We have a fabulous local restaurant called Amuse (Ottawa peeps - check it out!  Awesome west-end eats), where I recently ate an appetizer that had pan-fried (and then flambéed) halloumi.  It was so good that I was inspired to create a variation at home. With fewer carbs because I think if I entered cheese and garlic bread into MyFitnessPal, it would explode.  :p.

I made a salad topped with pan-fried halloumi, which I then dressed with a pesto dressing (my favourite Costco pesto + white wine vinegar) and it was FABULOUS.

I shared a photo of the salad (above), and I got a lot of questions about it, so I thought I would put up a brief post with a couple of ideas of how you could use halloumi (note that due to halloumi being a protected Cypriot product, you will sometimes find it marketed under similar names like halloom - Ottawa folks - I bought mine at Food Basics.  Most well-stocked grocery stores should have it if you poke around a bit).

Here are a few ways to enjoy your halloumi:

- pan-fried in a bit of oil, then served over salad (note that I particularly loved this with a pesto dressing....so rich and delicious)

- pan-fried, then flambéed with a bit of ouzo, then served over crusty garlic bread, with chopped heirloom tomatoes (similar to the fabulous Amuse appetizer....or better yet, head straight to Amuse and just have them make it for you!)

- on skewers - I did this over the summer and it was a huge hit with our family - the cheese holds up well to grilling, and a light brush of marinade is all you need.  You can skewer just cubes of cheese, or mix it up with vegetables (that's I how usually make all our skewers - a mix of vegetables and protein)

I have also pinned a couple of ideas that I haven't yet tried, like this Winter Caprese Salad with beets and halloumi and this Warm Lentil dish with fennel and halloumi.

Have you tried halloumi?  What's your favourite way to eat it?

Tuesday, December 27, 2016

quick and easy breakfast casserole with ham, peppers, potato pancakes and cheese

Pin It Now!


Hard to believe that it's been a year since my last post...I have to confess there have been many occasions when I've been tempted to just shutter the whole blog idea.  I'm still cooking a lot, but with kids, work, and life in general, something just really had to give and it was the blog.  I'm going to try to post more often in 2017 (though I'm sure I've said that before).  Part of my strategy is that I'm going to try to make things a bit easier on myself...I just got a new phone, and it takes pretty decent photos.  So you'll probably see more posts with phone photos.  Not the same as the DSLR, but it's also WAY less hassle for me.


Anyway, back to this recipe.  I actually feel compelled to share it, because I've made it three times in the last month.  And for anyone who knows me, this is a truly, truly exceptional circumstance. It's just really good and really simple, and could not be more perfect for busy holiday times.  

There are a million different breakfast casserole ideas out there, and this one is not hugely groundbreakingly different, but here are the reasons that I like this one:

1. You can throw it together in about 15 minutes.  No pre-frying, nothing complicated.  Some chopping, but not a crazy amount.
2.  The secret ingredient potato pancake crust gives this casserole a little bit of indulgence.  It's not super healthy, but it's so tasty.  An alternative could be to shred your own potatoes and pre-saute them with some grated onion, salt and pepper. But trust me on the potato pancakes.
3. It uses a dozen eggs.  Many of the other casserole recipes out there only use 6-8, so I find they aren't as hearty and filling as this one.  This makes 12 legit servings.
4.  You can either bake this right away or let it sit overnight, which makes it great for either a last minute brunch or for one where you need to plan ahead.  It reheats well too.  The first time I made it, I just cooked it Sunday night and then hubs and I ate it for breakfast all week.  Yum!

I took this photo on my phone!!!!  Not bad, eh?
quick and easy breakfast casserole

12 servings

1 package McCain Potato Pancakes (I'm linking so you can see the package - this post is not sponsored.  I just really like these - 2022 notes, McCain downsized the package so I now buy 2 packages and use 5-6 from the second package as well)
1 onion, diced
1 red pepper, diced
2-3 cups ham, cubed
2 c. shredded cheese (aged is better!!! - 2022 note - Farm Boy Fiesta shredded cheese is amazing in this.
1 dozen eggs
1 c milk
2 T dijon mustard
1/2 t salt
pepper

To assemble:
1. Lightly oil a 9x13 pan.  Line it with the potato pancakes.  I like to have them go up the sides, because the top bit gets extra brown during baking.

2. Sprinkle the diced onion, diced red pepper and ham over top. (An optional step here is that you can saute the onion and peppers, then add the ham and saute it to get some of the excess liquid out. Not necessary, but does improve the results.

3. Put the grated cheese on top.

4. In a large bowl/pitcher, crack the eggs, add the milk, dijon mustard, salt and some pepper.  I like to use my immersion blender here to make things perfectly smooth.  You'll have best results with a well-blended custard mixture.

5. Pour the egg mixture over the casserole.  You can either bake right away or let it sit in the fridge overnight.

To bake:
1. Put the casserole in a cold oven and turn the oven to 325F (this may just be paranoia on my part, but when taking a cold glass pan from the fridge, I prefer to place in a cold oven to avoid sudden temperature changes).

2. Bake about 1 hour-1h15, uncovered.  I like to bake mine in the top third of my oven, because that way the bottom doesn't get super brown, but the top does.  

3. IMPORTANT: The casserole is done when the egg mixture is set, but you shouldn't eat it right away.  Let it cool for at least 15 minutes.  When you cut in right away, it will be watery.  But if you let things settle and cool for a bit, it's perfect.

We had it on Christmas morning and it was great - super easy for me to just pop in the oven and we let it bake while the kids opened their gifts.  :)  


Tuesday, August 19, 2014

'tis the season...for heirloom tomatoes

Pin It Now!

In a perfect world, I would eat a wonderful, sustainable, 100-mile diet.  But since I refuse to subsist entirely on root vegetables and preserves all winter, that doesn't really happen, and we enjoy product from around the world all winter long.

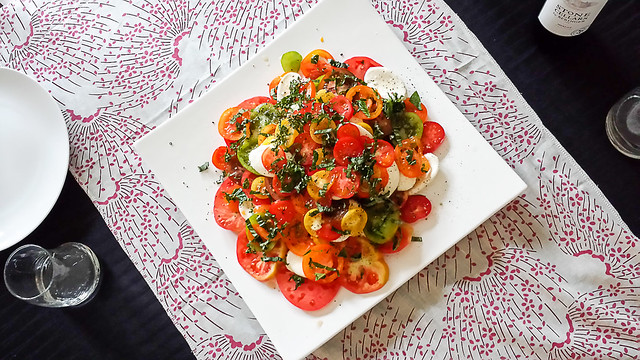
bryson farms layered heirloom tomato caprese salad

But come summer, I really want to do my best to enjoy the fantastic local produce grown (almost literally) in my own backyard (my own backyard having a massive patch of squash, which choked out everything else...maybe year two of gardening will be a bit more varied, hehe).

In the meantime, given my gardening failures, I get a local organic produce delivery from Bryson Farms, which isn't quite in my own backyard (Dekok, Acorn Creek and Shouldice are all closer), but I love the delivery aspect.  Farmers' markets are pretty awesome in theory, but I have a hard time scrambling everyone together to get going on a Saturday morning, and then the markets themselves are pretty crowded (not so awesome with an active two year old), and I never have enough small change.

So my lack of motivation/organization benefits to the extreme from nice farmers who are willing to bring their wares right to my front step.  You pay a premium, but I'm totally loving the variety of vegetables that we've been enjoying.

This past week, I got two containers of gorgeous rainbow heirloom tomatoes - all shapes, sizes and colours.  I knew they would be just perfect for a layered caprese-style salad.  There's no original recipe here - tomatoes + bocconcini + basil + salt + pepper - but I had a little fun with the presentation, and made a tomato pyramid.  I served this to six adults and three kids, and still had a bit left to take to work for lunch the next day.  It looked so pretty on the table, and I love how such simple, fresh ingredients can be showcased to perfection.  This is what eating local is all about, and I was happy to have these yummy tomatoes as the centrepiece for the meal.  :)

stacked heirloom tomato salad
serves 10 - easily made smaller
bryson farms layered heirloom tomato caprese salad
4 lbs heirloom tomatoes, assorted sizes and colours
2 containers bocconcini (mine came pre-sliced - bonus!)
1 bunch basil, cut in a chiffonade
fresh cracked pepper
fleur de sel

1. Slice the tomatoes with a serrated knife and arrange on a platter.  I find it's easiest if you start with the largest tomatoes, and then work the smaller ones in and around.  Mix up the colours and sizes.

2. While slicing the tomatoes, layer slices of bocconcini.  As you build up the layers of tomato/bocconcini, periodically add a light sprinkle of salt and pepper.

3. When you're done, sprinkle the basil over top.  I recommend keeping the dressing separate if you are in doubt of whether the salad will be finished in one sitting (the vinegar will make the tomatoes mushy).

balsamic-shallot vinaigrette
1/2 t sea salt
fresh cracked pepper
1 shallot, minced
3 T balsamic vinegar
2 T dijon mustard
1/2 c olive oil

1. Combine the salt, pepper, shallot and balsamic; whisk together.  Add in the mustard and whisk again.

2. Slowly drizzle in the olive oil while whisking until desired consistency/flavour is reached (usually somewhere between 2-3x the amount of vinegar that was used, depending on how acidic you like your dressing).

3. Drizzle over anything and everything.

That's it.  It's so yummy and simple and delicious.  And I had some of the leftover salad stuffed in a wrap with some turkey breast and it was also amazing.

Sunday, November 01, 2009

November is NaBloPoMo! how many days do you think I'll last???

Pin It Now!

DSC_3192
For years, I've been hearing about NaNoWriMo (National Novel Writing Month), where participants attempt to write a 50 000 word novel during the month of November. Given that I suck at fiction (and also at lying...as hubs will attest, I am the world's WORST liar), I've never even given participation a second thought. Any novel I would write would be awful. The very idea reminds of the times where I took writing classes in high school. I love writing, but I'm just not all that creative when it comes to plot and character and all the schtuff. I could do description like nobody's business, but just didn't have the creativity to come up with plotlines, etc., that would captivate.

However, the latest thing, if you will, is NaBloPoMo (National Blog Posting Month), which is much more up my alley. As the archives of this blog will attest, I am, at best, an infrequent poster. It isn't to say that I don't want to post, or that I don't have anything to say, but I just seem to have a hard time getting stuff from table to web site, if you catch my drift. So I'm going to give this a try. I certainly won't promise that you'll have photos and lovely descriptions every day, because I don't really cook THAT often. But I'll keep you abreast on what I'm eating, where it came from, and whether or not I liked it. Tonight, I made a pot roast for dinner. It sucked. I'm not posting it.

But my dinner earlier this week was FANTASTIC. Like, you know my aversion to leftovers?

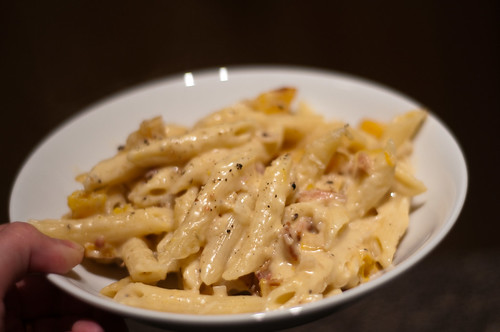
I ate this for lunch THREE days in a row (I stole it from hubs!). It was that good. It's so hearty and delicious and wonderful and yummy that you will all be rushing out to make it. I stole the recipe from Cooking Light, but modified it to make it better. It's awesome. Z loved it, hubs loved it and everyone who saw the pic on facebook demanded the recipe. MMMMMMMMMMMMMMMMM...yummy. I doubled the recipe and baked in a 13x9

Roasted Butternut Squash and Bacon Pasta


Yield: 5 servings


Ingredients
3/4 teaspoon salt, divided
1/2 teaspoon dried rosemary
1/4 teaspoon freshly ground black pepper
3 cups (1-inch) cubed peeled butternut squash (for a doubled recipe, I used 2 small squash and it worked just about perfectly)
Cooking spray
6 sweet hickory-smoked bacon slices (raw)
1 cup thinly sliced shallots
8 ounces uncooked mini penne (tube-shaped pasta)
1/4 cup all-purpose flour
2 cups 2% reduced-fat milk
3/4 cup (3 ounces) shredded sharp provolone cheese (I used 5-year-aged cheddar)
1/3 cup (1 1/2 ounces) grated fresh Parmesan cheese
Preparation
Preheat oven to 425°.

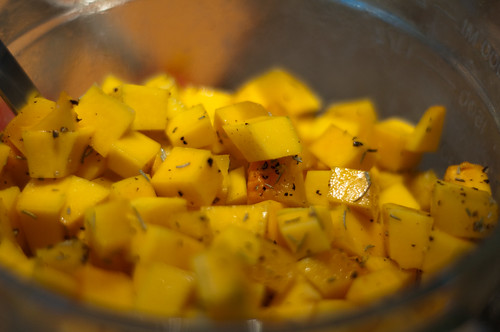
1. Combine 1/4 teaspoon salt, rosemary, and pepper. Place squash on a foil-lined baking sheet coated with cooking spray; sprinkle with salt mixture. Bake at 425° for 45 minutes or until tender and lightly browned. Increase oven temperature to 450°. This will make your house smell AMAZING.

DSC_3170

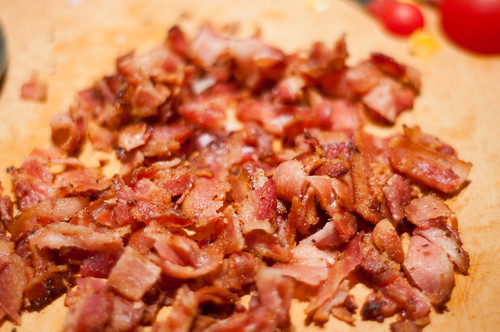
2. Cook the bacon in a large nonstick skillet over medium heat until crisp. Remove bacon from pan, reserving 1 1/2 teaspoons drippings in pan; crumble bacon.

DSC_3180

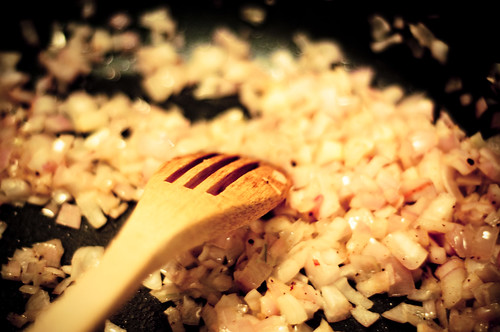
Increase heat to medium-high. Add shallots to pan; sauté 8 minutes or until tender. Don't throw out your bacon fat yet!!!

DSC_3179

3. Cook pasta according to the package directions, omitting salt and fat. Drain well.

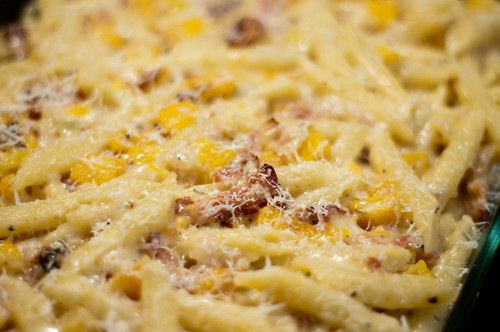
4. Add another 2 T of bacon fat to your shallots (yum!). Combine flour and 1/2 teaspoon salt and add to the shallots over medium-high heat. Let it cook for a couple of minutes. Gradually add milk, stirring constantly with a whisk; bring to a boil. Cook 1 minute or until slightly thick, stirring constantly. Remove from heat. Add provolone (cheddar is better!!!), stirring until cheese melts. Add pasta to cheese mixture, tossing well to combine. Add bacon and squash and stir gently (or you will mash the squash) Spoon pasta mixture into an 11 x 7-inch baking dish lightly coated with cooking spray. Sprinkle evenly with Parmesan cheese. Bake at 450° for 10 minutes or until cheese melts and begins to brown.

DSC_3184

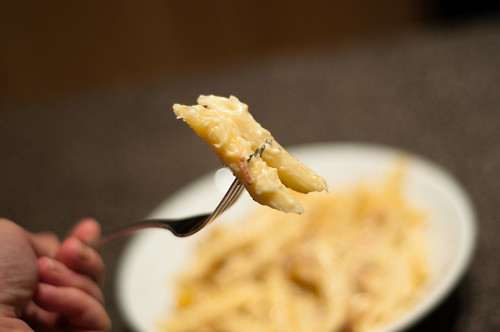
It's so good. YUM. The squash is so rich and with the savoury addition of the rosemary and the smokey bacony goodness...this is the PERFECT fall comfort food. You definitely want to make this ASAFP.

So, here's to day one of NaBloPoMo. Hope we have another fruitful 29 days.

DSC_3195

Monday, February 02, 2009

cordon bleu...or maybe it's green....

Pin It Now!

Since being on mat leave, I've done a number of things. First, I got a nice big TV. Next, I upgraded my cable package.

And last, I've become totally and completely addicted to the Food Network. However, in doing so, I've discovered that they tend to replay the same episodes about three times a day. Probably not a huge deal if you only tune in every once in a while, but when it's on your TV all day, most days, it gets darned annoying.

The added bonus is that the idiosyncracies of the various hosts really start to grate on your nerves. I'm not about to get into a full-blown invective lambasting the various people on tv, but one show in particular that I *almost* love is Chef At Home. It's hosted by Michael Smith and he's got a great approach to food. Unlike most chefs whom I would be absolutely sh!tbaked to have at my home (you know, the ones who ascribe to the idea that there is only ONE correct way to make every individual dish), he seems to have a totally down-to-earth approach to food. I think we'd get along.

That is, of course, if I could get over his didactive narration. Seriously, he talks to me like I"m about 5 years old (coincidentally, the age of his cherubic little son, Gabe). And if you watch each episode, a fun drinking game would be to take a shot every time he uses the word "aromatic." Might liven things up.

Anyway, with all that said, his food is almost unerringly fabulous. I caught a preview for an episode a while back and was so intrigued by it (ham and cheddar chicken baked on a bed of onions) that off I went to www.foodtv.ca to try to find the recipe.

It was yum. I made the whole meal and it was a big hit. Simple, delicious...no complaints here. I might skip the spinach sauce next time (it made a TON and was just a little too spinachy tasting), but the onions were amazing, and the stuffed pototoes kicked all kinds of ass. Two thumbs way up. Make this meal - it'll impress your inlaws and fill your bellies.

Ham and Cheddar Chicken Rolls
stolen from Chef at Home
20081222-DSC_1220

4 chicken breasts, boneless and skinless
Sprinkled sea salt and freshly ground black pepper, to taste
4 tbsp Dijon mustard
8 slices deli ham
8 thin slices cheddar cheese
2 tbsp olive oil
4 onions, peeled and thinly sliced
1 tbsp dried thyme

Directions:

1. Preheat your oven to 350°.

2. Layer two pieces of plastic wrap on top of each other. Fold them in half, open and place a chicken breast near the fold. Fold over the plastic wrap covering the meat then gently pound and flatten the breasts using a rolling pin, meat pounder or the bottom of a heavy pot.

3. Season the chicken, then spread a thin layer of Dijon over each piece.

4. Lay two slices of ham and two slices of cheddar on each breast. Roll them up tightly.
20081222-DSC_1211

5. Sauté the onions with the oil, dried thyme, salt and pepper. Continue cooking until they are lightly browned and golden.
20081222-DSC_1210

6. Place the chicken rolls on top of the onions in the pan or transfer to another baking pan, cover with a tight-fitting lid or foil and bake for 20-25 minutes, until the rolls are cooked through.
20081222-DSC_1212

You may serve them whole with a scoop of the onions or slice each one into several ‘rounds’ and present them on a bed of the onions.
20081222-DSC_1217


Spinach Sauce
stolen from Chef at Home
as mentioned, I could take this or leave it. It makes WAY too much - I've frozen the leftovers to use as a pizza sauce

2 tbsp olive oil
1 onion, peeled and minced
2 cloves garlic, peeled and minced
1 lb. spinach leaves, washed
1/2 cup white wine
1/2 cup chicken broth
Sprinkled sea salt and freshly ground black pepper, to taste

Directions:
1. Pour the oil into a saucepan over medium-high heat then add the onions and garlic. Sauté until they are fully aromatized, until the whole kitchen smells great!

2. Add the spinach, white wine and chicken broth and cook briefly just until the spinach softens, shrinks and wilts down. This is a 6qt pot, btw.
20081222-DSC_1213

3. Puree with a hand blender, counter blender or food processor and season with salt and pepper.
20081222-DSC_1216

Salsa Stuffed Potatoes
stolen from Chef at Home
these potatoes ROCK - I used hot salsa and old cheddar. I recommend you do the same

4 large baking potatoes
1/2 cup your favourite salsa
1 cup grated cheddar cheese
Sprinkled sea salt and freshly ground black pepper, to taste

Directions:
1. Preheat your oven to 350°.

2. Bake the potatoes for an hour or so, until their flesh is very tender.

3. When they are cool enough to handle, trim the top off of them. Scoop out most of the flesh, leaving enough around the inside of the skin to keep it whole and give it strength.

4. Mash the scooped potato with the salsa and cheese. Spoon the mixture back into the potato shells, mounding them over the top a bit as needed.
20081222-DSC_1215

5. Bake until they are hot and the tops are golden brown and beautiful (about 20 minutes...put them back in the same time as the chicken!)

20081222-DSC_1218

This is a great meal to serve to company - it's got loads of flavour, but there's nothing in it that is especially exotic or strange to the unadventurous tastebud. I had no leftovers, so that should say something. Super yum. Thanks for reading!

Monday, December 15, 2008

complete satiety using only the basics

Pin It Now!

I almost hesitate to post this as a recipe. It's so ridiculously simple - I certainly can't lay claim to any sort of originality or great wave of creative genius here.

In a nutshell, I was hungry, low on fresh ingredients and so I just put a few very simple things together and WOAH. It's really freaking good.

The best parts of this are that it's ready in mere minutes (faster than KD and with less stirring) and if you have a well-stocked pantry, you can probably make it right this second.

So go make it already.

Salt and Pepper Pasta
1 pound good quality pasta (I like barilla or de cecco)
extra-virgin olive oil (about 1/4 cup - it's worth using your best stuff for this)
sea salt (ideally fleur de sel)
fresh black pepper
cheese for grating (real parmigiano or grana padano or pecorino romano are best)

1. Bring a large pot of salted water to a boil.

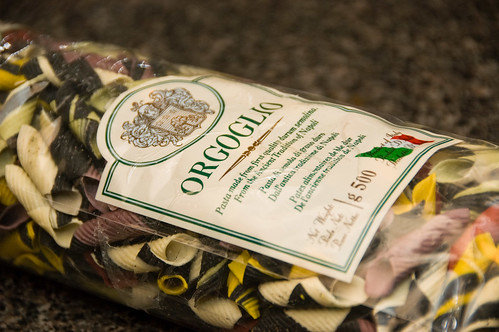
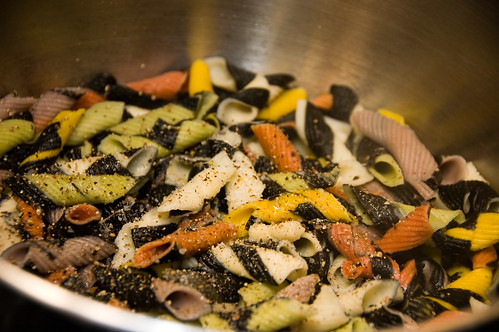
2. Cook pasta to your preferred doneness (al dente!!! please!!!!). Start tasting it a minute or two before the package says it will be ready...you really don't want to overcook the pasta if you can avoid it. I had this really funky pasta in my cupboard and this was a great recipe to use it in because there was no heavy sauce masking the fun colours of the pasta.
funky coloured pasta

This recipe is a good way to use any funky shaped or coloured pastas you might have hanging around. I was a little sad that some of the bright colour came off in the pasta water though:
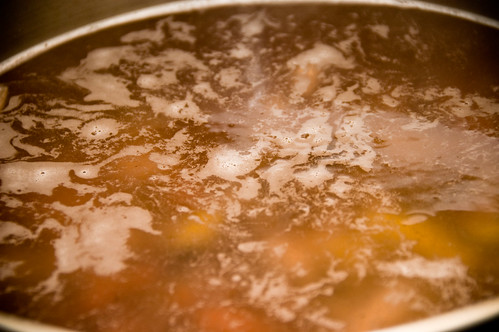
pasta changed the colour of the water

3. When the pasta is cooked, drain, but don't rinse. Put it back in the pot and toss with olive oil, a good solid pinch of sea salt (again, I highly recommend coarse fleur de sel - because salt doesn't dissolve in oil, you get nice little tangs of salt throughout, rather than a solidly salty dish). Table salt wouldn't be as good because it's really intensely super duper salty. I know it sounds silly to say salt is salty (duh), but sea salt has a number of other minerals in it that tend to broaden the flavour of it and make it less sharply salty. Grind a LOT of pepper over top. Salt and pepper are your flavours here, so use a good amount.

salt and pepper pasta

4. Use a microplane to grate some cheese over the pasta in the pot, and toss to coat everything.

5. Serve the pasta with additional cheese and let people grate LOTS on top of their pasta.

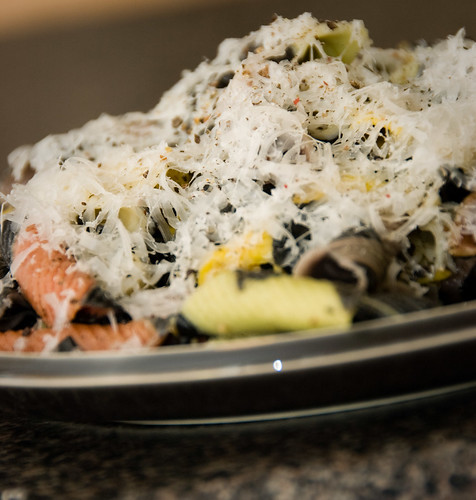
salt and pepper pasta with grana padano

Hubs could not get enough of this, and between the two of us, we scarfed the entire pound of pasta with him inquiring about whether there was more. It really is that good - a super duper simple dish that just allows a few classic flavours to shine. I call it recession gourmet. If you paired it with a green salad and some ice cream, you'd have a three course meal that you could serve to anyone - even your mother-in-law - and you'd have a delicious meal that's very easy on the wallet. Eating cheaply doesn't have to mean eating badly...

Thanks for reading! Oh, and keep voting on the poll - I'm shocked that only one person thinks I'm deluded thus far. I expected the anonymous internets to be out in full force to crush my video star dreams, lol.

Thursday, November 20, 2008

yummy lasagna in my tummy

Pin It Now!

So, since I moved, I don't think I ever posted a pic of my new kitchen...I'm pretty sure the entire reason that this house won me over was because of the sheer size of the kitchen. I totally LOVE it. SO much counter space, so much cupboard space...LOVE. IT. I also love the giant patio door and the window above the sink that make it such a bright room during the day. Besides the pantry, my other favourite feature is the desk area - I like being able to search for recipes online, so it's perfect to have a kitchen computer. Great for blogging too. :)

my new kitchen

I still have a little work to do in improving it (check out the snazzy lighting...ugh), but it's such a great and inviting space to work in.


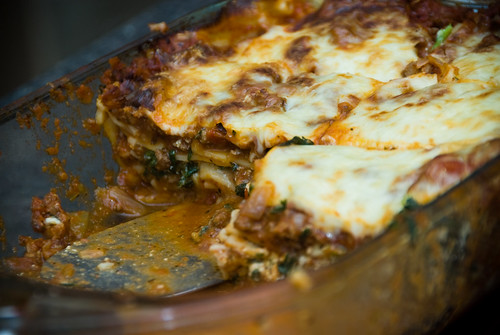
Now, about the food (i.e., the mess that's on the counter is actually my mise en place for lasagna making)...I don't think there's really such thing as an awful lasagna. Generally, when you get the combination of tomato sauce, cheese and pasta...it's probably not going to be bad.

I mean, it can be kinda bad, if you use those heinous oven ready noodles...but overall, it's hard to go wrong. So, while I definitely recommend this recipe (it was very yummy), I don't know if I can say it's really THAT much better than most of the other recipes out there.

One thing I can say, however, is that you should never make just one lasagna. It's one of those dishes where with about 10% more effort, you can have 100% more food. Sounds like a good investment to me! The thing with this particular lasagna is that there is very little chopping involved - an onion, some garlic...that's about it. The rest of the effort is really more about just putting it together, and since it's not especially difficult to assemble, you should definitely consider making a second lasagna for your freezer.

I still don't like most frozen food, but lasagna is the exception - I find an uncooked lasagna freezes really well (just try to defrost it, if you can, before baking). I'm personally a fan of just defrosting it on the counter, but the bacteria police (who seem to think that bacteria will somehow grow on what is essentially a block of things that are all going to fine at room temp for a couple of hours....) will suggest that you defrost in your fridge. I don't like fridge defrosting...it's SO slow...but do whatever turns yourr crank.

This lasagna is yummy. If you make it, you'll like it.

Sausage, Spinach and Ricotta Lasagna
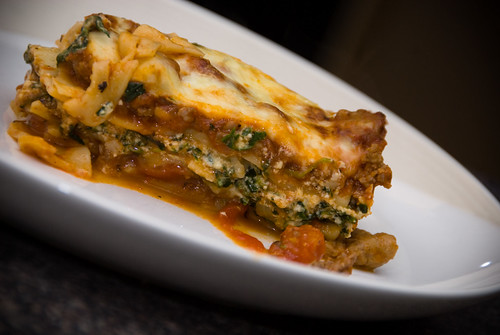
sausage, spinach and ricotta lasagna

Sauce:
8 oz light Italian sausage
8 oz extra-lean ground beef
1 c chopped onions
2 t minced garlic
1 t dried oregano
1 t dried basil
1/4 t dried red pepper flakes
1 jar (700 mL) pasta sauce
1 can (540mL) tomatoes with italian herbs, undrained, cut up (I use kitchen scissors in the open can)
1 T balsamic vinegar
1/2 t pepper

12 uncooked whole wheat lasagna noodles
2 c light ricotta cheese
1 package frozen chopped spinach, thawed and squeezed dry
1/3 c grated parmesan cheese
1 egg
1/3 c chopped FRESH basil
1/2 t salt
2 c packed shredded part-skim mozzarella cheese

1. Spray a 9x13 pan with cooking spray and set aside.

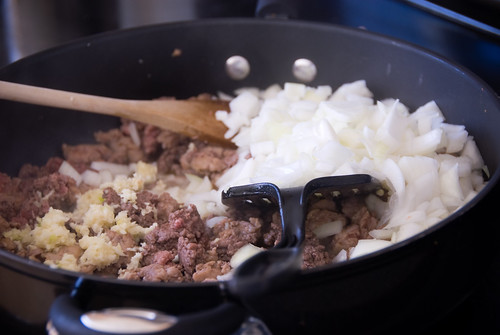
2. To make the sauce, remove casing from the sausage and break into small pieces in a large deep skillet (my 6 qt sauté pan was able to hold a double batch). Add ground beef, onion and garlic. Cook over medium heat until the meat is no longer pink. Stir in oregano, red pepper flakes and dried basil.

sausage fest

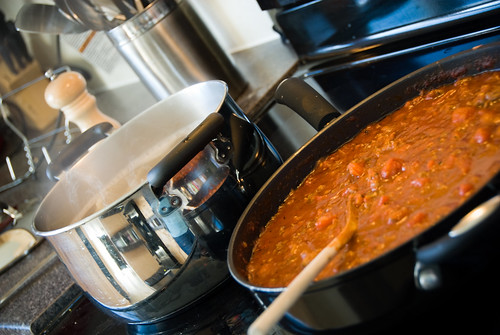
Cook 1 more minute. Add pasta sauce, tomatoes, vinegar and pepper. Bring to a boil, and then simmer until you're ready to use it (at least 20 minutes).

3. While the sauce is simmering, cook the lasagna noodles until they are BARELY done (about 8-9 minutes). They'll absorb some of the sauce liquid, so you want to make sure they still have a little texture to them. Rinse them REALLY REALLY well with cold water (or else they will stick together).

sauce and noodles

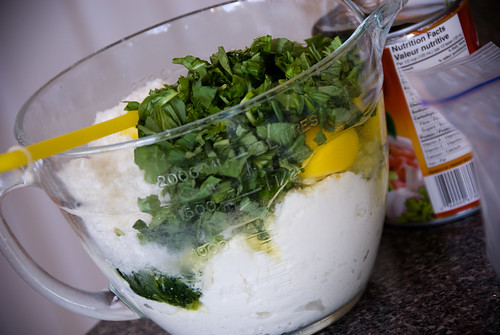
4. In a medium bowl, mix together the ricotta, spinach, basil, parmesan, egg and salt.

spinach, basil and ricotta filling

5. To assemble the lasagna, start with 1 cup of the meat sauce on the bottom of the 9x13 pan. Top with 4 lasagna noodles. Spread 1/3 of the remaining sauce over the noodles. Top with 4 more noodles. Add 1/3 of the sauce again, then add ALL of the ricotta spinach mixture. Top with 4 more noodles. Add the rest of the sauce and spread evenly.

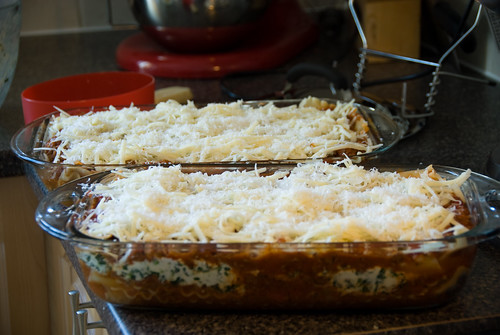
one for now, one for later

6. Top it all off with the grated mozzarella. I like to grate a little more parmesan on top of mine too.

7. Spray some oil on a piece of foil and cover your lasagna. Bake at 375F for 35 minutes. Uncover and bake an additional 15 minutes. (I like to broil my lasagna for 2-3 minutes at the end so the cheese gets nice and brown). Let stand for about 10-15 minutes before serving (or it will be a soggy mess).

I served this to a crowd varying from teens to not-so-teens, and it was met with universal approval.

yummy

Dessert was SUPER simple. In fact, it was actually an afterthought. Lil Z was fussing like mad so I stuck her in the baby bjorn (similar to the picture below, but without the monkey suit, lol).

trick or treat...

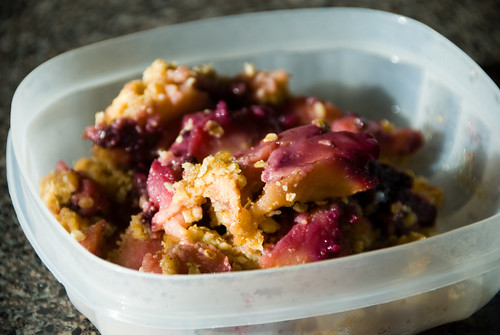
Since she shares my addiction to the food network, I thought she might enjoy watching me cook. We made an apple-blueberry crisp. I forgot to take a picture last night, but these are the leftovers I ate for brekkie today - it's quick, easy, and among the least-bad-for-you desserts you can make:

Last minute Apple Crisp
20081120-DSC_0056

6 apples (I had idareds that proved unsuitable for snacking due to mushiness)
1/3 c craisins (I happened to have them)
1/2 c frozen blueberries (again, had them on hand)
1/2 lemon

Topping:
3/4 c flour
1/2 c oats
1/2 c brown sugar
1 t cinnamon
1/4 t cardamom
4 T softened butter

1. Peel and core apples. Chop them. Z seemed quite fascinated by this whole process. Dump them in a greased pan (I used a 9x13 because I like to have a thinner layer of apples).

2. Sprinkle craisins and blueberries over top. Squeeze the juice from the 1/2 lemon over top.

3. Combine the flour and the butter (I used a pastry blender). Stir in the oats, brown sugar, cinnamon and cardamom. Take about 1/3 c. of the mixture and combine it with the apples.

4. Dump the rest of the mixture on top and press into a sort of crust. Bake at 350F for about 40-45 minutes (until the apples are cooked).

Yum. Very easy to put together, and odds are, if you have apples on hand, you can probably make an apple crisp. It's super forgiving too - you can change the ratios of things, add different spices...as long as there are apples and cinnamon involved...odds are that it will be yummy. The blueberries give it a nice purpley colour, so I always like to add them...they aren't necessary though.

Z seemed to enjoy her own personal cooking show, along with the witty narration and soundtrack (which included such top 10 hits as the alphabet and that stupid mini-wheats song that I can't stop singing to her because it always makes her grin...hehe). I've already started shopping for her first play kitchen...

thanks for reading!

Sunday, October 14, 2007

crowdsourcing mass cookery

Pin It Now!

There's been a lot of buzz lately about the infinite power of crowdsourcing. While the word is generally a neologism associated with the online world, it can, like so many things, be applied to other aspects of our lives.

Like dinner. :)

I was introduced to this whole concept when asked if I would be interested in helping out with a progressive dinner being planned for some local university students. This involved having 3 successive sessions of 15+ hungry students stopping into my house for some main course.

Or, in the unforgettable words of Queen Ant, "they come, they eat, they leave."

Always eager for new challenges, I accepted. And then I started thinking....wtf. You've all seen photos of my paltry little kitchen...not exactly the stuff of which mass production is made. And I wasn't even sure if it was a place where mass production could be made...you see, I don't even have a huge pot. My biggest pot is a 6qt. Which contains precisely (if you fill it to the brim and don't stir) 24 cups of liquid. And if you start doing the math....24 cups for 50ish people is not really going to satisfy.

So my mind was set aflurry with what exactly I could feed these people. In a group that size, you're bound to have the intersection of all sorts of likes, dislikes, allergies and ideologies.

I had a few thoughts cross my mind (briefly considered lasagna, but it always seems like such a cop-out, and people end up eating way too many bad lasagnas in their lives anyway....I didn't want to go there).

So I came up with burritos. And it worked PERFECTLY. Here are a few of the kick-ass attributes of the burrito:
- it's easy to make
- you can easily make several kinds (hence negating the need for one giant pot for filling)
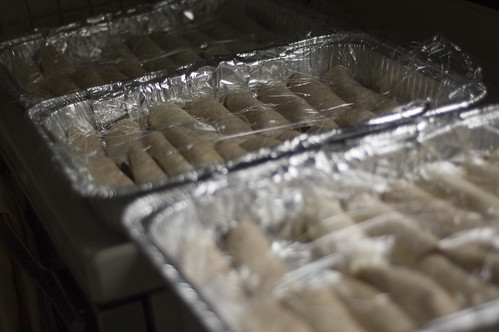
- trays of burritos are stackable (key when one has only a single fridge)
- you can make the filling in advance
- you can round out the meal with a pot of refried beans and some mexican-seasoned rice
- chips and salsa on the table fill in the blanks

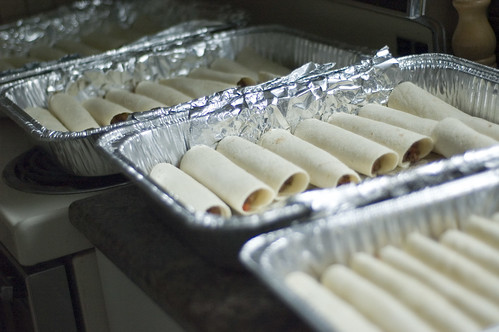
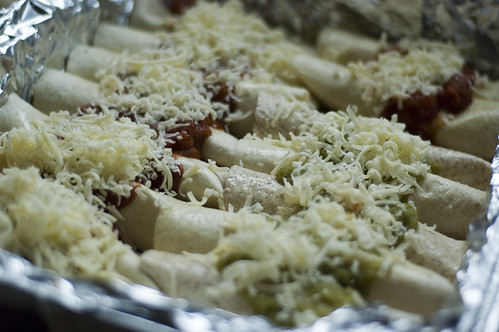
Platters with beef burritos:
that's a lot of burritos

Other things I learned:
- 2 kg of rice was way too much. I filled 3 3-qt corningware casseroles with rice and didn't even go through one. It's a good thing we like rice.
- 5 pounds of ground beef will make 70 burritos (who would have thought?)
- chicken burritos are the most popular, followed by beef, then trailing way behind is bean (even though they are really good!)
- people love fruit punch
- I kinda have fun hosting that many people in a night
- it's faster and easier to make 140 burritos, 6 qts of refried beans and 12 qts of rice than it is to throw a dinner party for 4
- 15 x 24 inch aluminum roasting pans kick ass
- university students are, for the most part, very polite and lovely people (not that I was anticipating otherwise, but it was still nice)
- hubs is the best sous-chef ever (I think he chopped almost everything!)
- the grating function of the food processor is possibly the best thing ever - I grated about 3 pounds of cheese in five minutes!
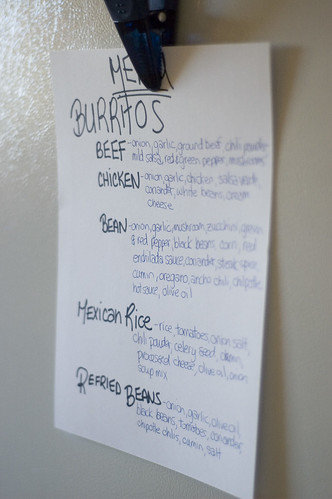
- labelling everything and listing ingredients might be geeky, but it's appreciated nonetheless
the menu

Timing was overall pretty short between the groups of people (15 minutes) so hubs and I developed a great system for making sure food was hot, safe and fresh....

1. As people arrived, I directed them to serve themselves drinks from a table I had set up (assortment of pop, juice and ice tea).

2. Then they would grab their plate and head in to the kitchen....I would serve their choice of burrito to them (because I could tell them all apart), then they would serve themselves rice and beans.

Platter of beef (topped with red salsa) and chicken (topped with green) burritos:

lots of burritos

Platter of chicken and bean burritos (bean were whole wheat shells):
more burritos


3. As soon as I served the last person, I would take out the next 2 platters of burritos, top them with their respective sauces, dress with cheese and put in the oven at 350F. I would switch positions after 15 minutes. The beans would go back on their burner. The rice would get nuked again (no more space in the oven).

4. As soon as the group left (and most were kind enough to bring the dishes into the kitchen!), hubs would wash the plates (I am lucky enough to have about 40 small dinner plates), I would distribute napkin/flatware (I tasked hubs to rolling up a knife and fork in pretty fall napkins beforehand....made setting the table very quick).

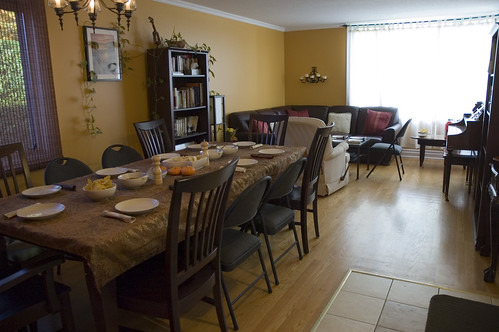
Here is the LR/DR set-up:
the set-up

other spectrum of living room set up

5. Put out all the plates, top up the condiments as needed (hot salsa, milk salsa, sour cream, guacamole and taco chips). I would also add more drinks and ice too.

6. Start the process over again with each group.

So....should any of you ever get a hankering for mass producing a big ole pile of burritos, here are some recipes:

Beef Burritos - this was me catering to the MPV eaters....not spicy, nothing weird in it)
(makes about 70, using 6-inch shells)
5 lbs of ground beef....

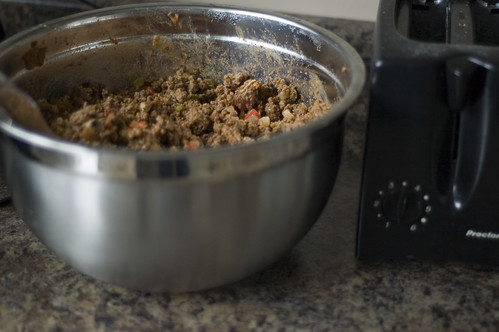
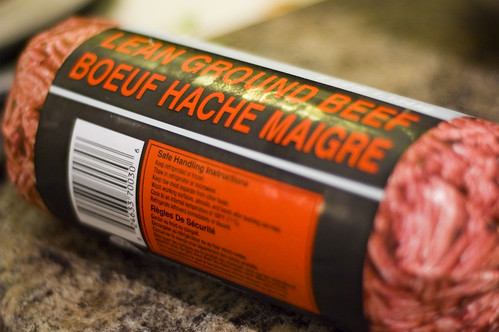
5 pounds lean ground beef (I admit it...I caved and bought the stuff that comes in a tube....gross, eh? It actually smelled really good while it was cooking though, so not so bad as I suspected it might be....)
who knew beef came in a tube?  ew

6 cloves garlic
3 cups chopped onion
3 T chili powder
2 cups mild salsa
1 red pepper, chopped
1 green pepper, chopped
2 cups chopped mushrooms

1. In two batches, cook the ground beef THOROUGHLY in a large, deep skillet. When it's mostly cooked, add half the garlic, onion, chili powder, red pepper, green pepper and mushrooms. Cook until meat is really really cooked.

2. Drain in a strainer (oily burritos are NASTY).

3. Dump into a very large bowl (seriously, the bigger the better.....I think my bowl is almost 10 qts).

4. Repeat with remaining beef and veggies.

5. Stir in enough salsa so the mixture is moistened (I bought my salsa in half gallon jugs).

6. I made the filling the day before and just popped the bowl in the fridge.

7. To make burritos, gather your shells, and use about 2 spoonfuls of filling per shell (I was using a regular flatware spoon and scooping). Roll up and place in a pan. (if you're using larger shells, you can fold them properly, but with six-inch shells and making 140 of them all told, I wasn't going to fuss with that).

8. They can be frozen like this, or refrigerated and stacked. To bake, top salsa and cheese (I like to put both in a line down the middle, because it's easier to separate them when they aren't completely glued together with cheese). Bake at 350F for about half an hour.

Chicken and White Bean Burritos with Salsa Verde (for the more adventurous eater)
makes about 33 burritos
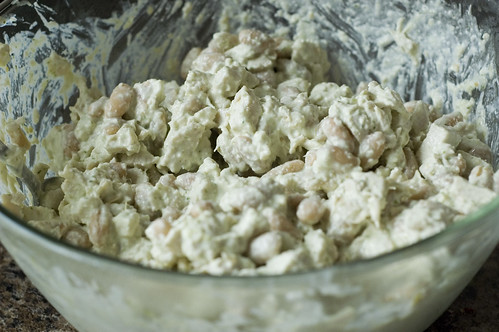
chicken, white bean and cheese filling

3 lbs of chicken breast, cooked and chopped into small cubes
2 cans white beans, drained and rinsed
1.5 blocks of light cream cheese, softened
Salsa verde:
24 oz (about 3 cups) of salsa verde (Herdez brand)
3/4 c. coriander
6 cloves garlic
3 cups onions

1. Place the salsa verde, coriander, garlic and onions in the blender and blend away.
2. Mix the chicken, beans, cream cheese and 1.5 cups of the green stuff together.
3. Roll as per beef burritos.
4. To bake, top with the rest of the green stuff, and a bit of cheese. Bake at 350F for 30 minutes.
These ones are a HUGE hit. I've made them before and I'll make them again.

Black Bean and Veggie Burritos - for vegetarians and people who just like food....these are really good!
makes 40-45 burritos
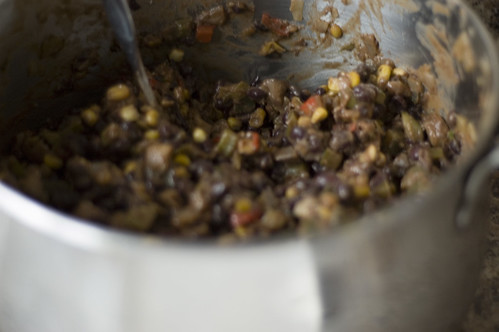
bean burrito filling

3 cups onion, chopped
6 cloves garlic
4 cups chopped mushrooms
2 chopped zucchinis
1 green pepper, chopped
1 red pepper, chopped
3 cans black beans
2 cups corn
1 can red enchilada sauce
1/2 cup chopped coriander
1 T steak spice
1 T cumin
1 t oregano
a few shakes of ancho chile powder
chipotle hot sauce
3-4 T olive oil

1. In a large pot (6 qt!), heat the olive oil over medium heat. Add onion and garlic. Cook until softening. Add the mushrooms, zucchini, and peppers. Cook until the mushrooms are releasing their liquid.

2. Add the beans, corn, enchilada sauce and spices. Continue to cook until almost all of the liquid has evaporated (if your filling is liquidy, you will have soggy, watery burritos....gross).

3. Wait for your filling to cool and stuff burritos.

4. To bake, top with more red enchilada sauce, and then cheese. Bake at 350F for 30 minutes.

Mexican Rice Overdrive
This stuff is okay. Not the best thing in the world, but tasty, and will fill people up. If you were making biiiiiiig burritos, it would be a tasty addition. But feel free to scale it down, eh?

2 kg parboiled rice, uncooked
1 can diced tomatoes
1 T onion salt
2 T chili powder
1 t celery seed
1 T cumin
1 small jar of processed cheese food (aka cheeze whiz....I know...GROSSS....but trust me when I say it gives the rice a really pleasant texture.....I do now how gross it is)
1 T olive oil
1/2 package onion soup mix

1. Cook rice (I did it in two session in my rice cooker).
2. Meanwhile, in a medium sauce pan (3 qt), combine remaining ingredients. Bring to a boil until cheez melts.
3. Mix together with cooked rice (in a GIANT bowl).

Makes about 9 quarts.

Refried Bean Bonanza
3-4 T olive oil
6 onions, chopped
8 cloves garlic
6 cans black beans, drained and rinsed
1 can diced tomatoes
1/2 cup chopped coriander
5-6 chipotle chilies in adobo sauce
1 T cumin
salt

1. Cook onions and garlic thoroughly in a 6 qt pot.
2. Add remaining ingredients. Heat thoroughly and partially mash with a potato masher. You can make them really smooth, but I prefer mine at a 'bean dip' consistency. Taste the mixture and season accordingly.

These beans are very tasty and slightly spicy.

So now I will be eating burritos for the next month.

YUM.

Sorry for the big long break between posts. Thanksgiving chez DNM is up next though.....

Thanks for reading and sticking with me!

Saturday, September 01, 2007

quiche for the pastry averse

Pin It Now!

Let's face it, my sordid history with pastry has been somewhat faithfully documented since the inception of this blog. I hate working with pastry. I love eating it. I hate how it deposits itself to my backside after I've eaten it. And so the circle continues.

But it's hard to ignore the sheer comfort appeal of a quiche-like tart. It's yummy, it's quick to put together and it is such a nice dinner to have every once in a while.

So when I came across this next recipe, I was actually quite thrilled, The original called for squishing together pillsbury breadsticks to make a crust, but what with the acquisition of my new kitchenaid, I wasn't going to allow that nasty little shortcut a place in my kitchen.

Why defer to pillsbury when you can force slave labour out of hubs? He had the fortune (misfortune?) to be working from home that day, so against his loud protestations, I kindly coerced him into using the majestic kitchen aid to put together some dough (using the KA pizza dough recipe). I used half for this recipe, and the other half is sitting in my fridge. I don't yet have plans for it, but I will.

This tart was really yummy, and I ended up eating it for three days straight, due to an unanticipated and rather elongated power failure that interfered with other dinner plans. Yummy.

Leek and Potato Tart with Aged CHeddar
stolen and modified from cooking light

time to eat

1/2 lb of pizza dough (use your favourite recipe, one that uses about 3.5 cups of flour, and you'll need half of this....you can also cheat and use a premade dough)
Cooking spray
1 teaspoon vegetable oil
1 cup thinly sliced leek (about 1 large)
1/4 teaspoon black pepper
1 medium peeled baking potato, halved lengthwise and cut into 1/4-inch-thick slices (about 1 cup)
1 cup fat-free milk (I used 2% because hubs bought the milk again)
1/2 cup egg substitute (I used 2 eggs...next time I would use three to up the egg/milk ratio)
1/3 cup (1 1/2 ounces) grated cheese (I used extra-old cheddar - very yummy!)
2 tablespoons grated fresh Parmesan cheese
1 tablespoon Dijon mustard

1. Preheat oven to 375°.

2. Spread dough into a 9" glass pie plate (take note that if you drop a pyrex pie plate on ceramic, it actually explodes into tiny little bits...seriously, not one chunk is left unscathed....)
my crust is kinda fat

3. Heat the oil in a large nonstick skillet over medium-high heat. Add the leek, pepper, and potato; sauté 4 minutes (I suggest sautéing a little bit longer, up to 10 minutes). Spread leek mixture into prepared crust.
potatoes and leeks

4. Place the milk, egg substitute, cheeses, and mustard in a blender, and process until smooth. Pour milk mixture over leek mixture.
pouring the egg/milk mixture onto the veggies

5. Bake at 375° for 40 minutes; let stand for 10 minutes. (Consider baking for a little longer - my potatoes were still not totally tender....it was still awesome, but could have been marginally awesomer). And yes, that is now a word.

Also, shock of all shocks, my tart popped right outta the pan after the requisite 10 minute waitin period.

potato cheddar tarte

Yield: 8 servings (serving size: 1 wedge)

CALORIES 195 (26% from fat); FAT 5.6g (sat 1.6g,mono 1g,poly 0.7g); PROTEIN 8.9g; CHOLESTEROL 8mg; CALCIUM 135mg; SODIUM 435mg; FIBER 1.1g; IRON 1.8mg; CARBOHYDRATE 26.4g

Yum. This would make a great brunch dish too. Thanks for reading! And as always, I live for your comments. :)

Friday, August 31, 2007

tasty enchiladic quickie

Pin It Now!

I love enchiladas, burritos, tacos, or anything that purports to be pseudo-mexican inspired. O-town is not exactly a hotbed of mexican culinary authenticity, but the bits I've had have still been more than enough to give me a taste of this zesty cuisine.

My initial plan for last night was to make up a batch of chili-cheese enchiladas. Something quick, easy and healthy (using black beans and veggie ground round). I was going to make 12 of the little suckers and figured that should easily feed 5 people.

But then I remembered who was coming to dinner. And promptly realized that 12 enchilads would be a mere drop in the bucket. So I frantically went off in search of another enchilada recipe to offer as an alternative....came upon a recipe for chicken enchiladas with salsa verde. Behold, we have a winner. I used turkey instead of chicken (and you could really substitute whatever your heart desired) and they were FABULOUS.

Both kinds were awesome. I didn't take photos, because I didn't realize just how awesome they would be, but trust me when I say that you should make these. It's pretty quick to make up the 2 pans and you too can be a dinner hero.

Chicken Enchiladas with Salsa Verde
stolen from Cooking Light.com

Ingredients
1 cup chopped onion
1/4 cup chopped fresh cilantro
2 garlic cloves, minced
1 (7-ounce) bottle salsa verde (such as Herdez brand - Ottawa readers, you can find this at the Gloucester Loblaws and the Bells Corners Price CHopper, amont other places)
2 cups shredded cooked chicken breast (used turkey and it was fab)
1/3 cup (3 ounces) 1/3-less-fat cream cheese, softened
8 (6-inch) tortillas (corn tortillas were past their sell-by date so I used whole wheat)
Cooking spray
1/4 cup (1 ounce) crumbled queso fresco (didn't have time to go searching for this, so just used cheddar)
1/2 teaspoon chili powder
4 lime wedges (bought 'em and forgot to use 'em)
Cilantro sprigs (optional)


Preparation
Preheat oven to 425°.
1. Combine first 4 ingredients in a blender; process until smooth. Combine chicken and cream cheese in a large bowl. Stir in 1/2 cup salsa mixture. Reserve remaining salsa mixture.

2. Warm tortillas to soften them (if necessary) Spoon about 1/4 cup chicken mixture down center of tortilla; roll up. Place tortilla, seam-side down, in an 11 x 7-inch baking dish coated with cooking spray. Repeat procedure with remaining tortillas, broth, and chicken mixture.

Pour remaining salsa mixture over enchiladas; sprinkle evenly with queso fresco and chili powder. Bake at 425° for 18 minutes or until thoroughly heated. Serve with lime wedges. Garnish with cilantro sprigs, if desired.

Yield
4 servings (serving size: 2 enchiladas and 1 lime wedge)

Nutritional Information
CALORIES 327(26% from fat); FAT 9.5g (sat 4.4g,mono 2.9g,poly 1.3g); PROTEIN 28.5g; CHOLESTEROL 78mg; CALCIUM 149mg; SODIUM 493mg; FIBER 3.3g; IRON 1.8mg; CARBOHYDRATE 31g

Chili Cheese Black Bean Enchilada

Ingredients
Cooking spray
1/2 cup chopped onion
1/2 teaspoon ground cumin
1/2 teaspoon dried oregano
1/2 teaspoon chili powder
2 garlic cloves, minced
1 (15-ounce) can black beans, rinsed and drained
1 (12-ounce) bag frozen soy crumbles, thawed (I used a package of Yves veggie ground round)
3/4 cup bottled salsa
1/3 cup (3 ounces) block-style fat-free cream cheese, softened
1 cup (4 ounces) shredded reduced-fat extrasharp cheddar cheese, divided
12 (6-inch) corn tortillas (could only get whole wheat)
1 (10-ounce) can enchilada sauce (can be found at either the Gloucester Centre Loblaws or Bells Corners Price Chopper)


Preparation
Preheat oven to 350°.
1. Heat a large nonstick skillet coated with cooking spray over medium-high heat. Add onion, and sauté 4 minutes or until tender. Stir in cumin, oregano, chili powder, garlic, beans, and soy crumbles, and cook 2 minutes, stirring mixture frequently.

2. Stir in salsa, and cook 1 minute. Remove from heat, and add cream cheese and 1/2 cup cheddar cheese, stirring until cheese melts.

3. Warm tortillas according to package directions. Spread 1/3 cup enchilada sauce in bottom of a 13 x 9-inch baking dish coated with cooking spray. Spoon about 1/3 cup black bean mixture down center of each tortilla, and roll up. Arrange enchiladas, seam sides down, crosswise in dish. Pour remaining enchilada sauce evenly over enchiladas, and sprinkle with 1/2 cup cheddar. Bake at 350° for 20 minutes or until thoroughly heated.

Yield
6 servings (serving size: 2 enchiladas)

Nutritional Information
CALORIES 386(30% from fat); FAT 12.9g (sat 4g,mono 3.8g,poly 3.4g); PROTEIN 26.8g; CHOLESTEROL 17mg; CALCIUM 390mg; SODIUM 995mg; FIBER 10.7g; IRON 5.4mg; CARBOHYDRATE 43.9g


This was awesome. There was barely enough left for my lunch today! I served the enchiladas with salsa and sour cream and would happily eat them at any time of day. YUM. This would be a great dish to make up in advance for company, and the best part is that you can have one of each enchilada, still have a fabulous dinner for less than 400 calories, and it's loaded with protein and fibre and really does a great job of making you feel full. YUM.

Tuesday, August 14, 2007

three for one

Pin It Now!

I'm beginning to think that I'm in serious need of a vacation. Lately, I just feel burnt out and useless and like I need to just spend a few days loafing around with no nagging concerns.

Work is busy, home seems busy, and I just want a break.

But I'm not getting one, so here is a quick post, with three tasty meals that I ate in the past week. It's a little too late for me to witticize, but I do have something yummy (hopefully) coming for you all on Thursday. Stay tuned.

The first dish is that last part of my 'eating for free' week. Good things hide in the back of my pantry and in the bowels of my freezer. An army could probably live for a month on the sheer amount of random starchy bits I have stocked up (including a container of some grain....I don't know what it is, and hence have no idea how to cook it).

At any rate, I came up with this when my dad was visiting...somehow, he read of 'eating for free' week, and ended up bringing some of his own food (totally NOT allowed, hehe), as he was fearing for his tummy.

But he needn't have feared. I put a number of italian antipasto staples to work and dinner was tasty, flavourful and very filling. No empty bellies here.

Scooby Doo Pasta with Pesto Cream Sauce
(I know, I know...another seafood pasta....what can I say, it's a household fave)

1/2 lb frozen calamari
1/2 lb frozen scallops
1 lb imitation crab

1 onion
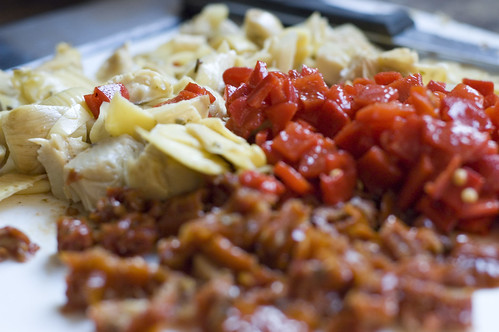
1 jar marinated artichokes
1 jar roasted red pepper
1/2 jar oil-packed sundried tomatoes
1 small jar of pesto
1 tomato
lots of garlic
1 can of evaporated milk (I use skim)
parmesan cheese
pepperoncini peppers (optional)
1 pound pasta (I used scooby doos, also known as tortoglioni...I think...)

1. Put a large pot on the stove to boil.

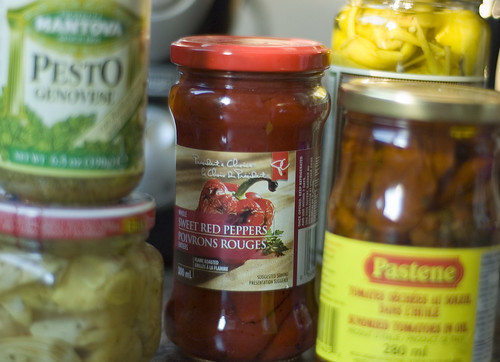
2. Gather your ingredients in all their prefabricated goodness. Admire.
DSC_1582

3. Heat a touch of olive oil in a large skillet, add seafood, onion and garlic.
DSC_1584

4. Cook gently (medium-low heat) until almost done. Meanwhile, chop the roasted red pepper, sundried tomatoes, artichokes, and the fresh tomato.
DSC_1583

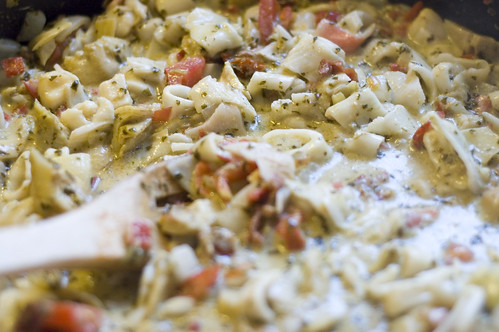
5. Add all this stuff to the pan. Incorporate pesto and evaporated milk (a good substitute for cream - and it won't curdle).

6. Grate parmesan cheese over the pan (makes it extra yummy).
DSC_1588

7. When water boils, add pasta and cook to desired tenderness.

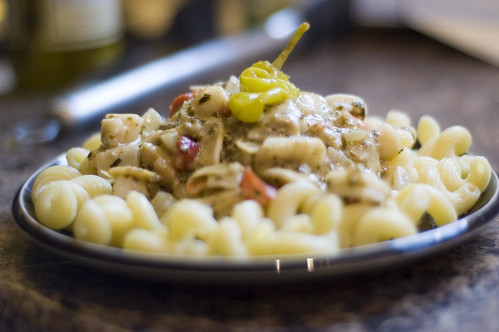
8. Serve sauce over pasta, top with parmesan and a pepperoncini if desired (after the photo, I passed mine along to hubs, who was all too pleased to indulge).

DSC_1593

YUM. Fast, easy, not the worst thing in the world for you to eat, and a great way to work on cleaning out that pantry!

I was tempted to place this recipe in its own post and title it "eating for poo", but hubs vetoed the idea. So I'm burying the moniker deep in this post, in hopes that he won't read. hehe.

I will explain (and it isn't quite as gross as it sounds). The backstory is that a year or two ago, our dryer was smoking incessantly (like more than your average chain-smoker). We called an appliance repairman to come take a look, and it turned out to be this very cool sicilian guy. Our dryer is located in our basement, and happens to be right next to our rabbit cage (housing our two fat rabbits). This guy was quite excited by the sheer amount of poop these guys generate (must be seen to be believed) and we quickly struck a deal. We give him poo. He gives us fresh home grown veggies (that have, of course, been fertilized by said poo). Hubs is a bit grossed out by this, but I'm happy to play around a bit with backyard bounty I was not given the chance to kill.

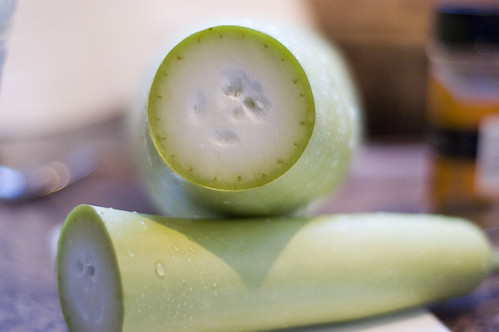
Anyway, this time, he came buy with the strangest looking zucchini I've ever seen...apparently, it's some sort of sicilian zucchini.
DSC_1759

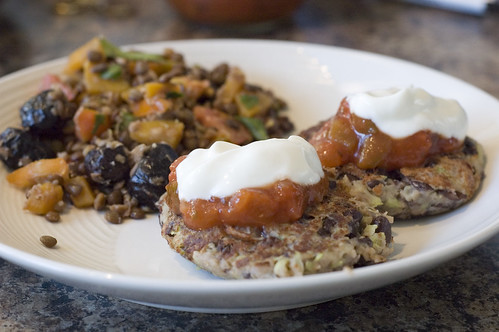
And it's also huge (almost rabbit-sized....). So this is what I started making with it. Also, ignore the lentil salad in the background. It was not very yummy and I'm not sharing the recipe, because I could barely choke it down. I think I like the idea of a nice lentil salad a lot better than the reality. Pu-ah.

Black Bean and Zucchini Cakes
DSC_1768

15 ounces canned black beans, drained and rinsed
2 egg whites
1tsp chopped roasted garlic (I used regular garlic)
1 T ground cumin
1 T chili powder
1 1/3 cup shredded zucchini
1/3 plain whole wheat/grain bread crumbs


1. Mash the beans a bit with the fork, (so there is some whole, and some mushed), mix in the rest of the ingredients.
DSC_1761

2. Spray a non stick pan with oil, heat over medium heat. Make mounds in the pan and flatten a bit with the back of spoon. Cook for about 4-8 minutes.

Serve with Salsa and sour cream

Easy and quite tasty.

And then I have yet another risotto. It's starting to be come a favourite. It's yummy, requires few ingredients, and you can vary it with tons of success. Here's a hint - pretty much all risotto is the same - 1.5 cups of rice and about 5 cups of broth. It's just the seasonings that change.

Wild Mushroom Risotto

1 pound mixed wild mushrooms (I used shitake and oyster)
1/4 c. minced shallot
1 T olive oil
1 T butter
1/4 c. white wine (or whatever you have...I used vermouth and it was not bad at all!)
1.5 cups arborio rice
5-6 cups chicken broth
1/2 c. parmesan cheese
1 T butter
2 T fresh herbs (HIGHLY recommend rosemary here, but alas, the store was out...so I used basil...not fragrant enough with the woodsy mushrooms)

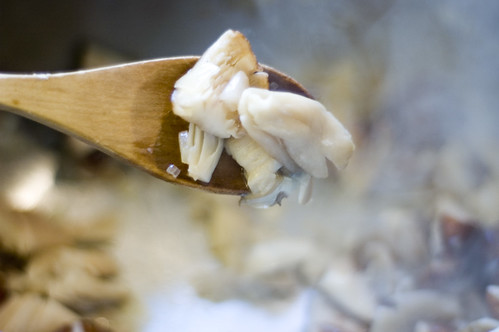
1. Chop your mushrooms and shallot. Meanwhile, melt butter with olive oil in a large pot.
DSC_1730

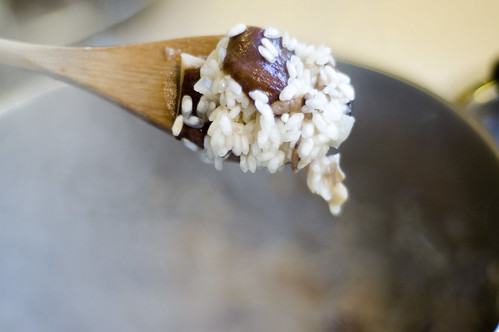
2. Add mushrooms and shallot and sauté until shallot is translucent. Add rice and give a good stir (about 30 seconds).
DSC_1735

Add your booze of choice. Stir more.
DSC_1736

3. Add broth, 1/2 cup at a time, and stir pretty much incessantly for the next 30-35 minutes. When you start to run out of broth, add more. Keep on truckin'
DSC_1737

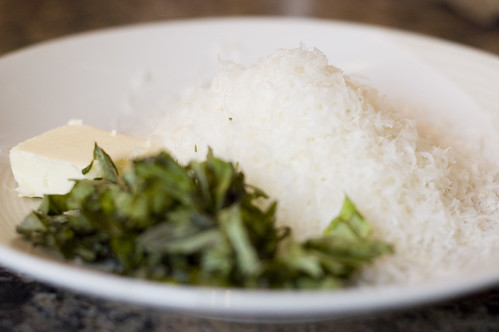
4. When rice is done to your liking (start tasting after about 20 minutes), stop adding broth. Stir in parmesan cheese, butter and fresh herbs.
DSC_1739

Taste and see if it needs anything more. Serve immediately (does not keep well).

We were going to have it plain, but hubs was insisting on shrimp. So he sautéed it with about 8 cloves of garlic, a lot of butter and a bit of lemon juice. It was good.

DSC_1740

Thanks for visiting, thanks for commenting, and I swear, it won't be two weeks before my next picture post. Your patience with my procrastination is most appreciated.

Related Posts with Thumbnails