Photobucket - Video and Image Hosting

Sunday, October 30, 2011

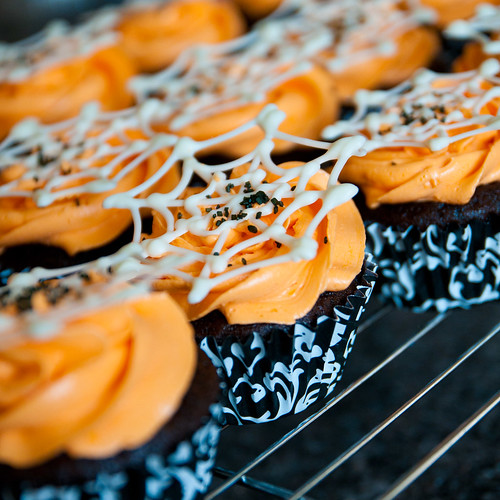
spooky spiderweb cupcakes

Pin It Now!

DSC_3056
They really aren't that spooky - more cute than anything!

This is just going to be a quick post, but thought I would share.

I made double chocolate cupcakes, using this cake recipe I've used millions of times before (it makes 36 cupcakes, if you use a 1/4 c measure to scoop the cupcakes). Bake at 300F for about 21 minutes (don't overbake, or they will be dry). At some point, I'd kinda like to experiment in making this recipe a tiny bit less sweet (maybe less sugar, or using unsweetened chocolate instead of dark chocolate....)...otherwise, it's sheer chocolate perfection. It's nice and soft, and moist and deeply chocolatey. OMNOMNOM.

I tried a different icing technique - I'd recently read about icings that involved a cooked milk/flour mixture incorporated into whipped sugar and butter. I used this whipped vanilla buttercream recipe from Epicurious. I was intrigued for a couple of reasons....first, the flour/milk would cut the pure buttery sweetness of a classic buttercream, and second, I had hopes that the use of granulated sugar would avoid that powdery blech taste of regular buttercream too. I wasn't disappointed. I made this recipe, doubled it, and added the zest of an orange, along with enough orange gel colour to make them a bit more Halloweeney. The icing is delicious - it has a wonderfully soft texture and isn't as dead sweet as most. I'll try this technique again!

Last, I topped them with white chocolate spiderwebs. I was actually shocked at how easy they were to make - I just purchased some white chocolate pastilles, melted them, and piped them from a ziploc bag (with the teeeniest snip ever in the corner). I drew a freehand template with a sharpie, and just piped onto waxed paper overtop of the template.

DSC_3058


For good measure, I piped a few freehand ghosts too (had too much chocolate left, and was not convinced that any of my spiderwebs would make it off the paper). I used currants for eyes, and sprinkled with a little bit of black glittery sugar.

DSC_3060

It was super easy to do (even for me, who is COMPLETELY talentless at piping/decorating) and they came off the wax paper pretty easily too (no need to chill in the fridge). You'll see that Geek Sweets has a beautiful photo walkthrough of these spiderwebs. Check it out!

DSC_3063

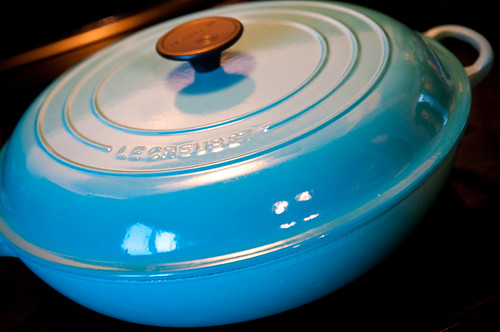
Coming up soon - a post about my $50 Food Day dinner party (four courses AND bread for $5/person), and a phenomenal braised chicken cashew curry. I have a new toy.....isn't it beautiful? Look forward to lots of braising in the near future. ;)

DSC_3073

Oh, and last but not least, mini-foodie two is on the way....coming sometime in April. Should be good times...

Cheers, and thanks for reading!

Sunday, October 02, 2011

falling in love with fall comfort food

Pin It Now!

I have both the fortune and misfortune to live in a country where the weather is pretty much unpleasant for at least half the year. As a result, I'm surrounded by people who are completely devoted to and consumed by all things Summer and sun, and are all about taking advantage of everything the warm weather has to offer.


I am not one of those people. I actually don't like hot weather.

I love the Fall. I love cool crisp mornings, I love fiery bright forests, and I absolutely love Fall comfort food. Like obsessively love it. For the last month, I'll I've been able to think about is stew, roast, pot pie and root vegetables. I've actually been a bit gleeful that it's finally getting cold (kay, maybe I was not so gleeful to greet a cold, rainy, gray morning today...but I digress).

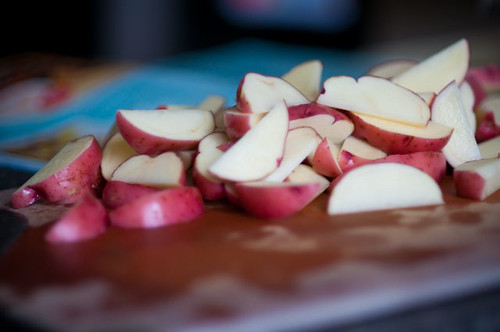
Mmmmmmmmmmm.....potatoes. I could live on potatoes.

DSC_2956

So I'm indulging myself. I hope you enjoy some of these treats as much as I have been. I've been in a cooking frenzy this weekend. On top of the wonderful feast I'm about to share, I also made a batch of baked beans today (from October's Clean Eating - on shelves now) (for tomorrow's dinner, to be gobbled up accompanied by cheddar garlic biscuits). For tonight, I made a bolognese sauce that Lil Z and I enjoyed with farfalle. YUM. PS - If you make that bolognese, add a can of tomato paste and a good palmful (2T) of italian herbs).

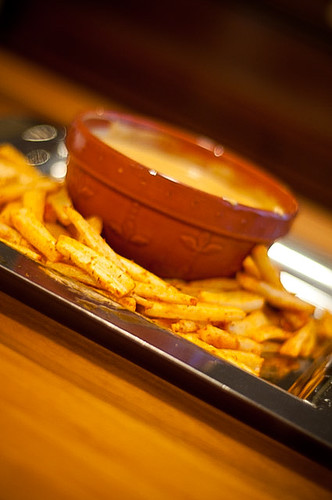
For Saturday's dinner, I wanted to use seasonal ingredients, so that basically gave me a harvest theme. I started the meal with my favourite curried parsnip fries, with yogourt curry dip. Love these guys - they are so easy to make and they usually go flying off the table. 1lb of parsnips feeds 3ish people, and 2lb of parsnips is best for a crowd. If people are dieting, then probably best to stick with 1lb of parsnips (I had some dieters in the crowd, and hence lots of leftovers).

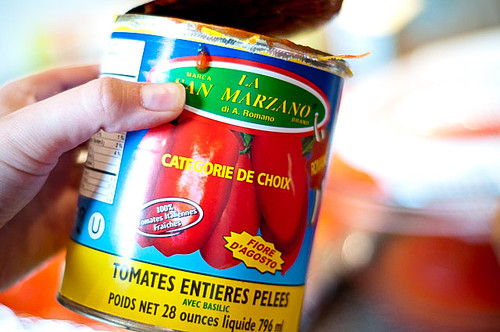
I followed the parsnip fries with the most decadent roasted tomato soup. I have recently discovered that Costco (in Canada, at least) carries these amazing San Marzano style tomatoes (no, not controlled origin, but they are San Marzano type of tomatoes, grown in that region of Italy....just no AOC-type label).

DSC_2936

They are delicious and for the price, I'm totally cool with the lack of formal pedigree. I found the recipe on SmittenKitchen (who in turn, had adapted it from America's Test Kitchen). At this point, I don't care who came up with it - it is genius, and I totally agree with the simplified processed instituted by Deb at SK, because there's no need to strain your soup. Not for a fall feast. Perhaps if the Queen were coming, but that wasn't happening for me, so I didn't strain either.

Now, I confess that I had *intended* on serving my soup with no-knead spelt bread. Unfortunately, this turned out to be one of those ideas that was fabulous in my head, and utter failure in reality. The night before the dinner, I had mixed my flour, yeast, water and salt. I waited the requisite 18 hours. But when I went to try to 'fold' my dough, I discovered that the water and the flour had not actually merged. It was strange. So I pitched it. Ergo, there was no bread with the soup. But it's just was well, because frankly, the soup is robust enough to stand on its own.

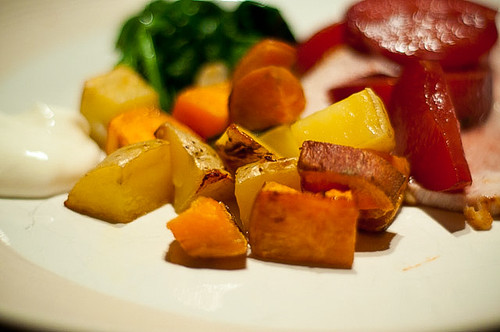
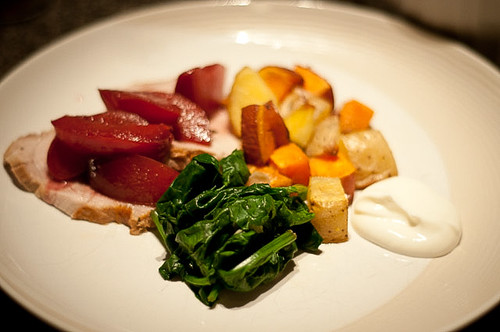
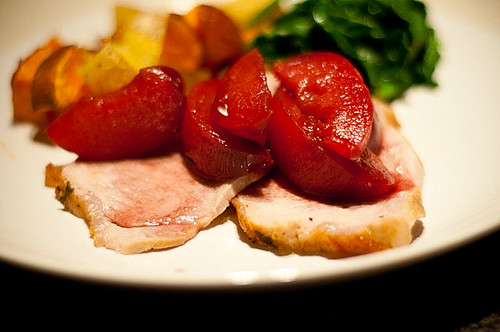
As a main, I served a centre-cut pork loin (I know, it's been four months since I posted, and I"m writing about pork AGAIN...sorry!), along with wine-poached plums. I accompanied this with sage-roasted potatoes/sweet potatoes, and sauteed spinach with garlic (spinach+garlic + splash of soy). It made for a colourful plate, with nicely balanced flavours. It would have been improved had I not (again...oops) overcooked the pork. In my defence, the thermometer went from 150F (not done enough for this particular dinner) to 170F in about five minutes. Zoinks. It was a little dry, but enough of the wine poaching liquid and it was very salvageable. :) Note to self: next time, take the damn roast out at 150F and let'er rest. Lesson learned. Again.

DSC_2959

For dessert, I finished it off with a chocolate spelt cake. Why the spelt obsession, you ask? My guest of honour has a wheat intolerance, and spelt is often well-tolerated by those with wheat sensitivities. That said, it's important to note that spelt is NOT okay for someone who has celiac disease, because it does have some gluten in it.

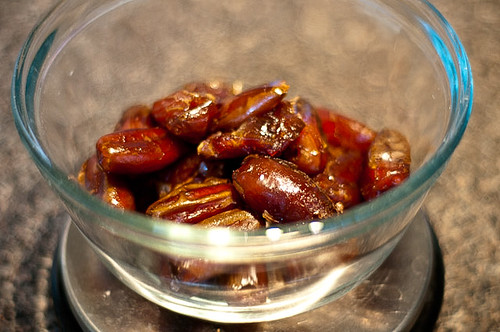
All that said, after my epic spelt bread failure, I was a little dubious of this chocolate cake actually being any good. It was a wholegrain chocolate cake, made only with cocoa (no actual chocolate) and filled with dates. I was definitely skeptical. I needn't have been though - it was actually pretty fabulous! You have to be careful not to overbake (take the cake out of the oven before any toothpick comes out dry....once the cake is set and mostly baked, take it out. It's delicious and even though you can see the odd date bit, but you really can't tell they are in there. And that means a lot, coming from me, because I maintain (and always have) that dates look like cockroaches.

DSC_2926
See? Pile of cockroaches. ;)

Parsnip fries with curry dip
DSC_2951

1 lb parsnips
1-2 T thai red curry paste
2 T vegetable oil
1 c plain yogourt
2 T indian curry paste (mild or hot, depending on your taste buds)
2 T honey/maple syrup

1. Preheat oven to 375F. Peel parsnips and cut into 'fries'. Look at these babies in all of their root vegetable-ey goodness.

DSC_2946

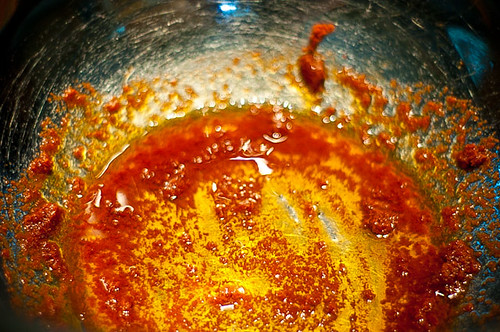
2. Combine thai curry paste and vegetable oil.

DSC_2947

Toss parsnips in oil/curry paste mixture.

3. Spread out parsnips on baking sheet (I line with parchment paper) and bake for about 30 minutes. You can go as long as 45, just watch the little bits for signs of burning.

4. Meanwhile, combine yogourt, indian curry paste and honey/syrup. Taste and adjust to your taste (i.e., if it's too hot, add yogourt. If it's too boring, add more curry paste. Add more sweetener if that is to your taste).

DSC_2948

5. Enjoy parsnip fries with dip! It's that easy.


Roasted Tomato Soup
(from Smitten Kitchen and America's Test Kitchen)
DSC_2954

2 (28-ounce) cans whole tomatoes packed in juice, drained, 3 cups juice reserved (I used San Marzanos)
1 1/2 tablespoons dark brown sugar
4 tablespoons unsalted butter
4 large shallots, minced (about 1/2 cup)
1 tablespoon tomato paste
Pinch ground allspice
2 tablespoon all-purpose flour
1 3/4 cups chicken stock, homemade or canned low-sodium
1/2 cup heavy cream
2 tablespoons brandy or dry sherry (I used marsala)
Salt and cayenne pepper

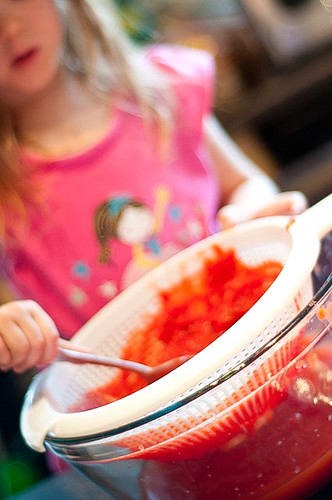
1. Adjust oven rack to upper-middle position and heat oven to 450°F. Line rimmed baking sheet with foil. With fingers, carefully open whole tomatoes over strainer set in bowl and push out seeds, allowing juices to fall through strainer into bowl. I had help for this part. ;)
DSC_2938

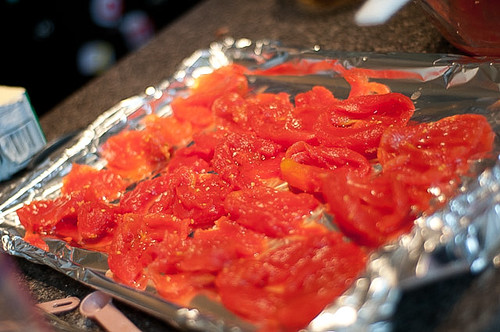
Spread seeded tomatoes in single layer on foil. Sprinkle evenly with brown sugar (I forgot to sprinkle with sugar....I just mixed it into the soup....I'm pretty sure it was almost as good!).

DSC_2940

Bake until all liquid has evaporated and tomatoes begin to color, about 30 minutes. Let tomatoes cool slightly, then peel them off foil; transfer to small bowl and set aside.

2. Heat butter over medium heat in large saucepan until foaming. Add shallots, tomato paste and allspice. Reduce heat to low, cover, and cook, stirring occasionally, until shallots are softened, 7 to 10 minutes. Add flour and cook, stirring constantly, until thoroughly combined, about 30 seconds. Gradually add chicken stock, whisking constantly to combine; stir in reserved tomato juice and roasted tomatoes. Cover, increase heat to medium, and bring to a boil. Reduce heat to low and simmer, stirring occasionally, to blend flavors, about 10 minutes.

3. Blend with the pulverizer of your choice (for me: immersion blender....no extra pots to clean!). Add cream and warm over low heat until hot, about 3 minutes. Off heat, stir in brandy and season with salt and cayenne. Serve immediately. I didn't find that extra salt was really needed, but to each his/her own.

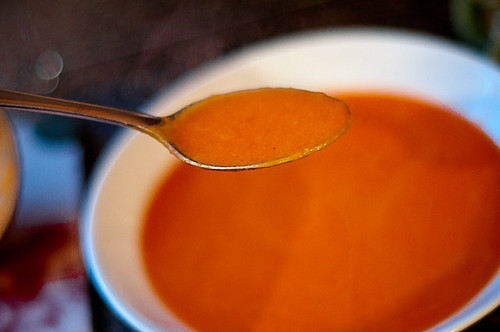
This soup was what canned tomato soup only wished it could be....sophisticated, rich, delicious and SO perfect for a cold rainy day. It WOULD be perfect with grilled cheese. Yum. I had grandiose plans of swirling some more on top of the soup, but it really doesn't need a thing....so it doesn't look fancy, but it's YUM. Make it.

Roasted Pork Loin with Poached Plums
stolen and slightly modified from Epicurious.com
makes 6 servings
DSC_2945
6 sweet firm red or black plums (such as Burgundies, Satsumas, or El Dorados; about 2 pounds), quartered, pitted
2 cups Pinot Gris or Viognier
1 cup dry red wine
2 whole star anise
cinnamon stick
1/4 cup plus 1 1/4 teaspoons sugar, divided
2 cups low-salt chicken broth
5 fresh thyme sprigs plus 1 teaspoon finely chopped thyme, divided

2 tablespoons chopped shallot

Pork
2 1 1/4-pound pork tenderloins (I used 1 centre-cut loin roast, about 2.5 lbs)
3 tablespoons olive oil, divided
2 teaspoons chopped fresh thyme
2 garlic cloves, minced
Chopped fresh chives

For Plums:
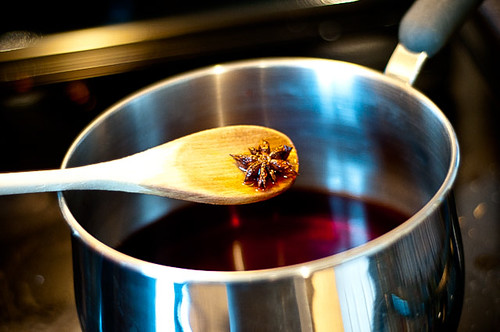
1. Combine first 5 ingredients and 1/4 cup sugar in heavy large saucepan; bring to boil, stirring until sugar dissolves. Reduce heat; simmer until plums are tender, about 20 minutes. Transfer plums to platter. Strain wine mixture.

Star anise is pretty.
DSC_2944

2. Return strained liquid to same saucepan. Add broth, thyme sprigs, and shallot. Boil until mixture is reduced to 1 cup, about 25 minutes. Strain sauce; stir in 1 1/4 teaspoons sugar and chopped thyme. Season with salt and pepper.

For Pork:
1. Preheat oven to 400°F. Brush pork with 1 tablespoon oil; sprinkle with thyme, garlic, salt, and pepper.

2. Heat remaining 2 tablespoons oil in large ovenproof skillet over medium-high heat. Add pork and cook until brown on all sides, turning often, about 5 minutes. Transfer skillet to oven, and roast pork until thermometer inserted into center registers 160F, about 20 minutes (I cooked mine for 40 minutes because center loins are much thicker than tenderloins....when in doubt, use a thermometer).

3. Remove skillet from oven and let pork stand 10 minutes. Cut pork crosswise into 1/2-inch-thick slices. Serve with poached plums and sauce. Sprinkle with chopped chives.

DSC_2958

Chocolate Espresso Spelt Cake


1 1/2 sticks (3/4 cup) unsalted butter, softened, plus additional for pan
3/4 cup unsweetened Dutch-process cocoa powder plus additional for dusting pan and cake (I confess to not knowing whether my cocoa is dutch process or not...it was Fry's...I think it is)
1 cup boiling-hot water
1 1/2 tablespoons instant-espresso powder
1 1/2 teaspoons vanilla
1 teaspoon baking soda
1/2 lb Medjool dates (12 to 14), pitted and coarsely chopped (1 1/2 cups)
2 cups spelt flour
2 teaspoons baking powder
3/4 teaspoon salt
1 cup packed dark brown sugar
2 large eggs

Special equipment: a 9-inch springform pan

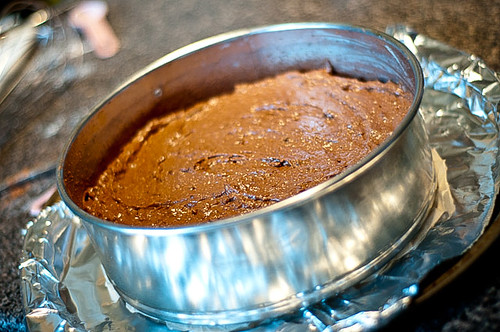
1. Put oven rack in middle position and preheat oven to 350°F. Butter springform pan, then lightly dust with cocoa powder, knocking out excess. I actually lined the bottom of my pan with parchment, just to be doubly sure, AND I baked it on a lined baking pan (I always do this because I do not trust liquidy substances in springform pans....learn from my mistakes)

DSC_2931

2. Stir together boiling-hot water, espresso powder, vanilla, and baking soda in a bowl, then add dates, mashing lightly with a fork, and steep until liquid cools to room temperature, about 10 minutes.

3. Whisk together spelt flour, cocoa powder, baking powder, and salt in another bowl. I'm told it's important to spoon spelt lightly into the measuring cup...so that's what I did.

DSC_2929

4. In yet another bowl (yes, by this point, your counter will be covered....), beat together butter and brown sugar with an electric mixer at medium-high speed until pale and fluffy. Add eggs 1 at a time, beating until just combined.

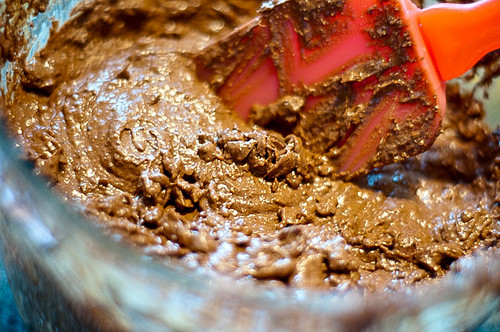
5. Beat in date mixture (batter will look curdled), then reduce speed to low and add flour mixture, mixing until just combined. The batter is pretty thick.

DSC_2933

6. Spoon batter into springform pan, smoothing top, and bake until a wooden pick or skewer inserted into center comes out with just a few crumbs....do NOT overbake....start checking at 40 minutes (the recipe says about 50 minutes to 1 hour).

DSC_2935

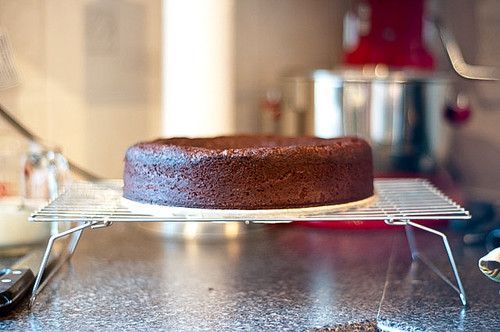
7. Cool cake in pan on a rack 5 minutes, then remove side of pan and cool cake on rack.

DSC_2942

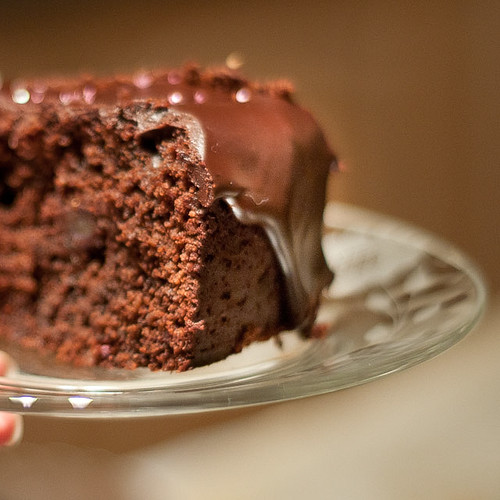
I decided to top my cake with a simple ganache - 4 oz whipping cream (35%), 4 oz dark chocolate (I used 70% Callebaut dark chocolate). Melt together in the microwave on 50% power. Stir until smooth. Pour over cake.....I cheated and used my ganache to fill in the slightly sunken middle of my cake. :)

DSC_2961

It was a great finish to the meal. Highly recommend it, especially if you or someone you know has issues with wheat. This would also be easy to make dairy-free (use vegan margarine or oil in lieu of butter) and I'm *told* (although cannot attest) that you can also use egg replacer in it. If someone tries that out, lemme know....

DSC_2968

Thanks for reading!


Sunday, June 12, 2011

bbq tastes of summer

Pin It Now!

DSC_0720

One of the many things to love about summer is that you just can't go wrong when you invite people over for a barbecue. Nobody expects anything fancy (most are content with burgers and hot dogs), and anything you do that's a bit outside of the box looks extra fancy as a result.

For example, tonight's dinner was nothing crazy - bbq'd pork tenderloin, roasted potatoes, salad and dessert - but having a little fun with the execution of the dinner made it super delicious.

Of course, things would have been helped had hubs not practically petrified the pork on the grill (you know that memo from the FDA last week, where they said it was safe to cook pork to 145F? hubs burned it). I was surprised that despite it's inner temperature reading of 180F (no, not joking), some parts of the pork were still not bad.....definitely not juice, but still edible. The thinner parts were chewy and hard (yuck), but the thicker middle parts were workable.

I'm so obsessed with cooking magazines that I took the chance to use two of my latest - June 2011 Clean Eating and Early Summer 2011 Food & Drink - they absolutely did not disappoint, and you'll see the recipes for southwestern cheddar potato wedges, salad with endive, feta, avocado and mint, and passionfruit pavlova following. They were all such delicious twists on ordinary...I felt compelled to share them.

DSC_0730

For the main, I opted for an asian-inspired (more pan-asian than any specific geographic location, hehe) pork tenderloin. Aside from charring, I thought the recipe would have benefited from longer marinating. I marinated about 3 hours, but I think that the flavours would have better permeated the pork with an overnight marinade. It was good though...I mean really, when there are meat and fire....it's hard for anything to be especially bad.

A little tip, when you are entertaining, make sure you have all of your garnishes ready to go before company arrives. In this instance, I had crumbled feta, cilantro, glaze for meat, grated cheddar and minced red peppers ready to go for last minute additions. It makes you look more organized and makes the whole meal flow a lot better.

DSC_0711

Honey-lime dressed salad with avocado, endive, mint and feta
DSC_0723
from Early Summer 2011 Food & Drink (will be online here soon)
As soon as I saw this combination of flavours, I knew it would be delicious. It's light and yummy and fresh...the mint adds that little bit of something extra, and it's all wonderfully balanced with the rich avocado, bright mind, sharp feta and yummy honey lime dressing all playing off each other. Can't go wrong with this. I'm sure it would be fine without the endive though - it was good, but you wouldn't be missing anything if you felt like not buying endives)

DSC_0703

DRESSING:
1/4 c olive oil
3 T lime juice
1 T honey
2 t dijon mustard
1 small garlic clove, minced
salt and pepper

SALAD:
1 large belgian endive (optional, I think)
1/2 cup mint leaves
8 cups greens (I used red leaf lettuce, baby spinach or mixed greens would work well)
1 large ripe but firm avocado, sliced
4 oz feta, crumbled

1. Combine dressing ingredients. Set aside (can be made in advance and fridgified)

2. Slice endive in half lengthwise. Cut out and discard core. Thinly slice. Coarsely tear mint leaves.

3. Combine salad ingredients in a large bowl. Toss. Add dressing. Toss. Eat immediately (will not keep).

Delicious. I think it would be great with a grilled chicken breast on top, or with a nice piece of fish, if you wanted to make the salad into a meal on its own).

Southwestern Cheddar Steak Fries
DSC_0719
stolen and lightly modified from the June 2011 issue of Clean Eating

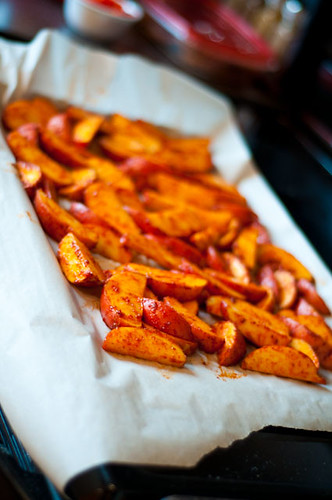
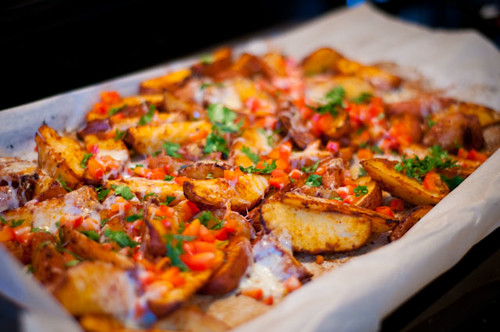
Potatoes are inherently yummy, so it's hard to go wrong, but this is like the love child of a potato skin and a roasted potato....and it's actually not too bad for you. YUM. I reduced teh amount of smoked paprika (and subbed sweet spanish paprika) because I find that smoked paprika tends to completely dominate all recipes. A little bit goes a long way. If you don't have smoked paprika, you could get some smokiness by using smoked salt, a drop of liquid smoke or some chipotle powder. I think they would be good even without the smoke though.

DSC_0705

1 lb red or yukon gold potatoes, scrubbed and cut lengthwise into wedges
1 T olive oil
1/2 t smoked paprika (I used bittersweet)
1.5 t sweet spanish paprika (not the cheap grocery store stuff)
1/2 t ground cumin
1/2 t garlic powder
1/4 t sea salt
1 oz finely shredded aged cheddar
1/3 c finely chopped red pepper
2 t minced cilantro

1. Preheat oven to 425F. Line a large baking sheet with parchment paper/silpat. In a large bowl, combine oil with paprika, cumin, garlic and salt. Toss potatoes with spice mixture. Place potatoes in a single layer on the baking sheet.

DSC_0710

2. Bake in centre of oven for 10 minutes. Flip and stir potatoes, and bake for another 10 minutes.

3. Remove potatoes from oven and sprinkle with cheese and red peppers. Bake another 5-7 minutes. Sprinkle with cilantro and serve immediately.

DSC_0714

Asian-inspired grilled pork tenderloin
DSC_0713

I've changed this recipe a little bit, because I like to marinate my pork to infuse the flavours a little more. I would marinate this overnight for maximum yum factor.

1/4 c hoisin sauce
2 T lemon juice
1 T dijon mustard
1 T honey
1 T toasted sesame oil
1 T low-sodium soy sauce
1 T grated ginger
1 T minced garlic
[1 t lemon zest....I omited because I juiced my lemons and was too lazy to zest them after]
2 pork tenderloins

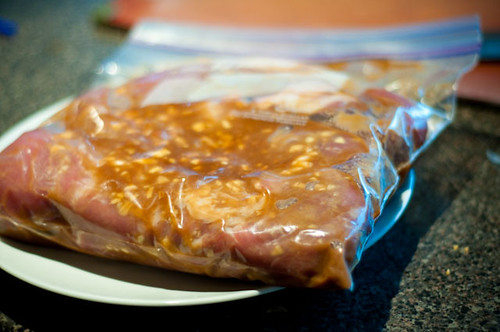
1. To make marinade/glaze, combine all ingredients except pork in a bowl. Mix. Pour 2/3 of marinade over pork. Reserve the rest of the marinade to use as a glaze/sauce.

2. Let pork marinate 24 hours (I say this is crucial...mine only marinated for 4 hours and the flavours were not permeated enough).

DSC_0707

3. Grill pork to desired doneness (FDA recommends a temperature of 145F, with a rest time of at least three minutes). Brush pork generously with marinade during laste five minutes of cooking. As mentioned above, hubs grilled to a temp of 180F. I let it rest for 10 minutes....it was still edible, but I think anything over 160F is really kinda overdone. Slice into thin slices and serve.

You could use this same recipe with either pork chops or chicken pieces and I think it would be equally great. The leftovers are awesom in stir fry, or in wraps or on salads. I was lucky enough to find pork tenderloin at half price today, so we royally stocked up.

DSC_0717


Passionfruit pavlova
DSC_0734
from Early Summer 2011 Food & Drink (will be online here soon)

I've written about pavlova before....for the uninitiated, it is a dessert consisting of a baked meringue, whipped cream and fruit. This is a relatively simple pavlova, and I think it's incredibly delicious. That said, I also found it too sweet, so I'm providing a recipe NOT based on what I actually made, but tweaked slightly to proportions that I am confident would yield a more balanced dessert.

Overall though, this is amazing...passionfruit is one of the most wonderful flavours in the entire planet - it's so intoxicatingly tropical....if you've never tried if before, this would be a most decadent initiation.

MERINGUE:
4 large egg whites at room temperature
1/2 t cream of tartar
3/4 c superfine sugar (just take regular and whiz it in the food processor)
1 t cornstarch
1 t white vinegar

CREAM & FRUIT
1 c whipping cream
2 T sugar
1 t lemon zest
1 T lemon juice
2 ripe passion fruit

1. Preheat the oven to 250F (120C).

2. Trace an 8-inch circle onto a piece of parchment paper using a marker. Line a baking tray with the parchment paper, marker-side down (so the marker does not get on your meringue).

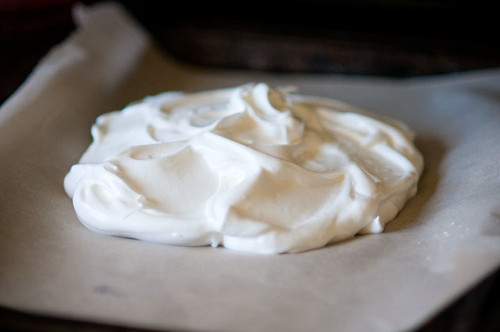
3. Whip the egg whites and cream of tartar until they are foamy. Slowly pour in the sugar while whipping and continue whipping on high speed until the whites hold a stiff peak and the sugar is dissolved (no longer feels gritty between your fingers). Fold in the cornstarch and vinegar.

This is the point where I'm thankful to have my beautiful Kitchenaid mixer:
DSC_0696


4. Spoon the whites onto the parchment paper and try to make them look snazzy with a spatula. I tried and failed, - you can see.

DSC_0698

5. Bake the meringue for 75-90 minutes, until the exterior is dry, cracking the oven door if the merinque starts showing signs of browning (I think mine browned a bit....it was still delish). Once out of the oven and cooled, the meringue should feel dry on the outside and peel away from the parchment paper easily. If still a little soft, return to the 250F oven for about 10-20 minutes. Cool the meringue on the tray before removing.

6. Whip the cream into soft peaks and beat in the sugar, lemon zest, juice and chill.

7. Just before serving, spoon the whipped cream over the meringue, and spoon the passion fruit seeds over the meringue - all you have to do is cut the fruit in half, stir the seeds with a spoon, and drizzle over top.

Voila. Tropical perfection. Slice and serve like a cake - serves 8.

DSC_0728

One final tip, given that this is a bbq-themed post. You can bbq bacon. Go do it and thank me later.

That is all.

Monday, May 16, 2011

something seriously good for meatless monday - lentil tacos and chocolate chickpea cake

Pin It Now!

I'm not sure why it is, but there's something about the combination of a crunchy shell, spicy filling, rich cheese, and bright notes of cilantro that just call to my soul. You can cobble together pretty much anything vaguely Mexican/South American/Tex-Mex/South-Western, and I will probably like it.


DSC_9448

I grew up with Old El Paso Taco kits (as I'm sure did a large portion of my readership...if not, you can read about them here - essentially a box containing taco shells, taco mix and some sort of taco sauce. Just add meat, lettuce and cheese and voila.). I liked them as a kid, but when I was a teenager, our family discovered fajitas, and frankly, there was no looking back. We raced ahead with our soft tortillas, grilled chicken and steak, and the lowly crunchy taco of our youth was forgotten in some cobweb-ridden corner of our minds.

Ever the nutritionally obsessed, I actually always thought that the soft shells were better for you than the tantalizingly crispy hard corn shells. (For my American readers, you have to understand that corn tortillas are few and far between in most parts of Canada). In recent years, I've made sure that my shells were 100% whole grain, usually opting for the Dempsters Ancient Grains type. A small tortilla (7 inches - you know you're going to eat at least two!) has about 100 calories, and features such stellar ingredients as whole wheat flour, flax, millet, spelt, kamut, barley, etc. It also features such not-so-stellar ingredients as glucose-fructose (that's Canadian for high-fructose corn syrup), sodium acid pyrophosphate, potassium sorbate, sodium propionate, monoglyceries, sodium stearoyl-2-lactylate, fumaric acid, cellulose gum, carrageenan, maltodextrin. And maybe sulfites.

Even if most of those ingredients aren't actually BAD, I just don't think so many ingredients are NECESSARY. I like shorter ingredient lists, most because I feel the food is then closer to what I could make at home. :) They also have 230 mg of sodium, so if you eat two (and seriously, you will), you've got 520 mg of sodium before you've even put anything in your fajita.

So I decided to go for a blast from the past (for me, at least) and try out hard taco shells. I was pleasantly surprised by a few things...first, the ingredient list was relatively short - corn flour, palm oil, salt, water and calcium hydroxide.

Even though there is palm oil, two stand n stuff shells (bigger than classic shells) have 130 calories, 6 g fat (2.5 g sat fat), 115 mg of sodium and 1 g fibre. The soft tortillas do getter on fibre and a bit better on fat, but 130 calories vs. 200 calories, and 115 mg sodium vs. 520 mg sodium...this makes the shells a solid contender. They certainly aren't any hard-core sort of health food, but they certainly aren't too bad either. I'm in.

Especially when you fill them with the most delicious filling of spiced lentils.

Yes, I realize this is madness.

Do lentils really belong in tacos? Can they really hold their own against the meaty deliciousness of seasoned ground beef?

DSC_9444

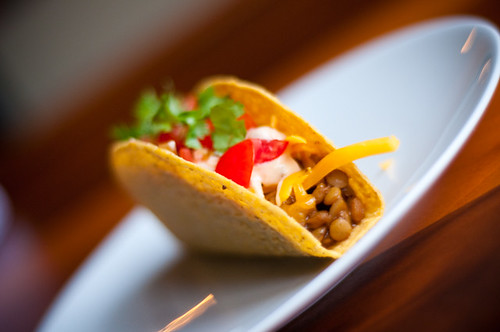
And surprisingly....they can. YUM. If you've a hankering for something meatless and wonderful, this meal is perfect. THe lentils are warm and delicious, and the spicy chipotle sour cream is the perfect creamy yet spicy foil. I've modified the recipe quite a bit from the epicurious original, but I think the end result is pretty darn delicious.

Make it now!!!

spiced lentil tacos
DSC_9437


1 tablespoon olive oil
1 cup finely chopped onion
1 clove garlic, chopped
1/2 teaspoon salt
1 cup dried brown or green lentils, rinsed
1 T chili powder
1 t cumin
1 t ground coriander
1 t paprika (sweet, not smoked)
pinch cinnamon
2 1/2 cups water

1/2 cup reduced-fat sour cream
1 chipotle chile in adobo sauce, finely chopped***
2 teaspoons adobo sauce
DSC_9419

8-10 taco shells
1 1/4 cups shredded lettuce/greens (I used cilantro)
1 cup chopped tomato
1/2 cup shredded cheddar

***What to do with leftover chipotle in adobo (which, unless you are a sword-swallowing fire-breather, you probably cannot down in one sitting)? I dump the contents of can into a freezer bag, and freeze it all flattened out. Next time you make this recipe (cuz there will, naturally, be a next time), just break off a pepper and off you go!

DSC_9425

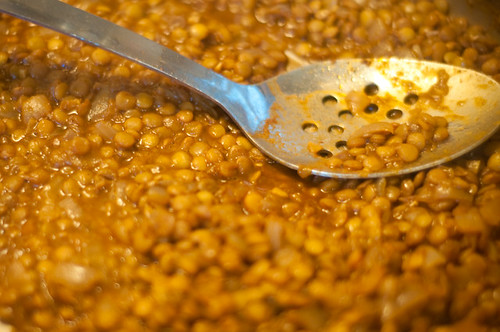
1. Heat oil in large skillet over medium-high heat. Cook onion, garlic and salt until onion begins to soften, 3 to 4 minutes.

DSC_9415

2. Add lentils and spices.

DSC_9414

Cook until spices are fragrant and lentils are dry, about 1 minute. Add water; bring to a boil.

3. Reduce heat, cover and simmer until lentils are tender, 25 to 30 minutes.

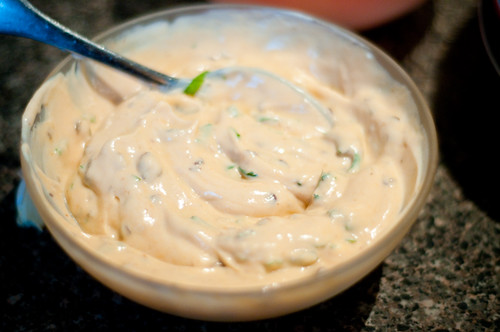
4. Meanwhile, Mix sour cream, chile and adobo sauce in a bowl.

DSC_9428

Uncover lentils and cook until mixture thickens, 6 to 8 minutes.

DSC_9432

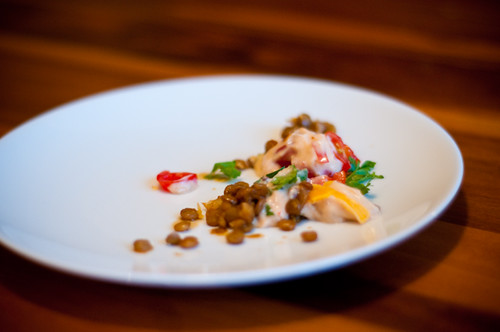
Spoon 1/4 cup lentil mixture into each taco shell (my taco shells needed 5 minutes in a 350F oven. Check the label on yours to see if they do too!). Top with 2 heaping teaspoons sour cream mixture, greens, tomato and cheese.

YUM. So good.

That said, I thought that these stand n stuff taco shells would be a good idea. Alas, the broader base exponentially increases the amount of filling that goes blasting out as you take your first bite. Behold:

DSC_9456

Stick with the normal shells - less mess, fewer calories. And as long as you don't go running around taking pictures of your dinner like a crazy person food blogger, you should be fine.

After dinner, I made the most random cake recipe. I came across this chocolate chickpea cake recipe while browsing on Serious Eats (SUCH an awesome site). It was just so weird....chickpeas, chocolate, no flour, no oil...how could this be possible?
DSC_9480

And I'm no stranger to incorporating legumes into my baking (witness: the bean cookie) This was just too weird not to make. Even better, I actually had all the ingredients on hand (hubs tucked some yummy 85% dark chocolate from Laura Secord into my Mother's Day gift...smart, smart man).

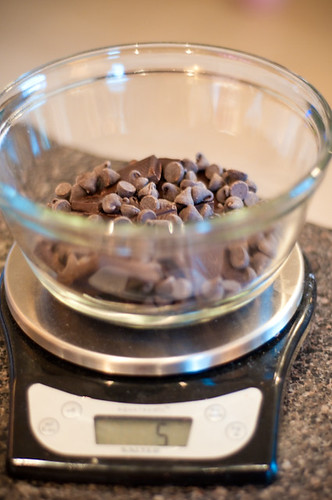
The cake is uber easy to throw together. Melt the chocolate in the microwave, and whizz the rest of the ingredients through the food processor. The best part was not having to use flour...I swear, every single time I take out my flour, it's like some evil little flour gnome has run up inside and carefully placed a whole bunch in the rolled-up top of the bag, just perfectly positioned to explode onto my [black] counter top in a white, powdery testament to my kitchen failures. Meh.

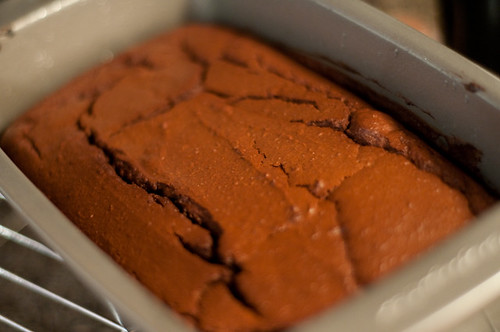
This was so easy. I baked the recipe for 50 minutes instead of 60 (though my oven was on convection). I think I'd check it at 45 minutes next time. Also, because I had no butter and was too lazy to 'flour' my pan with cocoa [relying instead on a brush of canola oil] my cake stuck a bit. You could eliminate this problem entirely by baking in a parchment paper lining. Alas, I was too lazy.

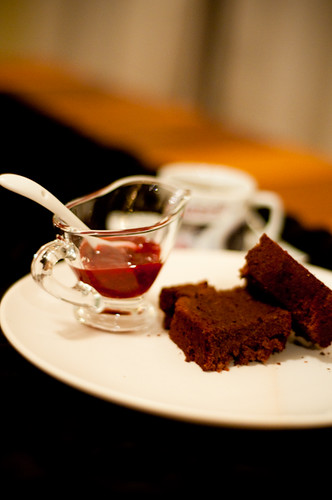
The results are a really delicious chocolate loaf...I wouldn't serve it for dessert on its own, I don't think (although topped with ice cream and chocolate sauce, with raspberry coulis, it would probably pretty fantastic). It's a great nibbling cake. The chocolate flavour (from mostly 85% cocoa, with a small handful of chips and one small square of 70%) is rich and deep and the cake is not too sweet. It lacks the soft squishy richness of a classic shortening/white flour loaf, but I don't think that's a bad thing.

I think I will be having cake for breakfast. :)

chocolate chickpea cake
DSC_9487

1 tablespoon butter, softened (or oil)
2 tablespoons cocoa powder (skipped it)
5 oz chopped bittersweet chocolate or chocolate chips (I used 3.8 oz 85%, 1 oz semi-sweet chocolate chips and 0.5 oz 70%)
1 (19-ounce) can chickpeas beans, rinsed and drained
4 large eggs
1/2 teaspoon vanilla extract (optional)
1/2 cup granulated sugar (I used raw cane sugar)
1/2 teaspoon baking powder
1/2 teaspoon salt


1. Adjust oven rack to middle position and preheat oven to 350°F. Grease interior of 1 pound loaf pan with flour, then dust all surfaces with cocoa, tapping out extra.

2. In a large microwave-safe bowl, melt chocolate by microwaving in 45-second intervals, at 50% power, stirring with a rubber spatula each time until melted. Alternatively, heat, stirring constantly, over double boiler until melted.

DSC_9460

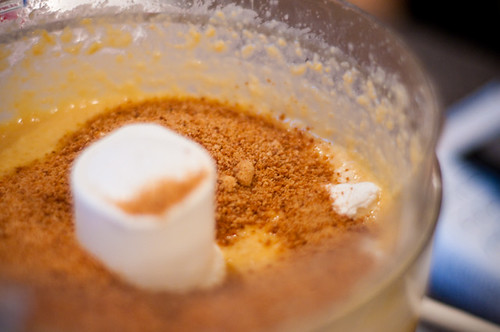
3. Puree beans, eggs and vanilla in a food processor (or using an immersion blender) until smooth, about 1 minute. Add sugar, baking powder and salt and blend to combine, about 20 seconds.

DSC_9462

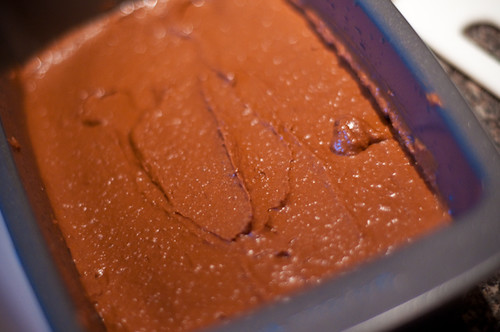
4. Add melted chocolate and blend to combine, scraping down sides of bowl well as necessary. Batter will have a thick, pudding-like consistency.

DSC_9465

Transfer batter into prepared pan and bake until knife inserted in center comes out clean, about 45 minutes.

DSC_9467

5. Allow cake to cool for 15 minutes on wire cooling rack before inverting onto serving platter. Cool completely. Dust with confectioner's sugar just before serving. Mine only stuck a little bit! (this is an achievement for me).

DSC_9480

Thanks for reading! If you're interested in more meatless monday ideas, check out the Meatless Monday website.

DSC_9476

PS - sorry for the cruddy low-light photos. Sadly, I blog in the real world and thus far, the sun has not yet listened to my pleas to hold off setting until I've finished cooking. ;)

Related Posts with Thumbnails