Photobucket - Video and Image Hosting
Showing posts with label kitchenaid. Show all posts

Tuesday, September 15, 2009

going all martha on you

Pin It Now!
DSC_2293

There are a number of things that I have always found super duper intimidating. They are things that other people do....not things that I could ever (generally) contemplate doing. Things like pickling, preserving, growing and such. And scariest in this list of things that other people do is pasta making.

Why would anyone endeavour to make their own pasta? It brings together all sorts of things that cause me no end of trouble...WHY in the world would I want to roll my own dough. And really, why would I want to expose myself to more dough frustrations than are strictly necessary?

But there were a few pasta making incursions into the edge of my consciousness, leading me to believe that maaaaaybe, just maaaaybe, pasta wasn't going to be this impossible thing I would never be able to achieve. Most specifically, I'm utterly addicted to Iron Chef America. I love this show for so many reasons (not so much the battle: offal that I'm watching right now...yuck!!! YUCK YUCK YUCK. What I love about this show is not just the crazy intense pace, but the fact that you see real chefs at work in the kitchen with real food. There's no magic going on - lots of knives, boards, bowls and grills. They use the same ingredients, and even the same equipment I do. I was entranced when I saw someone (sorry, can't remember who!) just piling flour on the counter and deftly nestling eggs right in the middle to create a perfect pasta. And of course, I saw them using the same mixer I have (actually, mine's nicer than theirs...) to make pasta. And they're doing this AND four other dishes in an hour. It almost seems like I'd imagined that real chefs had some sort of alchemy they were working in the kitchen; like it wouldn't ever be possible for me to cook the same types of things they were cooking. Besides, I adore eating out, so why would I want to imitate the snazzy eats I so enjoy.

Of course, then I started paying for day care. And paying for bus passes again. And all of those myriad expenses that go with returning to work. Net result is a temporary moratorium on meals out. And lots and lots of home cooking.

So....about making pasta.

Normally, I wouldn't. Make pasta, that is. And for this reason, I'd resisted picking up the pasta maker attachment for my beloved kitchenaid. I wasn't sure I would ever use it, and given my dough phobia, I thought it perhaps not the wisest investment for me (I've got the meat grinder already and it's FABULOUS and I've been eyeing the ice cream maker, but until I have more than two pairs of pants that zip...that's also on hold).

Buuuut....the nice people at kitchenaid were kind enough to send a pasta maker attachment to me (full disclosure here, peeps!), so I'll let you know what I thought. Though I can't say that I'll be making pasta all the time now, my pasta actually turned out much better than I thought and I will, in fact, be using it again. Many times. :) Hopefully for a looooong time to come.

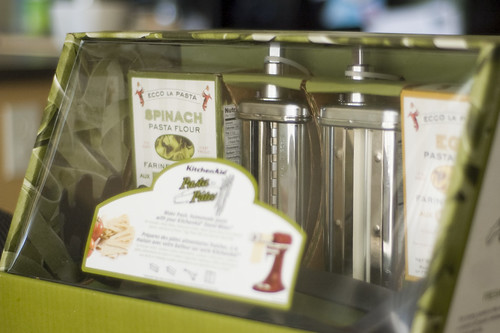
I was actually sent not just the pasta maker, but a complete kit (view below):
DSC_2268

It includes a roller and a cutter (for fettucine), a couple of utensils, two pasta mixes and an instruction manual/recipe book. It's an attractive package, though a bit of a beeeotch to get out of the packaging. The very first time I used it, I do confess to making one of the mixes. It turned out perfectly. But really, if you're going to go to the trouble of making your own pasta, why the heck would you make it from a just-add-water mix? Pasta is NOT that complicated - flour, eggs, salt, water. So don't use a mix. It's like making a perfect, beautifully decorated wedding cake and then the cake underneath is from cake mix. Why labour for hours and give Duncan Hines (or someone else) all the credit????? Weakness.
Anyway, yeah, the mix turned out perfect and was easy to make and tasted great. Not knocking the mix at all. Just the idea of the mix, hehe.

So I've got pictures of my second go at making my own pasta. Step by step. Witness my transition from dough phobic to mistress (dominatrix?) of all things starchy.

I'm going to talk you through the process of actually making the pasta, and I"ll include the recipe at the end. Because I wanted to be as authentic as possible (come on, I was making my OWN PASTA!), I decided to use semolina flour, rather than all-purpose. Semolina is a high protein flour made from durum wheat. Apparently, it's better than regular flour for pasta because it creates a stronger gluten structure. Since I haven't actually made all-purpose flour pasta, I couldn't really tell you the difference.

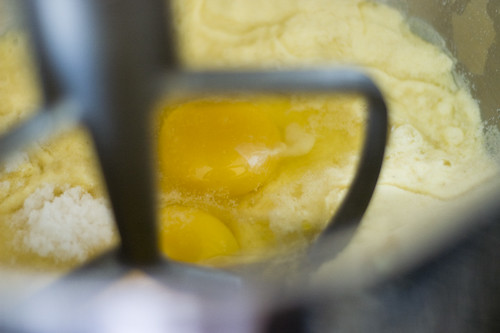
Anyway....you start by mixing the eggs, water, oil, semolina flour and salt (speed 2 with regular beater).

DSC_2276

Then you use the dough hook for a couple of minutes. Then you need it by hand a couple of times too. Then you divide it into eight (aw crap, I read the wheat directions, which have you dividing it in four...that explains why my pasta sheets were like four feet long, lol).

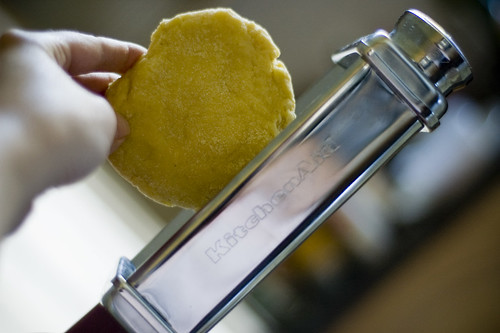
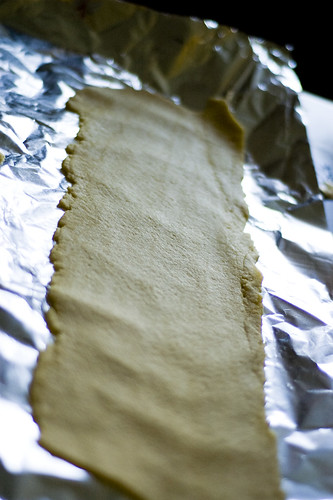
Then the fun begins. With each small piece of dough, roll it out a bit. The instructions said to flatten slightly, but I didn't have a lot of luck with that. I rolled it out to about 1/2" thick. You have to set the roller at the widest setting (number one) and then stick your dough there, turn the speed to 2 and hope something works.

DSC_2277

Mine worked not bad (witness, below):
DSC_2278

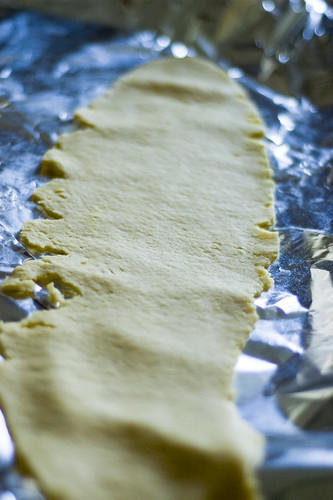
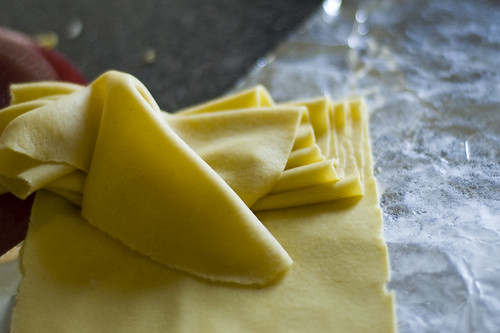
For this first pass through, obviously the dough looks like poop. Ragged, uneven, etc. So you fold it in half and put it through again. You do this a few times until it looks somewhat squarish.

Mine's still a little uneven, but I was impatient, hehe.
DSC_2279

After this, you change the roller setting (one at a time) and keep rolling your pasta until it hits the desired thickness. For fettucine, I like thickness four - something substantial. Plus, it's easier to work with.
DSC_2281

I confess to being transfixed at the watching the sheets stretch and pass through the roller. It was cool.

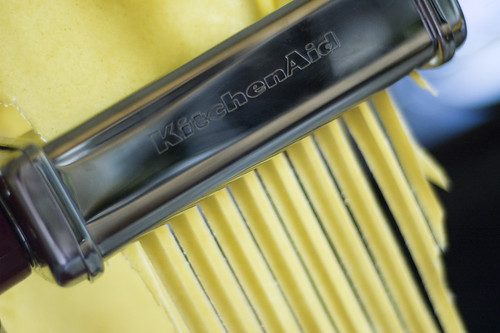
After that, I switched attachments and put the cutter on. Because I was a tool and only divided my dough into 4, my sheets were crazy long. Like longer than Lil Z. I cut them in half before putting them through the cutter. I used speed 2 again. I also had a lot of fun getting this pic (holding pasta in one hand, camera in the other, and just crossing my fingers that my freakishly long arms were long enough for my lens to focus):
DSC_2285

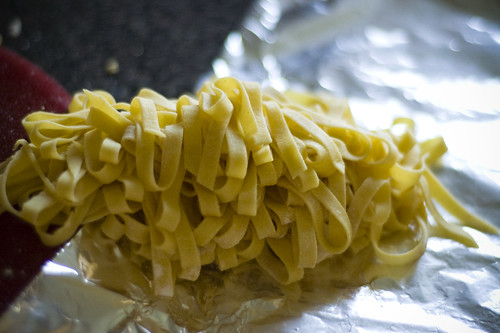
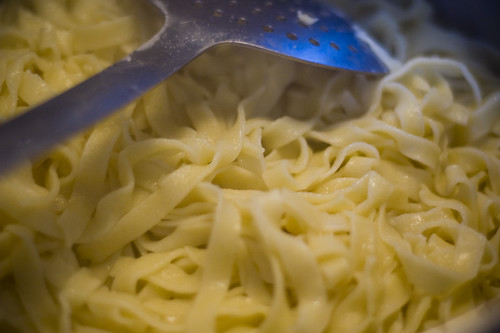
Looks like this coming out:
DSC_2286

I toss in LOTS and LOTS of flour. I couldn't quite figure out how to get my pasta stretched back out, so the flour kept it from becoming a gooey gluey mess before I had a chance to cook it.

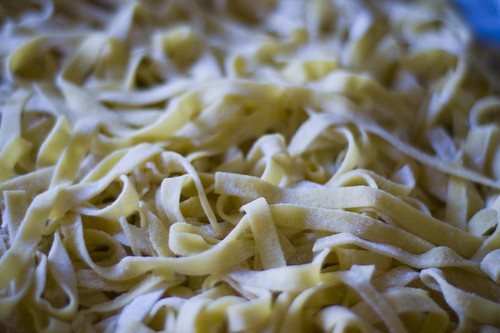
Miles and miles of pasta....
DSC_2289

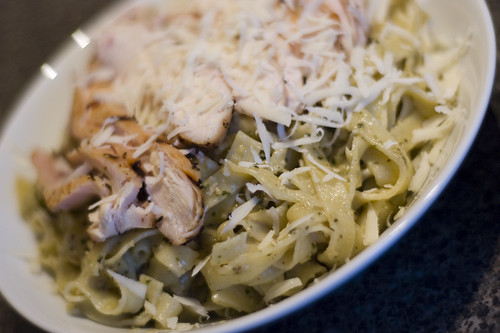
The pasta itself cooks in a snap (about 3 mins - start checking at 2 mins and drain when it hits your desired firmness. After all the work of making my own pasta, I didn't want to drown it in a heavy tomato sauce, so I decided to have a simple pesto cream sauce with grilled chicken. Recipe below.

Pesto Cream Fettucine with Chicken
1 recipe semolina egg pasta, cut into fettucine (below)
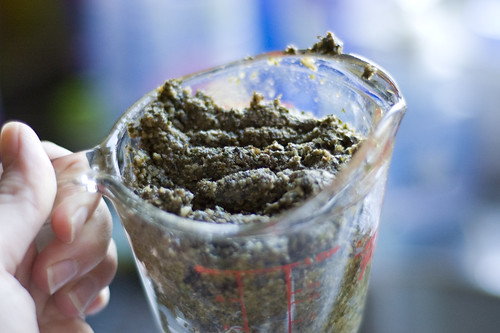
1 cup pesto (my recipe: bunch of basil, 1/3 c pine nuts [i had pecans], 4 cloves garlic, 1 cup parmesan, 1/3 c olive oil, process in food processor. season to taste)

DSC_2290

1 cup creamy stuff (I used evaporated skim milk..no, it's not as good as heavy cream, but it's not bad and high in calcium...light sour cream might work
4 chicken breasts (I brine mine in a mixture of salt, steak spice and sugar for about an hour, then grill)

1. Cook pasta 2-5 minutes.
2. While pasta is cooking, heat pesto and creamy stuff together.
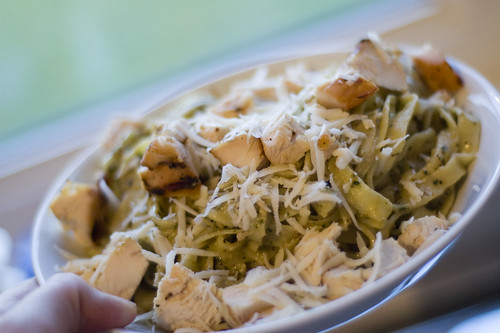
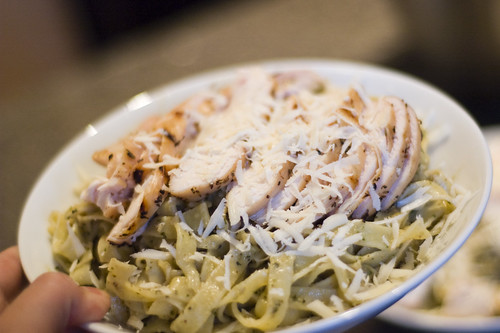
3. Grill chicken, let rest 10 minutes, then slice. Hubs and I are divided on slicing style.
His:
DSC_2297

Hers:
DSC_2299

4. Mix sauce with pasta, serve and top with chicken.

Semolina Egg Pasta
4 eggs (7/8 cup)
2 T water
1 T oil
3 1/3 c. semolina flour
1/2 t salt

1. Place eggs, water, oil, flour and salt in mixer bowl. Attach bowl and flat beater. Mix 30 seconds on speed 2.

2. Change to dough hook. Knead 2 mins on speed 2. Remove from bowl and hand knead for 1-2 mins. Divide into 8 pieces and roll as I explained above.

3. Cook 2-5 minutes in boiling salted water.

DSC_2292

(PS - If you have no machine, you could still make your own pasta. It can definitely be mixed by hand. Check out this link for more instructions: http://recipes.variousstuff.net/technique/Pasta%20by%20Making%20Pasta%20by%20Hand.html ) It certainly wouldn't be my cup of tea, but it is possible. You could also mix by hand and then get a hand-powered pasta roller to roll out your pasta. Labourious, but substantially cheaper than investing in a mixer and pasta roller attachment (they ain't cheap!).

Overall, I would totally recommend this to someone who is looking to add a little more cachet to their cooking arsenal. It was surprisingly easy to use, much less disastrous than I anticipated it would be and the pasta was really good! You do have to be careful not to overcook it as it gets a little too glutinous and soft rather quickly (my first batch was perfect, but I actually overcooked this by a bit). You can find the pasta kit for sale in a few spots, should you be interested (nope, I don't get kickbacks...I already got my kickback, hehe) -
Americans - kit is $149.99 here. Canadians - you can find it here for $199.99.

And as I said, I did receive it as a gift, but hopefully you guys have been reading long enough that you know I'd only give you an honest account of this...bs and pr ramble free. :)

Thanks for reading! My next little project is to use the sheets to make a lasagna and to find rennet tablets somewhere so I can make my own homemade mozzarella....any ideas Ottawa peeps?


Tuesday, March 24, 2009

pseudo-mexican spice

Pin It Now!

For reasons I can't fathom, I've had crazy crazy cravings for some spicy mexican fare lately. No, Lil Z is not going to be a big sis. I've just been absolutely craving fiesta-inspired food. Hubs and I just came back from a lovely, lovely respite in Cuba (where we attended and took some pics at a lush and colourful tropical wedding and trash the dress session. The whole setting just gave me intense longings for spicy food (Cuba is BEAUTIFUL, but the resorts are not exactly known as gastronomical meccas).

So the entire meal plan for this week is based around spice, spice and more spice. I recently got hold of a March 2009 copy of Cooking Light and within it found a veritable treasure trove of ethnic foods. So this week's plan consists almost entirely of recipes modified from that magazine. YUMMY. Cooking Light is my absolute FAVOURITE cooking magazine. As much as I love some of the more sinful publications (Bon Appetit, Gourmet), I really appreciate the fact that this magazine actually has food that I can eat and enjoy with little guilt. My back-to-work deadline is rapidly looming and I still can't jam myself back into most of my work attire...so Cooking Light is definitely de rigueur.

Last night, we dined on tex-mex turkey calzones, accompanied with a delicious black bean salad. The recipe as published in the magazine is pretty simple and quick. I complicated it a bit by making my own dough (I had the ingredients and the time), but if you follow their prescribed shortcuts, especially the one of just using shredded (already cooked) chicken breast), this would assemble in a jif. The results are deeeeeelish and satisfying and, as I was anticipating the sheer deliciousness of this meal, I doubled the recipe and froze half. I see some frozen calzones in the near future for me........

Tex Mex Calzones
tex mex turkey calzone
stolen and adapted from March 2009 Cooking Light

1 pound lean ground turkey breast
1 cup chopped onion
1 chopped green bell pepper
1 chopped red bell pepper (I cheated and used 2 green as they are cheaper!)
1.5 teaspoons ground cumin
2 teaspoons chili powder
4 garlic cloves, minced
1 cup fat-free fire-roasted salsa verde
1/4 c chopped cilantro
2 (11-ounce) can refrigerated thin-crust pizza dough (I made my own, recipe below)
2 cups preshredded Mexican blend cheese (I never buy pre-shredded cheese - it's SO expensive...I used grated old cheddar)
Cooking spray
low-fat sour cream

1. (If you're making your own dough, do that first!) See below. Preheat oven to 425°.

2. Heat a large nonstick skillet over medium-high heat. Add ground turkey to pan; cook 3 minutes, stirring to crumble. Add onion and next 5 ingredients (through garlic) to pan; cook 4 minutes or until vegetables are crisp-tender, stirring mixture occasionally. Remove turkey mixture from heat; stir in salsa and cilantro.

turkey calzone filling

3. Unroll dough; divide into 4 equal portions (per can....or if you make your own dough, divide into 8). Stretch each portion into a 6 x 4–inch rectangle.

my 'rectangle'

Working with one rectangle at a time, spoon about 1/2 cup turkey mixture on one side of dough. Top with 3 tablespoons cheese; fold dough over turkey mixture, and press edges together with a fork to seal.

how to fill a calzone

4. Place on a baking sheet coated with cooking spray. Repeat procedure with remaining dough and turkey mixture.

unbaked and about to be delicious

5. Bake at 425° for 15 minutes or until browned. Serve with sour cream.

baked and delicious

Calzone Dough:
4.5 teaspoons active dry yeast (2 packages)
2 t sugar
1.5 c warm water
3 c. all purpose flour
1 c. whole wheat flour
2 T ground flax meal (it's good for ya!)
1 t salt
1 T canola oil
spices: about 1/2 t each cumin, chili powder, coriander, garlic and zest of one lime....TOTALLY optional but they are easy to throw in and taste oh-so-yummy

1. In the bowl of a stand mixer/food processor, combine yeast, sugar and water. Add flours, flax, salt and canola oil and mix on speed 2 until combined and forming a nice, cohesive ball. If it won't combine, add water, 1 t at a time. If it's too sticky, add flour, 1 T at a time. (You can do this by hand as well...I am just lazy and in luuuuurve with my kitchenaid).

not yet dough in a bowl

2. Turn out the dough into a greased large bowl.

dough in a bowl

Cover and let rise in a warm place for 1 hour. I like to have it rise in the oven, with the oven light on. It's perfectly warm and draft-free. If you make the dough first, you can let it rise while you make the filling and the salad. By the time you're done those, the dough should be just about done. When it's ready, punch it down and divide into 8 equal portions.

Black bean salad:
black bean tomato onion and avocado
Combine 1 (15-ounce) can rinsed and drained black beans, 1 cup quartered cherry tomatoes, 1/2 cup chopped red onion, 1/4 cup chopped celery, 2 tablespoons fresh lime juice, 2 tablespoons chopped fresh cilantro, 1 avocado, 1 clove garlic and 1 tablespoon olive oil in a medium bowl; toss well to coat.

black bean salad

Yield: 8 servings (serving size: 1 calzone and 1 tablespoon sour cream)

CALORIES 416 ; FAT 14.1g (sat 6.1g,mono 4.9g,poly 1.6g); CHOLESTEROL 44mg; CALCIUM 195mg; CARBOHYDRATE 46.2g; SODIUM 771mg; PROTEIN 25.7g; FIBER 2.5g; IRON 2.5mg

Said hubs, about this meal....'this is freaking phenomenal.' And about leftovers at lunch: 'I could just eat a lunch of these black beans, onions and tomatoes on their own.' It's absolutely delicious. The salsa verde imparts just enough spice to satisfy and they are yummy pockets of mostly-healthy goodness. Two thumbs up.

Tonight's meal is hopefully equally delicious - tilapia with coconut red curry sauce, served on a bed of seasoned jasmine and bok choy rice. I'm excited already. Thanks for reading!!!!!!!!!

Saturday, September 01, 2007

quiche for the pastry averse

Pin It Now!

Let's face it, my sordid history with pastry has been somewhat faithfully documented since the inception of this blog. I hate working with pastry. I love eating it. I hate how it deposits itself to my backside after I've eaten it. And so the circle continues.

But it's hard to ignore the sheer comfort appeal of a quiche-like tart. It's yummy, it's quick to put together and it is such a nice dinner to have every once in a while.

So when I came across this next recipe, I was actually quite thrilled, The original called for squishing together pillsbury breadsticks to make a crust, but what with the acquisition of my new kitchenaid, I wasn't going to allow that nasty little shortcut a place in my kitchen.

Why defer to pillsbury when you can force slave labour out of hubs? He had the fortune (misfortune?) to be working from home that day, so against his loud protestations, I kindly coerced him into using the majestic kitchen aid to put together some dough (using the KA pizza dough recipe). I used half for this recipe, and the other half is sitting in my fridge. I don't yet have plans for it, but I will.

This tart was really yummy, and I ended up eating it for three days straight, due to an unanticipated and rather elongated power failure that interfered with other dinner plans. Yummy.

Leek and Potato Tart with Aged CHeddar
stolen and modified from cooking light

time to eat

1/2 lb of pizza dough (use your favourite recipe, one that uses about 3.5 cups of flour, and you'll need half of this....you can also cheat and use a premade dough)
Cooking spray
1 teaspoon vegetable oil
1 cup thinly sliced leek (about 1 large)
1/4 teaspoon black pepper
1 medium peeled baking potato, halved lengthwise and cut into 1/4-inch-thick slices (about 1 cup)
1 cup fat-free milk (I used 2% because hubs bought the milk again)
1/2 cup egg substitute (I used 2 eggs...next time I would use three to up the egg/milk ratio)
1/3 cup (1 1/2 ounces) grated cheese (I used extra-old cheddar - very yummy!)
2 tablespoons grated fresh Parmesan cheese
1 tablespoon Dijon mustard

1. Preheat oven to 375°.

2. Spread dough into a 9" glass pie plate (take note that if you drop a pyrex pie plate on ceramic, it actually explodes into tiny little bits...seriously, not one chunk is left unscathed....)
my crust is kinda fat

3. Heat the oil in a large nonstick skillet over medium-high heat. Add the leek, pepper, and potato; sauté 4 minutes (I suggest sautéing a little bit longer, up to 10 minutes). Spread leek mixture into prepared crust.
potatoes and leeks

4. Place the milk, egg substitute, cheeses, and mustard in a blender, and process until smooth. Pour milk mixture over leek mixture.
pouring the egg/milk mixture onto the veggies

5. Bake at 375° for 40 minutes; let stand for 10 minutes. (Consider baking for a little longer - my potatoes were still not totally tender....it was still awesome, but could have been marginally awesomer). And yes, that is now a word.

Also, shock of all shocks, my tart popped right outta the pan after the requisite 10 minute waitin period.

potato cheddar tarte

Yield: 8 servings (serving size: 1 wedge)

CALORIES 195 (26% from fat); FAT 5.6g (sat 1.6g,mono 1g,poly 0.7g); PROTEIN 8.9g; CHOLESTEROL 8mg; CALCIUM 135mg; SODIUM 435mg; FIBER 1.1g; IRON 1.8mg; CARBOHYDRATE 26.4g

Yum. This would make a great brunch dish too. Thanks for reading! And as always, I live for your comments. :)

Tuesday, August 07, 2007

a few things....

Pin It Now!

1. I'm a lazy poop. I've cooked, but I didn't take any pictures, so I haven't posted.

2. I am now even more in love with my kitchenaid. I just made my first batch of French bread with it. OMG. SO EASY. SO yummy. Granted, my loaves were more than a little mutant looking, but the taste and texture were fabulous and the fact that I didn't have to spend 10 minutes cursing and swearing at the dough made it all the better. If you have a kitchenaid, you must make bread with it. I am going to be HUGE.

The recipe is in this PDF, on page 61 - http://kitchenaid.com/assets/pdfs/product/ZUSECARE/9708307.pdf. It's freaking good. You could halve it though, and still get two tasty loaves.

3. I ate way too much this weekend. From home-smoked ribs to ultra-tasty homemade PB ice cream (not mine, sadly! I SO need an ice cream maker!), I think (actually, correct that, I KNOW) that I gained a few pounds this weekend. Meh.

4. I don't often make the same recipe twice, but there is one manicotti recipe that is just so tasty, I keep coming back to it. I never take pictures because manicotti is one of those dishes that, in theory, is beautifully stuffed pasta, awash with a zesty sauce....but in practice, I usually make a big mess when I take it out of the pan. Not so pretty.

But it's REALLY good and worth the labour. So you should make this. It freezes wel land makes enough to feed 6 hungry people. Also, it's tasty. And an excellent accompaniment to bread.

Chicken Vegetable Manicotti
This recipe is stolen and modified from one of the Looneyspoons books. Can't remember which one, but you should buy all of them anyway.

Ingredients
1 clove garlic, minced (I usually use 3-4)
1/2 cup finely chopped onions
3 boneless, skinless chicken breast halves, cut into small pieces (I use my food processor - I cut each breast into 3-4 pieces, and then pulse 2-3 times. It's finely chopped and a lot easier than cutting up icky raw chicken by hand...the one time I tried it, it took nearly an hour. So I recommend the food processor route).
1 cup each grated carrots, grated zucchini, and finely chopped mushrooms (*if* the grater attachment of my FP still worked, I would have used it.....I did chop the mushrooms in the FP though)
3 tbsp minced, fresh basil, or 1-1/2 tsp dried (go with fresh!)
1 tbsp minced, fresh oregano or 1 tsp dried (I usually just dump in some italian seasoning)
1/4 tsp black pepper
4 ounces light cream cheese, cut into cubes
1 cup part-skim ricotta cheese
1/4 cup grated Parmesan cheese
12 manicotti shells, uncooked (I find it fills more like 14)
3 cups of your favorite low-fat, tomato-based pasta sauce (that would be one can....I usually use nearly two, because I like lots of sauce!)
1/2 cup shredded, part-skim mozzarella cheese (2 ounces)

Instructions
To make filling:

1. Spray a large, non-stick skillet with non-stick spray. Add garlic and onions. Cook and stir over medium heat until softened, about 2 minutes. Be careful not to burn them.

2. Add chicken, increase heat to medium-high, and cook until no longer pink. Add carrots, zucchini, mushrooms, basil, oregano, and pepper. Cook for 3 more minutes. Add cream cheese and stir until melted. Remove from heat. Stir in ricotta and Parmesan cheeses. Transfer filling to a large bowl and refrigerate for 20 minutes.
While filling is chilling, cook manicotti according to package directions. Rinse with cold water and drain well. (do yourself a favour and undercook the manicotti - as soon as they start getting soft, take 'em out. If you fully cook them, good luck stuffing them!)

3. Using a small fork, stuff shells equally with filling. Spread a thin layer of pasta sauce over bottom of a 9x13 baking dish. Arrange stuffed manicotti (it's a tight squeeze). Pour remaining sauce over manicotti and sprinkle with mozzarella.


4. Cover with foil and bake at 350 degrees F. for 40 minutes. Let cool for 5 minutes before serving. Garnish with chopped parsley, if desired.

Yield: 6 servings
Per serving: 404 calories, 10.9 grams fat, 6.1 grams saturated fat, 33.3 grams protein, 43.6 grams carbohydrates, 1.4 grams fiber, 65.6 mg cholesterol, 586.8 mg sodium, percent of calories from fat: 24

Notes: Chicken is easier to cut into small pieces if it's partially frozen. It's easier to stuff manicotti shells if they're slightly undercooked. This also makes them less likely to tear. Drain the cooked shells and rinse them with cold water to stop the cooking process and to keep them from sticking together. Use a teaspoon to stuff them. If you prefer, you can substitute lasagna noodles in this recipe and make lasagna roll-ups, or you can use 24 jumbo pasta shells.

So, no pictures, but you've all seen manicotti before...this looks pretty much the same, but tastes REALLLLLY good. I love this stuff. Can't enough, actually.

Thanks for reading! Hope you didn't eat as much on the long weekend as I did!

Wednesday, July 25, 2007

make-ahead dinner party

Pin It Now!

One of the things I always have great intentions of doing is a series of articles on how to throw a relatively stress-free dinner party. But I'm a procrastinator, so I still haven't gotten around to it.

Anyway, hubs and I hosted friends of ours earlier this week, and had a great time figuring out a menu for the evening. Though hubs did little more than grunt his lack of disapproval (I would say that he grunted his approval, but that would mean that he was actually paying attention when I ran the menu by him....hehe...I ended up actually running the menu by our friend, because I figured that she would be better positioned to let me know whether or not I'd come upon a nutritional landmine.) Tip #1 for a successful dinner party - make sure your dinner guests are actually interested in eating what you're serving. It doesn't matter how awesome your prime rib is if your guests are vegetarians. ;)

Of course, hubs had to throw a curveball at me the day before the party....apparently, we weren't having two dinner guests, but three - for the first time since we've been in our house, we were having a teeny-tiny little guest. I was just annoyed because hubs had known this fact for days and hadn't bothered to let me know.

I was mostly a little panicked because I had a look around my house in a totally new light.....and rather than chic, my coffee table suddenly seemed dagger sharp, and my entire abode fraught with poisonous dangers not suited for kiddies. Yikes.

I am glad to say though, that everything went swimmingly. Turns out the cute little babies are huge fans of scallops, lemon risotto and all kinds of yummy things with all sorts of different flavours. Very cool.

Also, I have two new toys. You can see them both here:
look!  two new toys at once!

I know it only looks like one toy (the KitchenAid Pro Stand Mixer - WOOOOOOOOOOT), but there are, in fact, TWO toys at work here. You see the super narrow depth of field there? That's my new lens at work! EEEEEEEEeee! We finally picked up the 50 mm f/1.8 I had been coveting so you'll see it hard at work throughout this whole series of photos. I'm still learning, so sometimes the DOF is so narrow as to be ridiculous, but just learn to love the blurry goodness of a shallow focus. Woot!

Anyway, it's getting a little late, so I will get to my menu/food posts now - they'll be pretty basic, but I can assure ya, everything was a hit and the few leftovers I have are rapidly dwindling...

Menu:

Appetizers - cucumber cups filled with roasted red pepper dip (purchased), parmesan asiago dip (purchased); melba toast spread with cream cheese and topped with curry jelly (purchased) or thai sweet pepper jelly (purchased)

easy peasy appetizers

Soup - cream of "watercress" (more on the quotation use later) soup with seared scallops
Salad - canteloupe with crispy prosciutto, feta, pinenuts and basil oil

Main - cedar planked salmon with eggplant tomato stacks and lemon risotto

Dessert - chocolate raspberry baked alaska (oh darn, a dessert that required stand mixer use....)

YUM. I'll have the recipe posts up asap.

Related Posts with Thumbnails