Photobucket - Video and Image Hosting
Showing posts with label daring bakers. Show all posts

Monday, October 29, 2007

bostini cream pie...daring bakers
Pin It Now!

DSC_3782

For noobs, the Daring Bakers are a group of intrepid food bloggers who tackle a new culinary challenge every month.

This month, we tackled the fun and funky bostini cream pie, hosted by the lovely Mary of alpineberry.

There were parts of this recipe that I really liked, and other parts I wasn't a fan of.

I LOVED the chiffon cake....I would make it again and do it up as a layer cake - orange chiffon is really lovely and delicate and very very yummy.

Don't know as I'd pair it with dark chocolate again. I love dark chocolate, but unless you have something pretty aggressive, it ends up dominating anything you pair it with.....I loved the chocolate glaze, but it didn't really do anything to improve the dessert, I thought.

And last....the custard....I think I goofed 'er up somehow. Like maybe I killed it. It was grainy. Other people didn't really seem to have the same issue, so I'm pretty sure it was me....hehe.

Anyway....here are is my take on this fun new treat - and I halved the recipe and lost (somehow!) all my photos of the making of the custard. But since I sucked at it, I guess that's no big deal, eh? hehe

Bostini Cream Pie
(from Donna Scala & Kurtis Baguley of Bistro Don Giovanni and Scala's Bistro)
Makes 8 generous servings

INGREDIENTS:

Custard

3/4 cup whole milk
2 3/4 tablespoons cornstarch
1 whole egg, beaten
9 egg yolks, beaten
3 3/4 cups heavy whipping cream
1/2 vanilla bean
1/2 cup + 1 tablespoon sugar

Chiffon Cake

1 1/2 cups cake flour
3/4 cup superfine sugar
1 1/3 teaspoons baking powder
1/3 teaspoon salt
1/3 cup canola oil
1/3 cup beaten egg yolks (3 to 4 yolks)
3/4 cup fresh orange juice
1 1/2 tablespoons grated orange zest
1 teaspoon pure vanilla extract
1 cup egg whites (about 8 large)
1 teaspoon cream of tartar

Chocolate Glaze

8 ounces semi or bittersweet chocolate
8 ounces unsalted butter

INSTRUCTIONS

To prepare the custard:

Combine the milk and cornstarch in a bowl; blend until smooth. Whisk in the whole egg and yolks, beating until smooth. Combine the cream, vanilla bean and sugar in a saucepan and carefully bring to a boil. When the mixture just boils, whisk a ladleful into the egg mixture to temper it, then whisk this back into the cream mixture. Cook, stirring constantly, until the mixture is thick enough to coat the back of a spoon. Strain the custard and pour into 8 large custard cups. Refrigerate to chill.

To prepare the chiffon cakes:

Preheat the oven to 325°F. Spray 8 molds with nonstick cooking spray. You may use 7-ounce custard cups, ovenproof wide mugs or even large foil cups. Whatever you use should be the same size as the custard cups.

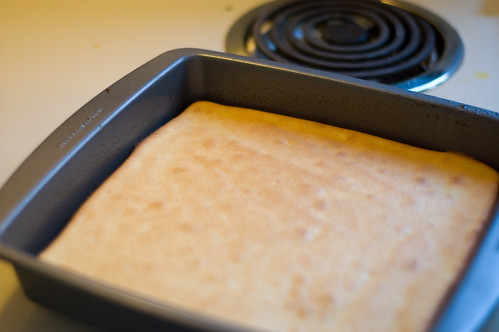
(I didn't have cute little cake molds, so I baked my halved recipe in a 9x9 pan, and I cooked it for less time). I would like to make it in 2 9x9 pans next time and make an orange cream layer cake. WOOT!

Also - photographic proof that I squeezed my own orange juice...
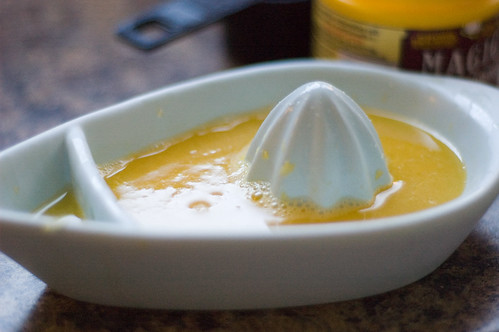
DSC_3771

Sift the cake flour, sugar, baking powder and salt into a large bowl. Add the oil, egg yolks, orange juice, zest and vanilla. Stir until smooth, but do not overbeat.

It always scares me a little when someone tells me to make something smooth, but not to overbeat it....
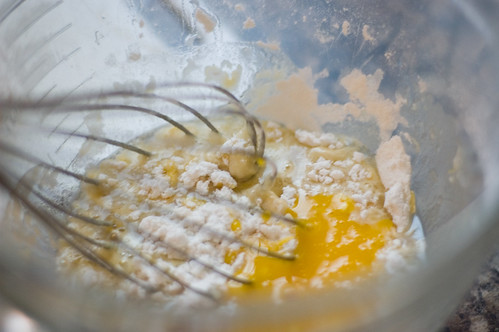
DSC_3772

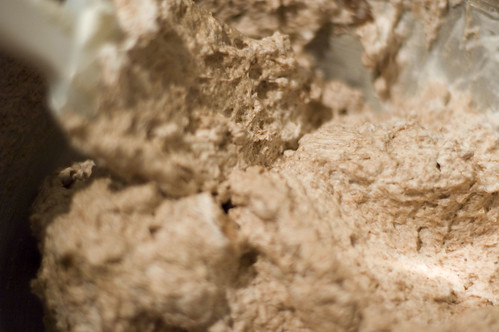
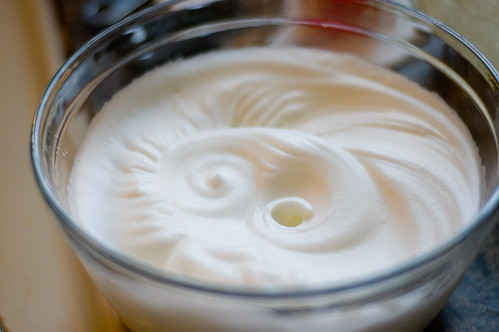
Beat the egg whites until frothy. Add the cream of tartar and beat until soft peaks form. Gently fold the beaten whites into the orange batter. Fill the sprayed molds nearly to the top with the batter.

I was enamoured of my frothy egg whites.
DSC_3773

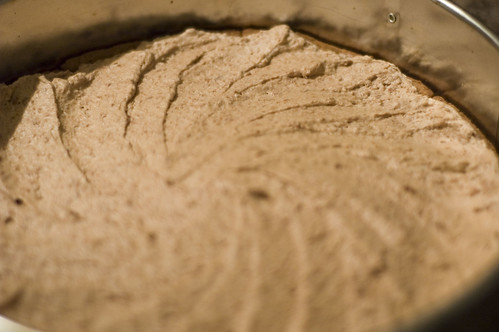
And even more so with my cake...
DSC_3775

Bake approximately 25 minutes, until the cakes bounce back when lightly pressed with your fingertip. Do not overbake. Remove from the oven and let cool on a wire rack. When completely cool, remove the cakes from the molds. Cover the cakes to keep them moist.

I think I ended up baking my cake for about 18-20 minutes. I started checking early because I keep burning things!
DSC_3776

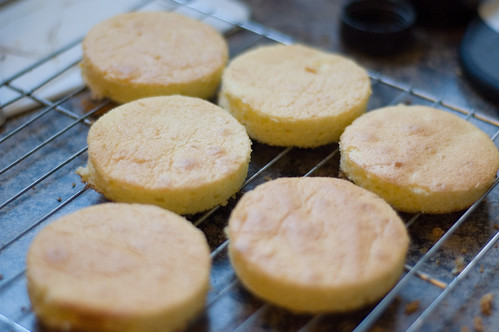
My much-abused spiegelau wine balloons served me well yet again....one of these days I'll stop using fine crystal as a cookie cutter....
DSC_3778

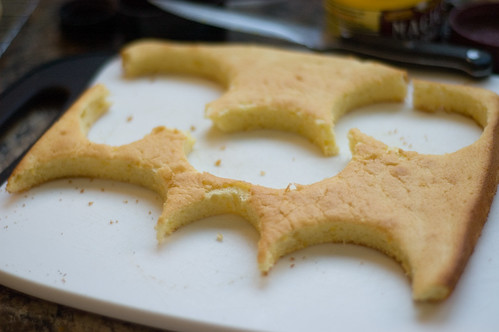
Also, I know the chiffon cake kicks complete ass because I got to eat these bits...mmmmmmmmmmmmmmmmmmmmmmmmmmmmmmmm
DSC_3777


To prepare the glaze:

Chop the chocolate into small pieces. Place the butter in a saucepan and heat until it is just about to bubble. Remove from the heat; add the chocolate and stir to melt. Pour through a strainer and keep warm.

To assemble:

Cut a thin slice from the top of each cake to create a flat surface. Place a cake flat-side down on top of each custard. Cover the tops with warm chocolate glaze. Serve immediately.

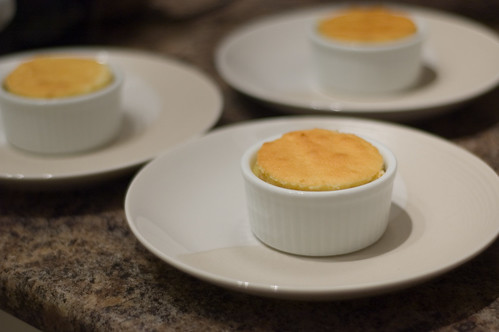
I didn't have to cut anything from my cakes, as they were already quite flat, and perfectly sized to my custard ramekins...
DSC_3780

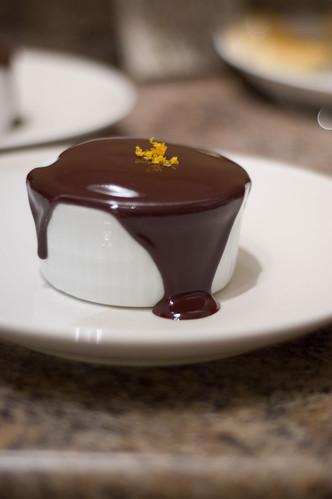
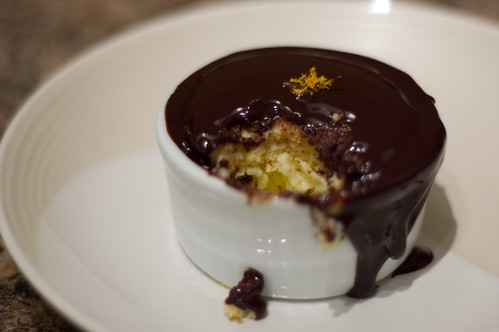
And then I poured the chocolate over top, garnished with orange zest....and proceeded to eat all the cake, but leave my grainy narsty custard. I want more cake. And perhaps someday I will learn how not to destroy custard....
DSC_3787

Thanks so much for reading! I'm so behind in all my posting - I seriously have like 200 photos I haven't even gone through yet, because life has just been so busy lately. I miss you guys!

Anyway, if you'd like to see other (likely more successful!) renditions of the bostini cream pie, check out the daring bakers blogroll here: http://daringbakersblogroll.blogspot.com/

Wednesday, August 29, 2007

chocolate and caramel with the daring bakers

Pin It Now!

cake!

It's that time of the month again...and no, I don't mean THAT time (or at least, if I did, I wouldn't post about it here), rather, the time where the exact same identical recipe starts suspiciously popping up on blogs around the globe.

Oh yeah. It's time for Daring Bakers.

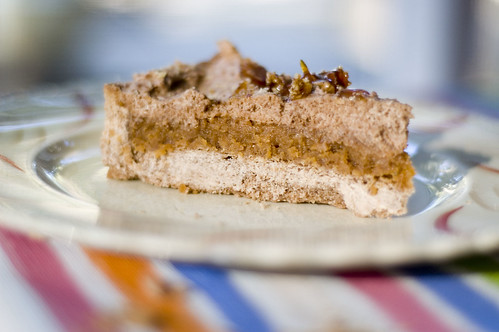
This month's recipe was a very fun Milk Chocolate Caramel Tart. I was super stoked to make it, because I don't often stretch my baking boundaries, and since this recipe was incorporating caramel (woohoo!) AND chocolate, I didn't see how it could possibly not be awesome. Well, read on....

Milk Chocolate and Caramel Tart
Daring Bakers - August


This tart starts with pastry. I freaking hate pastry.

Chocolate Shortbread Pastry
Note: The Chocolate Shortbread pastry can make 3 tart shells.

Preparation time: 10 minutes
Refrigeration: overnight
To make 3 tart shells: 9 ½ inches (24 cm) square
or 10 inches (26 cm round)

Ingredients:

1 cup (250g ) unsalted butter, softened
1 cup plus 2 tablespoons (150 g) confectioners’ sugar
½ cup (50 g) ground hazelnuts
2 level teaspoons (5 g) ground cinnamon
2 eggs
4 ½ cups (400 g) cake flour
2 ½ teaspoons (10 g) baking powder
1 ½ tablespoons (10 g) cocoa powder

A day ahead
1. In a mixing bowl of a food processor, cream the butter. (Leslie's Note - this is totally and completely different from any other pastry recipe I've made....they usually call for uber cold butter, so it stays in little bits and makes things flakey. This is strange)

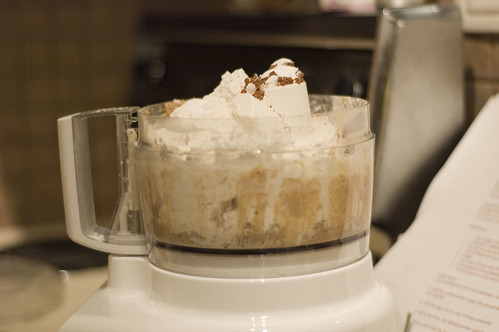
2. Add the confectioners’ sugar, the ground hazelnuts, and the cinnamon, and mix together. This part I can totally do. Doesn't it look nice?

from whence it all came

3. Add the eggs, one by one, mixing constantly

4. Sift in the flour, the baking powder, and the cocoa powder, and mix well.

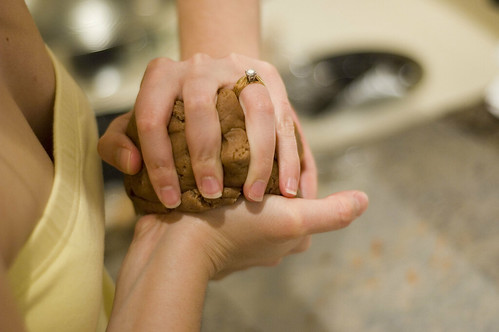
5. Form a ball with the dough, cover in plastic wrap, and chill overnight.

So I made a big ole ball outta the pastry. And it felt kinda strange. Almost plastic-like. This should have been another clue.

thank hubs for this shot

Milk Chocolate and Caramel Tart

Preparation time: 40 minutes
Baking Time: 30 minutes
Refrigeration time: 1 hour

Ingredients:

½ lb (250 g) chocolate shortbread pastry (see recipe above)
1 ½ cups (300 g) granulated sugar
1 cup (250 g) heavy cream (30-40 percent butterfat) or crème fraiche
¼ cup (50 g) butter
2 whole eggs
1 egg yolk
2 ½ tablespoons (15 g) flour
1 ¼ cups (300 g) whipping cream
½ lb (250 g) milk chocolate

1. Preheat oven to 325 °F (160 °C).

2. Line the baking pan with the chocolate shortbread pastry and bake blind for 15 minutes.

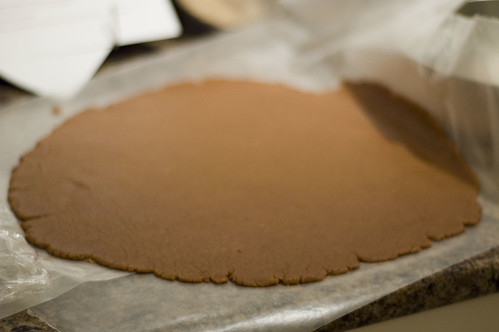
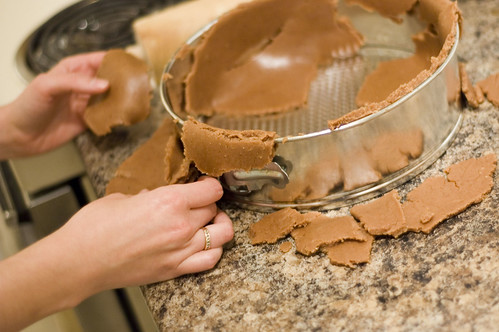
So I had a little fun with this simple little step. Witness.....I rolled out the pastry and it looked just about perfect (especially considering that it was I who was doing this....and I hate making pastry...

so it started out okay

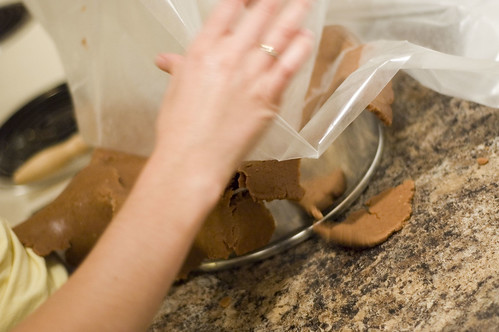
So then, culinary genius that I am, I decided to just pick the whole thing up on the waxed paper and toss it in the pan. I didn't want it to stretch and break while I was lifting it, so I figured this would minimize the whole stretchy misshapen pastry issue. Luckly, hubs was on hand to snap away. Witness again.....

BLAST!

No, thine eyes do not deceive thee. That really is the pastry utterly and completely disintegrating. Don't worry, there's an even better picture...

ugh

Oh yeah. It was bad. I think it just *might* be worse than the whole charred shortbread incident...not sure though....

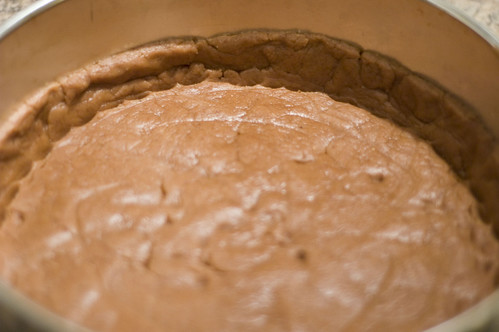
At any rate, I eventually squashed it into the pan, and came up with this:

yes, this is, in fact, the best i can do

Clearly, not that pretty, a little thick and clumsy, but WHATEVER. At least it's one congruous mass, which is more than we can say for the rolled out version, eh? I lined the pastry shell with foil and weighted it down with uncooked brown rice to keep it from puffing. The bottom line is that this pastry recipe sucks....it's not chocolatey enough to be chocolate and the cinnamon needs to be BANISHED. Blech.


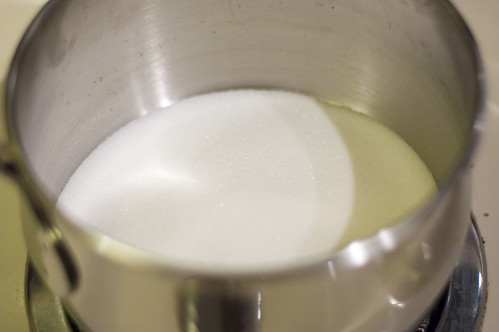
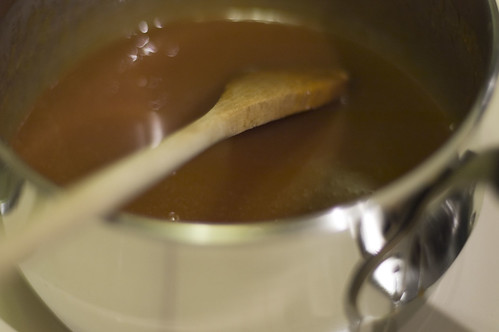
3. In a saucepan, caramelize 1 cup (200 g) granulated sugar using the dry method until it turns a golden caramel color. Incorporate the heavy cream or crème fraiche and then add butter. Mix thoroughly. Set aside to cool.

This recipe writer is a total minimalist. The "dry" method means that you are basically heating a pan full of sugar and crossing all the extremities that it doesn't ignite.

not so sure about dry caramel

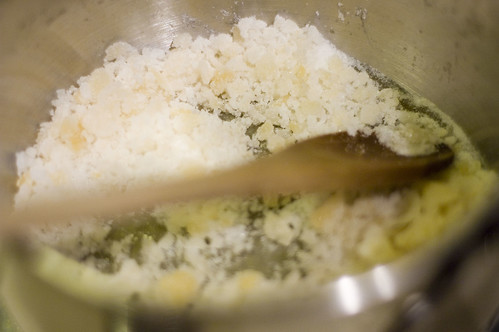
The jury seems to be out on whether one should or should not touch the caramel while it brown...I couldn't resist, because I was nervous that the bottom parts would scorch and burn before the top had even melted. So ended up with this:

um....is it supposed to do that?

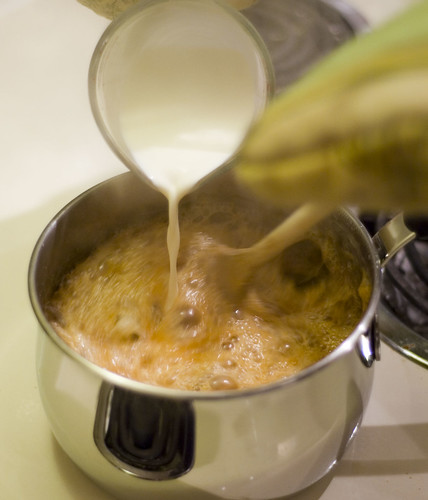
Meh. It eventually melted and didn't explode, much to my elation. Woot for that. Thankfully I had been warned about the thermodynamics that would ensue with the next step. Cold whipping cream and bubbling hot caramel make for explosive bedfellows, so I thankfully used a large enough pot to contain all the excitement. I was still completely freaked out though, so that's my ugly oven mitt you see blurred in the foreground.

fun with thermogenics

At this point (once it all calmed down), it was totally one of the best things I've ever tasted in my life. I would willingly eat it with a spoon. OMG. GOOD.

this stuff tastes like werthers.  seriously.  i could sell it.


4. In a mixing bowl, beat the whole eggs with the extra egg yolk, then incorporate the flour.

5. Pour this into the cream-caramel mixture and mix thoroughly.

This part was relatively straighforward. No further drama.

*crossing fingers that eggs don't scramble!)


6. Spread it out in the tart shell and bake for 15 minutes. Remove from oven and allow to cool.

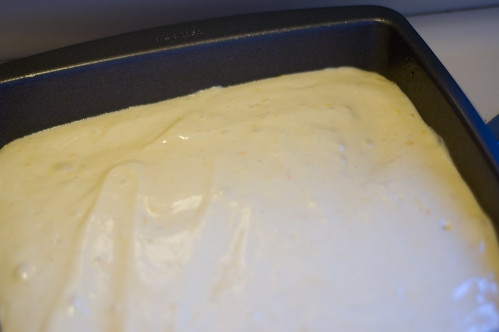
I'm not sure if it was really supposed to be spreading consistency, because mine was very much a pouring kinda mixture. But it looked nice.

pretty caramel

Though it didn't set up until about 30 minutes in the oven.

ha!  it set!


7. Prepare the milk chocolate mousse: beat the whipping cream until stiff. Melt the milk chocolate in the microwave or in a bain-marie, and fold it gently into the whipped cream.

So I totally ate at least 100g of milk chocolate at this step. I'm normally a dark chocolate whore, but this stuff just beckoned me with its creamy goodness. It's pretty easy to prepare. I melted the chocolate in the micro:

please don't ask how much chocolate I ate that isn't in this picture

And folded it into the cream. It ended up a touch grainy, but is anyone seriously going to complain about milk chocolate grains in the midst of billowy clouds of whipping cream? If they do, send them my way....

only slightly grainy chocolate mousse


8. Pour the chocolate mousse over the cooled caramel mixture, smoothing it with a spatula. Chill for one hour in the refrigerator.

This step makes me seriously wonder if buddy who wrote this recipe f'ed up his verbs. I POURED the caramel into the pan, but I definitely had to SPREAD the mousse. Mmmmmmmmmmmmmm.....mousse......

more handiwork admiration

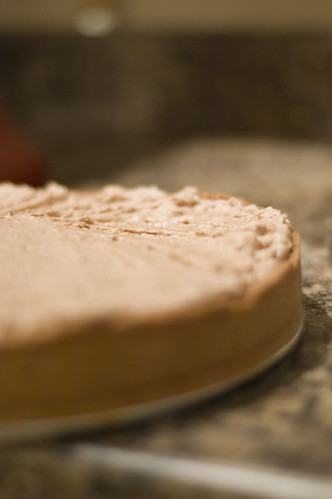
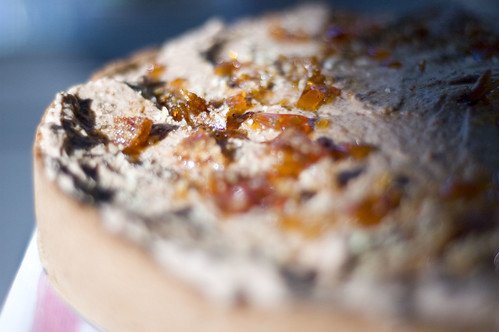
Thrilled with my handiwork and subsequent kitchen goddess status, I experimented with the ultra narrow depth of field in my new lens...yeah I know...overkill.

fun with narrow depths of field....


Caramel Fragments:

Melt ½ cup (100g) granulated sugar in a saucepan until it reaches an amber color. Pour it onto waxed paper laid out on a flat surface. Leave to cool. Break it into small fragments and stick them lightly into the top of the tart.

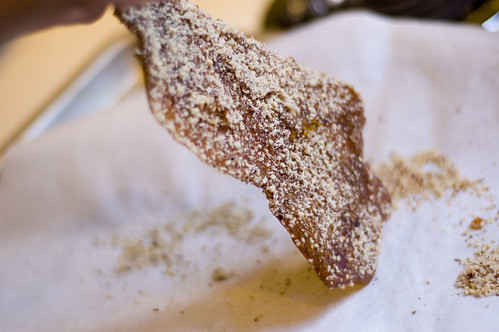
I had a little fun with this step. I used some of my leftover ground hazelnuts to make some of my caramel into a sort of hazelnut brittle. It was darn good.

nuts+caramel = brittle?

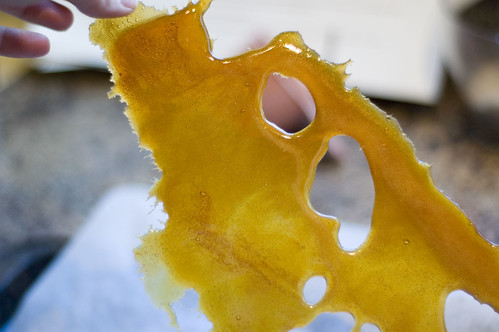
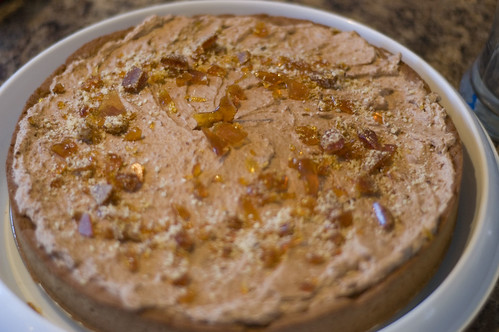
I also had fun with the regular caramel (which made cooler shapes):

you should totally admire my handiwork

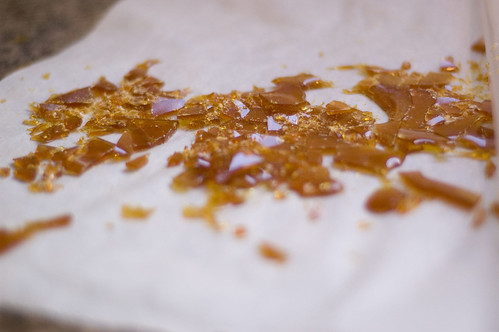
And bashing it all up with a meat mallet was surprisingly therapeutic (I learned the hard way last time that you don't mess with caramelized sugar....)

bashing sugar with a hammer is fun

Of course, like last time I did the DB challenge, this one was also to survive a 200 km trek (different place this time), so I packed it up to go!

before the 200 km trek

Under the cottage country setting sun, a few rays splashed their way across my cake, further melting the top sugary layer.....

cake in the sun


The Verdict:
The components of this cake are interesting. I will NEVER EVER EVER EVER AS LONG AS I LIVE be making that crust again. I hated working with it, and worse, I despised the cinnamon. It was WAY too strong and out of place.

That said, I loved the caramel filling. It was amazing. It was like eating a werthers, except I wasn't wondering how its creamy goodness had been made indefinitely shelf stable. I would make the filling again, in a regular pâte sucrée, and top with whipped cream. And it would make me a hero to whoever ate it.

Last, the milk chocolate mousse was yummy, but I personally found it was lost in this recipe. Don't get me wrong, I scooped it out of the bowl like chocolate was going out of style and I just found the last sale, but it's relatively sweet and not super chocolatey, so it wasn't enough to stand up to the assertive cinnamon and caramel flavours. It would also be good in its own tart, or as a filling in a really decadent chocolate cake.

And I totally want that caramel filling again right now.

Thanks for reading and be sure to check out what the other daring bakers created at the blogroll: http://daringbakersblogroll.blogspot.com/
Can't wait to see what next month's challenge is!

Thursday, June 28, 2007

now, officially, a DARING BAKER...

Pin It Now!

orangelogo

So this post is a day late, but you have to forgive me because it's my birthday. :)

The Daring Bakers is a group of intrepid food bloggers who, every month, follow a chosen recipe to a TEEEEEEEEEEE and make some crazy, complex carbohydrate laden craziness.

This month, we made bagels. I've made bagels before, using Mark Bittman's recipe. They were awesome a beautifully bagelly.

Sadly, *my* bagels this time were really not at all what a bagel should be. I personally found the recipe a little lean in terms of salt, and the instructions were a bit to vague in terms of how much flour should be used (stating 6-8 cups......unless one uses at least 8 cups, the dough is too bready to really be a true bagel).

Also, I found the yield to be a bit off.....the recipe stated that it would yield 15 (and several of the DB crowd purport to have succeeded here, so clearly this is just a ME thing), but I ended up with FORTY.

I live with just my husband. I don't really eat refined carbs.

So what could I do, but bring all of these lovely little bagels to work.....I ended up with onion, cinnamon and plain bagels and all of them were relatively quick to disappear from my bin. So even though they weren't the best bagels ever, it certainly didn't seem to impede people from eating them.

So here is a little documentary-style footage of my path....

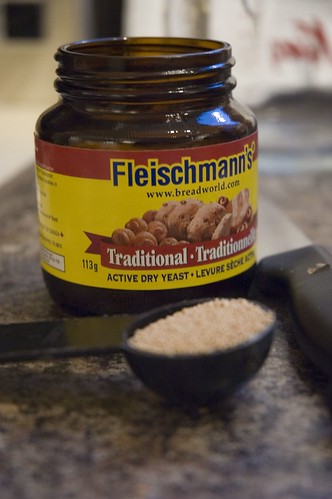
I was quite impressed at the 4T of yeast called for in this recipe!
how much yeast again?

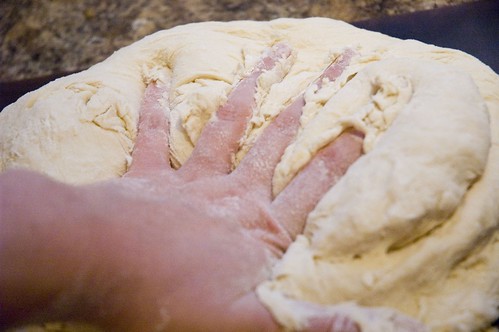
I got RIGHT into that dough...DB style!
smoooooooooooooosh that dough

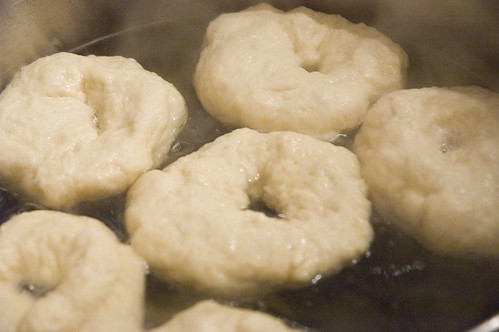
Of course, I got antsy and put too many bagels in the pot.....
i put too many in the pot

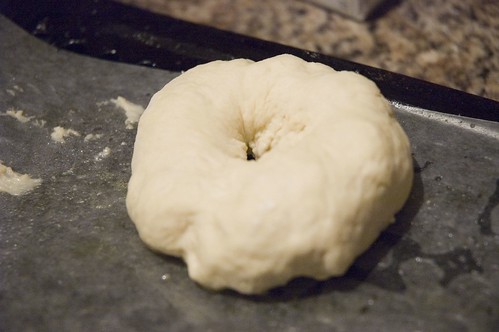
Boiled bagels (at least mine) are not terribly attractive....
boiled bagel

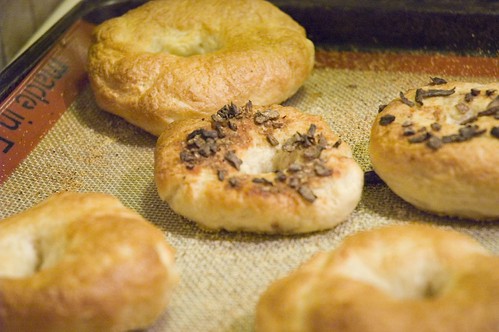
Some plain and onion bagels on the Silpat (onion didn't turn out very attractive, but was mighty tasty with some garden veggie cream cheese!)
bagels and silpat....they even stuck a bit - i was shocked

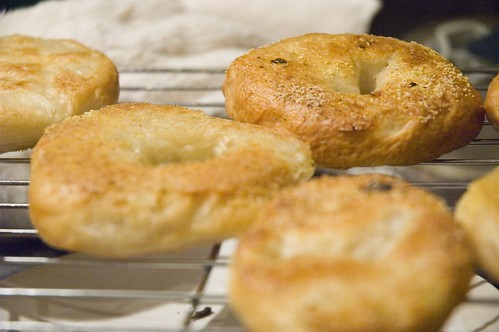
And some more tasty bagels!
somewhat bagel-y bagels

This has officially been the busiest month....I don't think I've had two seconds to sit down! Is it bad that I just want to crawl into bed and sleeeeeeeeeeeeeeeeeeeeeeeeeeep for the whole long weekend?

Without further ado, here is the fameuse recipe...follow at your peril, for it takes a far more daring baker than I to successfully attain bagel nirvana....and definitely check out some of the blogs on the Daring Baker blogroll!!!!!

Real Honest Jewish Purist's Bagels
Daring Bakers Challenge #7: June 2007

Post Date: Wednesday, June 27th


Allowed Modifications:


Topping of your choice, savory recommended, for the outside of the bagels only. No added ingredients or flavours inside the bagels.
Filling or spread of your choice for the outside of the bagel. (i.e. flavoured cream cheese or peanut butter)
Recipe ingredient exception allowed only if allergy or an ingredient not available or cost prohibitive in your region
Recipe Quantity: Fifteen (15) large, plain, Kosher bagels
Ingredients:


6-8 cups bread (high-gluten) flour
4 tablespoons dry baking yeast
6 tablespoons granulated white sugar or light honey (clover honey is good)
2 teaspoons salt
3 cups hot water
a bit of vegetable oil
1 gallon water
3-5 tablespoons malt syrup or sugar
a few handfuls of cornmeal
Equipment:

large mixing bowl
wire whisk
measuring cups and spoons
wooden mixing spoon
butter knife or baker's dough blade
clean, dry surface for kneading
3 clean, dry kitchen towels
warm, but not hot, place to set dough to rise
large stockpot
slotted spoon
2 baking sheets
How You Do It:


Step 1- Proof Yeast: Pour three cups of hot water into the mixing bowl. The water should be hot, but not so hot that you can't bear to put your fingers in it for several seconds at a time. Add the sugar or honey and stir it with your fingers (a good way to make sure the water is not too hot) or with a wire whisk to dissolve. Sprinkle the yeast over the surface of the water, and stir to dissolve.

Wait about ten minutes for the yeast to begin to revive and grow. Skipping this step could result in your trying to make bagels with dead yeast, which results in bagels so hard and potentially dangerous that they are banned under the terms of the Geneva Convention. You will know that the yeast is okay if it begins to foam and exude a sweetish, slightly beery smell.

Step 2- Make Dough: At this point, add about three cups of flour as well as the 2 tsp of salt to the water and yeast and begin mixing it in. Some people subscribe to the theory that it is easier to tell what's going on with the dough if you use your hands rather than a spoon to mix things into the dough, but others prefer the less physically direct spoon. As an advocate of the bare-knuckles school of baking, I proffer the following advice: clip your fingernails, take off your rings and wristwatch, and wash your hands thoroughly to the elbows, like a surgeon. Then you may dive into the dough with impunity. I generally use my right hand to mix, so that my left is free to add flour and other ingredients and to hold the bowl steady. Left-handed people might find that the reverse works better for them. Having one hand clean and free to perform various tasks works best.

When you have incorporated the first three cups of lour, the dough should begin to become thick-ish. Add more flour, a half-cup or so at a time, and mix each addition thoroughly before adding more flour. As the dough gets thicker, add less and less flour at a time.


Step 3- Knead Dough: Soon you will begin to knead it by hand (if you're using your hands to mix the dough in the first place, this segue is hardly noticeable). If you have a big enough and shallow enough bowl, use it as the kneading bowl, otherwise use that clean, dry, flat counter top or tabletop mentioned in the "Equipment" list above. Sprinkle your work surface or bowl with a handful of flour, put your dough on top, and start kneading. Add bits of flour if necessary to keep the dough from sticking (to your hands, to the bowl or counter top, etc....). Soon you should have a nice stiff dough. It will be quite elastic, but heavy and stiffer than a normal bread dough. Do not make it too dry, however... it should still give easily and stretch easily without tearing.

Step 4- Let Dough Rise: Place the dough in a lightly oiled bowl, and cover with one of your clean kitchen towels, dampened somewhat by getting it wet and then wringing it out thoroughly. If you swish the dough around in the bowl, you can get the whole ball of dough covered with a very thin film of oil, which will keep it from drying out.

Place the bowl with the dough in it in a dry, warm (but not hot) place, free from drafts. Allow it to rise until doubled in volume. Some people try to accelerate rising by putting the dough in the oven, where the pilot lights keep the temperature slightly elevated. If it's cold in your kitchen, you can try this, but remember to leave the oven door open or it may become too hot and begin to kill the yeast and cook the dough. An ambient temperature of about 80 degrees Fahrenheit (25 Centigrades) is ideal for rising dough.

Step 5- Prepare Water for Bagels: While the dough is rising, fill your stockpot with about a gallon of water and set it on the fire to boil. When it reaches a boil, add the malt syrup or sugar and reduce the heat so that the water just barely simmers; the surface of the water should hardly move.

Step 6- Form Bagels: Once the dough has risen, turn it onto your work surface, punch it down, and divide immediately into as many hunks as you want to make bagels. For this recipe, you will probably end up with about 15 bagels, so you will divide the dough into 15 roughly even-sized hunks. Begin forming the bagels. There are two schools of thought on this. One method of bagel formation involves shaping the dough into a rough sphere, then poking a hole through the middle with a finger and then pulling at the dough around the hole to make the bagel. This is the hole-centric method. The dough-centric method involves making a long cylindrical "snake" of dough and wrapping it around your hand into a loop and mashing the ends together. Whatever you like to do is fine. DO NOT, however, give in to the temptation of using a doughnut or cookie cutter to shape your bagels. This will push them out of the realm of Jewish Bagel Authenticity and give them a distinctly Protestant air. The bagels will not be perfectly shaped. They will not be symmetrical. This is normal. This is okay. Enjoy the diversity. Just like snowflakes, no two genuine bagels are exactly alike.

Step 7- Pre-heat Oven: Begin to preheat the oven to 400 degrees Fahrenheit.

Step 8- Half Proof and Boil Bagels: Once the bagels are formed, let them sit for about 10 minutes. They will begin to rise slightly. Ideally, they will rise by about one-fourth volume... a technique called "half-proofing" the dough. At the end of the half-proofing, drop the bagels into the simmering water one by one. You don't want to crowd them, and so there should only be two or three bagels simmering at any given time. The bagels should sink first, then gracefully float to the top of the simmering water. If they float, it's not a big deal, but it does mean that you'll have a somewhat more bready (and less bagely) texture. Let the bagel simmer for about three minutes, then turn them over with a skimmer or a slotted spoon. Simmer another three minutes, and then lift the bagels out of the water and set them on a clean kitchen towel that has been spread on the counter top for this purpose. The bagels should be pretty and shiny, thanks to the malt syrup or sugar in the boiling water.

Step 9- Bake Bagels: Once all the bagels have been boiled, prepare your baking sheets by sprinkling them with cornmeal. Then arrange the bagels on the prepared baking sheets and put them in the oven. Let them bake for about 25 minutes, then remove from the oven, turn them over and put them back in the oven to finish baking for about ten minutes more. This will help to prevent flat-bottomed bagels.

Remove from the oven and cool on wire racks, or on a dry clean towels if you have no racks. Do not attempt to cut them until they are cool... hot bagels slice abominably and you'll end up with a wadded mass of bagel pulp. Don't do it.

How To Customize Outside of Bagels: After boiling but before baking, brush the bagels with a wash made of 1 egg white and 3 tablespoons ice water beaten together. Sprinkle with the topping of your choice: poppy, sesame, or caraway seeds, toasted onion or raw garlic bits, salt or whatever you like. Just remember that bagels are essentially a savory baked good, not a sweet one, and so things like fruit and sweet spices are really rather out of place.

Related Posts with Thumbnails