Photobucket - Video and Image Hosting
Showing posts with label potatoes. Show all posts

Sunday, June 12, 2011

bbq tastes of summer

Pin It Now!
DSC_0720

One of the many things to love about summer is that you just can't go wrong when you invite people over for a barbecue. Nobody expects anything fancy (most are content with burgers and hot dogs), and anything you do that's a bit outside of the box looks extra fancy as a result.

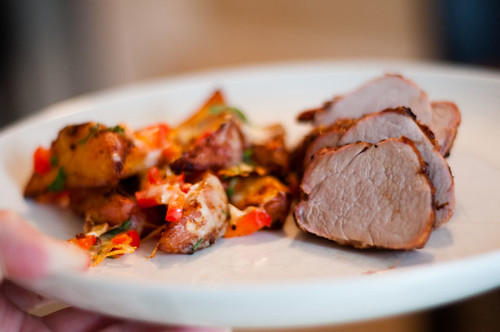
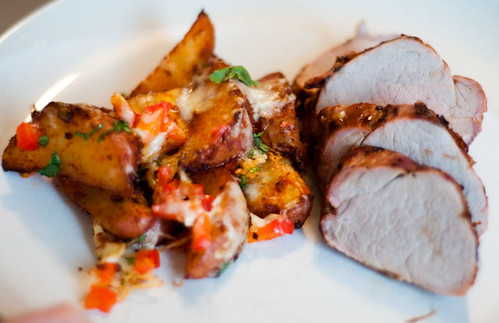
For example, tonight's dinner was nothing crazy - bbq'd pork tenderloin, roasted potatoes, salad and dessert - but having a little fun with the execution of the dinner made it super delicious.

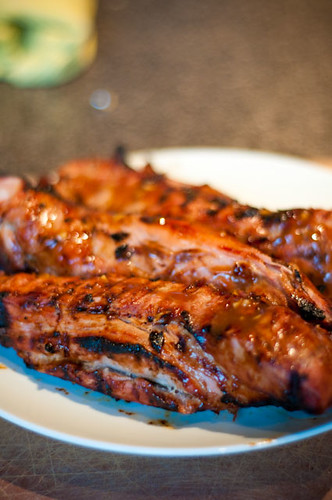
Of course, things would have been helped had hubs not practically petrified the pork on the grill (you know that memo from the FDA last week, where they said it was safe to cook pork to 145F? hubs burned it). I was surprised that despite it's inner temperature reading of 180F (no, not joking), some parts of the pork were still not bad.....definitely not juice, but still edible. The thinner parts were chewy and hard (yuck), but the thicker middle parts were workable.

I'm so obsessed with cooking magazines that I took the chance to use two of my latest - June 2011 Clean Eating and Early Summer 2011 Food & Drink - they absolutely did not disappoint, and you'll see the recipes for southwestern cheddar potato wedges, salad with endive, feta, avocado and mint, and passionfruit pavlova following. They were all such delicious twists on ordinary...I felt compelled to share them.

DSC_0730

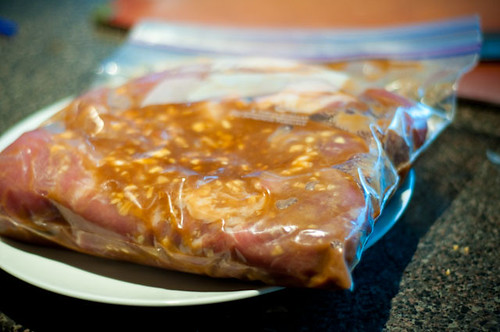
For the main, I opted for an asian-inspired (more pan-asian than any specific geographic location, hehe) pork tenderloin. Aside from charring, I thought the recipe would have benefited from longer marinating. I marinated about 3 hours, but I think that the flavours would have better permeated the pork with an overnight marinade. It was good though...I mean really, when there are meat and fire....it's hard for anything to be especially bad.

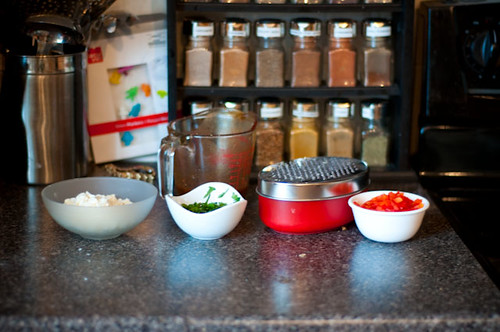
A little tip, when you are entertaining, make sure you have all of your garnishes ready to go before company arrives. In this instance, I had crumbled feta, cilantro, glaze for meat, grated cheddar and minced red peppers ready to go for last minute additions. It makes you look more organized and makes the whole meal flow a lot better.

DSC_0711

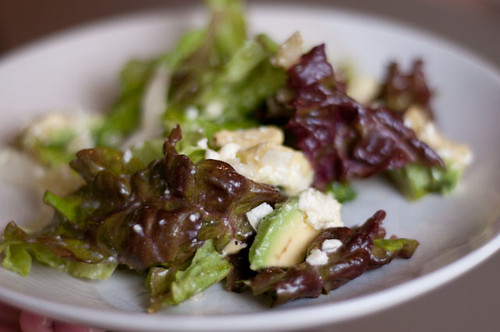
Honey-lime dressed salad with avocado, endive, mint and feta
DSC_0723
from Early Summer 2011 Food & Drink (will be online here soon)
As soon as I saw this combination of flavours, I knew it would be delicious. It's light and yummy and fresh...the mint adds that little bit of something extra, and it's all wonderfully balanced with the rich avocado, bright mind, sharp feta and yummy honey lime dressing all playing off each other. Can't go wrong with this. I'm sure it would be fine without the endive though - it was good, but you wouldn't be missing anything if you felt like not buying endives)

DSC_0703

DRESSING:
1/4 c olive oil
3 T lime juice
1 T honey
2 t dijon mustard
1 small garlic clove, minced
salt and pepper

SALAD:
1 large belgian endive (optional, I think)
1/2 cup mint leaves
8 cups greens (I used red leaf lettuce, baby spinach or mixed greens would work well)
1 large ripe but firm avocado, sliced
4 oz feta, crumbled

1. Combine dressing ingredients. Set aside (can be made in advance and fridgified)

2. Slice endive in half lengthwise. Cut out and discard core. Thinly slice. Coarsely tear mint leaves.

3. Combine salad ingredients in a large bowl. Toss. Add dressing. Toss. Eat immediately (will not keep).

Delicious. I think it would be great with a grilled chicken breast on top, or with a nice piece of fish, if you wanted to make the salad into a meal on its own).

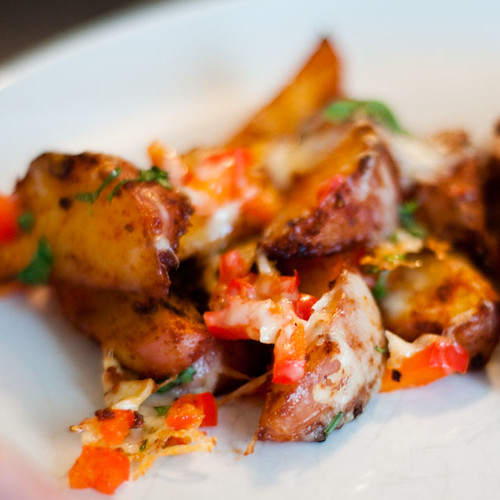
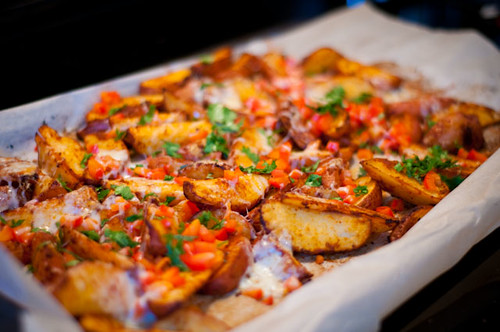
Southwestern Cheddar Steak Fries
DSC_0719
stolen and lightly modified from the June 2011 issue of Clean Eating

Potatoes are inherently yummy, so it's hard to go wrong, but this is like the love child of a potato skin and a roasted potato....and it's actually not too bad for you. YUM. I reduced teh amount of smoked paprika (and subbed sweet spanish paprika) because I find that smoked paprika tends to completely dominate all recipes. A little bit goes a long way. If you don't have smoked paprika, you could get some smokiness by using smoked salt, a drop of liquid smoke or some chipotle powder. I think they would be good even without the smoke though.

DSC_0705

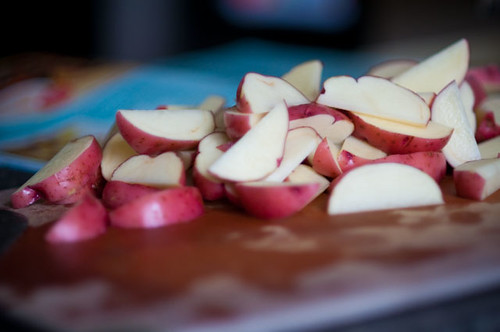
1 lb red or yukon gold potatoes, scrubbed and cut lengthwise into wedges
1 T olive oil
1/2 t smoked paprika (I used bittersweet)
1.5 t sweet spanish paprika (not the cheap grocery store stuff)
1/2 t ground cumin
1/2 t garlic powder
1/4 t sea salt
1 oz finely shredded aged cheddar
1/3 c finely chopped red pepper
2 t minced cilantro

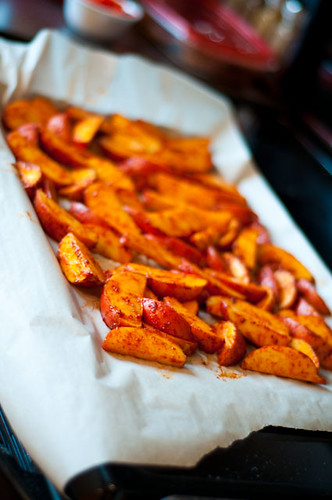
1. Preheat oven to 425F. Line a large baking sheet with parchment paper/silpat. In a large bowl, combine oil with paprika, cumin, garlic and salt. Toss potatoes with spice mixture. Place potatoes in a single layer on the baking sheet.

DSC_0710

2. Bake in centre of oven for 10 minutes. Flip and stir potatoes, and bake for another 10 minutes.

3. Remove potatoes from oven and sprinkle with cheese and red peppers. Bake another 5-7 minutes. Sprinkle with cilantro and serve immediately.

DSC_0714

Asian-inspired grilled pork tenderloin
DSC_0713

I've changed this recipe a little bit, because I like to marinate my pork to infuse the flavours a little more. I would marinate this overnight for maximum yum factor.

1/4 c hoisin sauce
2 T lemon juice
1 T dijon mustard
1 T honey
1 T toasted sesame oil
1 T low-sodium soy sauce
1 T grated ginger
1 T minced garlic
[1 t lemon zest....I omited because I juiced my lemons and was too lazy to zest them after]
2 pork tenderloins

1. To make marinade/glaze, combine all ingredients except pork in a bowl. Mix. Pour 2/3 of marinade over pork. Reserve the rest of the marinade to use as a glaze/sauce.

2. Let pork marinate 24 hours (I say this is crucial...mine only marinated for 4 hours and the flavours were not permeated enough).

DSC_0707

3. Grill pork to desired doneness (FDA recommends a temperature of 145F, with a rest time of at least three minutes). Brush pork generously with marinade during laste five minutes of cooking. As mentioned above, hubs grilled to a temp of 180F. I let it rest for 10 minutes....it was still edible, but I think anything over 160F is really kinda overdone. Slice into thin slices and serve.

You could use this same recipe with either pork chops or chicken pieces and I think it would be equally great. The leftovers are awesom in stir fry, or in wraps or on salads. I was lucky enough to find pork tenderloin at half price today, so we royally stocked up.

DSC_0717


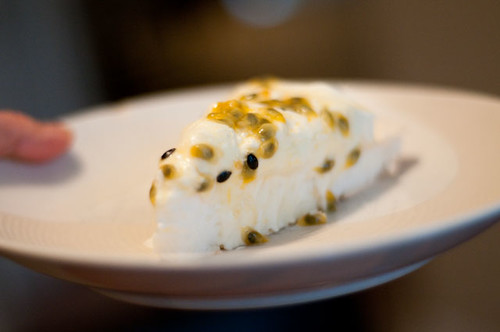
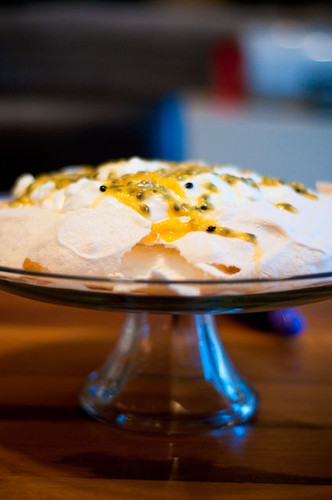
Passionfruit pavlova
DSC_0734
from Early Summer 2011 Food & Drink (will be online here soon)

I've written about pavlova before....for the uninitiated, it is a dessert consisting of a baked meringue, whipped cream and fruit. This is a relatively simple pavlova, and I think it's incredibly delicious. That said, I also found it too sweet, so I'm providing a recipe NOT based on what I actually made, but tweaked slightly to proportions that I am confident would yield a more balanced dessert.

Overall though, this is amazing...passionfruit is one of the most wonderful flavours in the entire planet - it's so intoxicatingly tropical....if you've never tried if before, this would be a most decadent initiation.

MERINGUE:
4 large egg whites at room temperature
1/2 t cream of tartar
3/4 c superfine sugar (just take regular and whiz it in the food processor)
1 t cornstarch
1 t white vinegar

CREAM & FRUIT
1 c whipping cream
2 T sugar
1 t lemon zest
1 T lemon juice
2 ripe passion fruit

1. Preheat the oven to 250F (120C).

2. Trace an 8-inch circle onto a piece of parchment paper using a marker. Line a baking tray with the parchment paper, marker-side down (so the marker does not get on your meringue).

3. Whip the egg whites and cream of tartar until they are foamy. Slowly pour in the sugar while whipping and continue whipping on high speed until the whites hold a stiff peak and the sugar is dissolved (no longer feels gritty between your fingers). Fold in the cornstarch and vinegar.

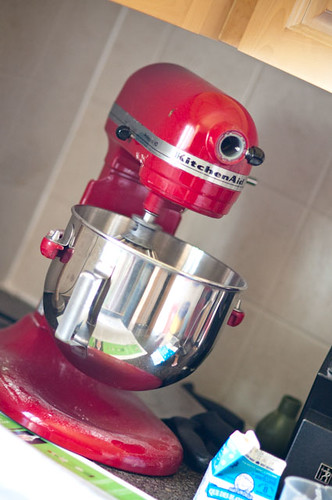
This is the point where I'm thankful to have my beautiful Kitchenaid mixer:
DSC_0696


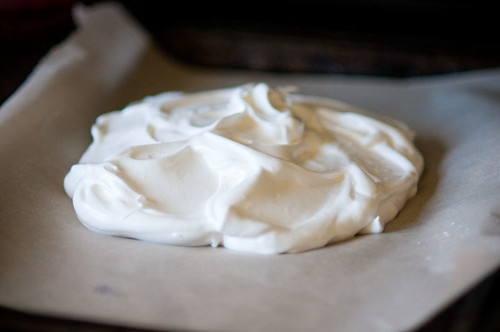
4. Spoon the whites onto the parchment paper and try to make them look snazzy with a spatula. I tried and failed, - you can see.

DSC_0698

5. Bake the meringue for 75-90 minutes, until the exterior is dry, cracking the oven door if the merinque starts showing signs of browning (I think mine browned a bit....it was still delish). Once out of the oven and cooled, the meringue should feel dry on the outside and peel away from the parchment paper easily. If still a little soft, return to the 250F oven for about 10-20 minutes. Cool the meringue on the tray before removing.

6. Whip the cream into soft peaks and beat in the sugar, lemon zest, juice and chill.

7. Just before serving, spoon the whipped cream over the meringue, and spoon the passion fruit seeds over the meringue - all you have to do is cut the fruit in half, stir the seeds with a spoon, and drizzle over top.

Voila. Tropical perfection. Slice and serve like a cake - serves 8.

DSC_0728

One final tip, given that this is a bbq-themed post. You can bbq bacon. Go do it and thank me later.

That is all.

Sunday, April 24, 2011

i feel like a round stuffed easter egg

Pin It Now!

DSC_9066
When I spent Thursday evening loafing instead of grocery shopping and menu planning (which, ofcourse, relegated me to spending Good Friday doing nothing, because grocery stores, etc. are not open on Good Friday)....I didn't really have high expectations of the food this weekend.

For Easter, we were entertaining hubs' parents, as well as hubs' sister and her hubs (and newborn! yep, the same newborn who was the subject of much merriment back in Feb). It wasn't really a full house, but I still wanted to have some fun with the menu and put on a good spread.

After some brainstorming Friday night, and some frantic (and crazy) grocery shopping on Saturday....I didn't even get down to cooking/starting ANYTHING until 1 pm. If you're at all familiar with my modus operandi, this is not normal. I like to be prepping the day before. Not midday the day of.

I had decided on an Easter dinner menu of crown roast of pork with onion stuffing, (because it makes sense to cook 10 lbs of meat for 7 people...), potato gratin, anise-roasted asparagus and pea salad with feta and spinach. Dessert was a three-nut maple tart with maple cream.

When tackling a menu like this, it's really important to have a plan. When you make your list of recipes, at the same time, note a few things:

1. Where the recipes are (i.e., epicurious, cookbook, magazine). Make sure to note page numbers and issue numbers (for print) or to create a favourites bookmark folder (for online). This will avoid last minute panic.

2. After choosing your recipe, carefully read through each recipe. Make a categorized grocery list (i.e., sort by produce, deli, dairy, meat, grocery).

3. While making your grocery list, make note of all components that need to be made (i.e., for a salad, you need to prep veggies and make dressing. For a tart, you need to make crust, make filling and bake). While noting all of these components, make sure you write down baking times (i.e., make pork - 3 hours oven, make tart crush - 30 min rest, 30 min oven).

4. Make a game plan. I take a look at my component list (i.e., the dressings, crusts, seasonings, dishes) and figure out what HAS to be done (i.e., pork need to go into oven by four, in order to serve dinner at 7:30), and what needs to work around that (i.e., tart needs to bake before pork...MUST FINISH TART BY 4). From here, I am able to make a 'work order'. In this dinner, I started by making tart crust. While the crust was resting, I made the pork stuffing. While the crust baked I made the tart filling. While the tart baked, I prepped the pork. While the pork baked, I made the potato gratin. Things like veggies can (and are usually best) be left to the last minute.

5. It seems a little haphazard, but I find that having a plan makes me feel more confident and ready to get a meal (and a complicated one like this) on the table on time. I also find that having a list of components is SUPER helpful when you have family coming, because you can assign and eager, early and willing family member to a component (i.e., make salad dressing, prep asparagus, chop onions, make breadcrumbs). I wouldn't do that for a fancy dinner party, but we all know it's different and more casual with (most?) families.

Dinner was on the table by 7:45. Not bad for making a tart, a roast, stuffing, gravy, potato gratin, roasted asparagus and a salad. And entertaining. And having fun. :)

I rocked it out pretty good...not gonna lie.

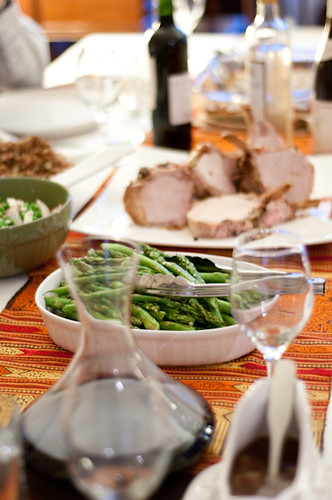
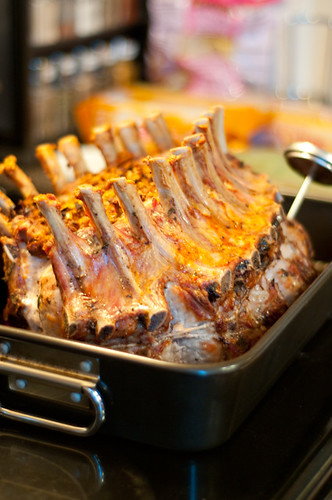
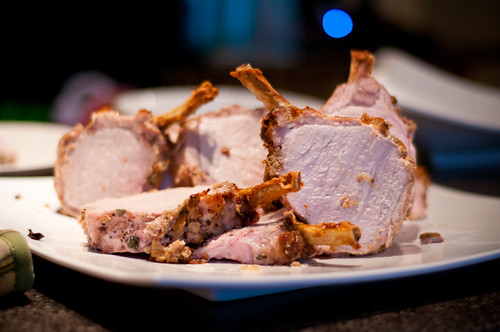
crown roast of pork with onion and bread-crumb stuffing
DSC_9051


Yield: Makes 10 to 12 servings
Active Time: 1 1/2 hr
Total Time: 4 1/4 hr

For stuffing
2 lb onions, finely chopped (6 cups)
2 1/2 teaspoons salt
1 1/2 sticks (3/4 cup) unsalted butter
2 tablespoons chopped fresh sage
1 tablespoon chopped fresh marjoram (dried is fine)
1 teaspoon black pepper
1 1/2 tablespoons cider vinegar
1/2 cup dry white wine
1 (1-lb) piece fresh Pullman loaf, pain de mie, or country loaf, cut into 1-inch cubes, then pulsed to coarse crumbs in a food processor (I used a multi-grain wheat country loaf)
3/4 lb sausage (something garlicky)
1 cup finely chopped celery

For roast
1 teaspoon finely chopped fresh sage
1 teaspoon finely chopped fresh marjoram or thyme (dried = fine)
2 teaspoons salt
1/2 teaspoon black pepper
1 (9- to 10-lb) crown roast of pork, rib ends frenched (so my butcher, whom I love dearly, did not to the best job on this part....it ended up looking fine in the end!)
1 1/2 cups water

For sauce
1/2 cup dry white wine
1 1/2 cups reduced-sodium chicken broth
2 teaspoons cornstarch, dissolved in 2 tablespoons water
2 tablespoons cold unsalted butter

Special equipment: an instant-read thermometer

Make stuffing:
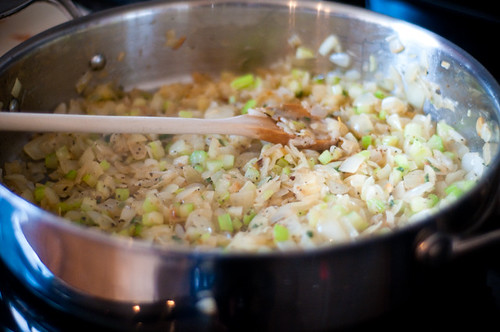
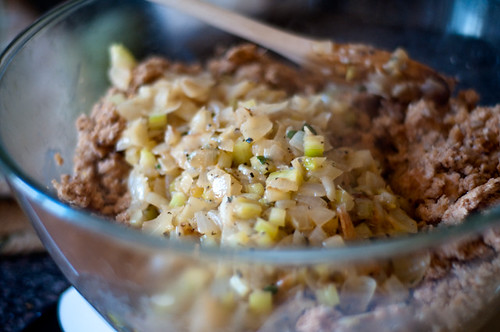
1. Cook onions with 1 1/2 teaspoons salt in 3/4 stick butter in a 12-inch heavy skillet over moderate heat, covered, stirring occasionally, until tender, about 10 minutes. Add celery and continue to cook, uncovered, stirring frequently, until onions are pale golden, about 10 minutes more. Add sage, marjoram, and pepper and cook, stirring, 5 minutes. Add vinegar and wine and boil, stirring occasionally, until liquid is evaporated, then remove from heat.

DSC_9018

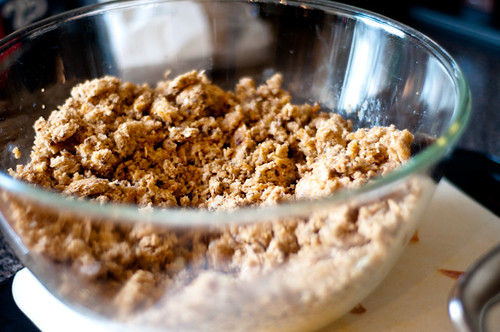
2. Melt the remaining 3/4 stick of butter and pour over bread crumbs. Remove sausage from casings, break apart, and cook in a skillet over medium heat until nicely browned.

DSC_9019

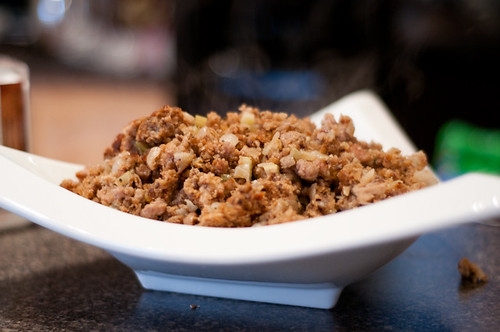
3. Reserve 1 cup onion mixture, covered and chilled, for sauce. Transfer remaining mixture to a large bowl and combine with crumbs.

DSC_9024

Cook roast and stuffing:

1. Put 1 oven rack in lower third of oven and another on bottom of oven and preheat oven to 350°F.

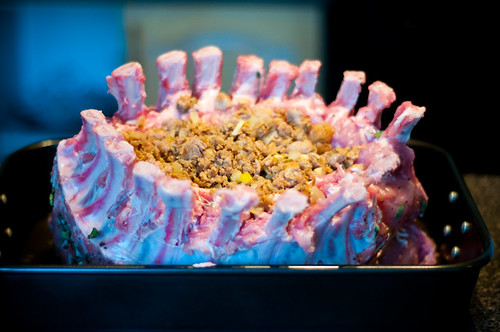
2. Stir together sage, marjoram, salt, and pepper in a small bowl, then rub over outside and bottom of roast. Put roast in a small flameproof roasting pan and mound 2 cups stuffing loosely in center, then add water (I used chicken brown) to pan. Transfer remaining stuffing to a buttered 2-quart baking dish and chill until ready to bake.

DSC_9031

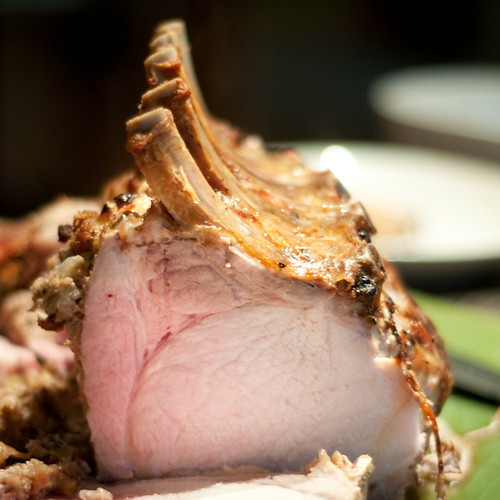
3. Roast pork in lower third of oven, covering stuffing and tips of ribs with a sheet of foil after about 30 minutes and adding more water if pan becomes dry, until thermometer inserted 2 inches into center of meat (do not touch bones) registers 155°F, 2 1/4 to 2 3/4 hours total. (If your guests are skittish about pink pork, as mine were, you'll want to cook your roast to a point where a thermometer inserted in the thinner side of the roast reads closer to 170F. The thicker side of the roast will still be juicy and delicious, but this way, you have some classically 'well-done' (*cough* overdone *cough*) pork for the squeamish. That said, pink pork is fine to eat.

Transfer pork to a platter and let stand 30 minutes. Bake stuffing for 30-45 minutes, until heated through (as long as your sausage is well-cooked, you don't need to worry about reaching a certain temperature for this dish).

DSC_9064

****NOTE: If you've let your pork rest, and you've cut into it and are completely skeeved by pinkness, just pan-sear the dinosaur-sized pork chops to your desired doneness, in a bit of olive oil and butter. But I swear, pink pork is deeeeeelish. Just don't serve it to the immuno-compromised (young kids, pregnant women, etc.).

Make sauce while pork stands:
1. Transfer pan juices from roasting pan to a gravy separator or a glass measure and skim off fat.

2. Straddle roasting pan across 2 burners, then add wine to pan and boil over high heat, stirring and scraping up brown bits, until reduced by about half, about 5 minutes. Add reserved onion mixture, broth, pan juices, and any juices on platter from roast and bring to a simmer. Restir cornstarch mixture and add to pan, whisking, then simmer 2 minutes. Add butter and swirl pan until incorporated. Season with salt and pepper.

DSC_9055

Carve pork and serve with stuffing and sauce.

DSC_9053

This is pretty good. Like I said, I found that parts of mine were (to my taste) overdone and a little dry, but parts will still juicy and delicious...so there's a little something for everyone with this dish. When in doubt, take some advice from my employer and get thyself a digital food thermometer and know how to use it.

Potato Gratin
from the Spring 2011 edition of Food and Drink - will be online in a month or two here: http://www.lcbo.com/fooddrink/index.shtml

1/2 c milk
1 c whipping cream
4 cloves garlic, sliced
1 t dried thyme
1 T chopped fresh rosemary
2 lbs potatoes peeled and thinly sliced - mandoline = your friend
salt and pepper
1/2 c (or more, mebbe) grated parmesan

1. Preheat oven to 400F.

2. Combine milk, cream, garlic, thyme and rosemary in a wide pot over medium heat and bring to a boil. Remove from heat. Add potatoes and stir together. Season well with salt and pepper.

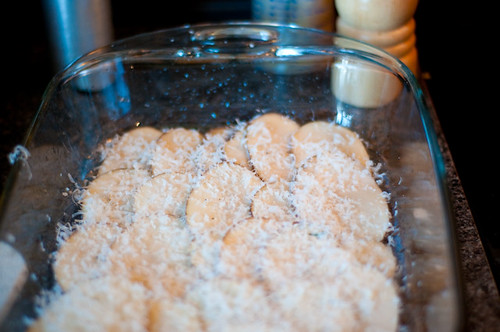
3. Grease a gratin dish large enough to hold the potatoes (I increase the potato amount, so I just used a 9x13). Arrange a layer of potato slices in your dish. Cover with a thin layer of parmesan. Repeat until you run out of potatoes, adding some fresh grated parmesan between each layer.

4. Pour remaining liquid over top. Add more parmesan.

DSC_9029

5. Bake for 50 minutes- 1 hour, until potatoes are tender and liquid is absorbed.

This is basically potatoes alfredo.....and it's pretty tasty. I think I would almost like it more with only milk, because I felt like the cream was just over the top. Not that that's a bad thing....BTW, I made mine in advance, and some of the raw potatoes were exposed to the air for a while...they got a little dark, and this is a bit unattractive. :p It's not harmful though...just a little ugly.

I'm not going to post the recipes for my sides, because you can get them both on epicurious. They were yummy though, and provided some great colour and nutritional balance to the meal.

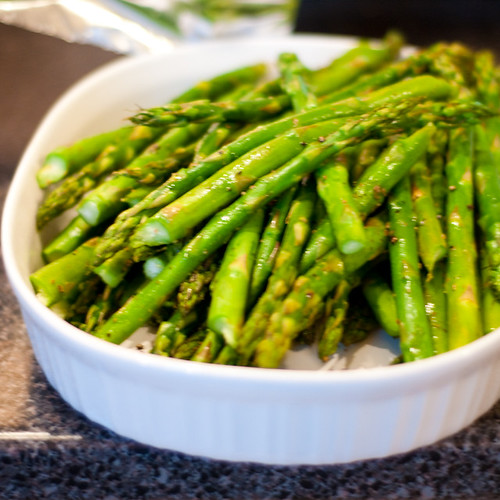
Roasted Asparagus with Anise Seeds
DSC_9061

(only change I made is that I didn't cut my asparagus up)

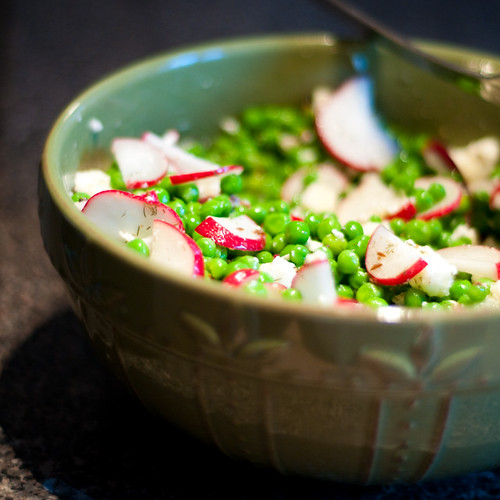
Pea Salad with Radishes and Feta Cheese
DSC_9041-2

(only change I made is to use caraway in lieu of cumin because I had a cumin-hating guest). Also, I did not have pea tendrils...not really sure where to find them).

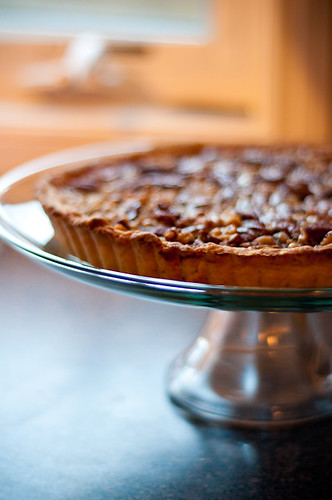
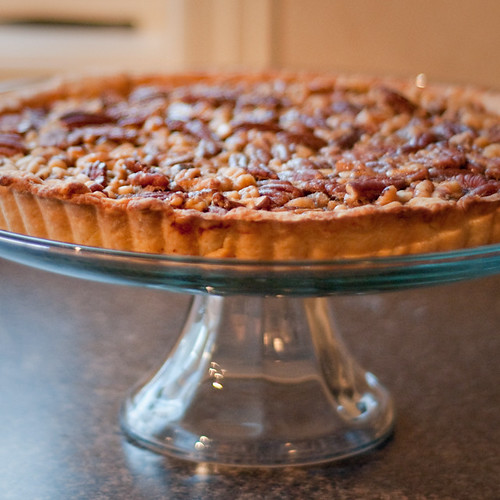
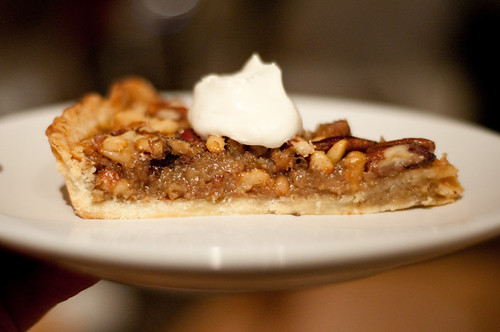
And for the finale, I made this delicious and sophisticated take on a pecan pie - a three-nut maple tart from the Spring 2011 issue of Food and Drink. I liked the incorporation of the pine nuts, and this gave me a great opportunity to showcase some of my uncle's amazing maple syrup (it is SO flavourful).

As tarts go, this is not complicated. There is pastry...which I hate making....but this one turned out not too horrific.). The filling is very easy - toast (and don't burn) nuts, and top with a maple-egg filling. YUM. If you have nut/caramel/buttertart lovers, this is great.

Three Nut Pie with Maple Cream
from Spring 2011 Food and Drink (should be online in a month here: http://www.lcbo.com/fooddrink/index.shtml )
DSC_9042

CRUST:
1 1/2 c flour (I used cake and pastry)
2 T granulated sugar
1/2 c COLD butter, cut into cubes
1 egg
1 t vanilla
1/4 t salt
ice water

FILLING:
1 cup pecan halves
1 cup walnut halves
1/3 c pine nuts
3 eggs
3/4 c maple syrup (DO NOT USE FAKE STUFF. JUST DON'T. IF YOU DO, I WILL NOT BE YOUR FRIEND. EVER.)
1/3 c packed brown sugar or maple sugar
2 T butter, melted
2 t vanilla

MAPLE CREAM:
1/2 c whipping cream
1-2 T maple syrup

Make pastry:
1. Combine flour and sugar in food processor. Add in butter. Pulse a couple of times. Whisk together egg and vanilla in a measuring cup. Add enough ice water to make 1/2 c.

2. Drizzle egg mixture over flour. Process until it forms a ball.

3. Shape ball into a disc. Wrap in plastic wrap. Freeze for 15 minutes (or refrigerate for 30....I was in a hurry!).

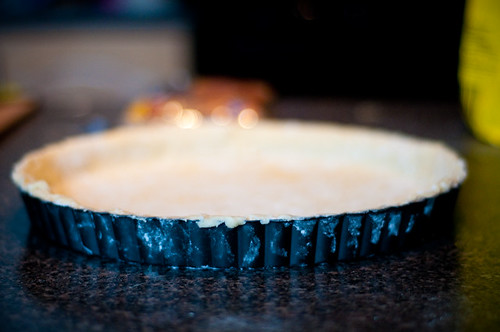
4. Roll pastry out on a lightly floured surface (I like wax paper because it is cheap and stuff doesn't stick to it. I only own one tart pan - 11 inches. The initial recipe is for a 10-inch pan, but the crust was just fine for 11 inches, and I just increased the nuts a bit. Roll the pastry to fit your tart pan. Press into pan, trim edges and prick lightly with a fork. Freeze for 15 minutes. This is probably one of my better pastry efforts. Yes, I am aware it still looks like poop. :p

DSC_9021

5. Preheat oven to 375F. Line tart shell with foil, and fill with rice/beans (or pastry weights) to weigh pastry down. Place a baking sheet on the bottom rack in the oven, and bake the tart shell on the midde rack for 15-20 minutes, or until edges are dry.

6. Remove paper and bake for 5-10 minutes more, until starting to turn golden brown and firm. Let cool (but leave oven on).

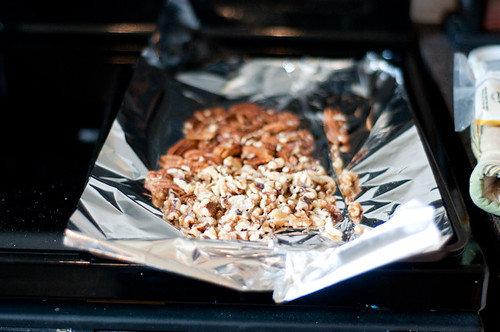
7. Spread pecans and walnuts on a rimmed baking sheet and toast for 3 minutes. Add pine nuts and stir. Toast for 3 more minutes. You could try to brown them a little more, but they will burn SUPER quickly...so I wouldn't. Scatter slightly-cooled toasty nuts in the baked tart shell.
DSC_9016

8. Reduce oven temperature to 325F.

9. Whisk eggs, syrup, sugar, butter and vanilla until well-blended. Pour over nuts. For expediency and sanity's sakes, place your tart pan on a foil-lined pizza pan. Mine did not really leak, but tart pans can and DO leak, and you really don't want a burnt maple mess on the bottom of your oven. Bake for 30 minutes, until filling is puffed in the centre and just set around the edges.

DSC_9044-2

10. Just before serving, whip cream in a chilled bowl until soft peaks form. Add in syrup. Serve with tart.

DSC_9083

Yummy. This would be a great fall recipe, but maple syrup is a spring thing, so I'm calling spring on it. A great finish to a delectable meal.


Sunday, April 17, 2011

fish and chips...all homemade-like

Pin It Now!

DSC_8920

I think I blew my kid's mind tonight.

I already shared my meal plan for the week and in order to decide what we were going to have for dinner today, I got Lil Z to pick the meal from the photos in the magazine (one of the advantages of planning from a beautifully-photographed magazine). She picked the fish and chips, which I found interesting, because I don't usually serve food like that at home. Maybe it's something she eats at daycare?

DSC_8924

At any rate, I'm pretty sure her mind was completely blown when she learned today that fish sticks are made from pieces of fish (at least mine are) and that chips are made from potatoes. Woah.

DSC_8926

As mentioned before, this week's meal plan is from the May/April issue of Clean Eating (my fave magazine in the whole world right now). Lil Z honed in on the tilapia fish sticks, with dill potato chips and coleslaw. The recipe had an optional tartar sauce that is pretty much the best thing I've ever had. Wow. It was not at all like a normal tartar sauce (i.e., uber sweet, cloying and crazy processed). This was sophisticated, tangy and delicious. And the beauty of using the menu from Clean Eating is that the ingredient that tend to go bad before being used up (in my fridge at least) are used for multiple recipes - cabbage, cottage cheese, etc. I like that, because I hardly ever go through a whole head of cabbage.

Of course, given the cabbage's gaseous properties on one's digestive system, I may like this less as the week goes on. ;)

tilapia sticks with potato chips and coleslaw
stolen and slightly modified from Clean Eating (April/May 2011)
DSC_8922

1 slice whole grain bread
1/2 lb yellow potatoes, scrubbed
2 T olive oil, divided
1/2 t sea salt
1 t dried dill

1/4 head cabbage, thinly sliced
1 large carrot, peeled and grated
(1 large apple, cut into matchsticks - I omitted because I knew it would brown)
1 1/2 t cider vinegar
1/2 t ground mustard
1 egg
3/4 lb boneless, skinless tilapia fillet
1/2 t dried garlic
1/2 t thyme

Sauce:
1/2 c 1% cottage cheese
2 t fresh lemon juice
1 T water
2 t capers, drained
1/2 t dried dill
1/4 c minced celery
fresh ground pepper

1. Preheat oven to 350F. Line a baking sheet with parchment paper and set aside. In a food processor, process bread into crumbs. Set aside.

2. Slice potatoes as thinly as possible (I used a mandoline).

DSC_8901

The fruits of my labours:
DSC_8904

Spread out evenly on baking sheet. Drizzle with oil (I was lazy and spayed with my Misto). Sprinkle with salt.

DSC_8906

Bake for 20 minutes, or until golden brown. As soon as they come out of the oven, sprinkle with dill and lightly toss to comine.

DSC_8914

3. Prepare slaw: In a large bowl, combine cabbage, carrot, radishes and (apple). In a small bowl, whisk together vinegar, mustard and 1 T oil. Toss with cabbage mixture.

DSC_8917

DSC_8923

4. Prepare fish sticks. I processed the tilapia briefly in my food processor (it was already dirty from the breadcrumbs).
DSC_8909

You can also chop very finely. Add chopped tilapia to egg and 1/4 c bread crumbs. Add 1/2 t dried garlic and 1/2 t thyme, as well as a sprinkle of salt and pepper. Use hands (or a silicone spatula) to thoroughly combine.

DSC_8910

5. Divide fish mixture into eight equal portions, shaping each into a rectangular stick about 2.5 inches long. Pour the remaining bread crumbs onto a deep plate. Dredge each stick in bread crumbs, pressing lightly to coat each side.

DSC_8912

6. (The original recipe said to saute. I am lazy - I baked. It worked great). Prehead oven to 400F. Arrange fish sticks on parchment paper (I re-used the same stuff from the potatoes). Spray fish sticks lightly with olive oil. Bake for about 16 minutes. I then broiled for two minutes to ensure optimum crunch.

DSC_8919

7. While the fish sticks are in the oven, mix together the cottage cheese, lemon juice and water in a blender/food processor (I used an immersion blender). Then add the capers, dill, celery and pepper.

Voila! Enjoy.

Monday, February 02, 2009

cordon bleu...or maybe it's green....

Pin It Now!

Since being on mat leave, I've done a number of things. First, I got a nice big TV. Next, I upgraded my cable package.

And last, I've become totally and completely addicted to the Food Network. However, in doing so, I've discovered that they tend to replay the same episodes about three times a day. Probably not a huge deal if you only tune in every once in a while, but when it's on your TV all day, most days, it gets darned annoying.

The added bonus is that the idiosyncracies of the various hosts really start to grate on your nerves. I'm not about to get into a full-blown invective lambasting the various people on tv, but one show in particular that I *almost* love is Chef At Home. It's hosted by Michael Smith and he's got a great approach to food. Unlike most chefs whom I would be absolutely sh!tbaked to have at my home (you know, the ones who ascribe to the idea that there is only ONE correct way to make every individual dish), he seems to have a totally down-to-earth approach to food. I think we'd get along.

That is, of course, if I could get over his didactive narration. Seriously, he talks to me like I"m about 5 years old (coincidentally, the age of his cherubic little son, Gabe). And if you watch each episode, a fun drinking game would be to take a shot every time he uses the word "aromatic." Might liven things up.

Anyway, with all that said, his food is almost unerringly fabulous. I caught a preview for an episode a while back and was so intrigued by it (ham and cheddar chicken baked on a bed of onions) that off I went to www.foodtv.ca to try to find the recipe.

It was yum. I made the whole meal and it was a big hit. Simple, delicious...no complaints here. I might skip the spinach sauce next time (it made a TON and was just a little too spinachy tasting), but the onions were amazing, and the stuffed pototoes kicked all kinds of ass. Two thumbs way up. Make this meal - it'll impress your inlaws and fill your bellies.

Ham and Cheddar Chicken Rolls
stolen from Chef at Home
20081222-DSC_1220

4 chicken breasts, boneless and skinless
Sprinkled sea salt and freshly ground black pepper, to taste
4 tbsp Dijon mustard
8 slices deli ham
8 thin slices cheddar cheese
2 tbsp olive oil
4 onions, peeled and thinly sliced
1 tbsp dried thyme

Directions:

1. Preheat your oven to 350°.

2. Layer two pieces of plastic wrap on top of each other. Fold them in half, open and place a chicken breast near the fold. Fold over the plastic wrap covering the meat then gently pound and flatten the breasts using a rolling pin, meat pounder or the bottom of a heavy pot.

3. Season the chicken, then spread a thin layer of Dijon over each piece.

4. Lay two slices of ham and two slices of cheddar on each breast. Roll them up tightly.
20081222-DSC_1211

5. Sauté the onions with the oil, dried thyme, salt and pepper. Continue cooking until they are lightly browned and golden.
20081222-DSC_1210

6. Place the chicken rolls on top of the onions in the pan or transfer to another baking pan, cover with a tight-fitting lid or foil and bake for 20-25 minutes, until the rolls are cooked through.
20081222-DSC_1212

You may serve them whole with a scoop of the onions or slice each one into several ‘rounds’ and present them on a bed of the onions.
20081222-DSC_1217


Spinach Sauce
stolen from Chef at Home
as mentioned, I could take this or leave it. It makes WAY too much - I've frozen the leftovers to use as a pizza sauce

2 tbsp olive oil
1 onion, peeled and minced
2 cloves garlic, peeled and minced
1 lb. spinach leaves, washed
1/2 cup white wine
1/2 cup chicken broth
Sprinkled sea salt and freshly ground black pepper, to taste

Directions:
1. Pour the oil into a saucepan over medium-high heat then add the onions and garlic. Sauté until they are fully aromatized, until the whole kitchen smells great!

2. Add the spinach, white wine and chicken broth and cook briefly just until the spinach softens, shrinks and wilts down. This is a 6qt pot, btw.
20081222-DSC_1213

3. Puree with a hand blender, counter blender or food processor and season with salt and pepper.
20081222-DSC_1216

Salsa Stuffed Potatoes
stolen from Chef at Home
these potatoes ROCK - I used hot salsa and old cheddar. I recommend you do the same

4 large baking potatoes
1/2 cup your favourite salsa
1 cup grated cheddar cheese
Sprinkled sea salt and freshly ground black pepper, to taste

Directions:
1. Preheat your oven to 350°.

2. Bake the potatoes for an hour or so, until their flesh is very tender.

3. When they are cool enough to handle, trim the top off of them. Scoop out most of the flesh, leaving enough around the inside of the skin to keep it whole and give it strength.

4. Mash the scooped potato with the salsa and cheese. Spoon the mixture back into the potato shells, mounding them over the top a bit as needed.
20081222-DSC_1215

5. Bake until they are hot and the tops are golden brown and beautiful (about 20 minutes...put them back in the same time as the chicken!)

20081222-DSC_1218

This is a great meal to serve to company - it's got loads of flavour, but there's nothing in it that is especially exotic or strange to the unadventurous tastebud. I had no leftovers, so that should say something. Super yum. Thanks for reading!

Related Posts with Thumbnails