Photobucket - Video and Image Hosting
Showing posts with label chocolate. Show all posts

Friday, January 13, 2017

healthy peanut butter chocolate smoothie (vegan)

Pin It Now!

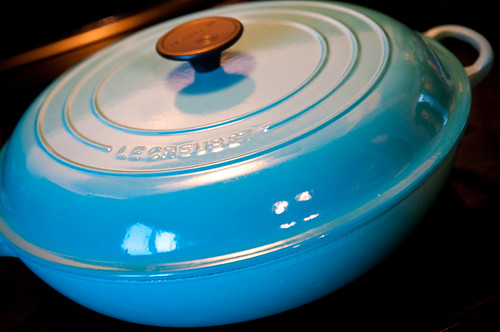
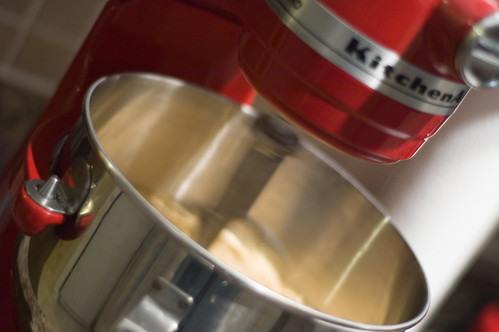
A year and a half ago, I caved and finally got myself a high end blender (a Blendtec) and since then, I have been blending up a storm (599 storms, actually, according to the handy counter on the front of the blender).  Obviously it's great for soups and sauces but I really really love what it does for smoothies.


I'm really picky on my smoothie texture (NO CHUNKS.  EVER.) so I found that a high powered blender was necessary to get the results I wanted.  I've perfected a number of smoothie recipes in the last 18 months or so, and I wanted to share one of my favourites with you today.  Another of my favourites is the Oh She Glows green monster - I don't even like bananas, and this smoothie recipe is great.


For me, a morning smoothie (or meal replacement smoothie) needs to meet certain criteria:

1. Above all, be full of healthy, wholesome ingredients.  No added sugar.  No juice.

2. Be filling - I like to make sure my smoothies weigh in at 250-300 calories, so there's enough energy in there to get me to lunch time.

3. Have a solid amount of fibre and protein - I do this through adding various seeds.  Generally, my protein intake is fine, so I don't add protein powders.  I find that between the fruit and the seeds, most of my smoothies have at least 10g of fibre, which is awesome.

4. Relatively low in sugar (I like to keep them at less than 20 grams of sugar if I can, including that from fruit).


My smoothies are not a dessert-type smoothie.  This is pure, tasty nutrition.  Some of them are hits with the kids and some are not.  The recipe below is one that's been a hit with pretty much everyone who has tried it.  If you haven't made this type of smoothie before, you'll likely have to scramble for some of the ingredients (powdered peanut butter, hemp hearts and chia seeds), but the good news is that if you decide to get into regular-ish smoothie making, the ingredients will serve you well and last quite a long time.

I like hemp hearts and chia seeds because they have some great nutrition, but also they are a bit softer than alternatives (like flax seeds or psyllium husks), so they blend into a smoother final product.  I can often find them on clearance at Winners or HomeSense.


You can easily substitute regular peanut butter for the powdered, but it will substantially change the calorie content, if that's a concern to you (2 T of powdered PB has 50 calories, while 2 T of regular PB has 200 calories).  If you're looking to bulk up the caloric content, totally go for regular PB!


Healthy Peanut Butter Chocolate Smoothie (vegan)
serve 1, but easily doubled

1 c unsweetened almond milk
2 T powdered peanut butter (like PB2, Tru-Nut or other brand)
1 T cocoa powder
1 T chia seeds
1 T hemp hearts
2 pitted dates, roughly chopped (alternative: use a frozen banana instead of dates for a chunky monkey smoothie!).  If your dates are small, or you have a real sweet tooth, try 3 dates - I find 2 is perfect, but I don't like really sweet smoothies
splash vanilla extract
1.5 c baby spinach
6-8 ice cubes

1.  Place all ingredients except the ice cubes in your blender.  Blend until smooth (on my blendtec, I use the 'smoothie function' and then about 15-20 seconds on high speed.  Dates don't blend super easily, so I find they need a bit more time to get smooth.  If you're using banana instead, it should blend pretty quickly.  It will probably take a minute or so to blend your smoothie.

2. Add ice cubes, and blend again on high speed for 15-20 seconds for a more milkshake-type consistency.

3. Enjoy.

To speed things along in the morning, I'll often pre-measure my dry ingredients into the blender at night (i.e., the hemp, chia, cocoa powder and PB powder).  I am not at my best before coffee* so this works well for me.

* massive understatement.  I cannot handle pre-coffee life.


Tuesday, November 12, 2013

laziness, procrastination, and a side of chocolate chip granola bars

Pin It Now!

chocolate chips granola bars

I consider laziness a prime motivating factor to many of my decisions (if one can in fact consider laziness in that way, without seeming too oxymoronic).  Anyway, as I've mentioned before, life with two small people is just that much busier than life with one, so by the time I get home from work, dinner is had, and kids are in bed, I'm feeling like I just want to veg.

Except there's still stuff that has to happen - dishes, making lunches, laundry, general house stuff (our new place needs a lot of work, which falls primarily to hubs, which means that the dishes/laundry that we used to do together now mostly fall to me, while he does such fun things as sand, prime, paint, etc.).

I was procrastinating last night, and a FB friend of mine posted a link to these homemade granola bars, which looked super easy and met a couple of important criteria - 1) I had all the ingredients and 2) they were nut-free.  Neither of my mini-foodies has allergies, but one of Lil Z's good friends in her class is allergic, and the whole classroom is nut-free.

And in the world of homemade snack bars, nut free poses a bit of a challenge - it's easy enough to avoid the types of bars with chunks of nuts, but so many recipes use nut butters as a binding agent.  This recipe avoided the nut issue entirely (though you could totally add chopped nuts or anything else to them - raisins, craisins, dried cherries, coconut, seeds, flax, etc.).  I made it very simply the first time around, but I can tell you I'll make it again.

I halved the recipe, because I only had 2c of oats left, and I also used quick oats, rather than old-fashioned.  It turned out fine and had a good amount of crunch (not the yucky mushiness of a lot of homemade bars).  I pressed mine in a parchment-lined 9x9 pan, and then slid it onto a cookie sheet to bake, for 30 minutes.  Once cool, they sliced quite well and held together surprisingly well (not nearly as crumbly as most homemade granola bars....though still on the messier side to eat).  Kinda like a Nature Valley bar.

(can't find original author to credit this...it's not mine, but it's pretty hilarious)


I sliced off the toastiest edges, and the bonus here is that you can keep those delicious crumbly bits, put them in a bag/container for a few days, and use them like granola, so there's no waste.

And did I mention you can get them in the oven in about 5-6 minutes?  That's my kind of home-made snack.  Nutrition wise, they are relatively comparable to a classic purchased granola bar, but in this case, you can use higher quality ingredients, and cut them whatever size/shape suits your audience.  Bam!

Lazy-Easy Chocolate Chip Granola Bars
taken and slightly modified from The Domestic Mess
chocolate chips granola bars

2 cups oats
2 T whole wheat flour
3T brown sugar
1/2 cup dark chocolate chips
1/4 t salt
1/4 c canola oil (I think coconut oil would be fab in this)
splash vanilla extract
1/4 c honey (other liquid sweetener like maple syrup would work well)

1. Preheat oven to 350F.

2. Combine oats, flour, sugar, chocolate chips and salt in one bowl.

3. In other bowl, whisk together oil, vanilla and honey (pro tip: measure your oil before your honey, and the honey will slide right out of the measuring cup)

4. Pour wet ingredients over dry and stir to combine.

5. Line a 9x9 pan with parchment paper (or foil), and squish the granola into as dense a square as you can.

6. Carefully slide the paper onto a baking sheet and cook for about 30 minutes (if you go longer, it will burn).  Let cool, then cut into bars, keeping the crumbly bits to use as granola.

And enjoy, because they are pretty tasty.

chocolate chips granola bars

Tuesday, September 11, 2012

muffins are really cake in disguise

Pin It Now!

When I was growing up, my mom used to make a dozen blueberry muffins fresh, from scratch, almost every morning.  Those muffins were LEGENDARY.  My brothers used to devour them as quickly as she could bake them.

I was actually indifferent to blueberry muffins (a fact I didn't tell her until much later), but my friends used to pretty much fall all over themselves to see who could claim the fresh-baked muffin in my lunch.

A nice homemade muffin is such a comforting treat....if it's fresh, it has that delicious crunchy top, the sweet taste, that feeling of satiety....yum.

Somehow though, in the unnamed number of years since I had my mom making my lunch (we'll just say it's a lot more than 10), the muffin has morphed.  It's gone from a few bites, to a cake-like monstrosity sugar bomb.  So muffins have a bad rap now (unlike the nutrition halo enjoyed by granola bars).

I maintain that muffins can totally be part of a tasty snack or breakfast, we just need to do a few things with them.  We need to make them smaller.  We need to cut the sugar.  And we need them to be whole grain.  Because I also love chocolate chip muffins, I'm going to use the Tim Hortons Chocolate Chip mufffin as a comparison.

Weight - TH has a 115g muffin.  My muffins weigh between 50g and 68g.

Calories - TH is 410 calories. A muffin should not be 400 calories.  These muffins are about 181 calories.

Sugar - TH is 37 g.  That is almost 10 teaspoons.  Mine have 8g.  That's about 2 teaspoons.  They still taste sweet.

Fibre - TH has 2g.  Mine have 4g, despite being half the size.

Sodium - TH has 430 mg.  Mine have 94 mg.

Bottom line, these muffins are denser, pack more fibre, way less sugar and sodium.  They are about equal in terms of fat, but mine get the fat from avocado and canola oil.

I got this recipe from the October 2012 issue of Clean Eating, and just tweaked it a wee bit.  It's not my recipe but it's so yummy, and I couldn't find it online anywhere to share it with you.  So I'm posting it.  And the picture is from my phone, so it is sub-par.  I'm feeling lazy, and didn't feel like dragging out my DSLR.

spelt avocado-banana chocolate chip muffins
stolen and lightly modified from October 2012 Clean Eating
spelt avocado banana chocolate chip muffins

1 3/4 c spelt flour (or whole wheat flour)
1/4 c brown sugar (or evaporated cane juice; I was out!)
1 t baking powder
1/2 t sea salt
2 eggs
2 T canola or olive oil
1 ripe avocado, peeled and pitted
1 ripe banana
1 t vanilla
1/2 c dark chocolate chips (I use minis for better distribution of chocolate OMNOMNOM)

1. Preheat oven to 350F.

2. Line a muffin tin with papers, or mist with cooking spray.  I let Lil Z pick the papers.

3.  In a large bowl, combine flour, sugar, baking powder and salt.

4.  In a medium bowl, place the avocado and banana.  Mash with a potato masher/pastry blender/fork.  Lil Z helped with this too.  Add eggs, oil and vanilla.  Combine with a whisk.

5.  Add liquids to flour mixture, and stir lightly until mostly combined.  Add chocolate chips and fold in.  Don't overwork your batter or your muffins will be hockey pucks.

6.  Spoon batter into muffin cups, filling each about 2/3 full (I use a 1/3 c. measure and don't quite fill it).

7.  Bake for 21-25 minutes, until tops are browned.  Let cool in pan for about 5 minutes, then remove and let cool on a rack.  Voila.

According to clean eating, here is the nutritional lowdown: per muffin, 181 calories, 7g fat, 27g carbs, 4g fibre, 8g sugar, 4g protein, 94mg sodium.

These are DELICIOUS.  Hubs, who normally eschews my chocolate chip muffins in favour of my mother's blueberry ones (apparently chocolate chip muffins are juvenile?) just loves them.  Lil Z hasn't tried them yet, but I am willing to bet that she is going to just love them.  And I love that I've given her something that's packed full of healthy fats, satiating fibre, and just enough chocolate to make it all yummy.

Had to post this because you NEED to make these muffins.  Dense and delightful.

Sunday, October 30, 2011

spooky spiderweb cupcakes

Pin It Now!

DSC_3056
They really aren't that spooky - more cute than anything!

This is just going to be a quick post, but thought I would share.

I made double chocolate cupcakes, using this cake recipe I've used millions of times before (it makes 36 cupcakes, if you use a 1/4 c measure to scoop the cupcakes). Bake at 300F for about 21 minutes (don't overbake, or they will be dry). At some point, I'd kinda like to experiment in making this recipe a tiny bit less sweet (maybe less sugar, or using unsweetened chocolate instead of dark chocolate....)...otherwise, it's sheer chocolate perfection. It's nice and soft, and moist and deeply chocolatey. OMNOMNOM.

I tried a different icing technique - I'd recently read about icings that involved a cooked milk/flour mixture incorporated into whipped sugar and butter. I used this whipped vanilla buttercream recipe from Epicurious. I was intrigued for a couple of reasons....first, the flour/milk would cut the pure buttery sweetness of a classic buttercream, and second, I had hopes that the use of granulated sugar would avoid that powdery blech taste of regular buttercream too. I wasn't disappointed. I made this recipe, doubled it, and added the zest of an orange, along with enough orange gel colour to make them a bit more Halloweeney. The icing is delicious - it has a wonderfully soft texture and isn't as dead sweet as most. I'll try this technique again!

Last, I topped them with white chocolate spiderwebs. I was actually shocked at how easy they were to make - I just purchased some white chocolate pastilles, melted them, and piped them from a ziploc bag (with the teeeniest snip ever in the corner). I drew a freehand template with a sharpie, and just piped onto waxed paper overtop of the template.

DSC_3058


For good measure, I piped a few freehand ghosts too (had too much chocolate left, and was not convinced that any of my spiderwebs would make it off the paper). I used currants for eyes, and sprinkled with a little bit of black glittery sugar.

DSC_3060

It was super easy to do (even for me, who is COMPLETELY talentless at piping/decorating) and they came off the wax paper pretty easily too (no need to chill in the fridge). You'll see that Geek Sweets has a beautiful photo walkthrough of these spiderwebs. Check it out!

DSC_3063

Coming up soon - a post about my $50 Food Day dinner party (four courses AND bread for $5/person), and a phenomenal braised chicken cashew curry. I have a new toy.....isn't it beautiful? Look forward to lots of braising in the near future. ;)

DSC_3073

Oh, and last but not least, mini-foodie two is on the way....coming sometime in April. Should be good times...

Cheers, and thanks for reading!

Sunday, October 02, 2011

falling in love with fall comfort food

Pin It Now!

I have both the fortune and misfortune to live in a country where the weather is pretty much unpleasant for at least half the year. As a result, I'm surrounded by people who are completely devoted to and consumed by all things Summer and sun, and are all about taking advantage of everything the warm weather has to offer.


I am not one of those people. I actually don't like hot weather.

I love the Fall. I love cool crisp mornings, I love fiery bright forests, and I absolutely love Fall comfort food. Like obsessively love it. For the last month, I'll I've been able to think about is stew, roast, pot pie and root vegetables. I've actually been a bit gleeful that it's finally getting cold (kay, maybe I was not so gleeful to greet a cold, rainy, gray morning today...but I digress).

Mmmmmmmmmmm.....potatoes. I could live on potatoes.

DSC_2956

So I'm indulging myself. I hope you enjoy some of these treats as much as I have been. I've been in a cooking frenzy this weekend. On top of the wonderful feast I'm about to share, I also made a batch of baked beans today (from October's Clean Eating - on shelves now) (for tomorrow's dinner, to be gobbled up accompanied by cheddar garlic biscuits). For tonight, I made a bolognese sauce that Lil Z and I enjoyed with farfalle. YUM. PS - If you make that bolognese, add a can of tomato paste and a good palmful (2T) of italian herbs).

For Saturday's dinner, I wanted to use seasonal ingredients, so that basically gave me a harvest theme. I started the meal with my favourite curried parsnip fries, with yogourt curry dip. Love these guys - they are so easy to make and they usually go flying off the table. 1lb of parsnips feeds 3ish people, and 2lb of parsnips is best for a crowd. If people are dieting, then probably best to stick with 1lb of parsnips (I had some dieters in the crowd, and hence lots of leftovers).

I followed the parsnip fries with the most decadent roasted tomato soup. I have recently discovered that Costco (in Canada, at least) carries these amazing San Marzano style tomatoes (no, not controlled origin, but they are San Marzano type of tomatoes, grown in that region of Italy....just no AOC-type label).

DSC_2936

They are delicious and for the price, I'm totally cool with the lack of formal pedigree. I found the recipe on SmittenKitchen (who in turn, had adapted it from America's Test Kitchen). At this point, I don't care who came up with it - it is genius, and I totally agree with the simplified processed instituted by Deb at SK, because there's no need to strain your soup. Not for a fall feast. Perhaps if the Queen were coming, but that wasn't happening for me, so I didn't strain either.

Now, I confess that I had *intended* on serving my soup with no-knead spelt bread. Unfortunately, this turned out to be one of those ideas that was fabulous in my head, and utter failure in reality. The night before the dinner, I had mixed my flour, yeast, water and salt. I waited the requisite 18 hours. But when I went to try to 'fold' my dough, I discovered that the water and the flour had not actually merged. It was strange. So I pitched it. Ergo, there was no bread with the soup. But it's just was well, because frankly, the soup is robust enough to stand on its own.

As a main, I served a centre-cut pork loin (I know, it's been four months since I posted, and I"m writing about pork AGAIN...sorry!), along with wine-poached plums. I accompanied this with sage-roasted potatoes/sweet potatoes, and sauteed spinach with garlic (spinach+garlic + splash of soy). It made for a colourful plate, with nicely balanced flavours. It would have been improved had I not (again...oops) overcooked the pork. In my defence, the thermometer went from 150F (not done enough for this particular dinner) to 170F in about five minutes. Zoinks. It was a little dry, but enough of the wine poaching liquid and it was very salvageable. :) Note to self: next time, take the damn roast out at 150F and let'er rest. Lesson learned. Again.

DSC_2959

For dessert, I finished it off with a chocolate spelt cake. Why the spelt obsession, you ask? My guest of honour has a wheat intolerance, and spelt is often well-tolerated by those with wheat sensitivities. That said, it's important to note that spelt is NOT okay for someone who has celiac disease, because it does have some gluten in it.

All that said, after my epic spelt bread failure, I was a little dubious of this chocolate cake actually being any good. It was a wholegrain chocolate cake, made only with cocoa (no actual chocolate) and filled with dates. I was definitely skeptical. I needn't have been though - it was actually pretty fabulous! You have to be careful not to overbake (take the cake out of the oven before any toothpick comes out dry....once the cake is set and mostly baked, take it out. It's delicious and even though you can see the odd date bit, but you really can't tell they are in there. And that means a lot, coming from me, because I maintain (and always have) that dates look like cockroaches.

DSC_2926
See? Pile of cockroaches. ;)

Parsnip fries with curry dip
DSC_2951

1 lb parsnips
1-2 T thai red curry paste
2 T vegetable oil
1 c plain yogourt
2 T indian curry paste (mild or hot, depending on your taste buds)
2 T honey/maple syrup

1. Preheat oven to 375F. Peel parsnips and cut into 'fries'. Look at these babies in all of their root vegetable-ey goodness.

DSC_2946

2. Combine thai curry paste and vegetable oil.

DSC_2947

Toss parsnips in oil/curry paste mixture.

3. Spread out parsnips on baking sheet (I line with parchment paper) and bake for about 30 minutes. You can go as long as 45, just watch the little bits for signs of burning.

4. Meanwhile, combine yogourt, indian curry paste and honey/syrup. Taste and adjust to your taste (i.e., if it's too hot, add yogourt. If it's too boring, add more curry paste. Add more sweetener if that is to your taste).

DSC_2948

5. Enjoy parsnip fries with dip! It's that easy.


Roasted Tomato Soup
(from Smitten Kitchen and America's Test Kitchen)
DSC_2954

2 (28-ounce) cans whole tomatoes packed in juice, drained, 3 cups juice reserved (I used San Marzanos)
1 1/2 tablespoons dark brown sugar
4 tablespoons unsalted butter
4 large shallots, minced (about 1/2 cup)
1 tablespoon tomato paste
Pinch ground allspice
2 tablespoon all-purpose flour
1 3/4 cups chicken stock, homemade or canned low-sodium
1/2 cup heavy cream
2 tablespoons brandy or dry sherry (I used marsala)
Salt and cayenne pepper

1. Adjust oven rack to upper-middle position and heat oven to 450°F. Line rimmed baking sheet with foil. With fingers, carefully open whole tomatoes over strainer set in bowl and push out seeds, allowing juices to fall through strainer into bowl. I had help for this part. ;)
DSC_2938

Spread seeded tomatoes in single layer on foil. Sprinkle evenly with brown sugar (I forgot to sprinkle with sugar....I just mixed it into the soup....I'm pretty sure it was almost as good!).

DSC_2940

Bake until all liquid has evaporated and tomatoes begin to color, about 30 minutes. Let tomatoes cool slightly, then peel them off foil; transfer to small bowl and set aside.

2. Heat butter over medium heat in large saucepan until foaming. Add shallots, tomato paste and allspice. Reduce heat to low, cover, and cook, stirring occasionally, until shallots are softened, 7 to 10 minutes. Add flour and cook, stirring constantly, until thoroughly combined, about 30 seconds. Gradually add chicken stock, whisking constantly to combine; stir in reserved tomato juice and roasted tomatoes. Cover, increase heat to medium, and bring to a boil. Reduce heat to low and simmer, stirring occasionally, to blend flavors, about 10 minutes.

3. Blend with the pulverizer of your choice (for me: immersion blender....no extra pots to clean!). Add cream and warm over low heat until hot, about 3 minutes. Off heat, stir in brandy and season with salt and cayenne. Serve immediately. I didn't find that extra salt was really needed, but to each his/her own.

This soup was what canned tomato soup only wished it could be....sophisticated, rich, delicious and SO perfect for a cold rainy day. It WOULD be perfect with grilled cheese. Yum. I had grandiose plans of swirling some more on top of the soup, but it really doesn't need a thing....so it doesn't look fancy, but it's YUM. Make it.

Roasted Pork Loin with Poached Plums
stolen and slightly modified from Epicurious.com
makes 6 servings
DSC_2945
6 sweet firm red or black plums (such as Burgundies, Satsumas, or El Dorados; about 2 pounds), quartered, pitted
2 cups Pinot Gris or Viognier
1 cup dry red wine
2 whole star anise
cinnamon stick
1/4 cup plus 1 1/4 teaspoons sugar, divided
2 cups low-salt chicken broth
5 fresh thyme sprigs plus 1 teaspoon finely chopped thyme, divided

2 tablespoons chopped shallot

Pork
2 1 1/4-pound pork tenderloins (I used 1 centre-cut loin roast, about 2.5 lbs)
3 tablespoons olive oil, divided
2 teaspoons chopped fresh thyme
2 garlic cloves, minced
Chopped fresh chives

For Plums:
1. Combine first 5 ingredients and 1/4 cup sugar in heavy large saucepan; bring to boil, stirring until sugar dissolves. Reduce heat; simmer until plums are tender, about 20 minutes. Transfer plums to platter. Strain wine mixture.

Star anise is pretty.
DSC_2944

2. Return strained liquid to same saucepan. Add broth, thyme sprigs, and shallot. Boil until mixture is reduced to 1 cup, about 25 minutes. Strain sauce; stir in 1 1/4 teaspoons sugar and chopped thyme. Season with salt and pepper.

For Pork:
1. Preheat oven to 400°F. Brush pork with 1 tablespoon oil; sprinkle with thyme, garlic, salt, and pepper.

2. Heat remaining 2 tablespoons oil in large ovenproof skillet over medium-high heat. Add pork and cook until brown on all sides, turning often, about 5 minutes. Transfer skillet to oven, and roast pork until thermometer inserted into center registers 160F, about 20 minutes (I cooked mine for 40 minutes because center loins are much thicker than tenderloins....when in doubt, use a thermometer).

3. Remove skillet from oven and let pork stand 10 minutes. Cut pork crosswise into 1/2-inch-thick slices. Serve with poached plums and sauce. Sprinkle with chopped chives.

DSC_2958

Chocolate Espresso Spelt Cake


1 1/2 sticks (3/4 cup) unsalted butter, softened, plus additional for pan
3/4 cup unsweetened Dutch-process cocoa powder plus additional for dusting pan and cake (I confess to not knowing whether my cocoa is dutch process or not...it was Fry's...I think it is)
1 cup boiling-hot water
1 1/2 tablespoons instant-espresso powder
1 1/2 teaspoons vanilla
1 teaspoon baking soda
1/2 lb Medjool dates (12 to 14), pitted and coarsely chopped (1 1/2 cups)
2 cups spelt flour
2 teaspoons baking powder
3/4 teaspoon salt
1 cup packed dark brown sugar
2 large eggs

Special equipment: a 9-inch springform pan

1. Put oven rack in middle position and preheat oven to 350°F. Butter springform pan, then lightly dust with cocoa powder, knocking out excess. I actually lined the bottom of my pan with parchment, just to be doubly sure, AND I baked it on a lined baking pan (I always do this because I do not trust liquidy substances in springform pans....learn from my mistakes)

DSC_2931

2. Stir together boiling-hot water, espresso powder, vanilla, and baking soda in a bowl, then add dates, mashing lightly with a fork, and steep until liquid cools to room temperature, about 10 minutes.

3. Whisk together spelt flour, cocoa powder, baking powder, and salt in another bowl. I'm told it's important to spoon spelt lightly into the measuring cup...so that's what I did.

DSC_2929

4. In yet another bowl (yes, by this point, your counter will be covered....), beat together butter and brown sugar with an electric mixer at medium-high speed until pale and fluffy. Add eggs 1 at a time, beating until just combined.

5. Beat in date mixture (batter will look curdled), then reduce speed to low and add flour mixture, mixing until just combined. The batter is pretty thick.

DSC_2933

6. Spoon batter into springform pan, smoothing top, and bake until a wooden pick or skewer inserted into center comes out with just a few crumbs....do NOT overbake....start checking at 40 minutes (the recipe says about 50 minutes to 1 hour).

DSC_2935

7. Cool cake in pan on a rack 5 minutes, then remove side of pan and cool cake on rack.

DSC_2942

I decided to top my cake with a simple ganache - 4 oz whipping cream (35%), 4 oz dark chocolate (I used 70% Callebaut dark chocolate). Melt together in the microwave on 50% power. Stir until smooth. Pour over cake.....I cheated and used my ganache to fill in the slightly sunken middle of my cake. :)

DSC_2961

It was a great finish to the meal. Highly recommend it, especially if you or someone you know has issues with wheat. This would also be easy to make dairy-free (use vegan margarine or oil in lieu of butter) and I'm *told* (although cannot attest) that you can also use egg replacer in it. If someone tries that out, lemme know....

DSC_2968

Thanks for reading!


Thursday, February 17, 2011

showered with food

Pin It Now!

So this post relates to my previous post, detailing all my monkey-themed baby shower craftiness. This is where you come for the menu.


DSC_8595

The baby shower was at 11 am on a Sunday, so I went with a brunch theme. Dietary restrictions of the crowd included one vegetarian and one with a moderate intolerance to wheat (i.e., not celiac, but not piles and piles of flour everywhere either).

The Menu (recipes, or links to recipes, all below)

spinach cheese souffle (or not so souffle)
potato fennel hash
buckwheat oatmeal scones with preserves
fresh fruit skewers with chocolate drizzle
BLT skewers with dijon aioli

chocolate cupcakes with chocolate mint swiss meringue buttercream

non-alcoholic mojito punch
OJ, coffee, tea

Spinach-cheese soufflé
DSC_8592
These were delicious little yummy ramekins of goodness. I took this recipe from epicurious and modified it to be crust-free mini-dishes.

1 tablespoons butter
1 medium onion, chopped
1 1b-ounce package frozen chopped spinach, thawed, squeezed dry
1/2 teaspoon salt
1/2 teaspoon pepper
1/4 teaspoon ground nutmeg

1 15-ounce container ricotta cheese
8 ounce jarlsberg cheese, grated (or other cheese - mozza, cheddar, gruyere)
1 cup grated Parmesan cheese
6 large eggs, beaten to blend

1. Melt butter in skillet. Add onion and sauté until tender. Mix in spinach, salt pepper and nutmeg. Sauté until all liquid is gone.

2. Combine ricotta, jarlsberg, parmesan. Mix in eggs. Add (cooled) spinach mixture. Blend well.

3. Spoon into 12 ramekins (mine are small). You can make them up the day before.

To BAKE: preheat oven to 350F. Bake about 30-40 minutes, until filling is set in center and brown on top.

YUM!

Potato-fennel hash
DSC_8604
(hash is at the bottom left of the picture. Scones are midway up the right side of the picture)
No creativity here - it's straight from epicurious. Get the recipe here: http://www.epicurious.com/recipes/food/views/Fennel-and-Potato-Hash-356731

It's a nice change from regular breakfast potatoes and because of the fennel, it's a bit lower in calories. I put mine together the night before and just heated it up with the souffles.

Buckwheat Oatmeal Scones with preserves
DSC_8608
These are based on this epicurious recipe, which I've made before, with great success. I wanted to try them with light buckwheat flour (not dark!). The result was surprisingly wonderful! If you can source gluten-free oats and buckwheat, this recipe can be suitable for celiac sufferers. Using the food processor will make your life easier, but it isn't crucial. You just need to otherwise use oat flour and a pastry blender.

1 2/3 cups buckwheat flour
1/4 cup plus 2 tablespoons sugar plus additional for sprinkling (I used organic palm sugar)
1 tablespoon baking powder
3/4 teaspoon baking soda
1/2 teaspoon salt
1 1/3 cups old-fashioned oats (I used large flake oats)
1 1/2 sticks (3/4 cup) cold unsalted butter, cut into tablespoon pieces
Finely grated zest from 1 large navel orange
2/3 cup well-shaken buttermilk plus additional for brushing

1. Preheat oven to 425F. Put flour, sugar, baking powder, soda, salt and oats in a food processor. Pulse 15 times. Add butter and pulse until mixture resembles coarse meal. Transfer to a bowl.

2. Stir together zest and buttermilk. Pour onto oat mixture, and stir just until you can get it to stick together in a ball. Divide dough into two balls.

3. Form each ball into a circle, about 1 inch thick. I don't use a rolling pin for this. Just my hands. Cut the circle into 8 pieces (like a pizza) and put them on a parchment-lined baking sheet. Do the same with the other half of the dough. So you now have 16 cute little scone triangles.

4. Brush the top of each triangle with more buttermilk, and sprinkle with sugar. Bake in the oven until golden brown (15-18 minutes) and transfer to a rack.

These are rich but light. Yum. Totally recommend.

Fruit Skewers
DSC_8582

Pretty self explanatory. Put fruit that won't brown on a skewer. I used starfruit, canteloupe, strawberry, kiwi, pineapple and dragon fruit. Just avoid things like apples and pear, which go brown. For the drizzle, I tried to be fancy and mix mine with sour cream. Don't do it. Just melt your chocolate and drizzle using a zip loc with a teeny bit of the corner snipped off. My drizzle was a little awkward and not nearly as fine as I wanted. Ah well. It tasted good.

BLT skewers with dijon aioli
DSC_8584
Another easy one. Cook bacon (I candied it in the oven like this recipe). Cut into pieces. Thread onto skewers with some romaine and a grape tomato. The sauce is simply 1/2 c mayonnaise, 1/4 dijon mustard, 1 minced clove garlic, pepper. Add a spoon of grainy mustard if you have some). Voila!


Chocolate cupcakes with chocolate-mint swiss meringue buttercream
DSC_8578

OMFG I was proud of these. Don't they look amazing!!!!! Now, before you're too impressed with me, I absolutely did NOT make the monkey toppers. Those were made by my friend, who runs the amazing Sophie Bifield Cake Company. She is so super talented. If you're crafty and know how to do these sorts of things, there are great instructions for the monkeys on the Frosted Cake n Cookie. This is well outside my comfort zone, so HUGE thanks to Sophie for the help.

The cake part of the cupcake was from this epicurious recipe that I've used before with great success. It makes great cupcakes, just adjust the baking time to 18ish-20ish minutes. 1 cake recipe makes 36 decent sized-cupcakes.

The cake is good, but holy crap...the frosting has opened up my entire cupcake world to new possibilities.

I'd never made swiss meringue buttercream before...but it's so bloody wonderful. It's an enormous pain in the ass to make (it took an HOUR), but it's fabulous. Don't make it if you don't have a stand mixer. I used Martha Stewart's icing recipe. and beat in 4 oz of melted, cooled 70% cocoa chocolate, and 1 t of peppermint extract. The recipe makes enough to generously frost 24 cupcakes.

To ice the cupcakes, I used the Wilton 1C icing tip. I love the ruffly deep swirls it made. And if I can do it, so can you, because I suck at this kind of thing. I bought it at Bulk Barn and used a disposable piping bag. My bag was only 12 inches. Buy a bigger one. Mine was irritatingly small.

lime-mint mojito punch
DSC_8580
I wasn't sure how this punch would go over....to the point that I yelled at hubs for stealing a glass of OJ the morning of the shower...but it was a HUGE hit! I'd make it again. It was refreshing and yummy and totally doesn't need the rum. Although rum wouldn't be a bad thing...as long as half of your guests aren't pregnant or nursing. ;)

1 cup sugar
1 cup water
zest of 3 limes

1 cup lime juice
1.5 cups mint leaves, whole (give or take)
4-5 cans club soda

1. On the stove top, combine the sugar, water and lime zest. Heat until the sugar is totally dissolved. Cool.

2. To make punch, combine lime juice, sugar syrup and mint leaves. Add club soda. Taste - add more club soda, juice, sugar, mint depending on what you think.

Yummy!

And voila. That's what we ate. It was super yummy and everything disappeared off the table. So I'd recommend all of the recipes here.

Tuesday, April 08, 2008

because I couldn't sleep without sharing the chocolate joy

Pin It Now!

Again, I should REALLY be in bed. My preggo butt will be T-I-R-E-D tomorrow.

Especially considering I'm in a new job and should really be trying my utmost to impress all and sundry.

But I can't sleep without sharing this cake.

So here it is....from the Best of the Best of Bridge, this is what I craved. I was all set to make a much healthier dessert (a very good one!) from Self magazine. It's a lovely apple caramel strudel in phyllo, done with a creamy caramel sauce. As long as you eschew the cooking spray for butter, it's a GREAT dessert.

But then I saw this one. And it was like the helpless moth, fluttering blindly, yet oh so lovingly, toward the flame.

Must. Have. Chocolate.

This chocolate raspberry torte is really more of a cake than a torte...but it's a delicious cake. Relatively easy to make (as much as a four layer cake can be easy) and very easy to work with. Texture of the cake itself is nice and light and soft, and the chocolate sour cream ganache icing is WONDERFUL to work with. Can't go wrong with this. You can make the cake the day before, but as the filling and icing need to be refrigerated, you should probably either make sure you have lots of fridge space or do the assembly the day of.

Chocolate Raspberry Torte - from Best of Bridge
DSC_5393

Cake:
2 cups all-purpose flour, sifted 500 mL (I used cake flour)
2 tsp. baking soda 10 mL
1/2 tsp. salt 2 mL
1/2 tsp. baking powder 2 mL
3 squares (1 oz. / 30 g size) unsweetened chocolate 75 g
1/2 cup butter 125 mL
2 cups light brown sugar,packed 500 mL (I only had dark brown and was out of vanilla, so I used 1.5 cups dark brown sugar and 1/2 c. vanilla bean sugar)
3 eggs
1 1/2 tsp. vanilla
3/4 cup sour cream 175 mL
1/2 cup strong coffee 125 mL (used decaf)
1/2 cup coffee flavoured liqueur 125 mL (but, awful preggo that I am, I still used the booze!)

Filling:
1 cup whipping cream 250 mL
2 Tbsp. icing sugar 30 mL
1-12 oz. jar raspberry or strawberry jam 340 mL (thankfully had most of a jar of seedless raspberry jam in the fridge - woot!)

Chocolate Sour Cream Icing:
1 1/2 cups chocolate chips 375 mL (I splurged and bought slightly more expensive chocolate chips - it's worth making sure your chocolate chips are tasty enough to actually eat. I can attest to their tastiness, seeing as during the writing of this post, I finished off the bag....)
3/4 cup sour cream 175 mL
dash of salt
fresh raspberries or strawberries
***I used 2 cups of chocolate chips and about 1 1/4 cups of sour cream. I HATE not having enough icing. 2 cups of chocolate chips was actually too much....


1. Preheat oven to 350F. (180 degrees C).

2. Grease and flour two 9 inch (1.5 L) layer cake pans.

3. Sift dry ingredients. (Seriously, does anyone do that? I don't...)

4. Melt chocolate and let cool.

5. In a large bowl beat butter, brown sugar, and eggs at a high speed until mixture is light and fluffy, about 5 minutes.
DSC_5370

6. Beat in melted chocolate and vanilla.
DSC_5371

7. At low speed, beat in flour mixture (in fourths), alternating with sour cream (in thirds). Add coffee and liqueur, blending until smooth.

8. Pour batter into pans and bake 30 to 35 minutes or until surface springs back.
DSC_5374

9. Cool in pans for 10 minutes, then remove from pans and cool on wire racks.
DSC_5379


Filling:
1. Beat cream with icing sugar until stiff. Refrigerate.

2. Slice cake layers in half horizontally to make four layers. (Hint: Cake layers slice more easily if frozen first, though I actually found they sliced really well after having sat overnight! Trust me, if this knife-incompetent fool can do it, you can too!)

3. Place one layer, cut side up, on cake plate.

4. Spread with 1/2 cup (125 mL) raspberry jam and 1/2 cup (125 mL) whipped cream mixture.
DSC_5391

5. Repeat with remaining layers, ending with top layer, cut side down.
DSC_5392

Icing:
1. Melt chocolate chips in top of double boiler (I used the microwave. I don't have a double boiler and was clean out of pots.)

2. Add sour cream and salt and beat until icing is creamy and smooth. Ice top and sides of cake before it sets. Liberally indulge in excess icing.

To decorate cake....yeah, I had this vision of having a beautifully frosted cake, replete with raspberries, drizzly white chocolate and lucious curls of chocolate.

I couldn't find any raspberries so I had to sub strawberries.

My "drizzly" white chocolate looked like....um, actually, I'm not going to repeat what it looked like. It was EXTREMELY unattractive, obscene and gross looking. Blobs of white goopy stuff strewn across the cake. *ew* I waited until it cooled and picked it off (yes, it was that bad......).

I was using cheap chocolate to make curls and it would only flake. No curl whatsoever.

DSC_5394

But hey, at least the icing was good! The final product looked pretty nice though, I will say, even if it wasn't *quite* what I planned out. And I can't say enough about the value of an icing comb - it dresses up the look of your cake....and like pizza AND chocolate, even when it's bad....it still looks pretty good! :)

DSC_5403

Thanks for reading!

Related Posts with Thumbnails