Photobucket - Video and Image Hosting

Wednesday, April 30, 2008

lemon and poppyseed....take 2

Pin It Now!

I had a craving tonight, I'll confess it.

I wanted fresh baking. At first I thought I wanted chocolate cake....but couldn't find a quick, easy recipe. Then I thought I wanted a coffee cake....but no go.

And then I found an awesome recipe for lemon poppyseed cake. I had no intentions whatsoever of blogging this, so no progress photos, unfortunately.....but it's SO GOOD. I ate a quarter of it, and the only thing that's stopping me from eating the rest will be hubs' scorn and derision when he gets home to find I've not only baked a cake, but also eaten it too....

If you like lemons and poppyseeds, you should make it. The batter is strange (very dry), but it bakes up very nicely, so don't worry.

Fast, Easy Lemon Poppyseed Cake
more uses for lemons and poppyseeds
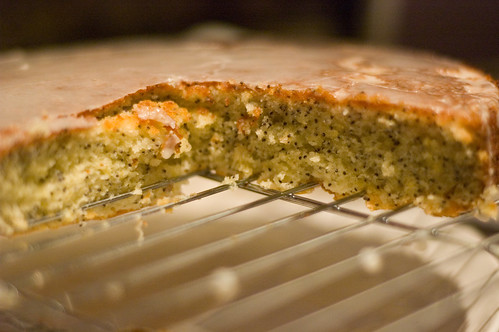
(for the record, if you can hold yourself back a little longer than I did, and NOT try to cut a warm cake on a cooling rack, your cake will probably hold together a lot better....OMG....so good.........)


1 1/4 cups all-purpose flour (I used cake flour because I'm out of all purpose)
1 teaspoon baking powder
zest of 1 lemon
1/4 teaspoon salt
2 sticks (1 cup) unsalted butter, softened
3/4 cup granulated sugar (I used vanilla sugar)
2 large eggs
2 tablespoons poppy seeds

1 1/2 cups confectioners sugar
3 tablespoons fresh lemon juice
1/2 t vanilla

Preparation
1. Put oven rack in middle position and preheat oven to 375°F. Butter a 9-inch round cake pan.

2. Whisk together flour, baking powder, lemon zest, and salt in a bowl.

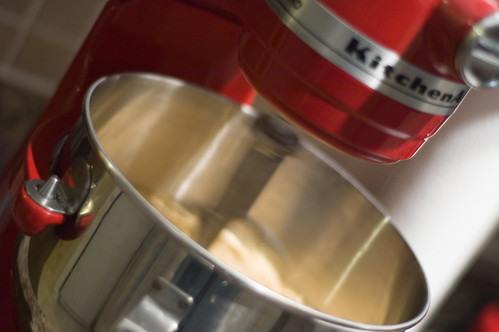
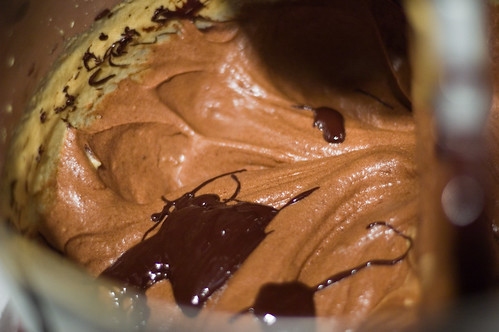
3. Beat together butter and granulated sugar in another bowl with an electric mixer at medium speed until pale and fluffy, 2 to 3 minutes.

4. Beat in eggs until combined. Reduce speed to low, then add flour mixture and poppy seeds and mix until just combined (batter is thick and does not pour)

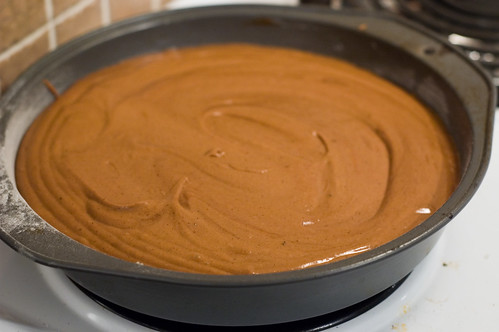
5. Transfer batter to cake pan, smoothing top, and bake until a wooden pick inserted in center of cake comes out clean and top is golden brown, about 30 minutes. (I baked mine 27 minutes)

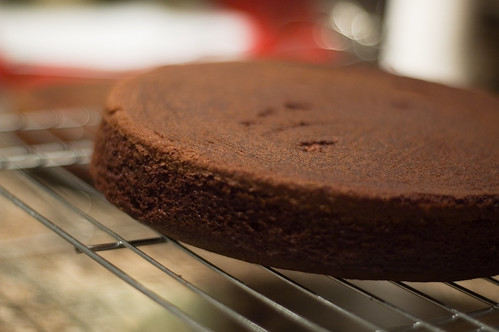
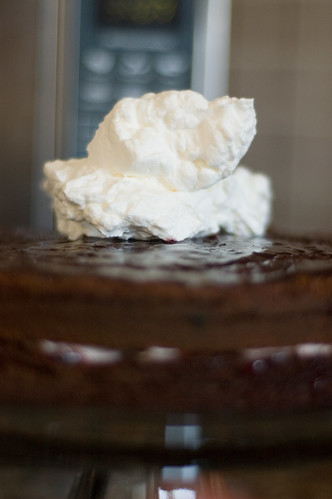
Cool cake in pan on a rack 5 minutes, then invert onto rack.Whisk together confectioners sugar, vanilla and lemon juice in a bowl until smooth. Pour glaze over warm cake, spreading it with a spatula to drizzle over edge. Put a plate under the rack unless you'd like to lick the glaze off your counter.

Let stand until glaze is set, about 15 minutes. Serve warm or at room temperature. It is freaking FANTASTIC warm. I really want to eat the rest of the cake.....

Thanks for reading!

Tuesday, April 22, 2008

a wizard has turned me into a whale...

Pin It Now!

...and I'm still trying to decide if it's awesome or not.

Photobucket

A little explanation is in order first, I think.....

To understand this little saying, you have to first understand a little bit more about hubs...and his penchant for obnoxious t-shirts. While most guys his age are busily straightening ties, and tying up their dress shoes....hubs is scouring the internet for the latest and most original obnoxious t-shirts. It so happens that a guy I went to high school with is also the mastermind behind the HILARIOUS dinosaur comics web page (if you have an offbeat and slightly cerebral sense of humour, totally check it out). Turns out, he's applied his wacky sense of humour to a rather unique brand of merchandise that totally appeals to my geek hubs - obnoxious t-shirts. Last year, hubs ordered a whole bunch of these shirts and they never fail to elicit comment.

But I am totally and completely stealing this one. First, the 80s computer game throwback is fabulously snicker-worthy. And second, I have officially been turned into a whale.

Orcinus orca is my alter ego.

Unequivocably HUGE (oh yeah, I actually had someone call me that).

And apparently I have another three months of growth left. Watch out world, or I will end up beaching myself somewhere...

I think hubs is going to need to order a couples of sizes up for me. You can buy your own wacky t-shirts HERE.

In the meantime, I'm trying to stem the onslaught of poundage by eating more homemade, healthy food. And I have decided that it is time for hubs to start picking up the slack in the kitchen....every night, it is now his job to go down to the freezer, and pick something out of it, and put it in the fridge. The next night, it is MY job, to take whatever it is he defrosted, and cook something out of it (for the record, hubs is AWESOME around the house, and probably does about 90% of everything...this is my facetious little way of giving up on meal planning because I am a lazy preggo).

So, on Sunday, hubs defrosted two things - a massive package of chicken breasts, and a mystery package of what looked like grilled salmon.

It was kinda funny, because I couldn't remember the last time we grilled salmon, and I certainly couldn't remember packaging up the leftovers thusly (the salmon was in a ziploc bag...I tend to put leftovers into containers, packaged up as meals). When the salmon finally defrosted on Monday night, I opened up the bag, and immediately smelled....smoke. Turns out it wasn't grilled salmon at all.....it was hot smoked salmon my mom had brought up from New Brunswick.

A whole different kettle of fish.

I normally purchase cold smoked salmon, simply because I FREAKING LOVE IT, but in trying to be a good preggo, I've been eating less of it (okay, I lie - I'm awful, I had cold cuts and alfalfa sprouts tonight). At any rate, I don't tend to eat a lot of hot smoked salmon, and it's something you have to use judiciously, because it's a very powerful flavour. A wonderful flavour, mind you, but definitely something that can easily overwhelm a delicate dish.

I did some poking around, and came across a great base recipe on epicurious, and modified it a bit to suit my taste and ingredients. I ate mine cold (as pasta salad should be eaten) and hubs heated his up (because he is grossed out by cold pasta). The result? We were both very happy with our respective meals, and it was a great way to enjoy all that lovely smoked salmon!

Lemon Poppyseed Penne with Smoked Salmon
lemon poppyseed pasta salad

Dressing:
1/3 c. mayonnaise
1 1/2 tablespoons Dijon mustard
1/2 c. sour cream
1 t dried dill
zest of 1/2 lemon
1/2 shallot, minced
2 tablespoons fresh lemon juice
1 tablespoon poppy seeds
pepper

Pasta:
3 cups penne pasta
1 pound asparagus, tough ends trimmed, cut into 1-inch pieces
goofed up my dof

1 cup frozen peas
4 ounces smoked salmon, cut into 1/2-inch pieces

1. Whisk the dressing ingredients in medium bowl. Season with salt and pepper.
homemade dressing is a good thing

2. Cook pasta in large pot of boiling salted water until almost tender but still firm to bite. Add asparagus and peas and cook until crisp-tender, about 2 minutes longer.

3. Drain, reserving 1/4 cup cooking liquid (I remembered this step just as I poured the last of the cooking liquid through the sieve...d'oh! A little tap water never hurt anyone....)

4. Rinse with cold water until cold. Drain well.

5. Transfer pasta and asparagus to large bowl (or back into the cooking pot if you're not being fancy...why dirty a bowl???).

6. Add smoked salmon. Mix reserved cooking liquid into dressing. Add to salad; toss to blend. Season with salt and pepper. Chill at least 1 hour and up to 6 hours. (I didn't chill it....I am waaaay too pregnant to wait an extra hour for dinner...it tasted the same today, so I conclude that the chilling step is unnecessary).

mixing it up

This is a fabulous pasta salad recipe - I wouldn't hesitate to bring it to a potluck (if I knew people liked smoked salmon - otherwise, shrimp, chicken, or feta would all be good substitutes), or serve it at a brunch. YUM. It's super quick, and doesn't have to be bad for ya if you use lighter dressing ingredients. I also have discovered the BEST high fibre pasta - Catelli Smart. Normally, I hate whole wheat pasta. I know some people swear by it, but it's so chunky and gross. Not at all what pasta is supposed to be....on a whim, I tried the new high fibre white pasta....and it is surprisingly great! Obviously not up to par with homemade, or really good italian imported stuff....but considering what it is, it's a more than acceptable inclusion into the dinner rotation.

Anyway, this whale is about to swim off to bed....thanks for reading! Also, I think mother nature needs a few thumbs up for the insanely awesome weather we've been having the past few days - 25C in April is both unheard of and mind-boggling. I am loving it.

Saturday, April 19, 2008

pork in whiiiiiiiiiiiiiine sauce

Pin It Now!

i love when my dinner has colour

For some reason, I never really cook pork. We just don't eat a lot of it, and as such, I never really have it in the house.

A couple of weeks ago, pork tenderloins were on sale, so hubs picked up a couple of packages to stow away in the freezer. On Sunday, I popped one into the fridge, thinking that I would cook it Monday night.

So I didn't cook it on Monday. Or Tuesday. Or Wednesday.....but when I finally got a round to it on Thursday night ( if you're a north American germaphobe, I know that you are totally gasping in horror at the cryosealed 3 days defrosted meat....get over it...), the meal was totally worth the wait. And I didn't get poisoned....

Pork tenderloin is a super versatile cut of meat - initially, I'd been thinking of trying a Thai-inspired stir-fry (coconut milk, thai curry paste, fresh basil, fish sauce, etc.), but I still wasn't really in the mood for that....so I ended up hunting around and found a fabulous and simple recipe on Cooking Light. I highly recommend this - it's company worthy, easy to make and very tasty. I like the simplicity of the ingredients, and it was a great complement to mixed roasted white and sweet potatoes (actually, it would have been just sweet potatoes, but when I asked hubs to pick them up, they were all teeny tiny....so I supplemented).

Mixed Roasted Potatoes
4 small (or 2 large) sweet potatoes, peeled and cubed
4 small (or 2 large) white potatoes, cubed (no need to peel)
2-3 T olive oil
2 cloves garlic, minced
1/2 t sea salt
black pepper
2 t crushed rosemary
1 t cumin

1. Toss the cubed potatoes with olive oil, garlic, salt, pepper, rosemary and cumin.

2. Put on the bottom rack of a 400F oven. Toss every 20 minutes - cook for 40-50 minutes. The longer, the better, IMHO.

these potatoes got totally roasted

Pork au Poivre
(shamelessly ripped off of Cooking Light)
Ingredients

2 pork tenderloins, trimmed
2 tablespoons coarsely ground black pepper
2 teaspoons olive oil
Cooking spray
1 cup fat-free, less-sodium chicken broth
1 cup dry red wine
1 shallot, minced
1 tablespoon Dijon mustard
1 tablespoon tomato paste

Preparation

1. Preheat oven to 425°.

2. Butterfly each pork tenderloin, cutting to, but not through, the other side.

3. Open halves, laying pork flat. Sprinkle each side of pork with 1 1/2 teaspoons pepper. Heat oil a large ovenproof skillet coated with cooking spray.

4. Add pork; cook for 2 minutes on each side.

is it just me or is this marginally obscene?

5. Place the pork in a 9x13 glass pan (spray with cooking spray first) and bake at 425° for 12 minutes or until meat thermometer registers 160° (slightly pink). My pork was in for closer to 20 minutes....and it was a bit pink in the middle. If you like your pork not pink, I would suggest starting with 15 minutes, and checking every five minutes after that....my tenderloins were quite thick, even butterflied.

seared loins

6. While the pork is in the oven, assemble your sauce ingredients and add the wine and shallots to the pan.

mise en place is always a good thing

Bring to a boil. Add broth and remaining ingredients to pan; stir well with a whisk. Bring to a boil over medium heat; cook until reduced by about half.

boiling totally gets rid of the alcohol *hic*

7. With a sharp knife, cut the pork into medallions about 1.5 cm thick. Serve with sauce.

ssssh.....don't show the food inspection agency

Cooking Light tells me that one pork tenderloin should serve four people. I tell Cooking Light that perhaps they should consider testing their recipes on people who have NOT undergone gastric bypass....generally, one regular sized tenderloin will serve 2 people. Three if you are dieting.

I served this with a green salad (with parmesan on top) and the roasted potatoes above. :) YUM. The pork was very moist, the sauce was super tasty and the cumin in the potatoes added just a wee touch of exoticism that really heightened the meal. Two thumbs up from me, and hubs sarcastically told me it was 'pork-tastic' after I bugged him for feedback.

dinner for the lazy

Pin It Now!

I don't know about you, but there are some days when I get home from work, I'm tired, I'm crusty from a long bus ride and I just don't feel like making dinner.

Given that I'm still childless for the next three months, and given that hubs is amenable to pretty much any culinary endeavour...sometimes I totally and completely cop out....

As much as I love ordering in at the drop of a hat, it's a bad habit to get into, it's expensive, and it packs on the pounds a lot more than they really need to be packed on (note to self: hide scale). Not to mention all the sodium, nitrates and other crap that ends up in all that food. No good.
This 'recipe' was from one such night....I can't remember why exactly I was tired (do I seriously even need a reason?), but I wanted something totally lazy, but also still more on the healthy side than not.

I also wanted ice cream (have you tried Haagen Daaz Dulce de Leche? SO FREAKING GOOD.....get each person their own pot, because you will eat it all).

I was staring into the freezer, hoping that some sort of inspiration would strike me....and then I spotted the FULL grocery bag of blackened, shriveled, frozen bananas. Bingo.

Hubs is always buying bananas when they are on sale for cheap (like 49 cents a pound). I hate bananas. I think all fruit should be at least somewhat crunchy, so their mushy wetness just grosses me out. So since hubs can never really finish an entire bunch of bananas, he always tosses the remainders in the freezer....in the sad, futile hope that I will someday successfully make banana bread out of them (I also hate banana bread).

But you know one thing I can tolerate bananas in? SMOOTHIES!

WOOT!

So here I had discovered this bag of extremely noxious looking black appendages....and right next to it was a nice big bag of tasty frozen berries (an excellent way to mask the banana flavour). Awesome. Turns out I also had yogourt and milk.

There are about a billion reasons why you should make a smoothie, but here are just a few:
- it's easy
- it's fast
- it's kinda like ice cream
- it is a good way to use up gross frozen bananas
- you get calcium
- you get potassium
- you get fibre and antioxidants from the berries.

I like my smoothies to be pretty thick, so if you prefer a thinner or less frozen texture, consider upping the milk, or using fresh (non-frozen) fruit). Some might argue that this is breakfast fare, but for someone who is all to happy to have french toast for dinner....this is fair game for the evening meal.

Banana Berry Smoothie
did i overfill this?

2 frozen bananas (I highly recommend peeling them before freezing them - MUCH easier to deal with....whatever you do, do NOT thaw then peel. Always peel than thaw. Defrosted banana peel is VILE)
2 cups frozen mixed berries (I like these ones:
freshness from the freezer...

400 mL milk (about 1.5 cups)
2 4-oz containers of yogourt (I like to use berry or vanilla)

1. If your hubby (like mine), has tossed the offending bananas into the freezer unpeeled, carefully cut the peel off. Cut each banana into four. Toss into the blender. I find that frozen bananas are surprisingly easy to cut - they have a solid ice-creamy texture. They are still gross though.
why won't he peel them before freezing?

2. Toss the berries into the blender.

2. Toss the bananas, berries, milk and yogourt into the blender. Blend away until smooth. Depending on your blender, you may need to stop and stir - despite its snazzy appearance, my blender has the irritating habit of whirring away so enthusiastically that it puts an air bubble in between the blades and the thing I'm trying to blend...arg).
yes, I ate a smoothie for dinner

This makes 2 huge smoothies, or four normal sized ones. I like to serve mine in a frosty beer glass.

if you can't have beer

Eat through a large bore straw or with a spoon - your choice. :) I paired this with an everything bagel and tzatziki. If you're not preggo, you may want to consider a different food combo.

Tuesday, April 08, 2008

because I couldn't sleep without sharing the chocolate joy

Pin It Now!

Again, I should REALLY be in bed. My preggo butt will be T-I-R-E-D tomorrow.

Especially considering I'm in a new job and should really be trying my utmost to impress all and sundry.

But I can't sleep without sharing this cake.

So here it is....from the Best of the Best of Bridge, this is what I craved. I was all set to make a much healthier dessert (a very good one!) from Self magazine. It's a lovely apple caramel strudel in phyllo, done with a creamy caramel sauce. As long as you eschew the cooking spray for butter, it's a GREAT dessert.

But then I saw this one. And it was like the helpless moth, fluttering blindly, yet oh so lovingly, toward the flame.

Must. Have. Chocolate.

This chocolate raspberry torte is really more of a cake than a torte...but it's a delicious cake. Relatively easy to make (as much as a four layer cake can be easy) and very easy to work with. Texture of the cake itself is nice and light and soft, and the chocolate sour cream ganache icing is WONDERFUL to work with. Can't go wrong with this. You can make the cake the day before, but as the filling and icing need to be refrigerated, you should probably either make sure you have lots of fridge space or do the assembly the day of.

Chocolate Raspberry Torte - from Best of Bridge
DSC_5393

Cake:
2 cups all-purpose flour, sifted 500 mL (I used cake flour)
2 tsp. baking soda 10 mL
1/2 tsp. salt 2 mL
1/2 tsp. baking powder 2 mL
3 squares (1 oz. / 30 g size) unsweetened chocolate 75 g
1/2 cup butter 125 mL
2 cups light brown sugar,packed 500 mL (I only had dark brown and was out of vanilla, so I used 1.5 cups dark brown sugar and 1/2 c. vanilla bean sugar)
3 eggs
1 1/2 tsp. vanilla
3/4 cup sour cream 175 mL
1/2 cup strong coffee 125 mL (used decaf)
1/2 cup coffee flavoured liqueur 125 mL (but, awful preggo that I am, I still used the booze!)

Filling:
1 cup whipping cream 250 mL
2 Tbsp. icing sugar 30 mL
1-12 oz. jar raspberry or strawberry jam 340 mL (thankfully had most of a jar of seedless raspberry jam in the fridge - woot!)

Chocolate Sour Cream Icing:
1 1/2 cups chocolate chips 375 mL (I splurged and bought slightly more expensive chocolate chips - it's worth making sure your chocolate chips are tasty enough to actually eat. I can attest to their tastiness, seeing as during the writing of this post, I finished off the bag....)
3/4 cup sour cream 175 mL
dash of salt
fresh raspberries or strawberries
***I used 2 cups of chocolate chips and about 1 1/4 cups of sour cream. I HATE not having enough icing. 2 cups of chocolate chips was actually too much....


1. Preheat oven to 350F. (180 degrees C).

2. Grease and flour two 9 inch (1.5 L) layer cake pans.

3. Sift dry ingredients. (Seriously, does anyone do that? I don't...)

4. Melt chocolate and let cool.

5. In a large bowl beat butter, brown sugar, and eggs at a high speed until mixture is light and fluffy, about 5 minutes.
DSC_5370

6. Beat in melted chocolate and vanilla.
DSC_5371

7. At low speed, beat in flour mixture (in fourths), alternating with sour cream (in thirds). Add coffee and liqueur, blending until smooth.

8. Pour batter into pans and bake 30 to 35 minutes or until surface springs back.
DSC_5374

9. Cool in pans for 10 minutes, then remove from pans and cool on wire racks.
DSC_5379


Filling:
1. Beat cream with icing sugar until stiff. Refrigerate.

2. Slice cake layers in half horizontally to make four layers. (Hint: Cake layers slice more easily if frozen first, though I actually found they sliced really well after having sat overnight! Trust me, if this knife-incompetent fool can do it, you can too!)

3. Place one layer, cut side up, on cake plate.

4. Spread with 1/2 cup (125 mL) raspberry jam and 1/2 cup (125 mL) whipped cream mixture.
DSC_5391

5. Repeat with remaining layers, ending with top layer, cut side down.
DSC_5392

Icing:
1. Melt chocolate chips in top of double boiler (I used the microwave. I don't have a double boiler and was clean out of pots.)

2. Add sour cream and salt and beat until icing is creamy and smooth. Ice top and sides of cake before it sets. Liberally indulge in excess icing.

To decorate cake....yeah, I had this vision of having a beautifully frosted cake, replete with raspberries, drizzly white chocolate and lucious curls of chocolate.

I couldn't find any raspberries so I had to sub strawberries.

My "drizzly" white chocolate looked like....um, actually, I'm not going to repeat what it looked like. It was EXTREMELY unattractive, obscene and gross looking. Blobs of white goopy stuff strewn across the cake. *ew* I waited until it cooled and picked it off (yes, it was that bad......).

I was using cheap chocolate to make curls and it would only flake. No curl whatsoever.

DSC_5394

But hey, at least the icing was good! The final product looked pretty nice though, I will say, even if it wasn't *quite* what I planned out. And I can't say enough about the value of an icing comb - it dresses up the look of your cake....and like pizza AND chocolate, even when it's bad....it still looks pretty good! :)

DSC_5403

Thanks for reading!

chicken. with a side of chocolate.

Pin It Now!

I am a baking and cooking machine lately. After several weeks (okay, maybe months) of neglect, my beautiful and revitalized kitchen is finally serving its true purpose...lots of counterspace for lots of dirty dishes...er...lots of cooking for lots of hungry people.

Yup, that's TOTALLY what I meant to say.

You'll have to forgive me if this is a little disjointed - it's already after midnight, I should *technically* be in bed and the babe is kicking up a storm and addling my brains. I must say, it makes the formulation of a complete sentence a bit of a challenge.

We had some friends over for dinner this weekend, and, as per usual, I had lots of fun putting together the menu. Making it didn't go so smoothly, but at least picking out the recipes was fun. :)

I didn't photograph every course, as some of the recipes are either repeats or are SUPER simple, but don't worry, I'll still share all the deets for ya.

Soup - this indian spiced carrot soup from epicurious - this soup was great except for me being an idiot. When I made up my grocery list, I didn't bother to read the instructions - only the ingredients. So it said I needed coriander seed. So I bought some. Had to go to like 3 grocery stores to find whole coriander seed (thank goodness for the ever-accommodating hubs). Of course, when I get home, I find out that the FIRST bloody thing I'm supposed to do is pulverize the coriander in a spice mill.

I don't have a spice mill.

But i have a heck of a lot of coriander seed....any takers? I did my best to bash it up by taking out my frustrations with a rolling pin....but either the babe has sapped my strength, or my self-perceived vitriolic frustrations are a lot more insipid than I suspected. The result? Icky bits of coriander shell left in the soup....with the odd unpleasant mouth feel of fingernail clippings.

Hmmm..on second thought..that sounds REALLY gross....a) I don't eat my fingernails....or even chew them...and b) I'm REALLY seriously hoping no one else thought that. The soup was excellent. Save yourself some work and buy preground mustard and coriander seed. ;)

Salad was very simple - baby spinach and strawberries with a creamy poppyseed dressing (dressing was easy - 1/3 c. sugar, 1/4 c. white vinegar, 1/2 c. canola oil, 2 T sesame seeds, 2 T poppy seeds, 1/2 t worcestershire, 1 T dijon and about 3 T of whipping cream). Tasty, easy and very pretty. Can't go wrong with strawberries and spinach!

I have to say, I was actually pretty pleased with how the main course turned out. I took a bit of a risk in making the chicken (combining two recipes and a little bit of ingenuity), and while cooking time was a little longer than anticipated....the result was great!

Stuffed Chicken en Papillote with Sundried Tomato Cream Sauce

For all my constant parchment paper pushing, I'd never actually cooked something IN the stuff. I'd cooked tons of stuff ON it, but never once taken the drastic plunge of thoroughly investing my culinary success within its pulpy, shiny depths.

I'm not sure why. It's awesome! This stuff was a little slow to cook (likely due to being rolled), but when the initial recipe called for double wrapping and boiling in saran wrap....the bisphenol A-averse little voice in me said...WTF...boiling food in soft plastic? Are they insane? So I sought out an alternative. This recipe is a culmination of a chicken recipe from cooking light, a sauce recipe from epicurious, and plain old luck in the cooking method department.

Ricotta, Sundried Tomato and Spinach Stuffed-Chicken breasts

2 cups boiling water
10 sun-dried tomatoes, packed without oil
1 1/2 teaspoons extra virgin olive oil
1/2 cup finely chopped onion
1 1/2 teaspoons dried oregano (consider using fresh basil - I think it would be better!)
4 garlic cloves, minced
1 (10-ounce) package frozen chopped spinach, thawed, drained, and squeezed dry
3/4 cup (3 ounces) shredded part-skim mozzarella cheese
2/3 cup fat-free ricotta cheese
1/4 cup (1 ounce) grated Parmesan cheese
1/2 teaspoon salt, divided
1/4 teaspoon black pepper, divided

8 skinless, boneless chicken breast halves (quick story about my chicken breasts....they were huge! Seriously, if these chickens had been people, they would be DDs. I ended up cutting mine in half because they were simply too big to do anything with....if you have smaller chicken breasts, you may be better off just pounding them thin, without cutting them first)

1. Combine boiling water and sun-dried tomatoes in a bowl; let stand 30 minutes or until soft. Drain and chop.

2. Heat oil in a large nonstick skillet over medium-high heat. Add onion, oregano, and garlic; cook 3 minutes or until onion is tender, stirring occasionally. Add spinach; cook 3 minutes or until liquid almost evaporates. Add tomatoes; cook 1 minute. Place spinach mixture in a bowl; cool 5 minutes. Stir in cheeses, 1/4 teaspoon salt, and 1/8 teaspoon pepper.

3. Depending on how big your chicken breasts are, slice each breast half lengthwise through to the other side. Open halves, laying breast flat. Place each breast half between 2 sheets of heavy-duty plastic wrap; pound to 1/4-inch thickness using a meat mallet or small heavy skillet.
DSC_5386

4. Spread chicken with a thin layer of filling mixture.
DSC_5387

5. Roll up, jelly roll style. Set aside and repeat with remaining chicken.
DSC_5388

6. To make the 'en papillote' part - basically, take a square of parchment paper, put 1-2 chicken breast rolls on it, and wrap it up nicely like a present. After much hunting for a handy dandy stapler (no luck unless I wanted to hand fold the staples from the staple gun with pliers....), I opted to just fold mine and tuck them under. There was a small loss of liquid, but really, not that much.
DSC_5390

7. Bake at 350F for about 45 minutes to an hour. Make sure you make at least one extra so you can cut into it and check for doneness!
This is me, checking to make sure I'm not poisoning anyone...
DSC_5395

8. To serve, you can put the packages right on the plate (more effective if you do a full meal en papillote), or de-package. I opted to open them myself.

The result was really nice - moist, flavourful chicken breast. I would definitely revisit this cooking technique. I served with a nice sundried tomato cream sauce....

Sundried Tomato Cream Sauce
double this for 8 chicken breasts

2 T butter
4 garlic cloves, minced
1/4 cup drained sun-dried tomatoes (packed in oil; 1/2 oz), patted dry and coarsely chopped
3/4 teaspoon dried hot red pepper flakes
1/4 cup dry white wine
3/4 cup chicken broth
1/4 cup heavy cream
1/4 cup thinly sliced fresh basil

1. In a saucepan, melt the butter. Add the garlic, tomatoes and hot pepper flakes and cook for 3-4 minutes.

2. Add the wine and cook until almost evaporated.

3. Add chicken broth and bring to a full rolling boil.

4. Add the cream (feel free to add a little extra) and boil until somewhat thickened (about 10 minutes).

5. Attack with the immersion blender (or blend with a regular blender for smoother texture).

7. Add in the chopped basil.

This sauce has a nice amount of zip - it's great on chicken, but would also be good on pasta or fish. MMMMMMMMMMMMMMMMMMMMMMMMMMMMMMMMMMm.....

I served the chicken with roasted rosemary potatoes and pan seared fresh peppers and onions:
DSC_5398

And come to think of it, the cake is so pretty, it really deserves its very own post...

Related Posts with Thumbnails