back to the future...cooking edition
Time to saddle up your culinary delorean, undo the evils of missed dinners past and learn how to cook, plan and eat for the future.
It's hard to imagine, but sometimes, just *sometimes*, the craziness of modern life can get in the way of cooking. There are some weeks where I (or anyone else, for that matter) may set out with the most true of intentions to cook beautiful homemade meals every night....but then stuff just happens (like you have to run out and buy a house, or you're getting mildly concerned because your baby is almost viable outside the womb and you have NOTHING whatsoever prepared), and it means that you don't get around to it.
And the irritating, wasteful and sad consequence is that you have all these lovely groceries that end up going bad AND you end up spending MORE money on take-out, delivery, eating out...or just generally eating unhealthily. 'Tis not so good.
Hubs and I are a little bad for this - on most Sundays, I'll plan out the meals for the week, write down the groceries needed, and then we'll shop for the week. I usually plan to make 4-5 meals, because I know that some nights we'll end up munching, some nights we'll end up having something strange going on, and of course, I still have night classes one night a week and hubs isn't always known for kitchen initiative....
Last week was a bit atrocious - only two of the five planned meals actually made it onto our table. At least this week, because we had a party on Friday, and company all weekend, I didn't end up really wasting anything....but it's still a little frustrating.
I have a solution for those weeks though. Alternatively, it can even be a solution for those random days off where you find yourself lounging about...nothing to do....you kinda want to cook, but there isn't really any need to....
The solution is cooking for the future. Cooking for the freezer, to be exact. Coming up with a meal (or two or three) that will serve you well in those weeks where you just don't have the time to put something on the table. Two to three hours in one afternoon can give you 3-6 meals worth of food that you can have on hand. It can save you TONS of money (cost is more like $7-8/meal vs. the $10+ per serving you'd spend on take-out), and it's also SO much healthier. At least you'll be able to pronounce all the ingredients.
Clearly, this isn't a remotely original idea....there are a number of companies out there (like Supperworks or Dashing Dishes) that have labour-free, really time-saving ways of doing this. BUT, if you're like me and prefer to DIY, or you are cheap (also like me!), or you live off the beaten path and this isn't even an option.....I have some ideas for ya!
Before I share some recipes though, because clearly this isn't the be-all and end-all of what you can cook and freeze, I want to share a few guiding principles to making this work for ya:
1) Make each item a complete meal. Make sure it has protein, starch and veggies. You might think you'll 'add a salad' or 'throw together some veggies' or whatever....but the reality is that on those nights where you want to rely on these meals, you will not have the time or energy to do that. So save yourself future heartache (and scurvy) and make the meal complete from the get-go.
2) Think about serving size when you freeze. What will work for you - single servings? Double servings? Family size? Choose a container that will fit your needs. If you're more likely to steal these for lunches, then use 2-2.5 cup containers. If it's a meal for two, choose a 4-5 cup container. And if it's for the whole fam damily, then get a big one!
3) Think about reheating method when you freeze. If it's something like a stirfry, that you're likely to heat in the microwave, for goodness' sake, don't stick it in a foil container. Alternatively, if it's pasta (like lasagna and canelloni) and still needs its finishing touch in the oven, don't put it in melty plastic.
4) ALWAYS label and date. You seriously have no idea how many random containers of frozen mystery food I have in my freezer. And I won't eat them, because I am pregnant and picky, and have no idea what they are. So PLEASE, take some masking tape and a sharpie (or other writing implement that won't run...ballpoint pen is good), and write down what it is that you've created, and when you've created it. You should make sure you consume the stuff within six months.
5) Some things just aren't meant to freeze. Pasta freezes well. Rice/stir fries/noodles freeze well. Potatoes don't freeze so well. Curries freeze well. Steak does not freeze well (unless you like reheated boot leather). Cream based sauces don't fare super well, but are still edible.
6) Don't leave too much extra room in the container. Unless you are lucky enough to have a snazzy vacuum sealer, you WILL have some air in the container. The more air you have, the more room you have for icky little ice crystals to grow and impart with your food with that oh-so-lovely freezer-burnt taste. So don't leave too much room.
7) Microwaving from frozen sucks the big one. It can be a little hard to plan ahead for this, but it really truly sucks to microwave a whole meal from frozen. The outside is practically incinerating, while you still have a frozen block in the middle. I VERY highly recommend three things:
a) Stick it in the fridge the day before you think you'll need it. It should be mostly defrosted by the next night.
b) Don't defrost in the original container. It's not all that great for you to microwave plastic, and if you're using a larger container, it will simply take FOREVER for the whole thing to get hot.
c) Don't forget that there was life before the microwave. It may seem old school, but heating things up on the stove is a LOT more even and sometimes it can even be quicker.
And without further ado, I'll share a few recipes I made today that work super well in the freezer:
Reduced-Fat Butter Chicken
(stolen and modified from Eat, Shrink and Be Merry)
This curry is easy on the palate, relatively mild and SUPER easy to make. You can use a rotisserie chicken, but if bony carcasses skeeve you, you can always cook up some chicken breasts to use in this. I'm a big fan of precooking the chicken on my indoor grill.
2 tbsp (30 mL) butter
1 cup (250 mL) chopped onions
2 tsp (10 mL) minced garlic
1 tbsp (15 mL) minced ginger root
1 tsp (5 mL) chili powder
1/2 tsp (2 mL) turmeric
1/4 tsp (1 mL) cinnamon
1.5 tsp curry powder
1 T curry paste (whichever kind you like...as always, I love Patak's)
19-oz (540-mL) can diced tomatoes, undrained
2 tbsp (30 mL) tomato paste
1 tbsp (15 mL) brown sugar
1/2 tsp (2 mL) salt
1/4 tsp (1 mL) freshly ground black pepper
4 chopped cooked chicken breasts (or use a rotisserie chicken)
1 cup frozen peas
1/3 cup (80 mL) light (5 per cent) cream
1/2 cup (60 mL) plain balkan-style yogurt
3 tbsp (15 mL) minced fresh cilantro
Hot cooked basmati rice
Directions:
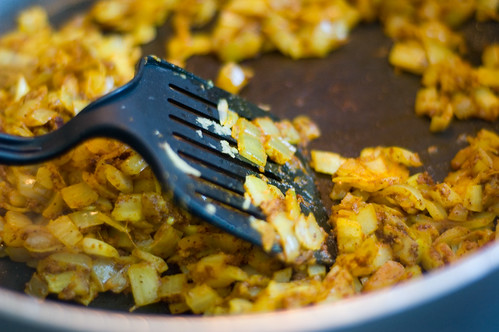
1. Melt butter in a deep skillet over medium heat. Add onions and garlic. Cook slowly, stirring often, until onions are tender, about 5 minutes.
2. Add ginger root, chili powder, turmeric, curry powder and paste and cinnamon. Cook 1 minute more.
3. Add undrained tomatoes, tomato paste, brown sugar, salt and pepper. Reduce heat to low.
4. Cover and simmer 10 minutes, stirring occasionally. Add cut-up chicken, peas cream and sour cream. Simmer, uncovered, 5 minutes more. Remove from heat and stir in cilantro.
5. Serve over hot rice.
Special freezing instructions: I use basmati rice for this (3 scoops in my rice cooker) and freeze with the rice on the bottom. You can also keep the rice and curry separate, if you prefer, but I find having them layered makes serving easier, even though it does increase the propensity for the rice to soak up a lot of the sauce.
"Wowie Maui Chicken"
(stolen and modified from Looneyspoons)
This is a sweet and sour chicken type dish. It comes together really quickly, especially when you have your kitchen wench (aka hubs today...he's VERY indulgent of his preggo wife) chopping everything to your specifications!
4 boneless, skinless chicken breast halves, cubed
3/4 cup finely chopped carrots
1/2 cup each: chopped red and green bell pepper
1/3 cup ketchup
2 tablespoons each: brown sugar, reduced-sodium soy sauce and white vinegar
2 cloves garlic, minced
3/4 cup chopped green onions
2 T water, 1.5 T cornstarch
1. Spray a large saucepan with nonstick spray. Add chicken. Cook over medium-high heat until no longer pink, about five minutes.
2. Add carrots, then 2-3 minutes later, add peppers.
3. Add the rest of the ingredients except onions, water and cornstarch. Stir well. Bring to a boil.
4. Add the onions, and stir in the combined water/cornstarch (to thicken the sauce). Make sure it boils or your sauce will be pasty and gross. Taste the sauce. If you want it zippier, feel free to add a little more ketchup/soy sauce.
5. When peppers reach desired doneness, serve over rice. I like to use jasmine rice for this dish (again, 3 scoops in the rice cooker, which amounts to about 1.5 cups of uncooked rice).
Freezing is the same for this as for the butter chicken - layer the rice and then add the chicken dish on top.
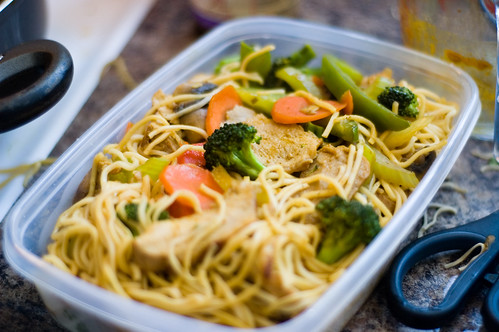
Singapore Noodles with Grilled Pork
This is my own recipe. It's quick, easy, tasty, gets lots of veggies into you and best of all, freezes really well.

1 pork tenderloin
pork tenderloin marinade (I used hoisin sauce because I had it. You need about 1/2 cup). Let the tenderloin marinate for about 1 hour at room temperature. This is a good thing to do at the beginning of a cooking marathon, because by the time you make your other food, the pork is nice and sweet and tasty)
2 T sesame oil
2 cloves garlic, minced
1 T minced ginger
1 carrot, thinly sliced
2 cups sliced mushrooms
1 green pepper, thinly sliced
1 red pepper, thinly sliced
1.5 cups broccoli florets
1 stalk celery, thinly sliced
(optional, because I forgot I had them - snow peas, bean sprouts!)
1/2 cup chopped green onion
200-250 g chow mein noodles (raw)
1/4 c. reduced sodium soy sauce
1/2 c. kikkoman stir fry sauce (you could substitute any combination of hoisin sauce, kecap manis, black bean sauce, teriyaki sauce, etc.)
1 T curry powder
1. Cook your pork tenderloin. I use the indoor grill. You could roast it, fry it, whatever. Just get it cooked. Once it rests for 10 minutes, slice it thinly.

2. In a large pot, boil enough water for your noodles. They will likely take 3-5 minutes to cook. Once they're done, drain them, rinse with cold water, and toss with about 1 T of sesame oil.
3. In a large pan/wok, heat the remaining 1 T of sesame oil over medium high heat. Add the carrots, mushrooms, garlic, ginger and celery (essentially, the veggies that will take the longest to cook).
4. Once the mushrooms start to release their water (rather than looking dry, they will start to shrink and you'll notice some water in our pan), add the remaining veggies. Toss for 3-4 minutes, until they start to soften.
5. Add the pork tenderloin, and in a small measuring cup, combine the soy sauce, stir fry sauce and curry powder. Pour the sauces over the veggie/pork mix and toss to mix. If you have some thick sauce remaining in the bottom fo your cup, add about 1/4 cup of water to it, then toss that in the pan as well.

6. When everything is piping hot, add the green onions and the noodles. To save yourself some headache (I always make a HUGE mess when stirring this because it's too big for my pan!), add the noodles a clump at a time, rather than dumping the whole mess in. It's a lot easier to mix them if they are already separated a bit.
7. Toss until noodles are not. If you find you're a bit lacking in sauce, add a bit more! :)
Freezing instructions - nothing special. Stick it in a container and freeze.
I hope you'll find this handy - it's something you can do for yourself if you know you've got a busy time ahead of ya (like tax season for accountants, or a new baby on the way). It's something you can do for other people (if they've got a new baby, or if a family is going through a difficult time). It's a great way to efficiently use your groceries, to spend a Sunday afternoon with your hubby and to save yourself some time in the future! All in all, hubs and I spent about 2.5 hours (MAX) preparing this food, and that was with a lot of breaks and goofing off.
Thanks for reading! I WILL post a belly pic soon, I swear! :)


