Photobucket - Video and Image Hosting

Tuesday, July 31, 2007

lazy does it....eating for free

Pin It Now!

Another day, another dinner.

Hubs and I have been mulling over reno costs, vacation costs and all those fun things and we've come to the conclusion that we probably spend too much moolah. And one of the prime things we spend too much moolah on is food. We actually have ridiculous grocery bills, considering there are just two of us.

*In theory* we should be able to eat well on $400/month. And I suppose that, in theory, we could. But in reality, we end up spending a LOT more than that.....so that prompted a flurry of discussion and a decision (my doing) that this week, we would eat for free.

As in, I would not visit the grocery store once this week. I'm starting off reasonably well, having just stocked up on a few things for hubby's wisdom tooth extraction (he's healing very well, by the way, and is most appreciative of your well wishes), so I'm improvising and making do with what I have.

So far this week, we've eaten the following....

1) Sunday I made up a crab pasta casserole of sorts.....basically, I took about a pound of macaroni and cooked it. At the same time, I mixed up some pre-packaged rosé sauce, and a can of half-fat cream of mushroom soup, and mixed it in with the macaroni, along with 1 box of frozen spinach, some onions, garlic and fresh basil, and 1 pound of imitation crab meat. Topped it with most of a can of spaghetti sauce, and then mozzarella and parmesan cheeses. This made an absolutely inordinate amount of food (8 servings) and used up a nice bit of stuff from my pantry. Two thumbs up from hubs, who was grateful for his first solid food in days.

2) Monday, I realized I would need to use up the tail end of my eggplant and tomato (from the stacks I made for the dinner party last week), so I decided to do two different indian dishes. I made up a 'butter eggplant' dish of sorts - about the equivalent of 1 large eggplant, 1 onion, 4 cloves of garlic, 2 T chopped ginger, 1 large chopped tomato, 2 T butter, 1 small can of salt-free tomato sauce, 1/4 c. vindaloo curry paste, and at the end, about 1/3 cup of low-fat sour cream. Very yummy. Paired it with a super easy chickpea curry - 1 onion, 4 cloves garlic, 1 T curry powder, 1 t mustard seeds, 1 t cumin seeds, 1 t ground cumin, 1/4 t cinnamon, then add a can of drained chickpeas and a cup of broth. Voila. Stirred some fresh coriander into both dishes and was good to go. Served over basmati rice. Easy-peasy and very satisfying.

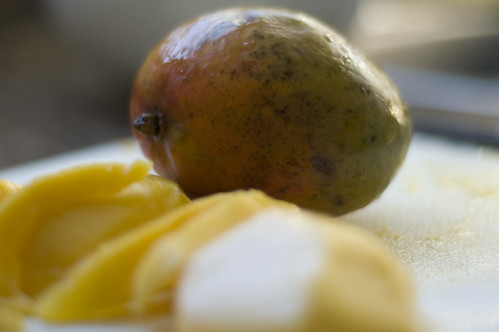
So that brings me to tonight, where I broke my lazy streak with the camera and actually took pictures. This time, the impetus was two mangoes that I HAD to have (they were on three for a dollar a couple of weeks ago - how can you resist this???), but that I had, thus far, been to lazy to prep. Peeling mangoes is a bit time-consuming, and since I normally bring fruit in my lunch, I just hadn't had time in the morning to get these guys ready to bring.

I also had a huge bag of shrimp in the freezer (Costco....). So I thought...hmmm...mango and shrimp. I sense another curry coming on. A more thai-type curry. Luckily, I also had coconut milk, fish sauce, some freezer-burnt peas and some thai green curry paste. This would be great if you had fresh basil, but even with dried, it was pretty darn tasty. I used Jasmine rice for this. I have to say, I didn't get home until 6:30....I loafed around until almost seven, and I was actually done dinner and cleaning up dishes by 7:45. Aside from the mango, there is very little work in this recipe. You could add onion or garlic, or snow peas (would have added onion, but I only have one left.....).

I'm kinda having fun with my food improv this week. But this is quick and was deliciously satisfying. You could substitute light coconut milk, but if you just restrict your portion a bit, the good stuff won't hurt ya. :)

Lazy Mango Shrimp Green Curry
suppah time

1.5 pounds of raw shrimp, unshelled (this will give you about a pound of shelled shrimp)
2 mangoes
1.5 cups frozen peas
1 can coconut milk
green curry paste (2-3 T)
2 t dried basil (or 1/4 c. fresh!)
1.5 T fish sauce
1 T sugar (optional)
cooked jasmine rice

1. Start the rice.

2. Shell shrimp and peel and chop mango.
not quite bad yet mangoes

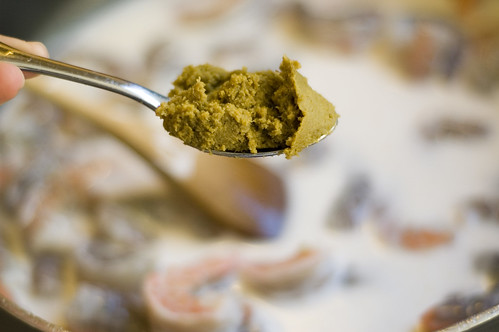
3. In a large skillet or pot, add the coconut milk, and stir in the curry paste. Thai curry paste is hot, so if you're not sure how much to use, err on the side of stinginess. I used all I had left. And yes, if you look carefully at the photo, you'll notice I forgot to add my curry paste at the beginning and am, in fact, adding it post shrimp.
green curry paste....sooooooooo lazy

4. Add shrimp, mango, fish sauce, basil and peas and bring to a boil.
mangoes and freezer-burnt peas

5. Cook until shrimp is opaque (about 5 minutes). Taste and decide if you want to add sugar (I like my curries sweet).

6. Serve over hot cooked rice. As mentioned, I like jasmine rice with thai food, but any rice is good. And if you can bring yourself to eat brown rice, power to ya. I just can't do it.

So that was my ultra lazy (and free, hehe) dinner tonight. Now I'll have to figure out what I can come up with for tomorrow. I'm thinking some spicy black bean soup with garlic toast. Ya? Thoughts? It has to be easy and involve a minimum of fresh produce. I have a few carrots left (unless I give them to my resident furry friends), some limp celery and also some dill, parsley, coriander and frozen corn. Oh, and potatoes. I have those too).

Thanks for reading! Hubs and I are debating having an 'eat for free' week every month or so to see if it works to help us cut back on grocs.

Monday, July 30, 2007

daring bakers go all gelatinous

Pin It Now!

orangelogo
For those who aren't familiar with the self-titled 'Daring Bakers,' we are a group of bloggers who, every month, tackle the most trepidatious of baking challenges....and we all post about them on the same day.

I actually made this cake a couple of weeks ago for my husband's grandmother's 70th birthday, but I couldn't reveal one little iota of the adventure until today. The challenge recipe for July was a beautiful strawberry mirror cake.

I know, you haven't heard of it either.

Basically, the concept is that you have two layers of white chiffon cake, surrounded by mounds of strawberry bavarian cream, topped with a strawberry gelatin layer (i.e., the mirror). Easy, peasy, eh?

And I'm sure it could be, if you used a box cake, J-E-L-L-O and all that fake stuff.

But that's not how the DB'ers work. We make EVERYTHING from scratch on these challenges....and while I'm all for making things from scratch, this was quite the baking feat for me (I really don't do a lot of baking requiring tremendous amounts of technique) and I was SUPER nervous when I saw the sheer amounts of gelatin involved.

I hate Jello. I hate jellied salads. I hate panna cotta. I don't like anything with that nasty, chewy, GELATINOUS texture. It just grosses me out. Anytime I've made something with gelatin before, I'm just so icked out at the texture, I can hardly bear to even look at it on my plate. So, in addition to worrying about my sub-par baking and decorating skills on this challenge, I was more than a little nervous about even liking (or, hehe, foisting the cake on others) what I was making.

On the upside, I was totally stoked at the prospect of purchasing strawberry booze, and even more so when I found this baby on the shelves of the trusty LCBO:
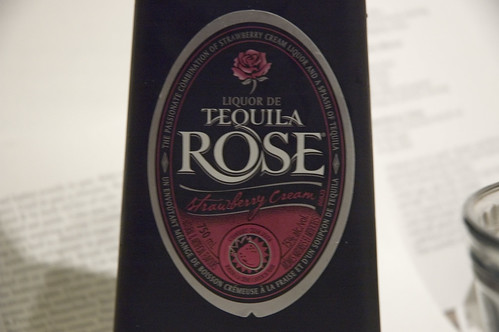
cooking with booze

And on the even upper side, I was even more stoked that the making of this cake coincided almost exactly with the arrival of the kitchenaid (yes, I know you've all seen the pics of it before, in addition to my incessent adoring yammering). This is the first time I got to use it.
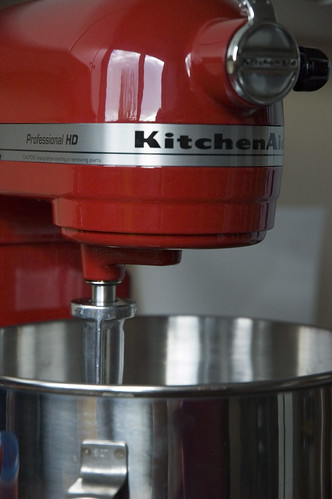
i love my new toy

So now I'd like to walk you through the making of the recipe. I took SO many pictures, and I am, in this case, hoping that the quantity of photos makes up for the rottenly shoddy quality of the final ones (didn't have my usual 1000 W lighting set-up...grrrr...).

Here is the story of the strawberry mirror cake.

Strawberry Mirror Cake

3 eggs
3 egg yolks
¾ cup sugar
1 tsp vanilla extract
3 egg whites
1/8 tsp cream of tartar
2 TBSP sugar
2/3 cup sifted cake flour (ack, why all of this insistence on sifting. LAME)
½ cup water
1/3 cups sugar
2 TBSP kirsch or strawberry liqueur (I didn't want to buy kirsch, and ended up finding strawberry cream tequila...this was clearly win-win, as my strawberry cream martini was great liquid courage for the tackling of this cake)
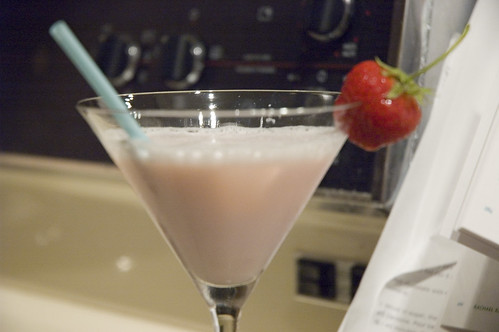
strawberry cream martini


Strawberry Bavarian Cream
2 ½ TBSP unflavored gelatin
1 ½ cups strained strawberry puree(1 ½ baskets) (shoot me now, I didn't strain it....see the seeds?)
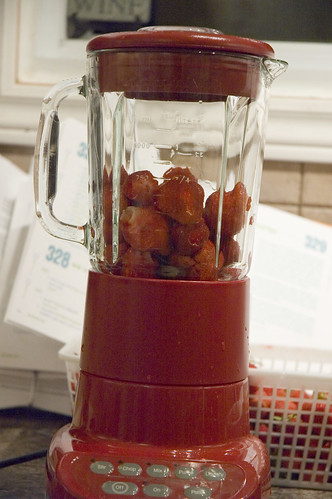
strawberries, pre blending
5 egg yolks
2/3 cup sugar
1 ½ cups milk
1 TBSP lemon juice
several drops of red food coloring
1 ¾ cups whipping cream

Strawberry Mirror


1 tsp lemon juice (had to omit - lemon juice + strawberry cream tequila = a curdled nasty mess. had to start that part over)
1 TBSP kirsch
1 TBSP water
1 TBSP unflavored gelatin
Few drops of red food coloring

Strawberry Juice
1 ½ pints of strawberries(18 oz)
¾ cup sugar
¾ cup water

1.Preheat oven to 450F. Butter and flour the sides of an 11-by-17 inch jelly roll pan(rimmed baking sheet). Line bottom of pan with a sheet of parchment paper cut to fit bottom pan exactly. (I don't own an 11x17 jelly roll pan, and all of my baking sheets have deteriorated to such a sorry state that I no longer cook food on the surface....I ended up cheating here and using 2 8" cake pans....which came back to bite me in the arse, as you'll see later)


2.Beat eggs, egg yolks and ¾ cup sugar together in a medium bowl until thick and light. Beat in the vanilla.

My egg separator was quite handy for this.
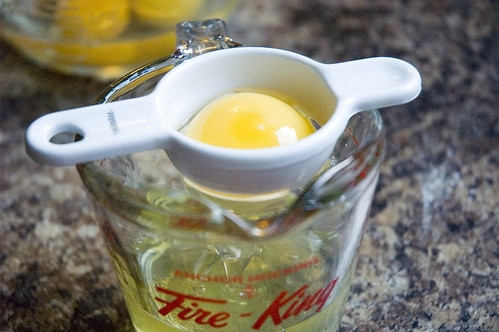
egg separators are very handy

3.In a separate bowl, beat the egg whites until foamy, add cream of tartar (couldn't add it, didn't have any and hubs was gone by this point) and beat until whites begin to form peaks. Add the 2 TBSP sugar and beat until the whites hold stiff, glossy peaks(do not over beat).

I was so enthralled with my brand new kitchenaid (that arrived JUST in time for me to pop its red cherry on this recipe!) that I took a photo of it in action. Wheeeeee!
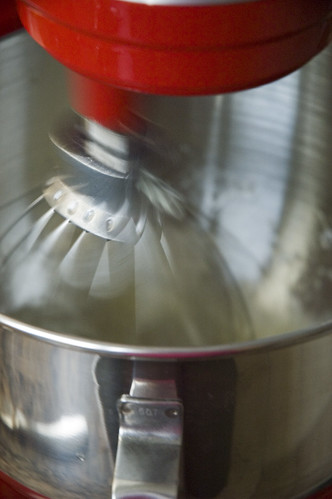
go kitchenaid go!

4.Sift flour over the egg yolk mixture and fold in .

Sifting is still one of my least favourite kitchen tasks. meh. At least I bought the cake flour though.
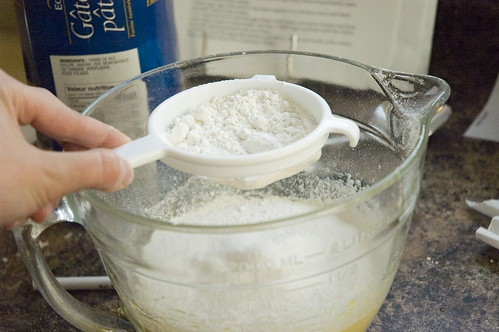
i still hate sifting

Stir in one fourth of the whites. Then carefully fold in the remaining whites.

5.Spread batter evenly in pan. It was very light and fluffy batter....also very tasty batter....please tell me I'm not the only one to nosh on the leftover batter in the bowl....
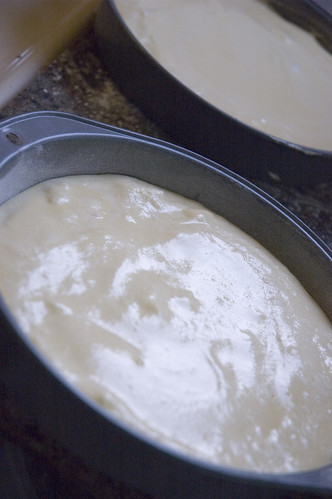
before i f'ed it up

Bake until light brown and springy to touch(7 to 10 minutes). (my cake was overdone at seven minutes...blast the 8" pans!!!!!!) Cool in pan 5 minutes. Run a knife along edge to loosen. Invert cake tin to cut out 8 ¼ inch circles of cake. Wrap the cake layers, separated with waxed paper, and set aside. Cake may be frozen at this point.

Here is my overcooked cake:
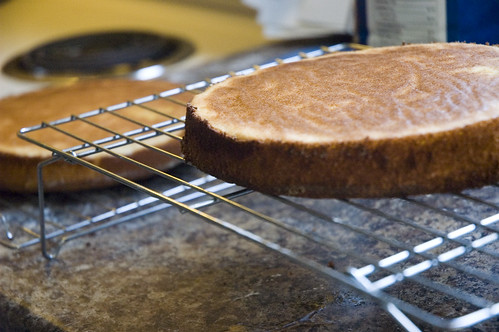
slightly overcooked chiffon

6.To make soaking syrup: Combine water and the 1/3 cup sugar in saucepan; bring to a boil to dissolve sugar. Cool to room temperature; flavor with liqueur. Set aside or refrigerate in glass jar until ready to use.

7.To assemble cake: Brush sides of 10-inch springform pan lightly with flavorless salad oil or almond oil. Cut out a cardboard circle that is exactly the same size as the bottom inside of the pan; cover cardboard with aluminum foil and fit into bottom of pan. Center one layer of the cake bottom of pan. Brush the cake with some of the soaking syrup to just moisten(not drench) the cake; set aside.

8.Prepare Strawberry Bavarian Cream. Immediately pour about half of the Bavarian Cream over the first layer of cake in the pan.

My bavarian cream was not exactly pouring consistency (barely even 'shovable', to say nothing of 'spreadable', but I could see even after the first layer that there was going to be a bit of a tight squeeze in this pan....
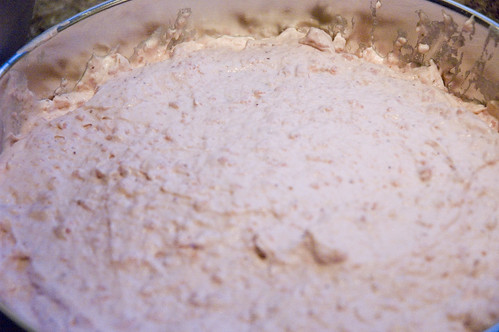
after the first layer of cake...uh-oh!

Set the next layer of cake on top of the cream. Pour remaining Bavarian Cream over cake and smooth top of the cream with spatula. Refrigerate until the cream sets(1 to 2 hours). (you'll note in the photo that because my cakes were a bit larger and thicker, I've got bavarian cream up the ying-yang and almost overflowing the stupid pan.....GRRRRR)

Here is my lovely bounty of (only slightly lumpy) bavarian cream:
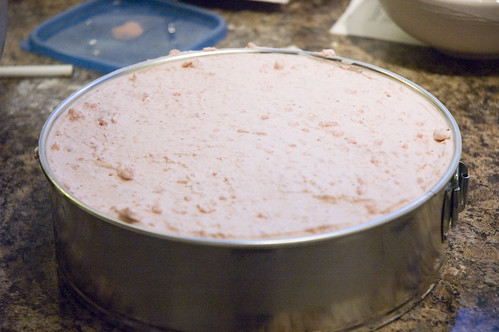
uh-oh....overflow!

9.Prepare the Strawberry Mirror. (I love how this is one TEEENSY little step....what a pain)

10.To serve: Wrap a hot towel around the outside of springform pan for a few minutes. Run a small sharp knife tip around the edge of the Strawberry Mirror to separate it form the sides of pan. Mirror will tear when sides are unlatched if it is stuck at ANY point. Slowly unlatch the pan and slide it off the cake. Slice cake in wedges and serve in upright slices.


Prep Work

Strawberry Bavarian Cream
1.Sprinkle the gelatin over the strawberry puree in a small bowl and set aside until spongy. (I stirred my gelatin right in)

I also didn't strain my strawberries. So sue me.
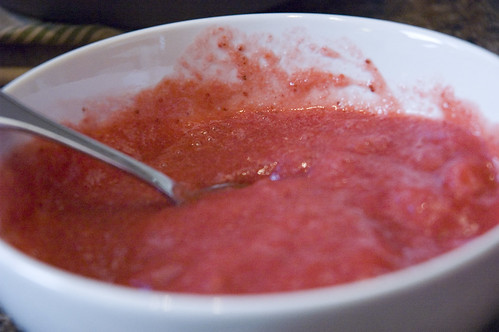
strawberry goo

2.Combine egg yolks and sugar in a bowl' beat until light. Bring milk to a boil in sauce pan. Pour hot milk into yolk mixture a tiny little bit at a time and stir with a wooden spoon. Return this mixture to the saucepan and cook over medium heat, stirring constantly, until your finger leaves a clear trail in sauce when drawn across the back of the spoon.(Do not boil or mixture will curdle.) Immediately remove from heat and stir in softened gelatin mixture. Pour into a stainless steel bowl places over a bowl of ice water.

Mine actually looked really pretty at this point!
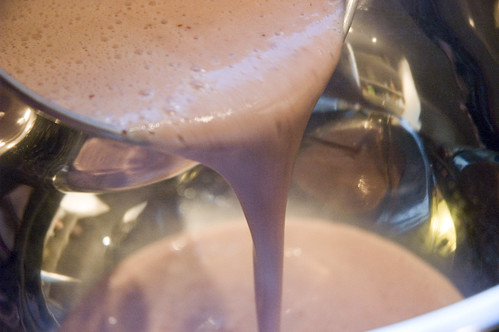
before I f'ed it up

Stir in lemon juice and a few drops of red food coloring. Cool over ice water, stirring occasionally, until mixture thickens to the consistency of softly whipped cream. (I would love to know where this elusive stage is! Mine was already a bit too set when I stirred in the whipped cream, which ended up with me having strawberry gelatinous lumps blobbed all throughout the bavarian cream. MEH)

3.While gelatin mixture is cooling, whip the whipping cream until it holds soft peaks. When the gelatin mixture resembles softly whipped cream, fold the whipped cream into the gelatin mixture.

Strawberry Mirror


1.Prepare strawberry juice.
2.Place lemon juice, kirsch, and water in a small bowl. Sprinkle gelatin over this mixture; set aside until spongy and soft.
3.Measure 1 ½ cups Strawberry juice into a small saucepan and bring to a simmer; pour over gelatin mixture and stir to dissolve gelatin. Tint to desired color with red food coloring. Place bowl over bowl of ice water and stir occasionally until the mixture is syrupy and just beings to thicken(do not let jell); remove from ice water.

My lovely strawberry goo mixture, chillin' in its ice water bath:
strawberry gel gelling
Word to the wise here: definitely wait until the strawberry juice REALLY has started to thicken....because otherwise you will have a lovely puddle of strawberry goo streaming across your cake, onto the counter, onto the floor (etc.). Of course, the problem would have been alleviated had I not filled the springform pan to the brim in the first place.....

This is what happens when you take pictures while under the influence of strawberry cream martinis...you get cocky, careless, and fail to notice the obvious liquidity of your strawberry goo:
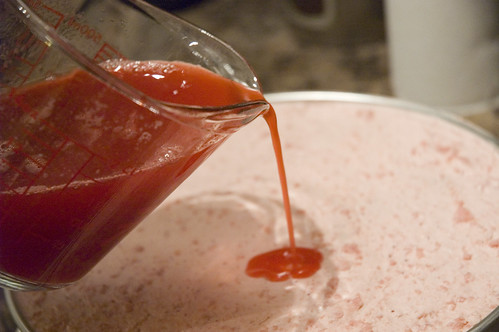
pre-goofing up

This is what happened the first time (after, of course, I'd cleaned up the disaster all over my counter):
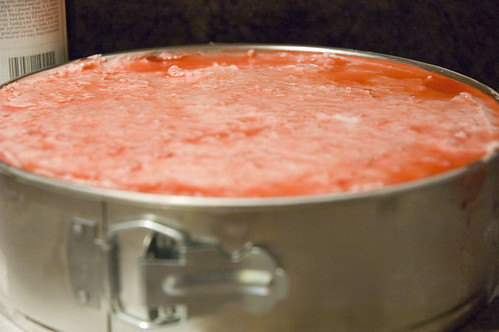
oops

4.When mixture is syrupy, pour a 1/16-inch layer over the top of cake. Refrigerate until set.

If at first you don't succeed, try try again...
cake topped with strawberry goo

Strawberry Juice

Wash and hull strawberries; coarsely chop. Place strawberries in saucepan; crush to start juices flowing.
cooking strawberries to make strawberry juice

Place over low heat; add sugar and water; simmer slowly 10 minutes. Pour juice and pulp through damp jelly bag or cheesecloth-lined colander and drain into a bowl for 15 minutes(Do not press down on fruit).

I was quite enthralled with the making of the juice. Very cool process. I think it would be a fun thing to do again.
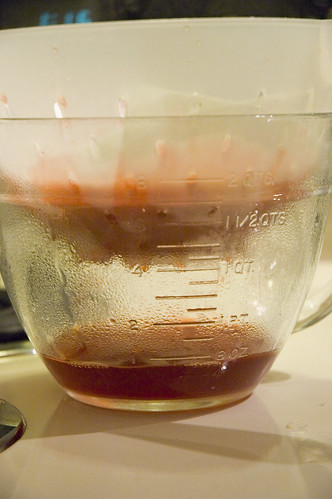
go strawberry juice go!


I didn't want to do too much to interfere (or hide?) with the mirror, but I did want to do a little something for the celebratory occasion. I don't think I'll ever be ANY good at icing anything, but I like to think of my style as quirky. Yes, that's it. It's QUIRKY. :)
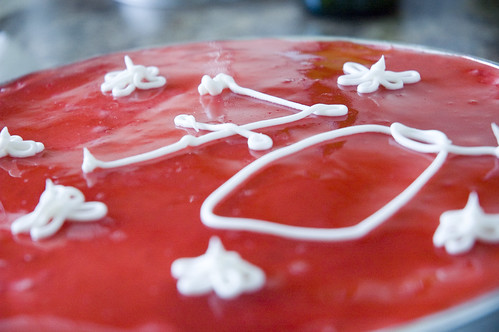
as close as I will ever get to actually icing something

The birthday girl was incredibly gracious and appreciative (always a true pleasure to really put forth an effort for someone who is always so giving and so generous). The cake put up a bit of a fight with the candles (note to self: don't try to stick candles in a jellied mousse cake again...it's a bit resistant and has a somewhat perplexing tendency of spitting said candles out at opportune times. After a 150 km trek, several hours on ice and much jostling, it was with relief that the cake came out beautifully.
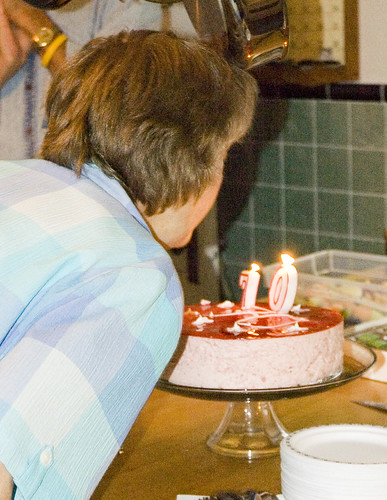
happy birthday!

Here is a slice, for you to behold....presentation is a little lacking, light is a little sparse, but hopefully you'll forgive me. I'm all about culinary realism, and so this is what I ate:
cake time!

Now, back to the initial question of whether or not the cake was any good. Well....this is what was left at the end. Strawberry gelatin bits and all, I think it's safe to say that the cake was an unequivocal success. In the true Canadian way*, the platter has been licked clean.
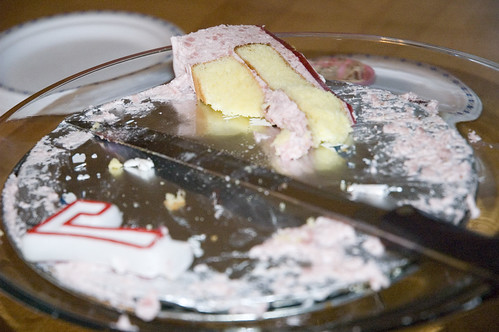
what was left...

*True Canadian Way - meaning that there is one tiny little sliver/scrap left because no one wants to be responsible for taking the last piece.....

I had loads of fun with this month's challenge and would like to thank Peabody for finding and hosting this challenge. The cake was wonderful (despite my chewing apprehension) and it was a lot of fun to try a recipe that I can most assuredly say, I NEVER would have tackled without a lot of guidance....

I cordially invite all my readers to see how the other DBs fared this month: http://daringbakersblogroll.blogspot.com/ DB members range from RANK amateurs (like ME!) to professional pastry chefs. So much talent, so much beauty. I can't wait to see how everyone does this month - I'm sure the presentations will all absolutely smush my little Royal Chinet plate, but I was just so pleased to be able to share such a lovely dessert with such a wonderful family, and to be a part of the challenge.

Thanks for reading. :)

Sunday, July 29, 2007

soup for the sicko

Pin It Now!

Poor hubs.

While most of us got our wisdom teeth out sometime in our late teens or early twenties, hubs was lucky(??!??) enough to keep his for quite a bit longer than that. The poor guy had his wisdom teeth (all four) out on Friday.

I'm proud to say that I've now mastered the art of making gatorade slushies and grape jello, and that the patient is coalescing nicely (albeit a bit grumpily). He's still not really on solid food yet, so I spend part of yesterday making him some nice, soft soups that he can enjoy (and that will, undoubtedly, provide a little more nutrition than the diced hotdogs he insists on eating.....ewwwwwww).

These soups are both delicious and very good for you. Especially the tomato-lentil one. Yum.

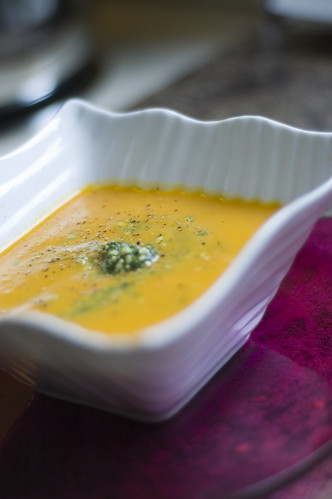
Carrot Soup with Dill Pesto
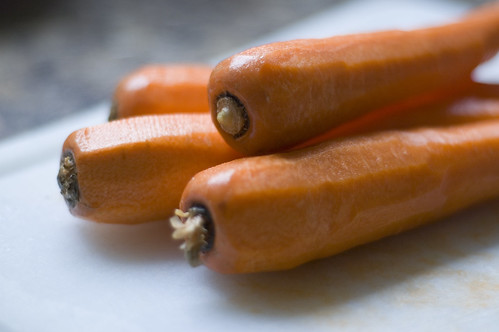
carrots

2 tablespoons unsalted butter
4 large carrots, thinly sliced
1 medium potato, peeled and diced
1 large onion, chopped
1 1/4 teaspoons dill
1/4 teaspoon celery seed
4 cups canned low-salt chicken broth
3/4 c. milk

1 cup packed coarsely chopped fresh dill
2 tablespoons pine nuts
2 tablespoons olive oil
salt, pepper

1. Melt butter in heavy large saucepan over medium heat. Add carrots, potato, onion and dill seeds and sauté until onion is translucent and tender, about 10 minutes.
soup in progress

2. Add 4 cups broth and bring to a boil. Reduce heat and simmer until carrots are very tender, about 35 minutes. Puree soup with immersion blender. Add milk, and thin with more broth if desired. Season to taste with salt and pepper.

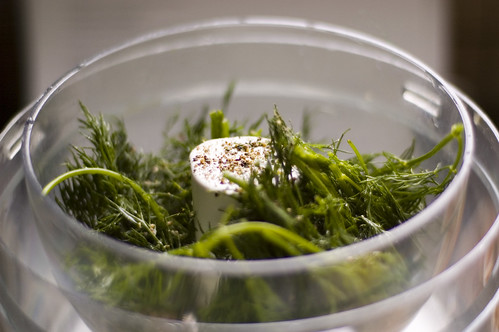
3. While soup is simmering, combine fresh dill and pine nuts in processor and chop finely using on/off turns. With processor running, slowly add oil and process until well blended. Season to taste with salt and pepper. (Soup and pesto can be prepared 1 day ahead. Cover separately and refrigerate.)

dill pesto

4. Divided dill pesto among bowls. Using knife, swirl pesto into soup.

carrot soup with dill pesto

Serves 4.


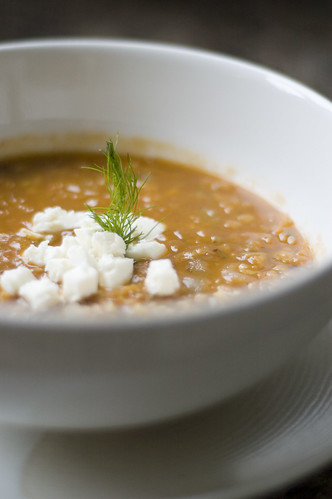
Greek-Inspired Tomato-Lentil Soup
greek tomato lentil soup with feta

2 tablespoons extravirgin olive oil
1 1/2 cups finely chopped onion
1/2 cup grated carrot
1/2 cup finely chopped celery
4 garlic cloves, minced
5 1/2 cups broth
1 1/2 cups dried lentils
2 tablespoons chopped fresh dill, divided
1 t dried oregano
1 t ancho chile powder
1/2 t cumin
dash allspice
2 T honey (optional)
2 bay leaves
1 (8-ounce) can tomato sauce
1 tablespoon balsamic vinegar
1/4 teaspoon freshly ground black pepper
3/4 cup (3 ounces) crumbled feta cheese

1. Heat oil in a large Dutch oven over medium heat. Add onion, carrot, celery, and garlic; cook 10 minutes or until the vegetables are tender, stirring frequently.

2. Add broth, dried lentils, 1 tablespoon dill, oregano, chile powder, cumin, allspice, bay leaves, and tomato sauce. Bring to a boil; reduce heat, and simmer 30 minutes or until lentils are tender.

3. Stir in remaining 1 tablespoon dill, vinegar, honey (if desired, and black pepper; discard bay leaves. Sprinkle with cheese.

Serves 6. Very yummy.

Thursday, July 26, 2007

i want something as hot as summer and as cold as winter….

Pin It Now!

Before figuring out what I wanted to make, I already knew a couple of things about dessert for my dinner party. First, that it would involve me using my lovely new toy. And second, that it would be something I could make ahead, without too much last-minute fussing.

So of course, why not guinea pig my guests on baked Alaska. Why not serve a dessert that has to be both hot and frozen, all at the same time. It seemed like a good idea at the time.

And, shocker of all shockers, it actually ended up working beautifully. The presentation was lovely and the taste was quite enjoyable. It’s a bit time-consuming to make, but you can do it up a day or two in advance, so it’s a great thing to be able to pull outta your freezer for dessert.

I took a ridiculous amount of photos. Enjoy. Yet again, stolen and modified from epicurious.com

Raspberry Chocolate Baked Alaska

150 g 70% cocoa chocolate, chopped
6 tablespoons (3/4 stick) unsalted butter
25 g 85% cocoa chocolate, chopped
1 1/4 cups sugar, divided
2 large eggs
1/3 cup all purpose flour
2 tablespoons unsweetened cocoa powder
1/2 teaspoon baking powder
1/8 teaspoon salt

1 pint raspberry gelato, slightly softened

4 large egg whites


1. Preheat oven to 350°F. Butter 9x9x2-inch metal baking pan; line bottom with parchment paper.

2. Stir bittersweet chocolate, butter, and unsweetened chocolate in small saucepan over low heat until chocolates melt and mixture is smooth. Cool 10 minutes.
melty gooey chocolate

3. While mixture is cooling, whisk 3/4 cup sugar and eggs in large bowl until well blended, about 1 minute. Whisk in chocolate mixture.

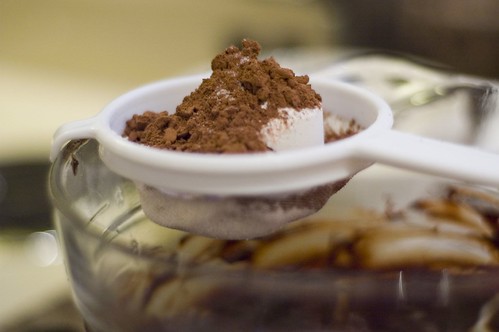
4. Sift flour, cocoa, baking powder, and salt over; stir to blend. (I don't have a sifter, so this is what I use:)
sifting is lame

Transfer batter to prepared pan. Bake cake until top looks dry and tester inserted into center comes out with some thick sticky batter attached, about 17 minutes. Cool cake in pan to room temperature.
chocolate cake

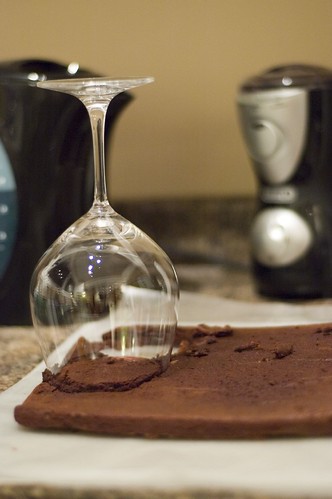
5. Cut around cake in pan. Place cutting board over pan and invert, tapping out cake. Peel off parchment. Using 3-inch round cutter (or spiegelau, hehe), cut out 6 cake rounds (save remaining cake for another use - i.e., munching and chewing while you go about completing your dessert).

a new use for spiegelau

6. Line a small baking sheet with parchment paper. Arrange cake rounds on prepared sheet.
cake rounds are yummy...the rest of the cake was pretty good too, hehe

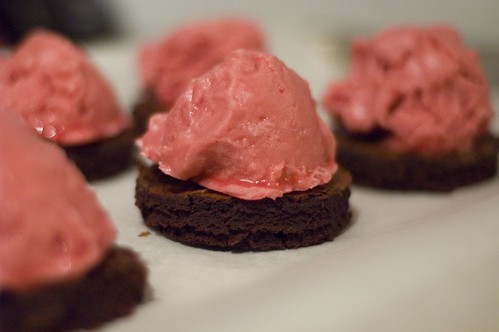
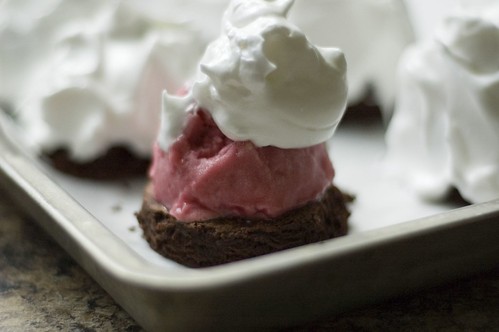
Using 2 1/4- to 2 1/2-inch-diameter ice cream scoop, place scoop of raspberry gelato in center of each round, leaving about 1/4-inch plain border.
cake and gelato is a good thing

Freeze until ice cream is solid, about 2 hours. (I was worried about my gelato, as it seemed to go straight from solid to liquid, with no in-between....as soon as it was soft enough, I scooped it into little mounds with a 1/2 c. round measuring cup and stuck those in the freezer - actual ice cream isn't so bad for melting, but gelato really just MELTS).

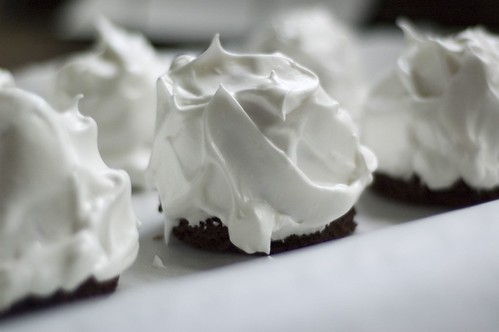
7. Combine remaining 1/2 cup sugar and egg whites in large metal bowl. Set bowl over saucepan of gently simmering water and whisk until mixture is very warm, about 2 minutes. Remove bowl from over water. Using electric mixer, beat meringue at high speed until very thick and billowy, about 2 minutes. Place baking sheet with cake rounds on work surface. Mound meringue atop ice cream on 1 cake round. Spread meringue evenly over to cover, sealing meringue to plain cake border and swirling decoratively.
so much frozen fun

Repeat with remaining desserts. Freeze uncovered on baking sheet until meringue is solid, at least 2 hours and up to 2 days.

unbaked alaska

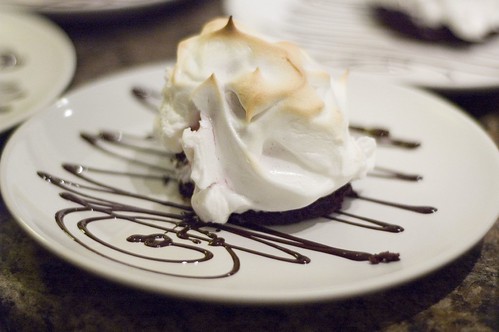
8. Preheat oven to 500°F. Transfer desserts still on baking sheet from freezer directly to oven. Bake until meringue is deep brown in spots, turning sheet as needed for even cooking, about 3 minutes. Transfer to plates ASAP before it turns into an imploded, melted, puddle of goo.

time for dessert

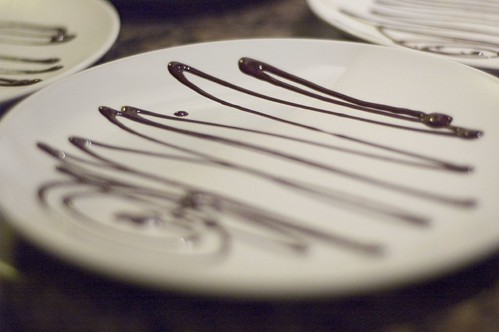
Many thumbs up for this. I drizzled a little more of the 85% chocolate on the plates (the joys of a microwave and a ziploc bag), but you could plate alongside fresh berries, coulis, or really anything.
chocolatey drizzle

I've also heard tell of flambéed alaskas - I wasn't quite ready to set my food on fire (particularly with a toodler in the midst), but would be open to the prospect next time. :)
there's something fishy around here

Pin It Now!

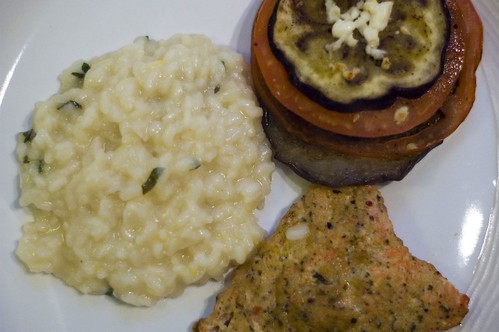
lemon risotto, eggplant tomato stacks, planked salmon

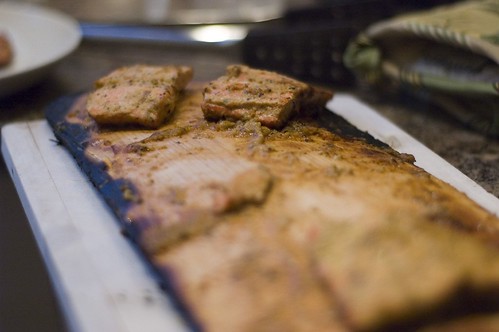
As mentioned, the main attraction of the dinner party was a lovely planked salmon dish...this is such a nice thing to have in the summer and it just so happened that I had picked up a number of cedar planks the last time I visited costco (they are expressly marketed for the purpose - I'm sure I paid a premium, but at least I can be reassured that they are not coated in all sorts of ucky chemicals....or I can tell myself that, anyway).

I was peeved with my salmon though (also from Costco). I'd been doing some reading about farmed salmon, so I've also been avoiding that lately in favour of the wild stuff (which is, of course, infinitely more expensive). I picked up some nice fillets of wild salmon, and when I got them home, I turned them over and found out THEY STILL HAD SKIN ON THEM. YUCK. I don't know anyone who eats salmon skin, so I really don't know why they bother leaving it on. How can you have a nice dinner plate, only to end up with wrinkly, rejected, nasty scaly skin left on it. So I had to skin the salmon (really NOT my favourite thing to do), and it looked more than a little butchered afterward. Gross. The final result was delicious though! Highly recommend for seafood lovers!

Planked Salmon Fillets
Paste
2 shallots
2 cloves garlic
2 T maple syrup
2 T olive oil
1 T balsamic vinegar
2-3 T dijon mustard
sea salt
minced parsley/rosemary
hot sauce

salmon fillets

1. Combine all paste ingredients in the food processor. Process until well blended. Taste the mixture - perhaps you like it a bit more acidic, or a bit sweeter, saltier or whatever. Season to your liking. I like mine on the sweet side, particularly because I was pairing it with two side dishes that were not sweetened.

2. Soak your cedar planks for 4-6 hours beforehand (the longer you soak, the longer they resist burning).

3. Arrange salmon on planks and douse with paste mixture. Cook over medium heat for about 15 minutes, keeping a spray bottle handy to extinguish flames. Alternatively, you can cook over indirect heat, but you won't have as much cedary steam going up through your salmon. It's safer, but not as flavourful. Yum.

planked salmon is da bomb

I paired the salmon with a nice lemon risotto. I used the 'make-ahead' method for the risotto, as I wasn't terribly keen on stirring for forty minutes while I had guests entertaining themselves (and hubs bbq'ing). Basically, it's the same process, except when you've added 3 1/4 c. of the broth, you stop. You spread the semi-cooked risotto out on a baking sheet (use some parchment paper to save washing!) and cover and cool it. You can resume as normal when you want to eat, adding the rest of the broth and the add-ins. This method can be used with any risotto. I stole this recipe from epicurious as well.

Lemon Risotto

5 cups canned low-salt chicken broth
3 1/2 tablespoons butter
1 1/2 tablespoons olive oil
2 large shallots, chopped
1.5 cups arborio rice or medium-grain white rice
1/3 cup dry white wine
1 cup freshly grated Parmesan cheese (about 3 ounces)
3 tablespoons chopped fresh parsley
2 tablespoons fresh lemon juice
4 teaspoons grated lemon peel (zest of about 1 lemon)

1. Bring broth to simmer in large saucepan over medium heat. Reduce heat to low; cover to keep warm.

2. Melt 1 1/2 tablespoons butter with oil in heavy large saucepan over medium heat. Add shallots and sauté until tender, about 6 minutes.

3. Add rice; stir 1 minute. Add wine and stir until evaporated, about 30 seconds. Add 1 1/2 cups hot broth; simmer until absorbed, stirring frequently. Add remaining broth 1/2 cup at a time, allowing broth to be absorbed before adding more and stirring frequently until rice is creamy and tender, about 35 minutes. (As mentioned above, if you want to make in advance, only add 3 1/4 c. of broth and then stop the process).

risotto, interrupted

4. Stir in cheese and remaining 2 tablespoons butter. Stir in parsley, lemon juice, and lemon peel. Season risotto with salt and pepper. Transfer to bowl and serve.

Makes 6 first-course or 4 main-course servings. This is a lovely side dish with fish.

The last thing I had on the plate were these beautiful little stacks of eggplant and tomato. I saw the initial picture and was totally sold. The bonus is that these used the same type of basil oil as I needed for the canteloupe salad, so I only had to make it once. Of course, my tomatoes ended up being too big but whatever. It still looked pretty. Woot woot for that.


Grilled Eggplant Stacks with Tomato and Feta

1 cup loosely packed fresh basil leaves
1/2 cup extra-virgin olive oil
2 medium eggplants (1 3/4 to 2 lb total)
1 large tomato (about 4 inches in diameter) and 2 medium tomatoes (about 2 1/2 inches in diameter)
3 oz feta, crumbled (about 3/4 cup)
Garnish: finely shredded fresh basil leaves

1. Blend basil with oil and 1/2 teaspoon salt in blender until finely chopped. Pour into a paper-towel- or coffee-filter-lined sieve set over a bowl and let drain 20 minutes.

2. Gather together sides of towel or filter and press gently on it to extract more oil. (You will have a generous 1/3 cup oil.) Scrape basil solids into a small bowl and reserve.

3. Preheat BBQ to medium heat. While grill heats, cut off bottoms of eggplants, then cut 6 (1/2-inch-thick) crosswise rounds from each, starting from cut end. Reserve remaining eggplant for another use. Cut 4 (1/3-inch-thick) rounds from large tomato and 2 center slices (1/3 inch thick) from each medium tomato, reserving remaining tomato for another use.

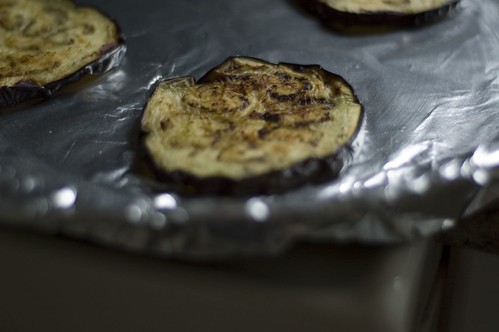
4. Lightly brush eggplant rounds on both sides with basil oil and sprinkle with 1/2 teaspoon salt and 1/4 teaspoon pepper. Grill on a lightly oiled grill rack, covered only if using a gas grill, turning over occasionally, lightly brushing eggplant with more basil oil occasionally if it looks dry, until eggplant is very tender, 6 to 10 minutes.

grilled eggplant...the first thing i haven't burnt on the bbq

Make stacks:
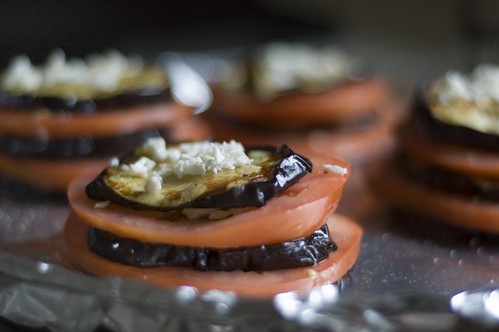
1. On baking pan, arrange 4 largest eggplant rounds side by side and spread each with a generous 1/2 teaspoon of reserved basil solids, then top each with 1 of 4 largest tomato rounds.

2. Season tomatoes with salt and pepper and top each with about 1 tablespoon feta.

3. Make another layer with medium-size eggplant rounds, basil solids, medium tomato rounds, salt, pepper, and feta, then top with remaining eggplant and feta.

eggplant tomato stacks with feta

You can make the stacks up in advance and just heat them in the oven (about 350F) for 10 minutes or so. YUM.

Wednesday, July 25, 2007

kinda fruit salad, kinda not

Pin It Now!

It really wouldn't be a dinner party if I didn't, at some point during my prep, fill my kitchen with billowy, messy, rancid smoke. It always happen, generally due to my aversion to using my underpowered yet high-pitched kitchen fan and searing things at high heat.

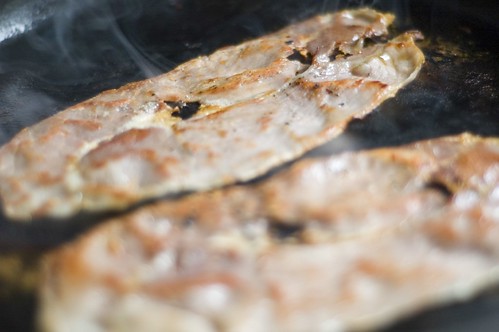
This was another recipe pilfered from the epicurious.com archives, and I also changed it up a bit. The original called for un-crispy prosciutto, but I'm not a big fan of the raw-meat texture, so I decided to crispify it. And hence filled my kitchen (and most of my house) with smoke.

At least the salad was yummy. This is a nice twist from a regular salad - a bit out of the ordinary, but not so different that your guests will run screaming. Also a hit with toddlers, apparently. :)
Canteloupe and Prosciutto with Basil Oil

2 tablespoons pine nuts
1/2 cup packed fresh basil leaves
1/4 cup olive oil
1 cantaloupe
1/4 pound thinly sliced prosciutto
2 ounces crumbled ricotta salata or feta (about 1/4 cup)

1. Preheat oven to 375°F.

2. On a baking sheet toast pine nuts until golden, about 5 minutes (note to the wary - this is another great way to fill your house with smoke - the pinenuts at the edge toast a lot faster and have a rather annoying propensity to burn), and cool.

3. In a blender purée basil with oil until basil is minced. Pour purée through a very fine sieve into a bowl, pressing hard on solids, and discard solids.

4. Heat an oiled pan over medium high heat. Sear prosciutto on both sides until it is slightly crispy and not too burnt. Cut into matchstick-size pieces. Don't be fooled by the pic - that's NOT steam. It's smoke.
where there's smoke....

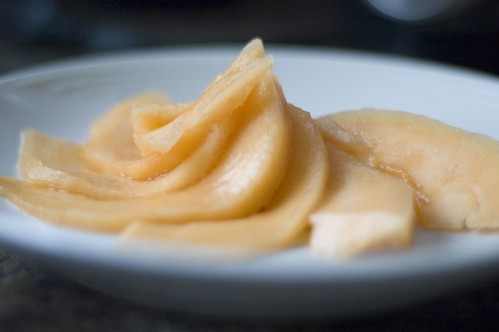
5. Halve and seed cantaloupe. Cut melon into 1/4-inch-thick wedges and discard rind.

5. Arrange melon decoratively on a plate.
pretty swisly canteloupe

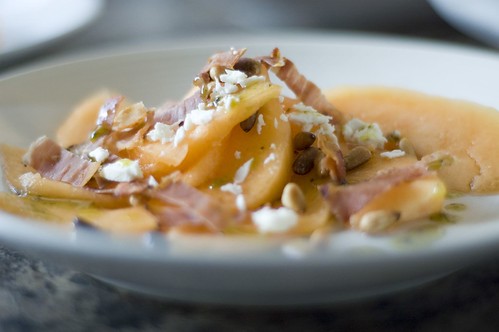
6. Top with prosciutto. Sprinkle melon and prosciutto with pine nuts and cheese. Drizzle basil oil over top.

canteloupe, prosciutto, pine nuts, feta and basil oil

Related Posts with Thumbnails