Photobucket - Video and Image Hosting
Showing posts with label oops. Show all posts

Wednesday, August 29, 2007

chocolate and caramel with the daring bakers
Pin It Now!

cake!

It's that time of the month again...and no, I don't mean THAT time (or at least, if I did, I wouldn't post about it here), rather, the time where the exact same identical recipe starts suspiciously popping up on blogs around the globe.

Oh yeah. It's time for Daring Bakers.

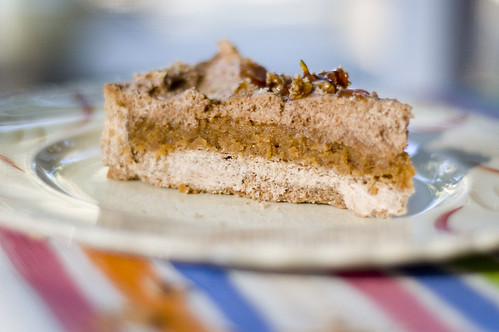
This month's recipe was a very fun Milk Chocolate Caramel Tart. I was super stoked to make it, because I don't often stretch my baking boundaries, and since this recipe was incorporating caramel (woohoo!) AND chocolate, I didn't see how it could possibly not be awesome. Well, read on....

Milk Chocolate and Caramel Tart
Daring Bakers - August


This tart starts with pastry. I freaking hate pastry.

Chocolate Shortbread Pastry
Note: The Chocolate Shortbread pastry can make 3 tart shells.

Preparation time: 10 minutes
Refrigeration: overnight
To make 3 tart shells: 9 ½ inches (24 cm) square
or 10 inches (26 cm round)

Ingredients:

1 cup (250g ) unsalted butter, softened
1 cup plus 2 tablespoons (150 g) confectioners’ sugar
½ cup (50 g) ground hazelnuts
2 level teaspoons (5 g) ground cinnamon
2 eggs
4 ½ cups (400 g) cake flour
2 ½ teaspoons (10 g) baking powder
1 ½ tablespoons (10 g) cocoa powder

A day ahead
1. In a mixing bowl of a food processor, cream the butter. (Leslie's Note - this is totally and completely different from any other pastry recipe I've made....they usually call for uber cold butter, so it stays in little bits and makes things flakey. This is strange)

2. Add the confectioners’ sugar, the ground hazelnuts, and the cinnamon, and mix together. This part I can totally do. Doesn't it look nice?
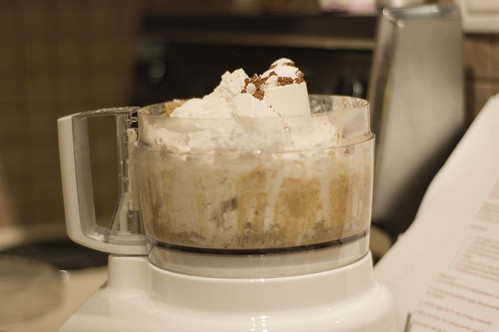
from whence it all came

3. Add the eggs, one by one, mixing constantly

4. Sift in the flour, the baking powder, and the cocoa powder, and mix well.

5. Form a ball with the dough, cover in plastic wrap, and chill overnight.

So I made a big ole ball outta the pastry. And it felt kinda strange. Almost plastic-like. This should have been another clue.
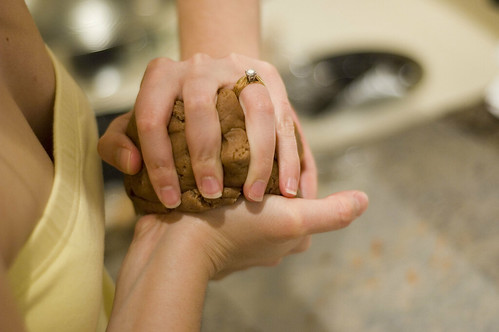
thank hubs for this shot

Milk Chocolate and Caramel Tart

Preparation time: 40 minutes
Baking Time: 30 minutes
Refrigeration time: 1 hour

Ingredients:

½ lb (250 g) chocolate shortbread pastry (see recipe above)
1 ½ cups (300 g) granulated sugar
1 cup (250 g) heavy cream (30-40 percent butterfat) or crème fraiche
¼ cup (50 g) butter
2 whole eggs
1 egg yolk
2 ½ tablespoons (15 g) flour
1 ¼ cups (300 g) whipping cream
½ lb (250 g) milk chocolate

1. Preheat oven to 325 °F (160 °C).

2. Line the baking pan with the chocolate shortbread pastry and bake blind for 15 minutes.

So I had a little fun with this simple little step. Witness.....I rolled out the pastry and it looked just about perfect (especially considering that it was I who was doing this....and I hate making pastry...
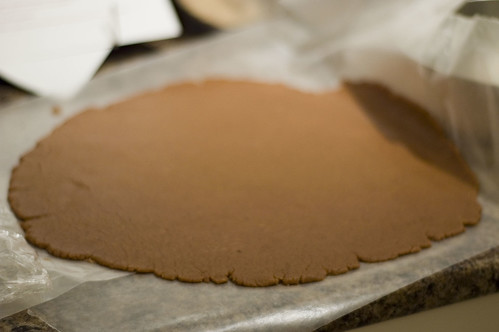
so it started out okay

So then, culinary genius that I am, I decided to just pick the whole thing up on the waxed paper and toss it in the pan. I didn't want it to stretch and break while I was lifting it, so I figured this would minimize the whole stretchy misshapen pastry issue. Luckly, hubs was on hand to snap away. Witness again.....
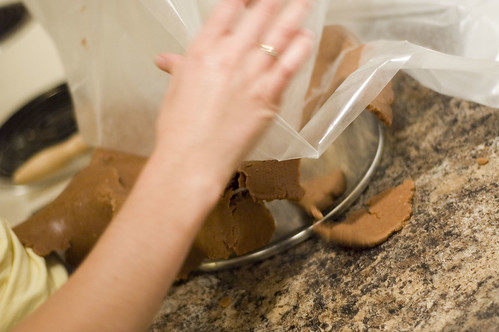
BLAST!

No, thine eyes do not deceive thee. That really is the pastry utterly and completely disintegrating. Don't worry, there's an even better picture...
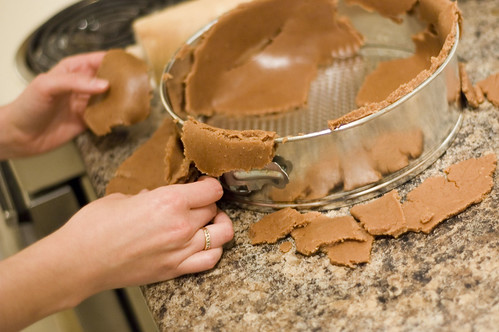
ugh

Oh yeah. It was bad. I think it just *might* be worse than the whole charred shortbread incident...not sure though....

At any rate, I eventually squashed it into the pan, and came up with this:
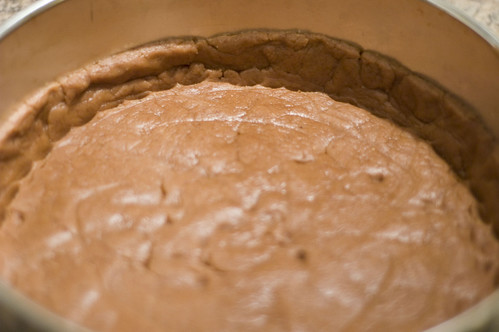
yes, this is, in fact, the best i can do

Clearly, not that pretty, a little thick and clumsy, but WHATEVER. At least it's one congruous mass, which is more than we can say for the rolled out version, eh? I lined the pastry shell with foil and weighted it down with uncooked brown rice to keep it from puffing. The bottom line is that this pastry recipe sucks....it's not chocolatey enough to be chocolate and the cinnamon needs to be BANISHED. Blech.


3. In a saucepan, caramelize 1 cup (200 g) granulated sugar using the dry method until it turns a golden caramel color. Incorporate the heavy cream or crème fraiche and then add butter. Mix thoroughly. Set aside to cool.

This recipe writer is a total minimalist. The "dry" method means that you are basically heating a pan full of sugar and crossing all the extremities that it doesn't ignite.
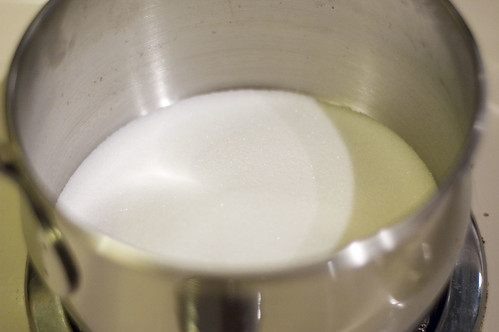
not so sure about dry caramel

The jury seems to be out on whether one should or should not touch the caramel while it brown...I couldn't resist, because I was nervous that the bottom parts would scorch and burn before the top had even melted. So ended up with this:
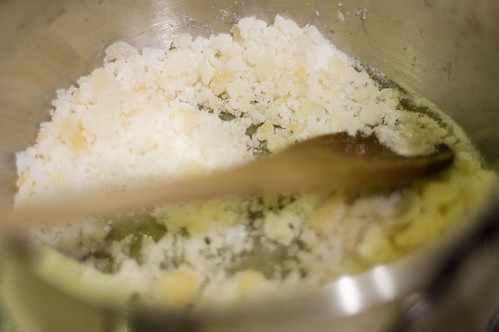
um....is it supposed to do that?

Meh. It eventually melted and didn't explode, much to my elation. Woot for that. Thankfully I had been warned about the thermodynamics that would ensue with the next step. Cold whipping cream and bubbling hot caramel make for explosive bedfellows, so I thankfully used a large enough pot to contain all the excitement. I was still completely freaked out though, so that's my ugly oven mitt you see blurred in the foreground.
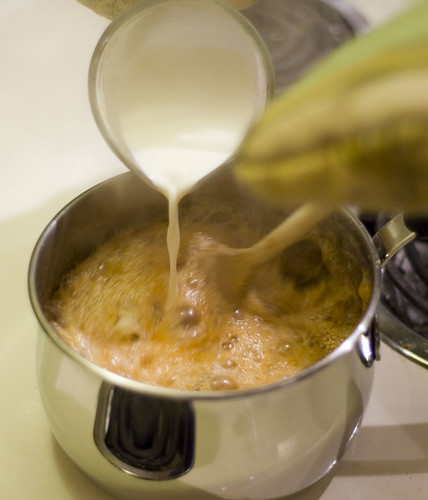
fun with thermogenics

At this point (once it all calmed down), it was totally one of the best things I've ever tasted in my life. I would willingly eat it with a spoon. OMG. GOOD.
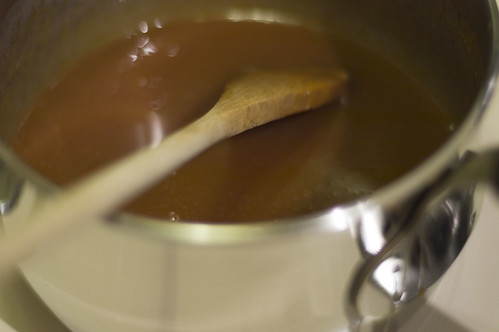
this stuff tastes like werthers.  seriously.  i could sell it.


4. In a mixing bowl, beat the whole eggs with the extra egg yolk, then incorporate the flour.

5. Pour this into the cream-caramel mixture and mix thoroughly.

This part was relatively straighforward. No further drama.

*crossing fingers that eggs don't scramble!)


6. Spread it out in the tart shell and bake for 15 minutes. Remove from oven and allow to cool.

I'm not sure if it was really supposed to be spreading consistency, because mine was very much a pouring kinda mixture. But it looked nice.

pretty caramel

Though it didn't set up until about 30 minutes in the oven.

ha!  it set!


7. Prepare the milk chocolate mousse: beat the whipping cream until stiff. Melt the milk chocolate in the microwave or in a bain-marie, and fold it gently into the whipped cream.

So I totally ate at least 100g of milk chocolate at this step. I'm normally a dark chocolate whore, but this stuff just beckoned me with its creamy goodness. It's pretty easy to prepare. I melted the chocolate in the micro:

please don't ask how much chocolate I ate that isn't in this picture

And folded it into the cream. It ended up a touch grainy, but is anyone seriously going to complain about milk chocolate grains in the midst of billowy clouds of whipping cream? If they do, send them my way....
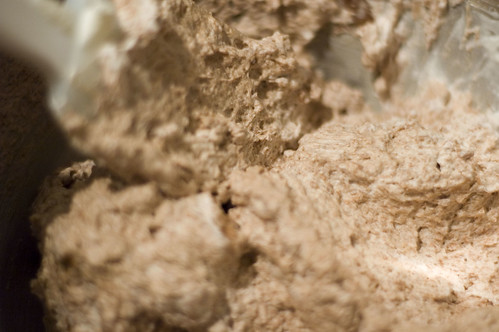
only slightly grainy chocolate mousse


8. Pour the chocolate mousse over the cooled caramel mixture, smoothing it with a spatula. Chill for one hour in the refrigerator.

This step makes me seriously wonder if buddy who wrote this recipe f'ed up his verbs. I POURED the caramel into the pan, but I definitely had to SPREAD the mousse. Mmmmmmmmmmmmmm.....mousse......
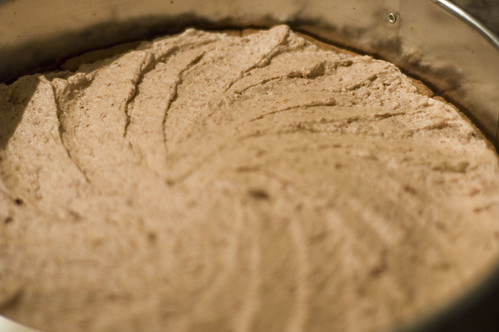
more handiwork admiration

Thrilled with my handiwork and subsequent kitchen goddess status, I experimented with the ultra narrow depth of field in my new lens...yeah I know...overkill.
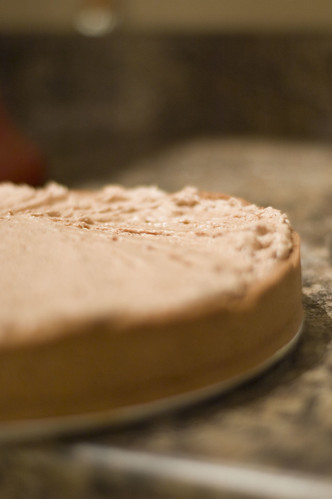
fun with narrow depths of field....


Caramel Fragments:

Melt ½ cup (100g) granulated sugar in a saucepan until it reaches an amber color. Pour it onto waxed paper laid out on a flat surface. Leave to cool. Break it into small fragments and stick them lightly into the top of the tart.

I had a little fun with this step. I used some of my leftover ground hazelnuts to make some of my caramel into a sort of hazelnut brittle. It was darn good.
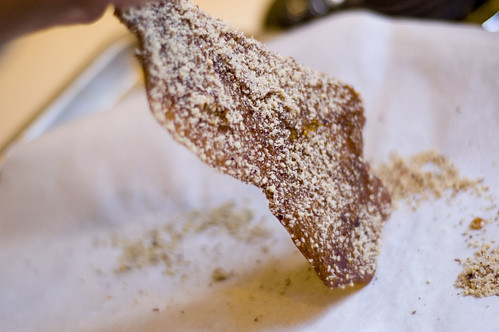
nuts+caramel = brittle?

I also had fun with the regular caramel (which made cooler shapes):
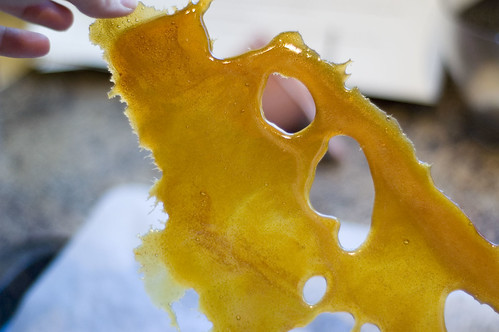
you should totally admire my handiwork

And bashing it all up with a meat mallet was surprisingly therapeutic (I learned the hard way last time that you don't mess with caramelized sugar....)
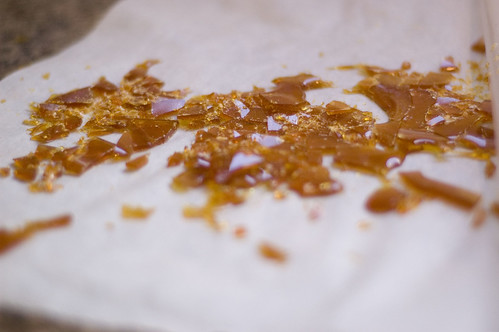
bashing sugar with a hammer is fun

Of course, like last time I did the DB challenge, this one was also to survive a 200 km trek (different place this time), so I packed it up to go!
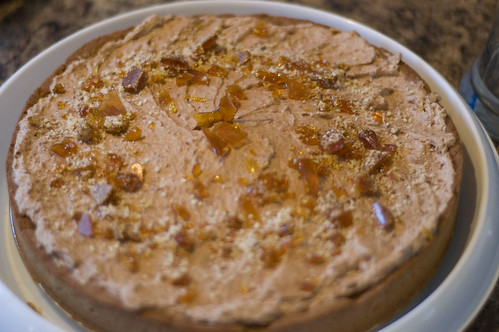
before the 200 km trek

Under the cottage country setting sun, a few rays splashed their way across my cake, further melting the top sugary layer.....
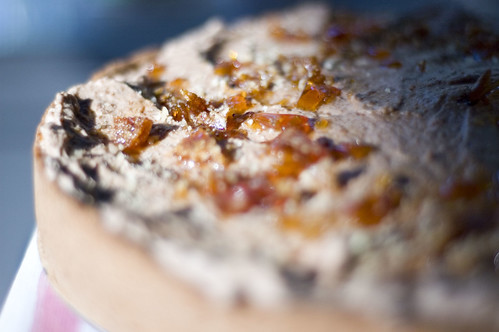
cake in the sun


The Verdict:
The components of this cake are interesting. I will NEVER EVER EVER EVER AS LONG AS I LIVE be making that crust again. I hated working with it, and worse, I despised the cinnamon. It was WAY too strong and out of place.

That said, I loved the caramel filling. It was amazing. It was like eating a werthers, except I wasn't wondering how its creamy goodness had been made indefinitely shelf stable. I would make the filling again, in a regular pâte sucrée, and top with whipped cream. And it would make me a hero to whoever ate it.

Last, the milk chocolate mousse was yummy, but I personally found it was lost in this recipe. Don't get me wrong, I scooped it out of the bowl like chocolate was going out of style and I just found the last sale, but it's relatively sweet and not super chocolatey, so it wasn't enough to stand up to the assertive cinnamon and caramel flavours. It would also be good in its own tart, or as a filling in a really decadent chocolate cake.

And I totally want that caramel filling again right now.

Thanks for reading and be sure to check out what the other daring bakers created at the blogroll: http://daringbakersblogroll.blogspot.com/

Can't wait to see what next month's challenge is!

Thursday, June 28, 2007

now, officially, a DARING BAKER...

Pin It Now!

orangelogo

So this post is a day late, but you have to forgive me because it's my birthday. :)

The Daring Bakers is a group of intrepid food bloggers who, every month, follow a chosen recipe to a TEEEEEEEEEEE and make some crazy, complex carbohydrate laden craziness.

This month, we made bagels. I've made bagels before, using Mark Bittman's recipe. They were awesome a beautifully bagelly.

Sadly, *my* bagels this time were really not at all what a bagel should be. I personally found the recipe a little lean in terms of salt, and the instructions were a bit to vague in terms of how much flour should be used (stating 6-8 cups......unless one uses at least 8 cups, the dough is too bready to really be a true bagel).

Also, I found the yield to be a bit off.....the recipe stated that it would yield 15 (and several of the DB crowd purport to have succeeded here, so clearly this is just a ME thing), but I ended up with FORTY.

I live with just my husband. I don't really eat refined carbs.

So what could I do, but bring all of these lovely little bagels to work.....I ended up with onion, cinnamon and plain bagels and all of them were relatively quick to disappear from my bin. So even though they weren't the best bagels ever, it certainly didn't seem to impede people from eating them.

So here is a little documentary-style footage of my path....

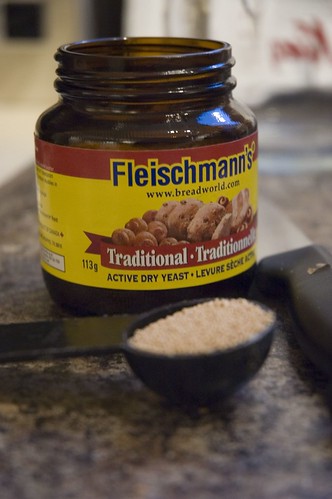
I was quite impressed at the 4T of yeast called for in this recipe!
how much yeast again?

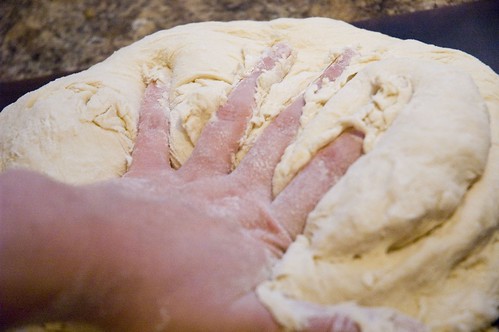
I got RIGHT into that dough...DB style!
smoooooooooooooosh that dough

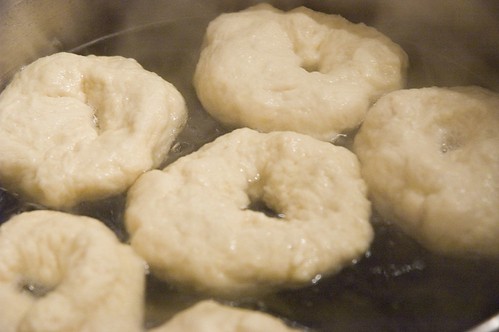
Of course, I got antsy and put too many bagels in the pot.....
i put too many in the pot

Boiled bagels (at least mine) are not terribly attractive....
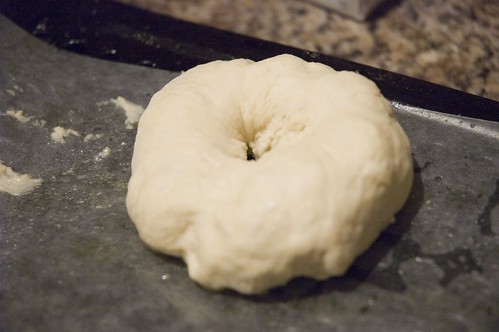
boiled bagel

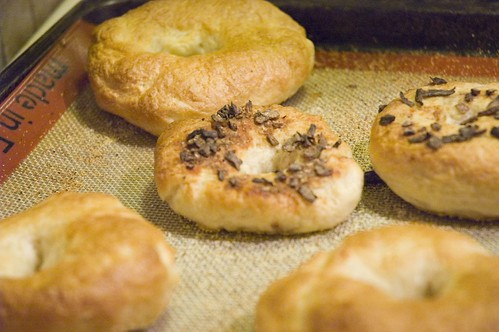
Some plain and onion bagels on the Silpat (onion didn't turn out very attractive, but was mighty tasty with some garden veggie cream cheese!)
bagels and silpat....they even stuck a bit - i was shocked

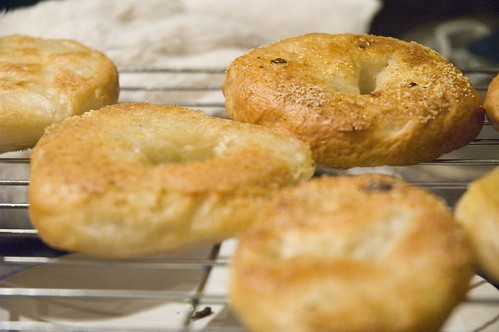
And some more tasty bagels!
somewhat bagel-y bagels

This has officially been the busiest month....I don't think I've had two seconds to sit down! Is it bad that I just want to crawl into bed and sleeeeeeeeeeeeeeeeeeeeeeeeeeep for the whole long weekend?

Without further ado, here is the fameuse recipe...follow at your peril, for it takes a far more daring baker than I to successfully attain bagel nirvana....and definitely check out some of the blogs on the Daring Baker blogroll!!!!!

Real Honest Jewish Purist's Bagels
Daring Bakers Challenge #7: June 2007

Post Date: Wednesday, June 27th


Allowed Modifications:


Topping of your choice, savory recommended, for the outside of the bagels only. No added ingredients or flavours inside the bagels.
Filling or spread of your choice for the outside of the bagel. (i.e. flavoured cream cheese or peanut butter)
Recipe ingredient exception allowed only if allergy or an ingredient not available or cost prohibitive in your region
Recipe Quantity: Fifteen (15) large, plain, Kosher bagels
Ingredients:


6-8 cups bread (high-gluten) flour
4 tablespoons dry baking yeast
6 tablespoons granulated white sugar or light honey (clover honey is good)
2 teaspoons salt
3 cups hot water
a bit of vegetable oil
1 gallon water
3-5 tablespoons malt syrup or sugar
a few handfuls of cornmeal
Equipment:

large mixing bowl
wire whisk
measuring cups and spoons
wooden mixing spoon
butter knife or baker's dough blade
clean, dry surface for kneading
3 clean, dry kitchen towels
warm, but not hot, place to set dough to rise
large stockpot
slotted spoon
2 baking sheets
How You Do It:


Step 1- Proof Yeast: Pour three cups of hot water into the mixing bowl. The water should be hot, but not so hot that you can't bear to put your fingers in it for several seconds at a time. Add the sugar or honey and stir it with your fingers (a good way to make sure the water is not too hot) or with a wire whisk to dissolve. Sprinkle the yeast over the surface of the water, and stir to dissolve.

Wait about ten minutes for the yeast to begin to revive and grow. Skipping this step could result in your trying to make bagels with dead yeast, which results in bagels so hard and potentially dangerous that they are banned under the terms of the Geneva Convention. You will know that the yeast is okay if it begins to foam and exude a sweetish, slightly beery smell.

Step 2- Make Dough: At this point, add about three cups of flour as well as the 2 tsp of salt to the water and yeast and begin mixing it in. Some people subscribe to the theory that it is easier to tell what's going on with the dough if you use your hands rather than a spoon to mix things into the dough, but others prefer the less physically direct spoon. As an advocate of the bare-knuckles school of baking, I proffer the following advice: clip your fingernails, take off your rings and wristwatch, and wash your hands thoroughly to the elbows, like a surgeon. Then you may dive into the dough with impunity. I generally use my right hand to mix, so that my left is free to add flour and other ingredients and to hold the bowl steady. Left-handed people might find that the reverse works better for them. Having one hand clean and free to perform various tasks works best.

When you have incorporated the first three cups of lour, the dough should begin to become thick-ish. Add more flour, a half-cup or so at a time, and mix each addition thoroughly before adding more flour. As the dough gets thicker, add less and less flour at a time.


Step 3- Knead Dough: Soon you will begin to knead it by hand (if you're using your hands to mix the dough in the first place, this segue is hardly noticeable). If you have a big enough and shallow enough bowl, use it as the kneading bowl, otherwise use that clean, dry, flat counter top or tabletop mentioned in the "Equipment" list above. Sprinkle your work surface or bowl with a handful of flour, put your dough on top, and start kneading. Add bits of flour if necessary to keep the dough from sticking (to your hands, to the bowl or counter top, etc....). Soon you should have a nice stiff dough. It will be quite elastic, but heavy and stiffer than a normal bread dough. Do not make it too dry, however... it should still give easily and stretch easily without tearing.

Step 4- Let Dough Rise: Place the dough in a lightly oiled bowl, and cover with one of your clean kitchen towels, dampened somewhat by getting it wet and then wringing it out thoroughly. If you swish the dough around in the bowl, you can get the whole ball of dough covered with a very thin film of oil, which will keep it from drying out.

Place the bowl with the dough in it in a dry, warm (but not hot) place, free from drafts. Allow it to rise until doubled in volume. Some people try to accelerate rising by putting the dough in the oven, where the pilot lights keep the temperature slightly elevated. If it's cold in your kitchen, you can try this, but remember to leave the oven door open or it may become too hot and begin to kill the yeast and cook the dough. An ambient temperature of about 80 degrees Fahrenheit (25 Centigrades) is ideal for rising dough.

Step 5- Prepare Water for Bagels: While the dough is rising, fill your stockpot with about a gallon of water and set it on the fire to boil. When it reaches a boil, add the malt syrup or sugar and reduce the heat so that the water just barely simmers; the surface of the water should hardly move.

Step 6- Form Bagels: Once the dough has risen, turn it onto your work surface, punch it down, and divide immediately into as many hunks as you want to make bagels. For this recipe, you will probably end up with about 15 bagels, so you will divide the dough into 15 roughly even-sized hunks. Begin forming the bagels. There are two schools of thought on this. One method of bagel formation involves shaping the dough into a rough sphere, then poking a hole through the middle with a finger and then pulling at the dough around the hole to make the bagel. This is the hole-centric method. The dough-centric method involves making a long cylindrical "snake" of dough and wrapping it around your hand into a loop and mashing the ends together. Whatever you like to do is fine. DO NOT, however, give in to the temptation of using a doughnut or cookie cutter to shape your bagels. This will push them out of the realm of Jewish Bagel Authenticity and give them a distinctly Protestant air. The bagels will not be perfectly shaped. They will not be symmetrical. This is normal. This is okay. Enjoy the diversity. Just like snowflakes, no two genuine bagels are exactly alike.

Step 7- Pre-heat Oven: Begin to preheat the oven to 400 degrees Fahrenheit.

Step 8- Half Proof and Boil Bagels: Once the bagels are formed, let them sit for about 10 minutes. They will begin to rise slightly. Ideally, they will rise by about one-fourth volume... a technique called "half-proofing" the dough. At the end of the half-proofing, drop the bagels into the simmering water one by one. You don't want to crowd them, and so there should only be two or three bagels simmering at any given time. The bagels should sink first, then gracefully float to the top of the simmering water. If they float, it's not a big deal, but it does mean that you'll have a somewhat more bready (and less bagely) texture. Let the bagel simmer for about three minutes, then turn them over with a skimmer or a slotted spoon. Simmer another three minutes, and then lift the bagels out of the water and set them on a clean kitchen towel that has been spread on the counter top for this purpose. The bagels should be pretty and shiny, thanks to the malt syrup or sugar in the boiling water.

Step 9- Bake Bagels: Once all the bagels have been boiled, prepare your baking sheets by sprinkling them with cornmeal. Then arrange the bagels on the prepared baking sheets and put them in the oven. Let them bake for about 25 minutes, then remove from the oven, turn them over and put them back in the oven to finish baking for about ten minutes more. This will help to prevent flat-bottomed bagels.

Remove from the oven and cool on wire racks, or on a dry clean towels if you have no racks. Do not attempt to cut them until they are cool... hot bagels slice abominably and you'll end up with a wadded mass of bagel pulp. Don't do it.

How To Customize Outside of Bagels: After boiling but before baking, brush the bagels with a wash made of 1 egg white and 3 tablespoons ice water beaten together. Sprinkle with the topping of your choice: poppy, sesame, or caraway seeds, toasted onion or raw garlic bits, salt or whatever you like. Just remember that bagels are essentially a savory baked good, not a sweet one, and so things like fruit and sweet spices are really rather out of place.

Tuesday, June 26, 2007

i <3 strawberries

Pin It Now!

I LOVE LOCAL STRAWBERRIES.

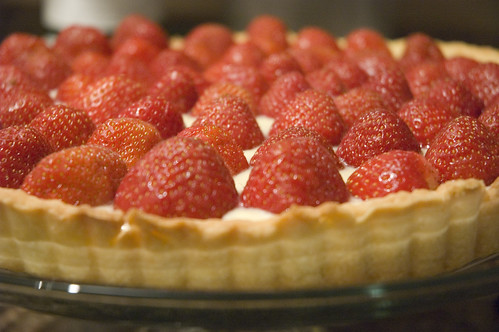
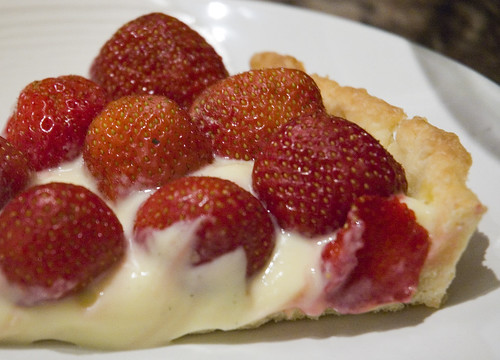
amaaaaaaaaaaaaaaaazing tart

When I was coming up with a menu for Saturday’s dinner, I knew for sure that the dessert would include fresh, local strawberries. Not just because I was writing about them for foodtv.ca, but also because they are just awesome.

I didn’t want to go for strawberry shortcake, as I was looking for a little more sophistication.

In this tart, I found it. This was un-freaking-believable. I mean, I had a few missteps along the way, and the final product didn’t quite present as nicely as it maybe could have…..but the taste absolutely made up for it. I don’t think I’ve ever eaten a more wonderful dessert.

I started by using my Better Homes and Gardens cookbook, as it had served me well in the past for things like foccacia and other sundry baking items. So I thought that for pâte sablée (basically a shortbread cookie! Woot!) and pastry cream, it would serve me well.

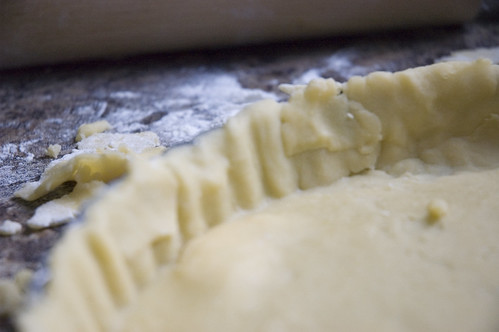
And so it is with great regret that I must inform you that I was woefully disappointed in this manner. First, the crust was a bitch to work with. It stuck to everything, and by the time I finally wrestled it into the pan, it looked awful. REALLY awful. As I’ve mentioned many times before, I suck at pastry. But this was even worse than my average effort…..behold….

this crust sucked hard

Nice eh? REALLY promising.

Folks, it didn’t get better from there……

i suck at pastry

BAHAHAHA. Is that sad or what? Even though I don’t ever pretend to be a patissière of any sort, I just couldn’t live with that burnt wreck. So I ate part of it (ack!) and then tossed it to start over. I ended up using Mark Bittman’s crust recipe, which was far superior and didn’t fail me at all. I should never have cheated on Mark!

The pastry cream wasn’t much better – it tasted fabulous, but it was a little runny. Funny enough, when I looked up Mark’s recipe for pastry cream, he was using twice the cornstarch. So I bet that one wouldn’t have been runny. I didn’t feel like making over my pastry cream though, as despite its runniness, it really did taste amazing. But for future reference, I would up the cornstarch to 2 Tablespoons. And use one egg instead of two egg yolks. But oh well.

Anyway, any of you who are fortunate enough to have fresh local fruit, you should use this recipe and make yourself a tart – any berries would be fantastic, as would peaches or any other summer fruit. You could cut the fruit in thin wedges, or leave berries whole (like I did….don’t leave peaches whole though, that would be weeeeird). You can also melt apricot jam/jelly with a bit of liqueur to glaze the top – it adds a touch of formality, but isn’t necessary.

I’m drooling just thinking about the awesomeness that is this tart. A perfect summer dessert. So simple, so fresh and so amazing.

Strawberries and Cream Tart
(I advise starting with pastry cream as it takes the longest to chill!)

Pastry Cream
(you’ll notice method is very similar to crème brulée)

½ c. sugar
4 t cornstarch (I strongly suggest using 2 T)
¼ t salt
2 c. light cream (you can even use whole milk)
1 vanilla bean (PLEASE spring for a vanilla bean for this one)
4 beaten egg yolks

1. In a heavy medium saucepan stir together 1/2 cup sugar, 4 teaspoons cornstarch, and 1/4 teaspoon salt.

2. Gradually stir in 2 cups half-and-half or light cream. If desired, add 1 vanilla bean, split lengthwise, with seeds scraped out into milk mixture.
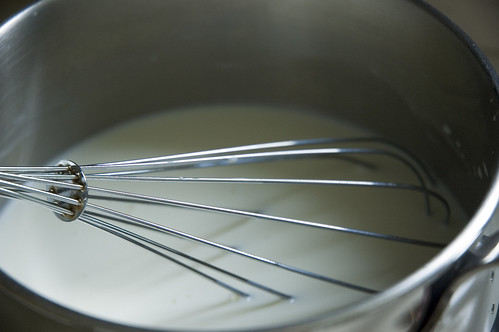
the beginnings of pastry cream

3. Cook and stir over medium heat until thickened and bubbly. Cook and stir for 1 minute more.

4. Gradually stir half of the hot mixture into 4 beaten egg yolks. Return all of the egg yolk mixture to saucepan. Bring to a gentle boil; reduce heat. Cook and stir for 2 minutes.

5. Remove from heat. Remove vanilla bean. Strain into a bowl. If not using vanilla bean, stir in 1 teaspoon vanilla (but PLEASE use a vanilla bean – you won’t regret it).

6. Place bowl of pastry cream in a bowl of ice water; chill for 5 minutes, stirring occasionally. Cover surface with plastic wrap. Chill 4 hours or until cold; do not stir. Makes 2 cups.
chilling the slightly-runny pastry cream

Pâte Sablée
1 ½ cups flour
10 T butter (1 stick plus 2 T)
¼ c. sugar
pinch salt
2 egg yolks
3 T ice water

1. In a food processor, combine the flour, sugar and pinch of salt (one or two pulses).
2. Cut the butter in 10 pieces and drop in the food processor. Pulse 3-4 times, until the butter is relatively finely chopped.
3. Drop in the two egg yolks and run for about 10 seconds, so egg is well combined.
4. Scrape mixture from food processor into a bowl. Sprinkle with 3 T of ice water. Combine using either a wooden spoon or your hands until it can be formed into a ball.
5. Wrap the ball in plastic wrap, form into a disc and freeze for 10 minutes (or refrigerate for 30-60 minutes).
To parbake the crust…..
1. Take out a 10 inch removable-bottom tart pan (you CAN make it in a pie pan, but a removable bottom is definitely your friend. You could alternatively try a springform pan, though you won’t end up with fluted edges).
2. Take the dough out of the freezer and place on counter (I put it on floured waxed paper). I also like the trick of topping it with a sheet of plastic wrap, as this avoids the endless fun of picking bits of dough off your rolling pin and trying to squish them back onto the crust.
3. From the centre, roll out into a 12-inch circle. If you find the dough starting to get too sticky, put it back in the fridge for a few minutes.
4. Gently transfer the dough into the tart pan (I like to pick up my waxed paper, which my dough has inevitably clung to, and flip it over the pan….this helps avoid stretching).
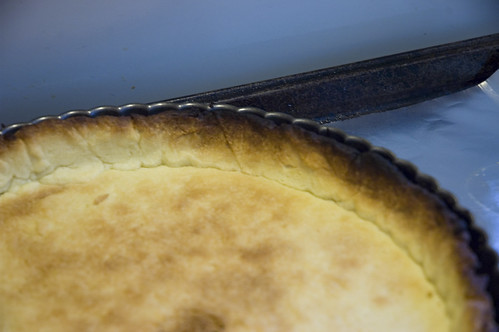
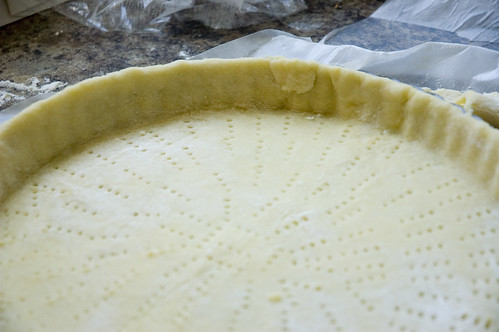
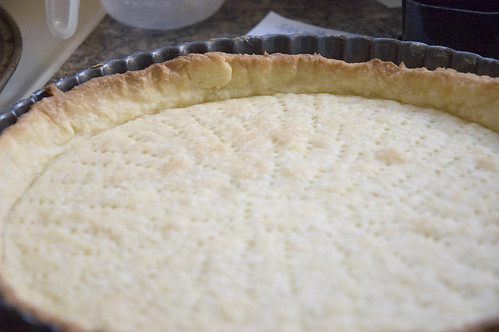
5. Press dough into pan and trim edges with a knife. Try not to let edges be thinner than the rest of the dough or they will burn beyond all recognition (see picture above!). Prick all over with a fork.
better crust

6. Preheat oven to 425F. Line dough with a layer of foil, and then fill with some sort of weight. I used brown rice….if you have pastry weights, go for it, but any sort of dry bean/grain will work.
7. Bake for about 12 minutes, covered.
8. Reduce oven temperature to 350F and remove the foil/rice/beans.
9. Cook another 15 minutes (checking every five minutes!!!!!) until crust is browned but not blackened.
better crust

10. Allow crust to cool.

To assemble tart:
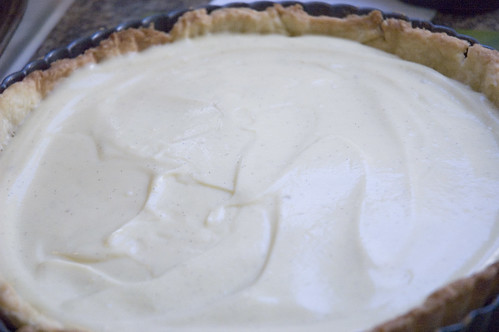
1. Spread pastry cream in tart pan. See those little black flecks? That's the vanilla peeps!
vanilla-flecked pastry cream in butter crust

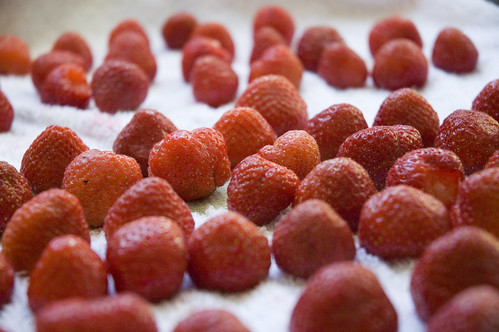
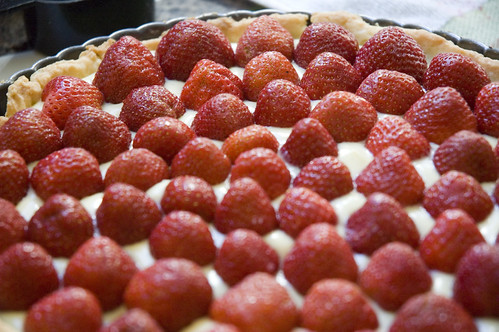
2. Put fruit on top (about 2 cups or so….). Arrange it fancy, make it simple, however you like. I chose simple for this, because I just wanted pure, delicious, almost rustic taste. You can have various fruits of different colours….use your imagination. I sorted my strawberries from large to small to make it look prettier.
sorted from smallest to largest

So simple, yet so goooooood
strawberry cream tart

3. BUT MAKE THIS NOW. IT’S THAT GOOD. You can see my runny pastry cream here....but if you up the cornstarch, you can fix this problem and end up with a tart that looks as pretty on the plate as it did in the pan!
this is the most amazing thing i've ever eaten

Wednesday, May 02, 2007

belated cinnamon-y goodness

Pin It Now!

SO BUSY. I have three posts to post, and nary a minute to actually take the time to write something!!!!!!!!! So I'm sneaking this in over my lunchtime at work and it will have to be short as I have only 23 minutes in which to write it.

On Sunday, we took a quick trip up the Valley to visit my in-laws (un-invited, bien sur). So to lessen the pain of the not-quite-unannounced company, I decided to bring a peace offering in the form of meltingly warm cinnamon-cardamom rolls.

I have to say though, timing these little suckers is a PAIN. No matter what way you go, it takes 3 hours to make them. And they're at their best directly out of the oven. So if you want your cinnnamon buns for a nice and relaxing 9AM brunch, guess who's NOT going to be relaxing. Hmph.

So I thought I would beat the system, so to speak. I figured that if I made up the cinnamon buns the night before, and just left them to rise overnight, and then brought them to my in-laws' place to bake, I would be set.

Not so much.

Don't do this. Letting the dough rise this long really had a detrimental effect on the finished texture - they weren't the doughy balls of cinnamon I have come to love and they would have been much better if I'd managed to do the get-up-really-early and throw them together thing.

They were still okay, don't get me wrong, but I think I owe the in-laws another batch of these guys, next time done right.

On the upside, if you have a breadmaker, they are pretty easy to put together. I just throw all the dough ingredients into my breadmaker and set it to the "dough" cycle. When that cycle finishes, I just make the recipe as directed. If you don't have a breadmaker, you can do this by hand, or you can do it in a food processor (easiest). I'm always a fan of getting someone else to knead, so I think you should all get breadmakers.

Low-Fat Cinnamon-Cardamom Rolls

Dough
1 cup water
2 T oil/butter
1 T sugar
1/2 t cinnamon
1/4 t cardamom
1 t salt
3.5 cups flour
1 t yeast

1. Add all ingredients to bread machine in the order specified in your manufacturers instructions (generally, all ingredients should be at room temperature, start with water, then put the flour on top. Put the sugar, oil, spices and salt around the outside, make a wee well and stick the yeast in there).

2. Set breadmaker to dough cycle and let run for required time (about 1 hour or so). If making by hand, combine all ingredients, knead until relatively smooth and then let rise for an hour or so). Or just buy dough.

Cinnamon Buns.....
1 batch of bread dough (about 1 pound)
1-2 T butter
1/2 c. packed brown sugar
2 t cinnamon
1/2 t cardamom
1/2 c icing sugar
1 ounce low-fat cream cheese
1 T milk

1. Spray a 9x13 pan with cooking spray.

2. Slowly, gently stretch the dough to a large rectangle. You want it to be at least 12 inches long and at least 9 inches high.
cardamom cinnamon sweet dough
(my dough turned out a little sticky, so I had to add more flour at the last minute and I clearly suck at kneading)

3. In a small bowl, combine the brown sugar, cinnamon and cardamom.
brown sugar for cinnamon buns!

4. Melt the butter and brush the dough rectangle with some of it. The less butter you use, the lower in fat your rolls will be. The more you use, the better they will taste. hehe. Sprinkle about 2/3 of the cinnamon mixture overtop.
sugary cinnamony goodness

5. Slowly, gently, roll it up. Roll it up the long way (i.e., at the end you want at least a 12 inch tube of cinnamon roll dough). Pinch the edges to keep it together. With a serrated knife, gently cut off 1-inch slices of dough.
rolled up cinnamon yumminess

6. Place these slices in your prepared 9x13 pan, slightly spaced apart (in theory, they should rise). Let them rise for 1-2 hours (this is where I erred).
waiting to rise....

7. When they are done rising, brush the rolls with a little more butter and sprinkle the remaining cinnamon/sugar mixture over top. Preheat the oven to 350F and bake for 20 minutes or so.
okay, so they didn't rise that much
If you actually follow the directions, you *will* get better results and puffier buns

8. While the buns are baking, make the cream cheese icing, if desired. Take the cream cheese (softened), icing sugar and milk and beat together with a hand mixer until smooth. If you find the icing too thick, add a few more drops of milk. If it's too thin, add a little more sugar. I like to put the icing in a zip loc and snip the corner for drizzly presentation.

Enjoy them while they're warm! They'll make your house smell incredible for the rest of the day and people LOVE these things (myself included - last time I made them, which was over 2 years ago, I ate almost a whole pan, so I had to stop making them!).

low-fat icing cures everything

On the up side, because I had to bring the camera up the valley to take pictures of my finished product (and yes, my in-laws do think I'm a little crazy...), I got to take advantage of our telephoto lens to take pictures of this cute little fellow:
DSC_8315

You can see more pictures of him in my flickr set HERE.

As always, thank you for reading and I can't say how much I appreciate all your wonderful comments! Stay tuned for vietnamese salad rolls and lentil soup! :)

Wednesday, April 25, 2007

double FARK.

Pin It Now!

Cakes didn't set. GAH!

just two quick things....

Pin It Now!

1. First, can someone please tell me why in tarnation do we not have 24-hour alarm clocks here in Canada?

You know, the kind of clock where you can CLEARLY see, no matter how much wine you've had, the time that you are setting it to? The kind of clock that does not allow the overindulgent wino nitwit (yes, that would be me) to set the clock to PM instead of AM before blurriedly stumbling off to bed .

People like me NEED a 24-hour alarm clock. There is a huge visual difference between 07h00 and 19h00....you're never going to mess those two up. But that stupid, freaking, infinitesimal DOT marking the difference between me getting to work on time or me racing around like a knob because the first word I've uttered that morning is a nasty four-letter one...and stumbling in late.....this is just unacceptable.

The solution is not less wine. I believe the solution is REVOLUTION. Demand the 24-hour alarm clock.

2. Why do I think I am greater than chemistry? Why do I think that because *I* am making something, that things will disobey basic laws of nature? Tonight, after class, I set to making two identical tropical fruit mousse cakes. I'm not sure why I thought this would be a good idea at 22h30 (note the clever use of the 24-hour clock?) Especially when the instructions say things like "let set 1-2 hours" Bah. Those things don't apply to ME. MY cake will clearly set up more quickly.

Anyway, the upshot of it is that I think I may have ruined about $40 of tropical fruit. Pffft. That said, you should all check out the original recipe on Applemint, because hers is beautiful.

I have a sneaking suspicion I've more in common with Macbeth than I'd care to admit.

Also, I've learned that one of the grossest things you can smell is the scent of hot water on granules of gelatin.

That is all. No real food here. If my cake actually turns out to be edible, I'll let you know tomorrow. I'm not holding up a lot of hope right now, because both of them look like utter crap. Meh. This'll teach me to just go about, converting recipes, tripling them and just making a huge big mess.....

ACK. And it's now 1AM. And I'm going to be ultra-busy tomorrow. This sucks.

Wednesday, February 21, 2007

a slightly sad start

Pin It Now!

So I hosted some friends of ours this past Saturday for a fun dinner full of overindulgence, wine, water (oops) and food. I tried a whole whack of new recipes, as usual guinea pigging my unsuspecting (or perhaps at least slightly suspecting) guests on new recipes, culinary experiments and delightful nibblies.

Sadly, I had all of these delusions of a wonderfully sophisticated appetizer....belgian endive leaves, capped with fresh figs, crumbled feta and candied pecan halves....sweet, salty, acidic, all in one....it sounded like a rather enticing beginning to what I hoped would be a tasty meal....

Well....I was foiled. Normally, when I have people over for dinner, I do most of my prep the night before (i.e., shopping, making soup, dessert, etc.) so the day I of, I usually need only worry about salad and bread. It didn't quite work out that way this time, so at 10am Saturday morning, hubs and I whipped out to our friendly neighbourhood Loeb to pick up the things I needed.

They didn't have endives. They didn't have figs. They didn't even have freaking pecans! Clearly, the endive appetizer was not meant to be.

It was actually kinda funny, I'd whipped through the store (while I sent hubs to the butcher and liquor shops) and then wandered back to the produce/cheese section. It was there that hubs found me, standing, lost, forlorn and highly peeved that I had to think of a new appetizer on the spot.

Eventually (after a few minutes of staring and scowling at the cheese in front of me), I decided on something quick and easy - smoked salmon with cream cheese on rye. I had capers, red onion and little slivers of lemon to garnish. It wasn't quite what I initially wanted, but I think it did the trick, especially because dinner was subjected to a weeeeeeeeeeee delay.

Totally my fault too. Some days, I really just shouldn't be doing anything that requires coordination. I was pouring water. And, because I'd set the table beforehand, I was pouring it at the table.

Bad bad BAD idea for me. Of course our Brita filter doesn't hold quite enough for six glasses of water....so part-way through, I had to refill the thing. And by this point, I was getting impatient for dinner (hubs was late) and didn't want my guests to feel forced to stay uber late.....so I made the fatal error of NOT waiting for the water to gently and oh-so-slowly trickle its way through that blasted filter.

The next thing that happened is perhaps a bit too obvious.....of course the lid popped off the Brita. Of course the Brita is super huge and like a litre of water splashed across the table. And of course I used a table cloth and not place mats. And of course I have a brand new custom solid maple dining table. Gah.

Hence another dinner delay. Had to UNset the table, and throw the table cloth in the dryer (because OF COURSE it's the only tablecloth I have that fits the new table).

Brutal.

But at least we had salmon to tide us over!

lazy lazy appetizer

Related Posts with Thumbnails