Pin It Now!
I have both the fortune and misfortune to live in a country where the weather is pretty much unpleasant for at least half the year. As a result, I'm surrounded by people who are completely devoted to and consumed by all things Summer and sun, and are all about taking advantage of everything the warm weather has to offer.
I am not one of those people. I actually don't like hot weather.
I love the Fall. I love cool crisp mornings, I love fiery bright forests, and I absolutely love Fall comfort food. Like obsessively love it. For the last month, I'll I've been able to think about is stew, roast, pot pie and root vegetables. I've actually been a bit gleeful that it's finally getting cold (kay, maybe I was not so gleeful to greet a cold, rainy, gray morning today...but I digress).
Mmmmmmmmmmm.....potatoes. I could live on potatoes.
So I'm indulging myself. I hope you enjoy some of these treats as much as I have been. I've been in a cooking frenzy this weekend. On top of the wonderful feast I'm about to share, I also made a batch of
baked beans today (from October's Clean Eating - on shelves now) (for tomorrow's dinner, to be gobbled up accompanied by
cheddar garlic biscuits). For tonight, I made a
bolognese sauce that Lil Z and I enjoyed with farfalle. YUM. PS - If you make that bolognese, add a can of tomato paste and a good palmful (2T) of italian herbs).
For Saturday's dinner, I wanted to use seasonal ingredients, so that basically gave me a harvest theme. I started the meal with my favourite curried parsnip fries, with yogourt curry dip. Love these guys - they are so easy to make and they usually go flying off the table. 1lb of parsnips feeds 3ish people, and 2lb of parsnips is best for a crowd. If people are dieting, then probably best to stick with 1lb of parsnips (I had some dieters in the crowd, and hence lots of leftovers).
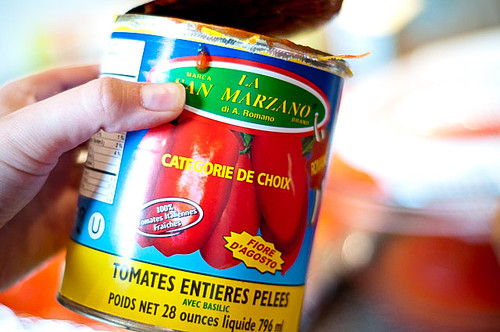
I followed the parsnip fries with the most decadent roasted tomato soup. I have recently discovered that Costco (in Canada, at least) carries these amazing San Marzano style tomatoes (no, not controlled origin, but they are San Marzano type of tomatoes, grown in that region of Italy....just no AOC-type label).
They are delicious and for the price, I'm totally cool with the lack of formal pedigree. I found the recipe on SmittenKitchen (who in turn, had adapted it from America's Test Kitchen). At this point, I don't care who came up with it - it is genius, and I totally agree with the simplified processed instituted by Deb at SK, because there's no need to strain your soup. Not for a fall feast. Perhaps if the Queen were coming, but that wasn't happening for me, so I didn't strain either.
Now, I confess that I had *intended* on serving my soup with no-knead spelt bread. Unfortunately, this turned out to be one of those ideas that was fabulous in my head, and utter failure in reality. The night before the dinner, I had mixed my flour, yeast, water and salt. I waited the requisite 18 hours. But when I went to try to 'fold' my dough, I discovered that the water and the flour had not actually merged. It was strange. So I pitched it. Ergo, there was no bread with the soup. But it's just was well, because frankly, the soup is robust enough to stand on its own.
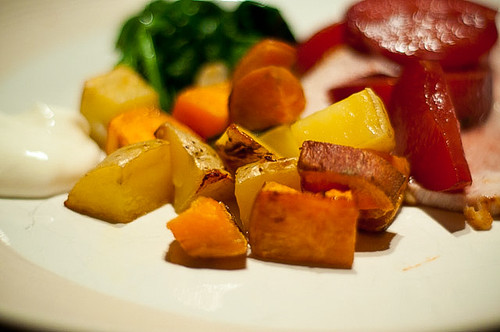
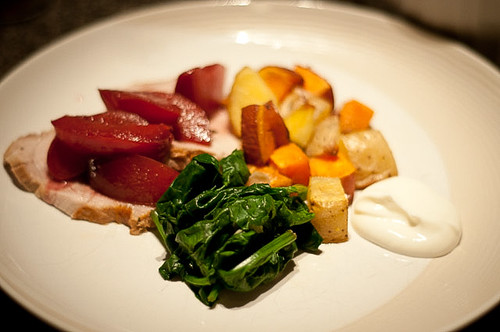
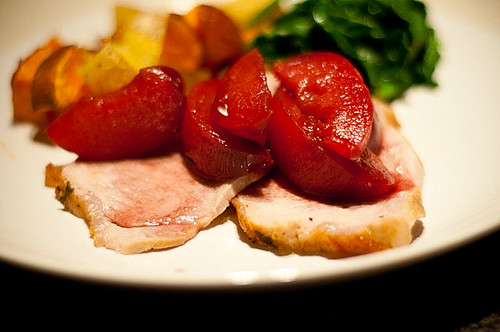
As a main, I served a centre-cut pork loin (I know, it's been four months since I posted, and I"m writing about pork AGAIN...sorry!), along with wine-poached plums. I accompanied this with
sage-roasted potatoes/sweet potatoes, and sauteed spinach with garlic (spinach+garlic + splash of soy). It made for a colourful plate, with nicely balanced flavours. It would have been improved had I not (again...oops) overcooked the pork. In my defence, the thermometer went from 150F (not done enough for this particular dinner) to 170F in about five minutes. Zoinks. It was a little dry, but enough of the wine poaching liquid and it was very salvageable. :) Note to self: next time, take the damn roast out at 150F and let'er rest. Lesson learned. Again.
For dessert, I finished it off with a chocolate spelt cake. Why the spelt obsession, you ask? My guest of honour has a wheat intolerance, and spelt is often well-tolerated by those with wheat sensitivities. That said, it's important to note that spelt is NOT okay for someone who has celiac disease, because it does have some gluten in it.
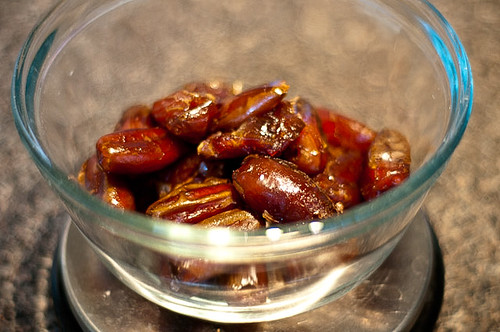
All that said, after my epic spelt bread failure, I was a little dubious of this chocolate cake actually being any good. It was a wholegrain chocolate cake, made only with cocoa (no actual chocolate) and filled with dates. I was definitely skeptical. I needn't have been though - it was actually pretty fabulous! You have to be careful not to overbake (take the cake out of the oven before any toothpick comes out dry....once the cake is set and mostly baked, take it out. It's delicious and even though you can see the odd date bit, but you really can't tell they are in there. And that means a lot, coming from me, because I maintain (and always have) that dates look like cockroaches.
See? Pile of cockroaches. ;)
Parsnip fries with curry dip
1 lb parsnips
1-2 T thai red curry paste
2 T vegetable oil
1 c plain yogourt
2 T indian curry paste (mild or hot, depending on your taste buds)
2 T honey/maple syrup
1. Preheat oven to 375F. Peel parsnips and cut into 'fries'. Look at these babies in all of their root vegetable-ey goodness.
2. Combine thai curry paste and vegetable oil.
Toss parsnips in oil/curry paste mixture.
3. Spread out parsnips on baking sheet (I line with parchment paper) and bake for about 30 minutes. You can go as long as 45, just watch the little bits for signs of burning.
4. Meanwhile, combine yogourt, indian curry paste and honey/syrup. Taste and adjust to your taste (i.e., if it's too hot, add yogourt. If it's too boring, add more curry paste. Add more sweetener if that is to your taste).
5. Enjoy parsnip fries with dip! It's that easy.
Roasted Tomato Soup
2 (28-ounce) cans whole tomatoes packed in juice, drained, 3 cups juice reserved (I used San Marzanos)
1 1/2 tablespoons dark brown sugar
4 tablespoons unsalted butter
4 large shallots, minced (about 1/2 cup)
1 tablespoon tomato paste
Pinch ground allspice
2 tablespoon all-purpose flour
1 3/4 cups chicken stock, homemade or canned low-sodium
1/2 cup heavy cream
2 tablespoons brandy or dry sherry (I used marsala)
Salt and cayenne pepper
1. Adjust oven rack to upper-middle position and heat oven to 450°F. Line rimmed baking sheet with foil. With fingers, carefully open whole tomatoes over strainer set in bowl and push out seeds, allowing juices to fall through strainer into bowl. I had help for this part. ;)
Spread seeded tomatoes in single layer on foil. Sprinkle evenly with brown sugar (I forgot to sprinkle with sugar....I just mixed it into the soup....I'm pretty sure it was almost as good!).
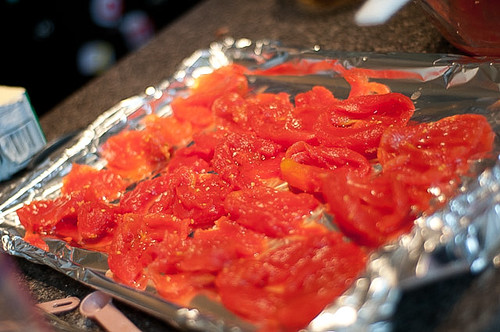
Bake until all liquid has evaporated and tomatoes begin to color, about 30 minutes. Let tomatoes cool slightly, then peel them off foil; transfer to small bowl and set aside.
2. Heat butter over medium heat in large saucepan until foaming. Add shallots, tomato paste and allspice. Reduce heat to low, cover, and cook, stirring occasionally, until shallots are softened, 7 to 10 minutes. Add flour and cook, stirring constantly, until thoroughly combined, about 30 seconds. Gradually add chicken stock, whisking constantly to combine; stir in reserved tomato juice and roasted tomatoes. Cover, increase heat to medium, and bring to a boil. Reduce heat to low and simmer, stirring occasionally, to blend flavors, about 10 minutes.
3. Blend with the pulverizer of your choice (for me: immersion blender....no extra pots to clean!). Add cream and warm over low heat until hot, about 3 minutes. Off heat, stir in brandy and season with salt and cayenne. Serve immediately. I didn't find that extra salt was really needed, but to each his/her own.
This soup was what canned tomato soup only wished it could be....sophisticated, rich, delicious and SO perfect for a cold rainy day. It WOULD be perfect with grilled cheese. Yum. I had grandiose plans of swirling some more on top of the soup, but it really doesn't need a thing....so it doesn't look fancy, but it's YUM. Make it.
Roasted Pork Loin with Poached Plumsstolen and slightly modified from
Epicurious.commakes 6 servings
6 sweet firm red or black plums (such as Burgundies, Satsumas, or El Dorados; about 2 pounds), quartered, pitted
2 cups Pinot Gris or Viognier
1 cup dry red wine
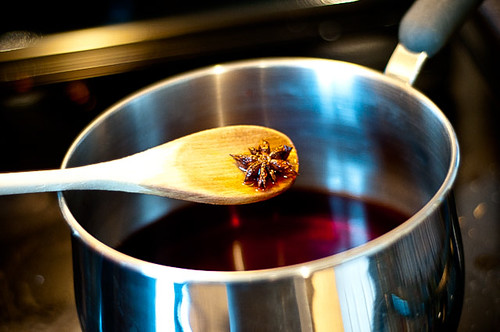
2 whole star anise
cinnamon stick
1/4 cup plus 1 1/4 teaspoons sugar, divided
2 cups low-salt chicken broth
5 fresh thyme sprigs plus 1 teaspoon finely chopped thyme, divided
2 tablespoons chopped shallot
Pork
2 1 1/4-pound pork tenderloins (I used 1 centre-cut loin roast, about 2.5 lbs)
3 tablespoons olive oil, divided
2 teaspoons chopped fresh thyme
2 garlic cloves, minced
Chopped fresh chives
For Plums:1. Combine first 5 ingredients and 1/4 cup sugar in heavy large saucepan; bring to boil, stirring until sugar dissolves. Reduce heat; simmer until plums are tender, about 20 minutes. Transfer plums to platter. Strain wine mixture.
Star anise is pretty.
2. Return strained liquid to same saucepan. Add broth, thyme sprigs, and shallot. Boil until mixture is reduced to 1 cup, about 25 minutes. Strain sauce; stir in 1 1/4 teaspoons sugar and chopped thyme. Season with salt and pepper.
For Pork:
1. Preheat oven to 400°F. Brush pork with 1 tablespoon oil; sprinkle with thyme, garlic, salt, and pepper.
2. Heat remaining 2 tablespoons oil in large ovenproof skillet over medium-high heat. Add pork and cook until brown on all sides, turning often, about 5 minutes. Transfer skillet to oven, and roast pork until thermometer inserted into center registers 160F, about 20 minutes (I cooked mine for 40 minutes because center loins are much thicker than tenderloins....when in doubt, use a thermometer).
3. Remove skillet from oven and let pork stand 10 minutes. Cut pork crosswise into 1/2-inch-thick slices. Serve with poached plums and sauce. Sprinkle with chopped chives.
Chocolate Espresso Spelt Cake
1 1/2 sticks (3/4 cup) unsalted butter, softened, plus additional for pan
3/4 cup unsweetened Dutch-process cocoa powder plus additional for dusting pan and cake (I confess to not knowing whether my cocoa is dutch process or not...it was Fry's...I think it is)
1 cup boiling-hot water
1 1/2 tablespoons instant-espresso powder
1 1/2 teaspoons vanilla
1 teaspoon baking soda
1/2 lb Medjool dates (12 to 14), pitted and coarsely chopped (1 1/2 cups)
2 cups spelt flour
2 teaspoons baking powder
3/4 teaspoon salt
1 cup packed dark brown sugar
2 large eggs
Special equipment: a 9-inch springform pan
1. Put oven rack in middle position and preheat oven to 350°F. Butter springform pan, then lightly dust with cocoa powder, knocking out excess. I actually lined the bottom of my pan with parchment, just to be doubly sure, AND I baked it on a lined baking pan (I always do this because I do not trust liquidy substances in springform pans....learn from my mistakes)
2. Stir together boiling-hot water, espresso powder, vanilla, and baking soda in a bowl, then add dates, mashing lightly with a fork, and steep until liquid cools to room temperature, about 10 minutes.
3. Whisk together spelt flour, cocoa powder, baking powder, and salt in another bowl. I'm told it's important to spoon spelt lightly into the measuring cup...so that's what I did.
4. In yet another bowl (yes, by this point, your counter will be covered....), beat together butter and brown sugar with an electric mixer at medium-high speed until pale and fluffy. Add eggs 1 at a time, beating until just combined.
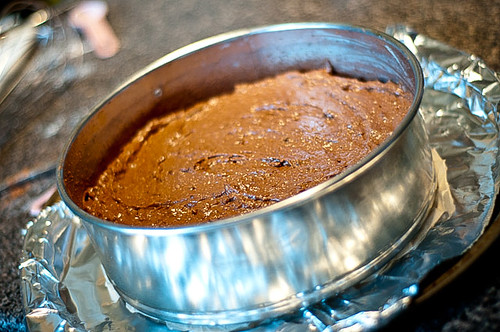
5. Beat in date mixture (batter will look curdled), then reduce speed to low and add flour mixture, mixing until just combined. The batter is pretty thick.
6. Spoon batter into springform pan, smoothing top, and bake until a wooden pick or skewer inserted into center comes out with just a few crumbs....do NOT overbake....start checking at 40 minutes (the recipe says about 50 minutes to 1 hour).
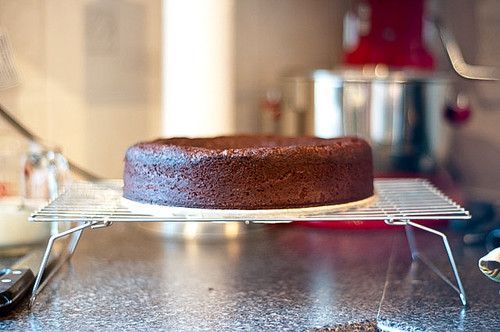
7. Cool cake in pan on a rack 5 minutes, then remove side of pan and cool cake on rack.
I decided to top my cake with a simple ganache - 4 oz whipping cream (35%), 4 oz dark chocolate (I used 70% Callebaut dark chocolate). Melt together in the microwave on 50% power. Stir until smooth. Pour over cake.....I cheated and used my ganache to fill in the slightly sunken middle of my cake. :)
It was a great finish to the meal. Highly recommend it, especially if you or someone you know has issues with wheat. This would also be easy to make dairy-free (use vegan margarine or oil in lieu of butter) and I'm *told* (although cannot attest) that you can also use egg replacer in it. If someone tries that out, lemme know....
Thanks for reading!

 They really aren't that spooky - more cute than anything!