Photobucket - Video and Image Hosting
Showing posts with label pasta. Show all posts

Monday, October 20, 2014

ghoulish monster pasta - fast and easy hallowe'en dinner
Pin It Now!


ghoulish monster pasta

For the last few weeks, I've become more and more interested in the blog and forum surrounding Mr. Money Mustache (I added a link, so you could go check it out).  While I'm unlikely to ever consider myself mustachian (and frankly, probably also too materialistic), I've really found a lot of sense in his advice and commentary about consumer spending.
ghoulish monster pasta

And that in turn has led me to examine my own spending a little more closely.  And I've realized that, just like so many others, that I do a lot of impulsive and completely unnecessary spending (exhibit A, my shoe collection, exhibit B, my dress collection, and exhibit C, my extensive kitchen gadget and serveware collection.
ghoulish monster pasta

So I'm trying to be a lot smarter about expenditures.  I don't have any dreams of retiring at 40 and being financially independent at that point (read the MMM blog for more of that type of inspiration, because you are unlikely to find it here), but I just wanted to talk about some of the smaller decisions I've made lately to reduce impulsive and unnecessary spending.  :)
ghoulish monster pasta

I've been in contact with Raise.com regarding Hallowe'en related post that mentioned their service, and I was kind of scratching my head as to how to link both Raise.com (a gift card buy and sell site) and Hallowe'en, and also rationalize this under my newfound frugality.  I'm not sure I'm succeeding, but anway. (As an aside, I will start with a bit of bad news first, for my Canadian readers, Raise.com is not currently able to process international orders (that said, you can check out the similar Canadian service of CardSwap.ca)).

I actually find this idea quite frugal - essentially, if you find yourself with a gift card you can't use, rather than buying something you don't actually need, you can sell it.  Likewise, if you're planning to spend money in a given store, you can acquire a giftcard for that store at a discount (which, combined with whatever other offers you can find for that store, can offer you a pretty great deal, particularly when it's money you planned/needed to spend anyway).  I spot a TON of Home Depot gift cards on the site, and saving an additional few per cent off home improvement materials strikes me as a good deal for sure.
ghoulish monster pasta

Of course, it's not a great deal if you spend money you either don't have or didn't plan on spending.

Anyway, so how exactly do we link this to Hallowe'en??? Well, the thing is, I had some ideas for a fun Hallowe'en dish; one that would be super simple to put together and quick enough to get on the table between getting home from work/school and trick or treating, but that would also offer a little bit of fun.
ghoulish monster pasta

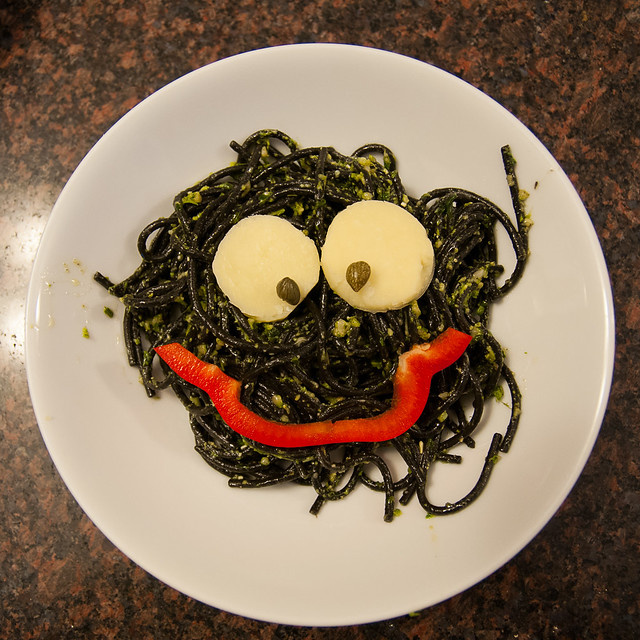
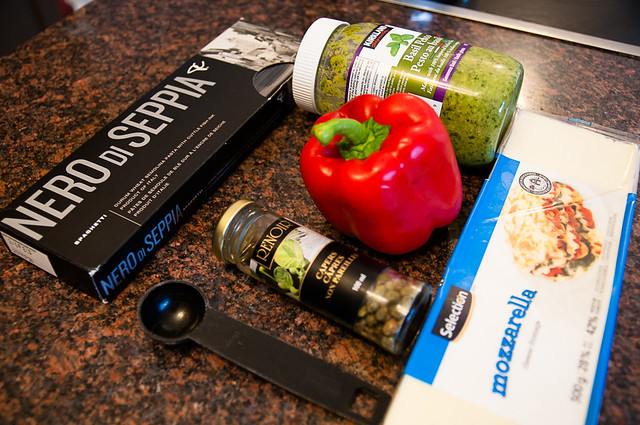
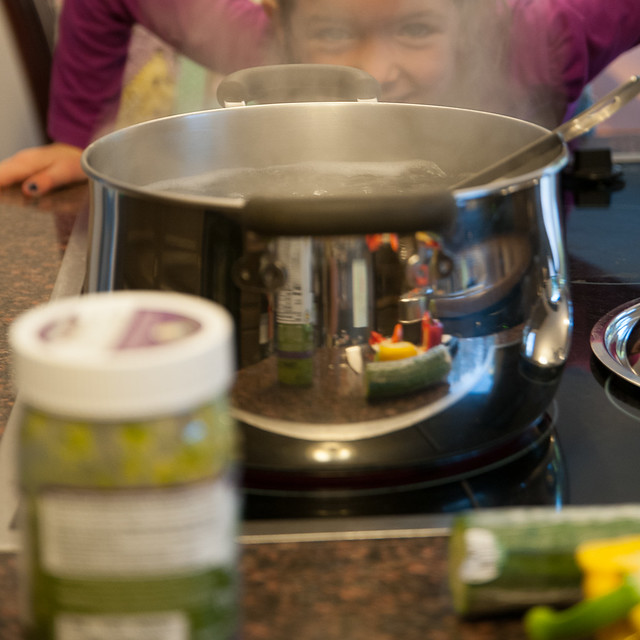
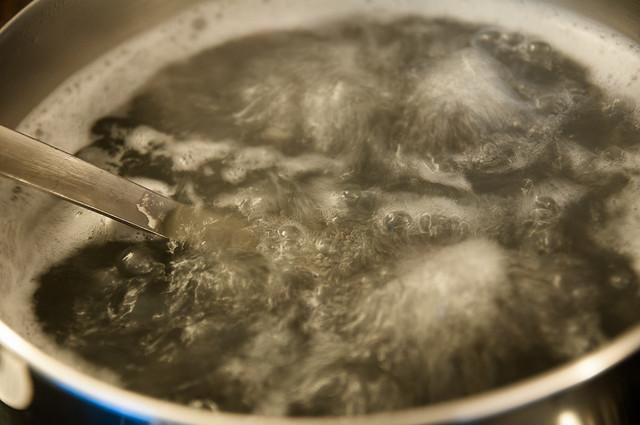
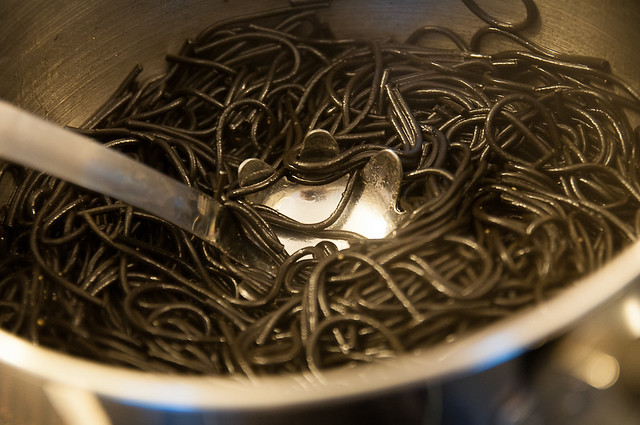
This black monster pasta was a HUGE hit with our entire household.  I happened to have the black pasta on hand already (President's Choice Black Label), but will admit it was a total impulse purchase and quite expensive compared to typical pasta; this dish would work equally well with white or whole grain pasta, though I did find the black noodles especially ghoulish.  I also had some of my favourite pesto from Costco on hand, so I used that up (though again, a tomato sauce or cream or rose sauce would also work just as well).  But you have to admit that the green pesto on the black noodles is great for that extra gruesome touch.
ghoulish monster pasta

The 'magic' of this dish is in the eyes.  And initially, I thought I would just purchase some of that thinly sliced cheese (the type sold for sandwiches) and maybe pick up a cookie cutter of some sort to cut it out.  And this is where I heard the voices of frugality in my head.  Pre-sliced cheese is INSANELY expensive (especially when you look at the cost by weight).  And it's ridiculous to buy a cutter for the sole purpose of making a single dish.
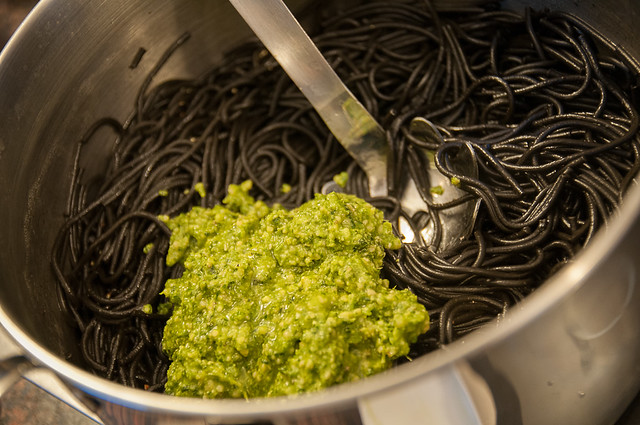
ghoulish monster pasta

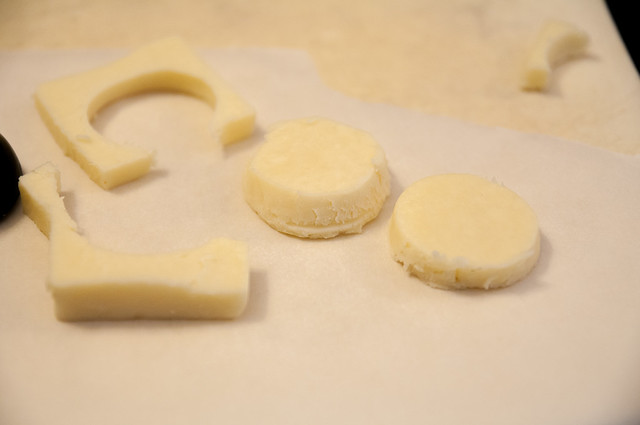
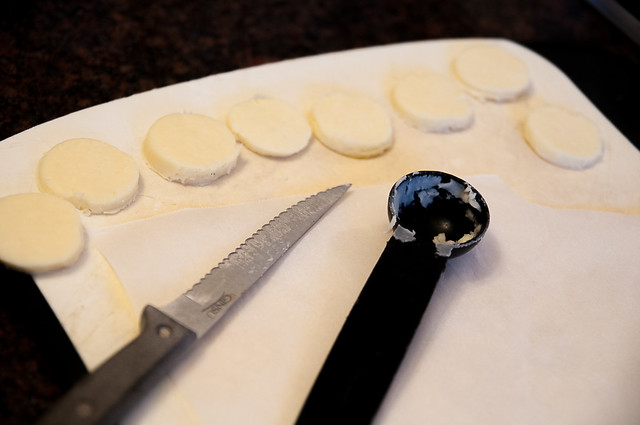
So I just used mozzarella I had on hand (it was a bit of a pain to cut, as evidenced by the slightly ragged edges) and I cut it with a round tablespoon measure.  And you know what?  It totally worked, and though my photos are maybe not quite as cute as they otherwise could have been, the kids sure did love this pasta.  Pesto is almost always a hit in our house, and the bit of fun with the eyeballs and mouth completely made them giggle and the kids were super excited to eat it.
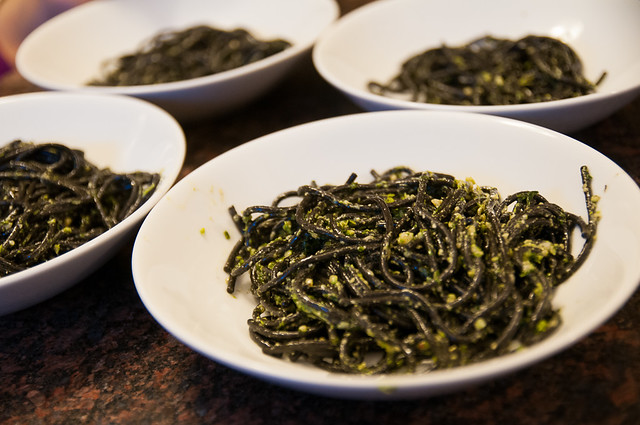
ghoulish monster pasta

I think they had the most fun talking about the various expressions of the monsters, and experimenting with the various positions of the red pepper mouth.
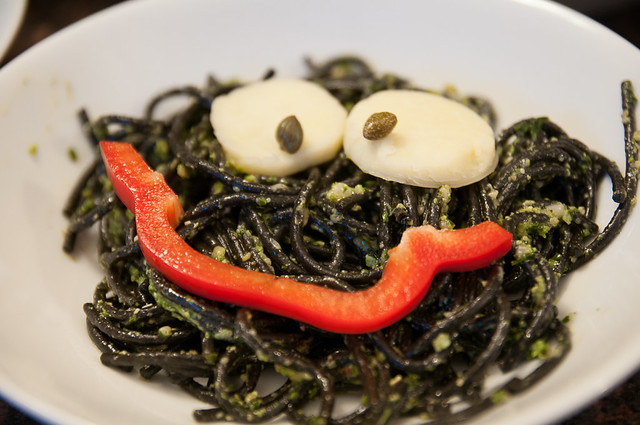
ghoulish monster pasta

For balance, I served with a nice green salad.  Because vegetables.
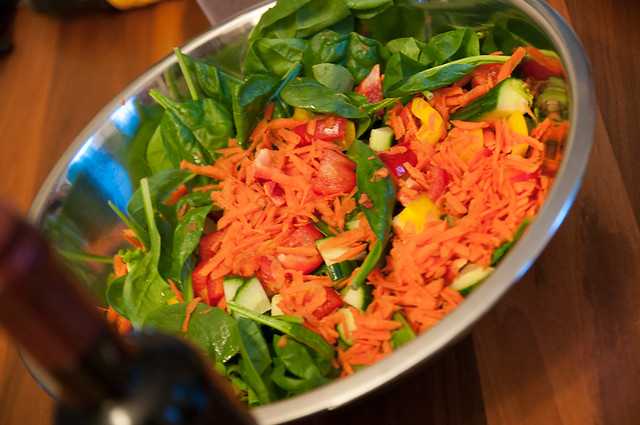
ghoulish monster pasta

monster pasta
serves 4-6 (it served our family of four, plus two generous lunches)
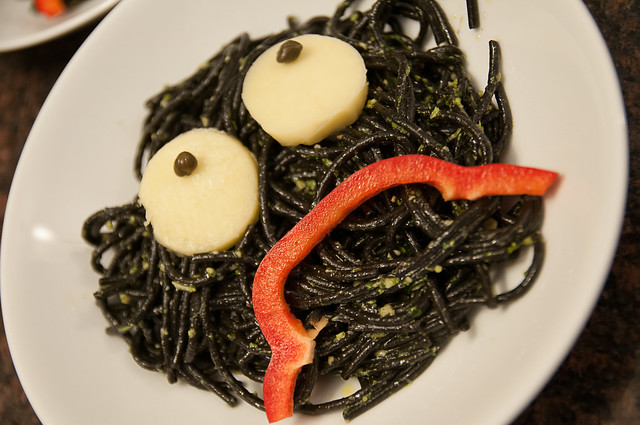
ghoulish monster pasta

1 450-500g package pasta (ideally black, but any kind will work)
olive oil
salt
pepper
1/2 c pesto (or other sauce)
white cheese
capers
red pepper

1. Cook pasta according ot package directions.

2. Meanwhile, take thin slices of the cheese, and cut out two circles for each serving.  You want the circles to be about 1" in diameter.  Give or take.  Slice rings from your red pepper, and cut each in half.  I left some of the inner white portion attached because I liked how it gave the monsters character.  I think I may have put too much thought into this.

3. Once you drain the pasta, you can toss it with a touch of olive oil, salt and pepper.  I like to, but it's not necessary.

4. Add the pesto and stir it in.

5. For each serving, top with two circle eyeballs, and then add a caper on top of each.  I made sure that hubs' monster was rolling its eyes. Art imitating life and all that.

6. Add a pepper slice for the mouth.

And you're done.  It's crazy easy.  I know there are much fancier hallowe'eny meals out there, but the beauty of this one is that you actually have the time and ingredients to make it.  Or you can improvise (don't have capers?  Don't buy them just for this.....use olive rings or pickle slices, or anything you can find that gives your monster just that perfect haughty expression.  You could even use tofu instead of cheese, if you wanted).

So all this to say, I'm trying to quiet that little voice in my head that makes me want to go all spendy, and though I made only a couple of small choices regarding this dish, those are the types of small choices that can keep adding up.
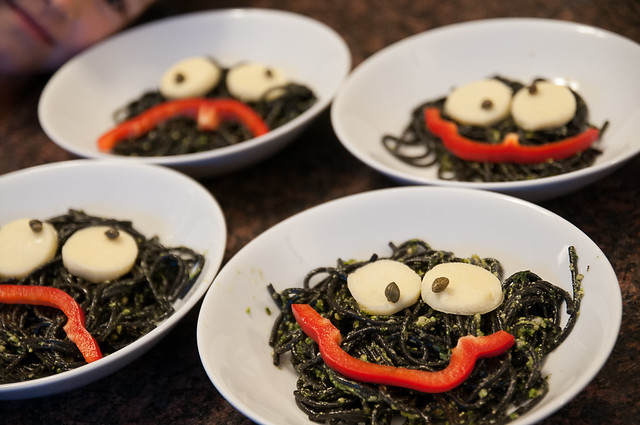
ghoulish monster pasta

I think a service like Raise.com (or Cardswap.ca for my Canadian readers) is a great way to get money for something you don't need, and also to get a great deal on your planned spending.

I'm also going to go one step farther and recommend you try to find your local Buy Nothing group.  These are great hyper-local gifting communities - so far I've found that it's a fabulous way of getting rid of things I no longer need, but that are not likely to sell, and you never know what you might come across (though I'm still looking to see if anyone's wanting to get rid of an old tortilla press.....I've banned myself from buying additional gadgets that will be infrequently used, but hey, if someone has one gathering dust......).
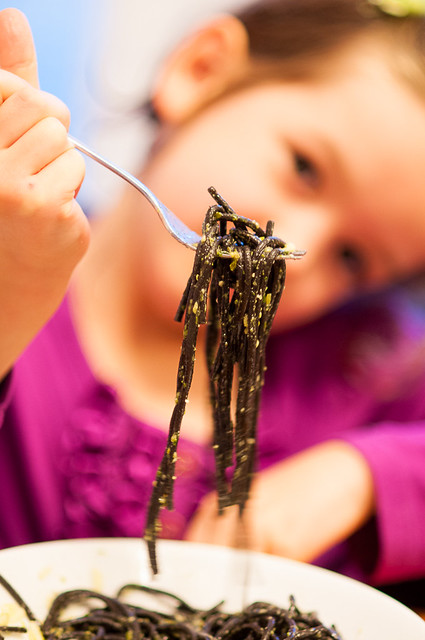
ghoulish monster pasta

Cheers - happy selling and gifting and trick or treating.  :)


Thursday, October 16, 2014

orzo with shrimp, feta, summer squash and vermouth

Pin It Now!

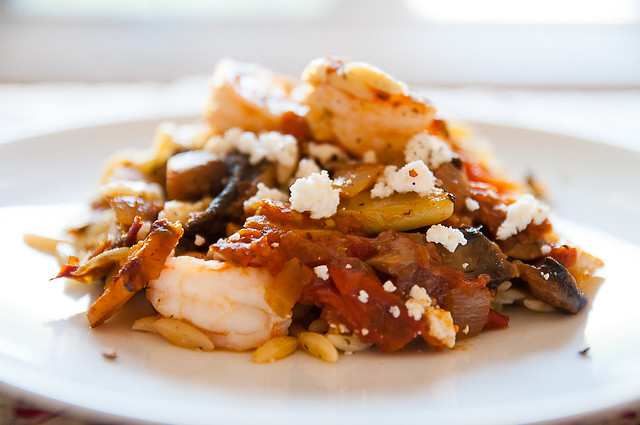
shrimp and orzo bake with feta

This is a super simple dinner that I made a while back.  I had meant to share this ages ago, but life being what it is, I got distracted and didn't get to it.

shrimp and orzo bake with feta

So now is the time.

shrimp and orzo bake with feta

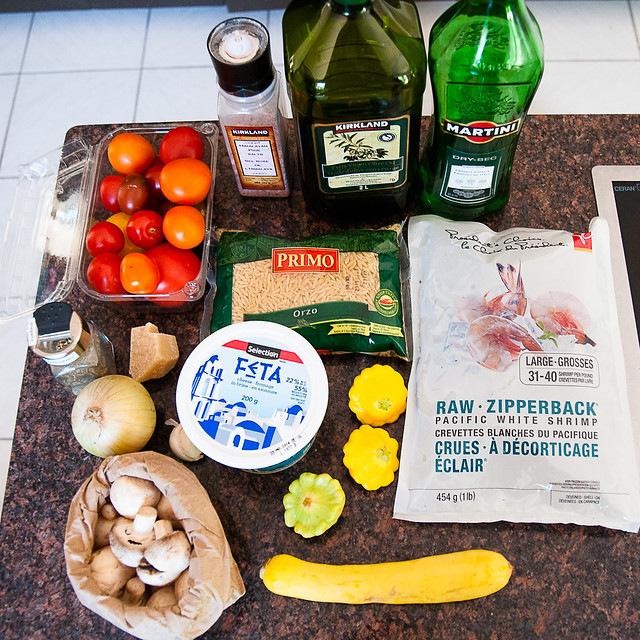
This dinner came about because I had some shrimp, feta and fresh organic vegetables from Bryson Farms that needed to be used, and in my googling/pinteresting, I came across this recipe from epicurious, that looked like a great base.

shrimp and orzo bake with feta

The original doesn't call for much in the way of vegetables, which is honestly a problem that I find with a lot of casseroles.  Personally, if I'm going to get everything together in a big dish and bake it, I want to have enough vegetables contained within it that I don't feel guilty if I can't muster my schmidt together enough to make a salad or veggies on the side.  So I almost always add more veggies, and it almost always works out well.

shrimp and orzo bake with feta

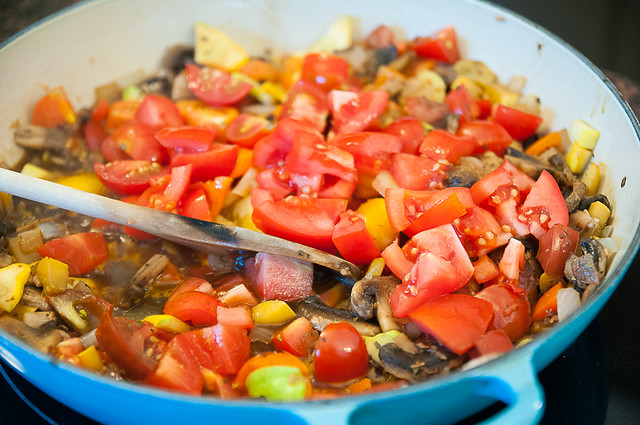
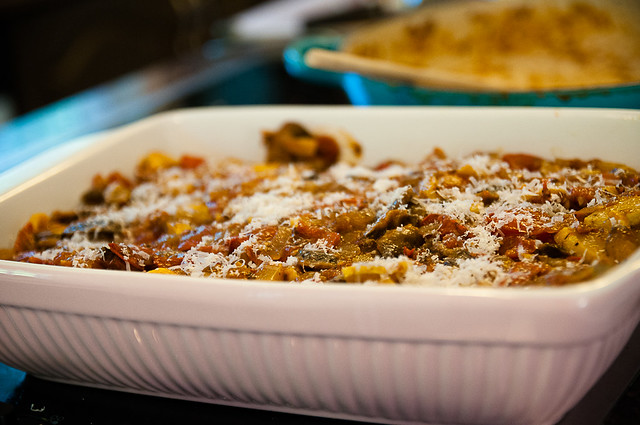
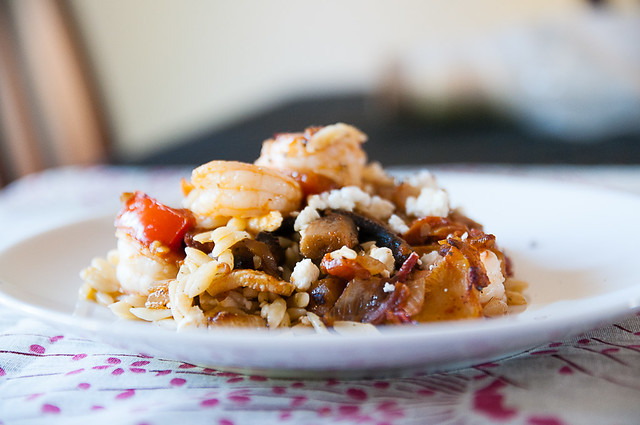
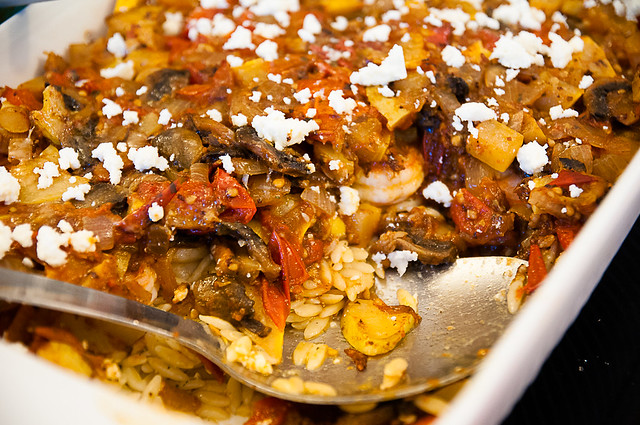
In this case, I used fresh tomatoes in lieu of canned, and also added mushrooms and summer and pattypan squash.  They were great!  And the whole casserole had fantastic flavour, so I would recommend this.  Orzo could easily be substituted with rice or quinoa or millet if you preferred.  I have a weakness for orzo though.

shrimp and orzo bake with feta


Orzo with shrimp, feta, zucchini and vermouth
modified from epicurious
serves 6

shrimp and orzo bake with feta

8 ounces orzo (rice-shaped pasta - this is about a 1/2 package)
6 tablespoons olive oil
1 cup crumbled feta cheese
1/4 cup freshly grated Parmesan cheese
2 T dried basil (fresh would be better, but I didn't have any)
1/2 lb mushrooms, chopped
1 lb summer squash/zucchini, diced
1 pound uncooked medium shrimp, peeled, deveined
2 garlic cloves, chopped
14 1/2-ounce can diced tomatoes in juice (I just weighed out 16 ounces of chopped fresh tomatoes)
1/2 cup dry vermouth (or white wine)
2 teaspoons dried oregano

1. Preheat oven to 400°F. Brush 11x7-inch glass baking dish with oil.

2. Cook orzo according to package directions. (when I have time, I like to toast the orzo first --> you can see the technique in this recipe). Drain well and return orzo to same pot. Add 2 tablespoons olive oil, 1/4 cup feta cheese, Parmesan cheese, and 1 T basil and stir.

3. Arrange orzo mixture in casserole dish.

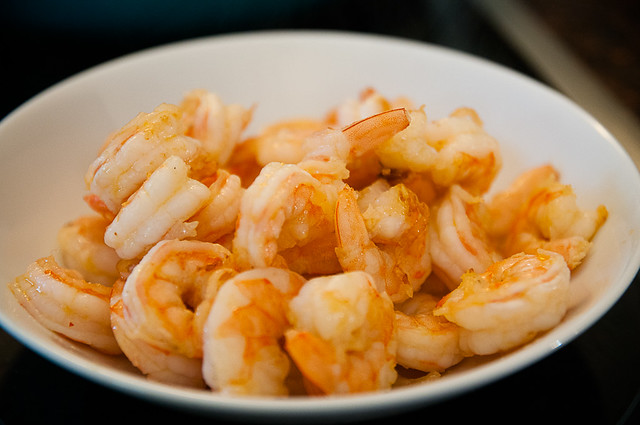
4.  Heat 2 tablespoons oil in large skillet over medium heat. Add shrimp and sauté until slightly pink, about 2 minutes (shrimp will not be cooked completely). Arrange shrimp on top of orzo.

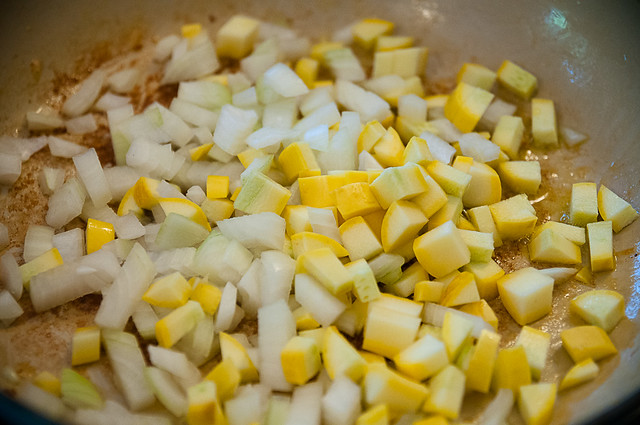
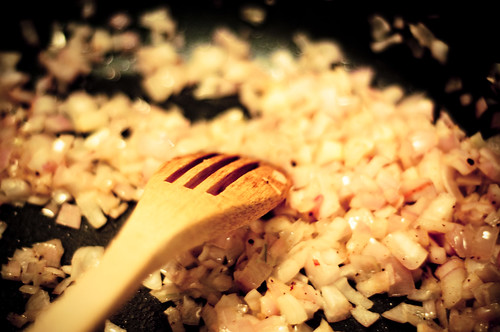
5. Add remaining 2 tablespoons oil to same skillet. Add mushrooms and summer squash/zucchini, garlic and sauté over medium-high heat for 2-3 minutes. Add tomatoes with juice; cook 1 minute. Stir in vermouth and oregano and remaining 1T basil.

6. Simmer uncovered until the tomatoes start to break down about 5-7 minutes. Season sauce to taste with salt and pepper; spoon over shrimp. Add a sprinkle more parmesan.

7. Bake orzo until heated through, about 10 minutes. Sprinkle with remaining feta.

shrimp and orzo bake with feta

This is so simple to make and is delicious.  It could easily be modified to suit what you have on hand - chicken would work (though make sure it's cooked first), and you could mix up the vegetables to include peppers, fennel, eggplant, etc.  This would also be good with goat cheese instead of feta (if you like goat cheese.....which I don't), and I think black olives would probably be a great addition too.

Hope you enjoy!  Thanks for reading.  :)
Monday, January 06, 2014

anachronistic potluck goodies - smoke salmon tart, buffalo chicken dip and salads

Pin It Now!

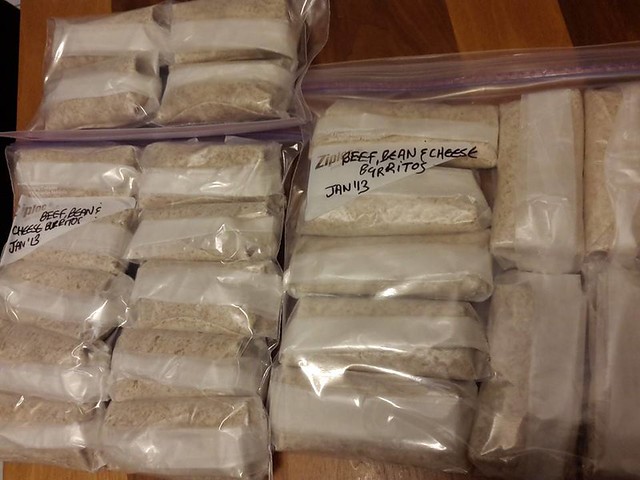
I made a batch of freezer burritos today, and was all proud of myself, so I uploaded a pic to my facebook page....and a friend promptly pointed out that I'd labeled them all with January 2013.  *facepalm*

freezer burritos

In the spirit of going back in time, let's go back a few weeks to the holidays (or really, it could be going forward in time to your next potluck), as I have a few recipes to share that are great for potlucks of all sorts.

I will shamelessly admit that I like to bring the dish that everyone wants the recipe for.  I like cooking, I try to make food that's appealing, so I score it as a win every time someone genuinely likes my food enough to want to know how to make it themselves.  And I always share the recipe.

But with that said, there are varying types of potlucks and varying types of audiences.  Except for the smoked salmon tart, which is probably best at a potluck where you KNOW at least a couple of people like smoked salmon, I do think most of these dishes will work for most potlucks, and while we all love baked brie and nacho dip, somebody else always brings those things.  So here are a few alternatives to spice things up and broaden the potluck horizons.

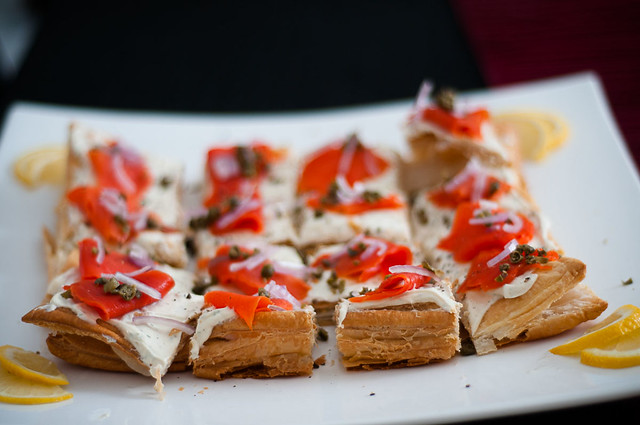
smoked salmon puff pastry tart

Without fail, one of the recipes I get asked for most often is this buffalo chicken dip.  It's not pretty, so I didn't take a photo of my own, though I have shamelessly stolen the one below from the Frank's website (because it's also not my recipe - it's theirs).  This dip is creamy, spicy and filling.  People just gobble it up.  It's also completely and utterly terrible for you, so eat sparingly.


Photo credit: Frank's

Buffalo Chicken Dip
delicious buffalo chicken dip!


photo and recipe credit: Frank's, with a few mods


1 pkg. cream cheese, softened
1/2 cup Frank's red hot sauce
1/2 cup ranch dressing
 2 cups chopped/shredded cooked chicken.
1/2 cup finely shredded aged cheddar

1. Preheat oven to 350°F.

2. Combine all ingredients in a 1-quart baking dish.

3. Bake 20 min. or until mixture is heated through; stir. Serve with crackers or vegetables. (I like it with tortilla chips).

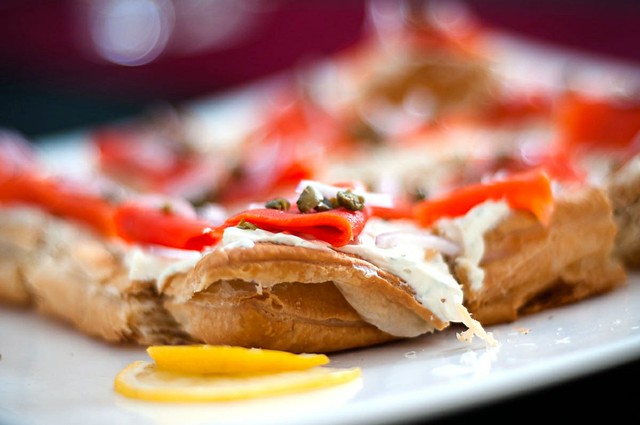
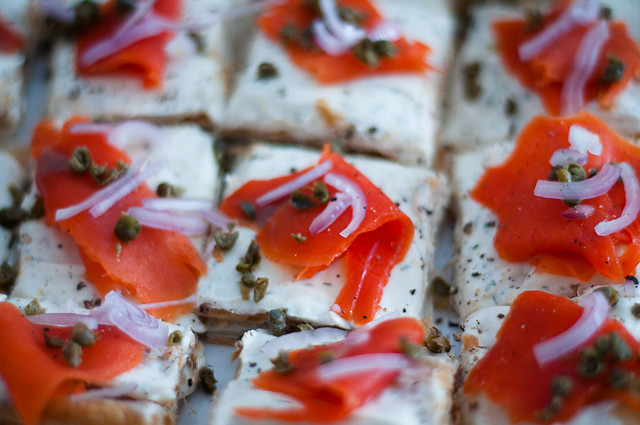
To continue in the appetizer vein, a favourite thing for me to make is this smoked salmon tart.  It looks beautiful and fancy, and the best part is that the actual labour involved is relatively low.  It's not fussy to make.  This is ALWAYS a hit with the smoked salmon lovers, and always avoided by everybody else.

But that's okay, because it means more delicious smoked salmon for me.

Smoked Salmon Tart
smoked salmon puff pastry tart

1 sheet pre-rolled puff pastry (check label - I like PC brand because it is pre-rolled AND made with some real butter - if you don't get pre-rolled, you'll have to give it a go yourself and it could end up not as nicely shaped)
1/2 c high quality sour cream (high fat, and also check the label for stabilizers like carageenan and guar gum - avoid these for the nicest quality and find one that just contains milk/cream and bacterial cultures)
1/2 package cream cheese
1 T dijon mustard
1 clove minced/crushed garlic
dill (fresh or dried - about 2 T/ 2 t respectively)
salt, pepper
4 oz pre-sliced smoked salmon
1 shallot, thinly sliced
2-3 T capers, roughly chopped (otherwise they roll off)
fresh cracked black pepper
lemon slices

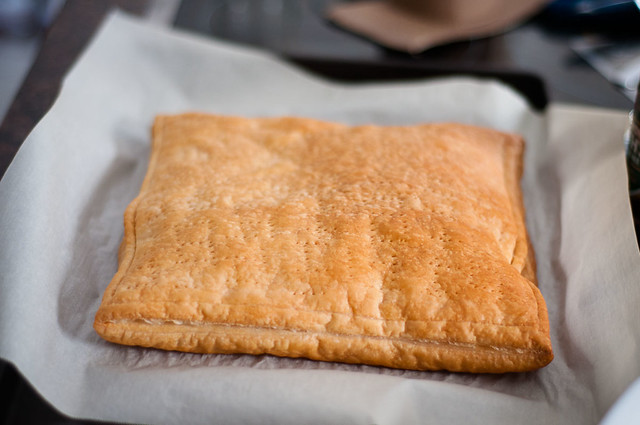
1. Preheat oven to 400 F.  Bake puff pastry sheet for about 20-24 minutes, or until it is nicely golden brown.  You could try pricking it with a fork and scoring it at the edge to keep it from rising, but as you can see, that is a bit of an exercise in futility.  :p

smoked salmon puff pastry tart

2. Let puff pastry cool, and in the meantime, combine the sour cream, cream cheese, mustard, dill, garlic and a bit of salt and pepper.  Once the pastry is cool, spread the cream cheese/sour cream mixture.

3. In terms of presentation, I find it easiest to slice the tart at this point (on a cutting board because it makes a big crumby mess) and carefully transfer the pieces to your serving platter.  I think it slices best into 16 pieces, but you could go smaller (25 pieces) or bigger (9 pieces) depending on the size of your group and how much they like smoked salmon.  Top each slice with a piece of smoked salmon and decorate with slices of shallot, capers and fresh cracked pepper.  Adorn the platter with lemon slices.  Done.

And doesn't it look pretty?

smoked salmon puff pastry tart

My last couple of recipes to share are salads - these recipes are both big crowd pleasers and hold well for a day or two - they are great for picnics or barbecue type potlucks.

The first is a recipe for a kale, wild rice, pomegranate and feta salad that I take ZERO credit for - it's from Lindsay at Pinch of Yum, but I can say that I've made it three times in the last month (pomegranates are in season!) and it's been a hit every time.  I love the texture contrast between the pomegranate, kale, wild rice and nuts, and the salty touches of feta are perfect.  I use pecans in this recipe, because that's usually what I have around the house, and I don't sauté the onion for the dressing (mostly due to laziness). I'm not going to re-post here, because I don't have a lot to add, but look how beautiful it is (and her photos are gorgeous, as you can see here):

gorgeous salad from Pinch of Yum
photo credit: Pinch of Yum

So that's why you should make it.

Last thing I'm sharing is a VERY simple recipe for greek pasta salad - I love this one because it's ever so slightly outside the yucky mayo pasta salad box, and pretty much everyone will try it and enjoy it.  This comes together really quickly and makes a good-sized batch, so it's great for a crowd.  I usually just purchase greek salad dressing (I love Farm Boy's), but you could use your personal favourite greek dressing recipe as well (I love the FB one because the ingredient list is so short that it's pretty much the same as homemade!).

Quick Greek Pasta Salad
greek pasta salad
1 lb box pasta (penne, fusilli, corkscrews or bowties work well)
1 large green pepper
1 large red pepper
1 cucumber
1 small red onion (if it's really pungent, go easy on the onion)
2 cups small tomatoes (grape/cherry - leave them whole if you want your salad to have shelf-life, as cut tomatoes go mushy)
1 cup kalamata olives
200 g crumbled feta (give or take)
1.5 cups greek salad dressing (give or take)

1. Cook pasta according to instructions for al dente.  When the pasta is cooked, rinse it repeatedly in cold water until it is cool and the sticky starch is gone.

2. Chop the peppers, cucumber and onion to bite-sized pieces.

3. Combine the cooled pasta with the chopped vegetables, tomatoes, olives, feta and salad dressing.

And you're done.  It's that easy.  Amounts on this are very forgiving - if you have more or less of a given ingredient, it will still be great (case in point, I was SUPER short on olives for this batch and it was still a hit!).

Anyway, I know this wasn't the most focused post, but hopefully you've got a few ideas now for potlucks (or even just lunches, because these salads are EPIC).

Cheers and thanks for reading!


Tuesday, September 25, 2012

quick and easy - the bbq chicken pasta edition

Pin It Now!

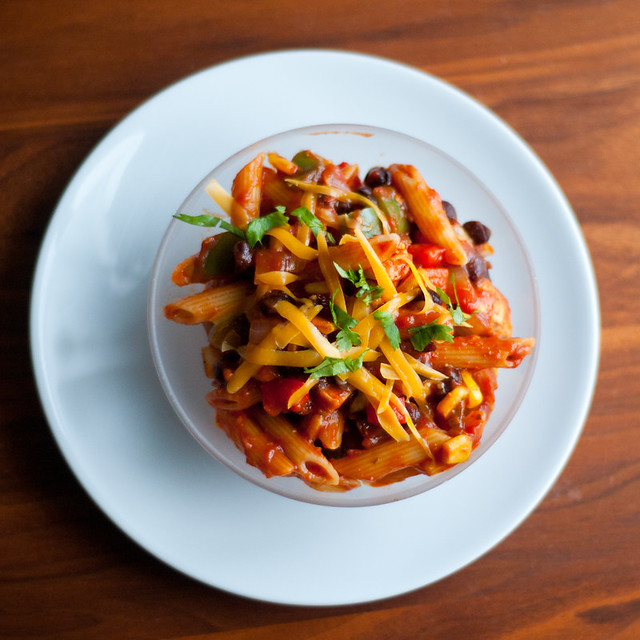
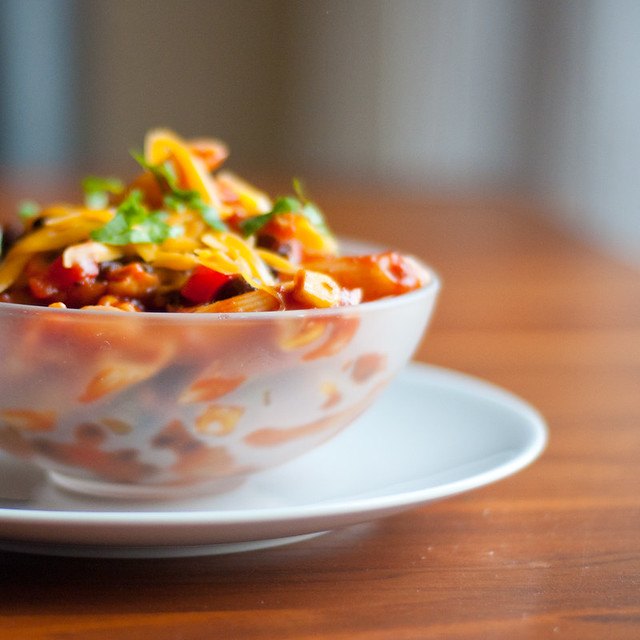
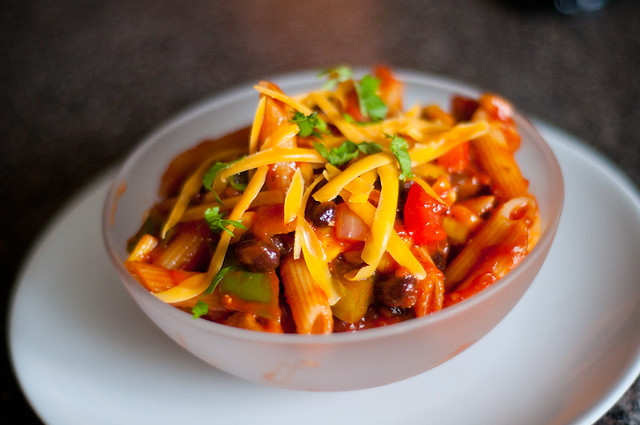
bbq chicken pasta bowl

The tiniest person in my house turned six months old today.  It's crazy to think how quickly time flies.  While I write this, she is happily bouncing up and down in her Jolly Jumper, watching me type and giggling away.  Have you seen those things?  I want one.

But I digress.

Last night, I was going out for Indian food with a few friends, and so I wanted something quick and easy to make for hubs and Little Z.  I also wanted it to make copious amounts of leftovers, so we'd all have something for lunch today too.

I was flipping through books/websites, and then I decided that I'd create a sort of BBQ chicken pasta dish.  Kind of along the idea of a bbq chicken pizza, except in pasta form.  I'd say it was pretty successful, and hit all the right notes (as in, easy, fast, made a lot), but the one thing that was missing was smokiness, and I think that's because I didn't use the most appropriate kind of bbq sauce.  I just used a chicken&rib sauce thta had a lot of sweetness, but none of the smokey/hickory flavour that was needed.  So if you make this, be sure to use a smokey bbq sauce, and you won't regret it.

bbq black bean & chicken pasta bowl
bbq chicken pasta bowl

1 T olive oil
1 lb chicken breast, diced
(montreal steak spice)
1 onion, diced
1 red pepper, diced
1 green pepper, diced
1 large clove garlic, minced
1 can black beans, drained and rinsed
1 cup frozen corn (or fresh or canned)
1 T chili powder
1 can spaghetti sauce (use a fairly plain sauce)
3/4 c bbq sauce (I suggest a smokey one --> look for hickory or mesquite)
1 box of pasta (I used penne; I think wagon wheels would be so cute for this dish though)

Garnish:
grated cheddar
minced cilantro

1. Heat large pasta pot full of water.

bbq chicken pasta bowl

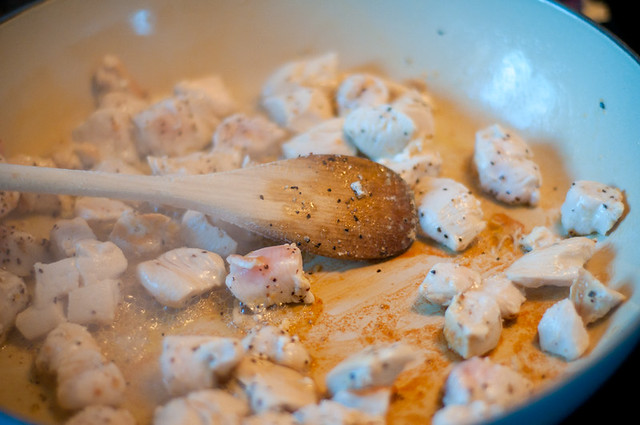
2. While water is heating, in a large, deep skillet, sauté chicken in olive oil over medium heat, until cooked through, sprinkle with a bit of montreal steak spice, if you have it).  Remove chicken from skillet.

bbq chicken pasta bowl

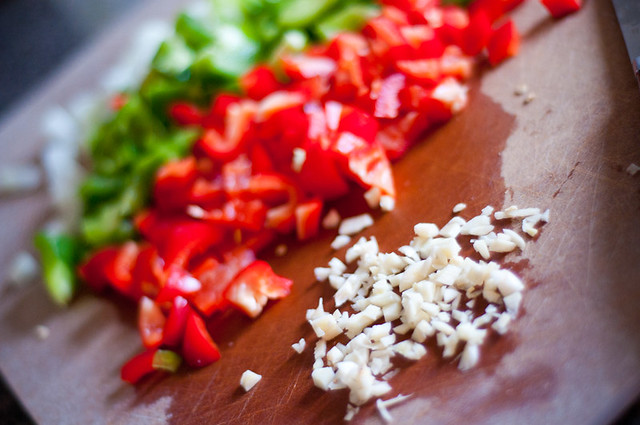
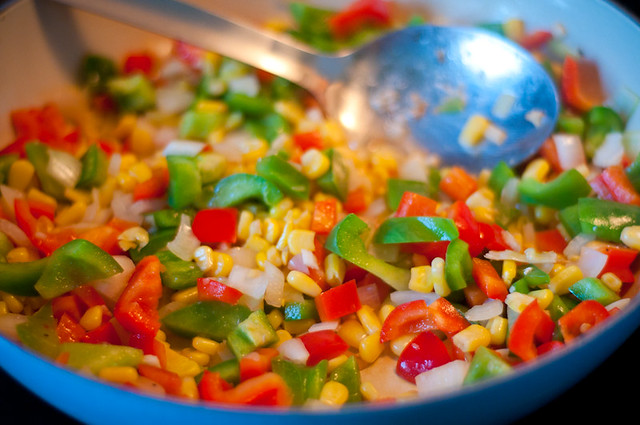
3. To skillet (don't bother to clean it), add a touch more olive oil, then add onion, red pepper, green pepper and garlic.  Saute until veggies are softened (about 5-6 mins).  Add black beans and corn.  Saute a couple more minutes, until corn is heated through.  Stir in chili powder.

bbq chicken pasta bowl

4. By this point, your pasta water is probably boiling.  Add about 1 T salt (optional), and then cook pasta according to directions.  Penne takes 11 minutes.

5. Meanwhile, add spaghetti sauce and bbq sauce to veggie mixture.  Stir.  Return chicken to skillet, stir and turn heat down to low and let simmer while pasta cooks (otherwise you will have exploding tomato sauce all over your stove).

6. Drain pasta, but do not rinse.  Return pasta to pasta pot.  Dump skillet contents in.  Combine.

7. Serve, topped with cheddar and cilantro.

Easy-peasy and pretty delicious.  But like I said, go for a smokey bbq sauce!

bbq chicken pasta bowl

Tuesday, September 04, 2012

pasta + meatballs + pesto + veggies = omg

Pin It Now!


DSC_5794

yes, I know it's been a while since I posted.

I have been cooking (so I totally encourage anyone who wants to know what I'm cooking from day-to-day to like my FB Page - https://www.facebook.com/pages/Definitely-Not-Martha/155084067933484  :)

Since I'm linking to so many recipes from FB, it seemed like overkill to be reposting my versions of them here.

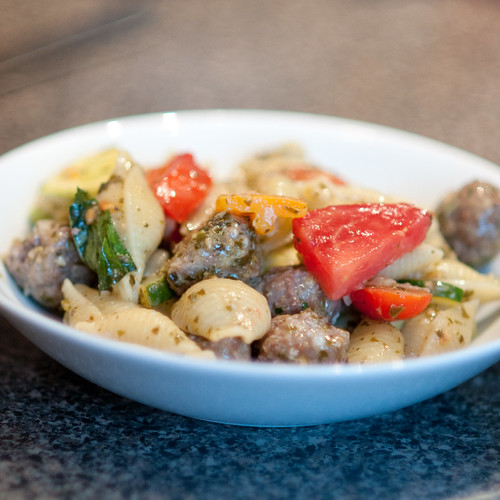
That said, since I created my own 'recipe' (I use the term loosely) tonight, I felt I had to share.  I've been craving pesto for a few days, and last night, I had defrosted a pack of extra-lean ground beef.....so I figured, why not make mini-meatballs, and serve with veggies, pasta and pesto.

As a bonus, I visited the farmers' market on the weekend, so I had a surfeit of luscious (and a bit overripe) heirloom tomatoes, some pattypan squash and a whole whack of basil.  EVEN BETTER.

This is a recipe that lends itself well to substitutions.  You could buy the meatballs.  You could make your own pesto.  Really, any mix of veggies that you have would work well.  It's more the idea of the recipe - pasta + pesto + meatballs + veg.  My version is pretty kick ass though.  Just sayin'

shells with pesto and mini-meatballs
DSC_5799

meatballs:
1 lb extra-lean ground beef
1/2 c finely chopped onion
3 T minced parsley
1/2 c breadcrumbs (I used panko)
1 egg
1 T worcestershire sauce
salt, pepper

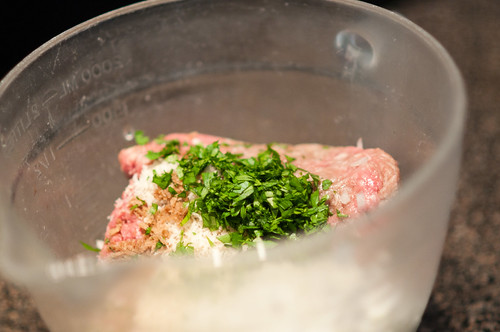
1. Combine all ingredients.

DSC_5786

2. Preheat oven to 400F.
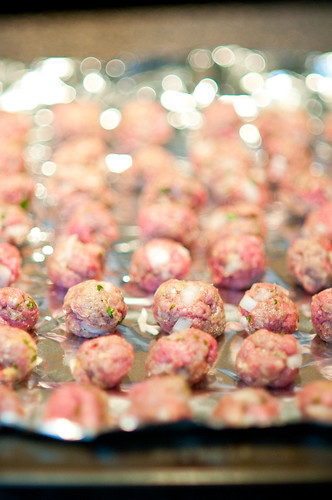
3.  Form into about 50 mini-meatballs and arrange on cookie sheet (I cover mine with foil because I"m lazy and hate handwashing).

DSC_5788

4. Bake for 10 minutes.  Turn the broiler on, and broil for about 2 minutes to brown the tops. (Note: use a digital thermometer to ensure your meatballs have reached at least 71C.  Test 3-4 of the biggest one.  Because nobody wants e.coli!)

everything else:
2 T olive oil
1.5 cups diced onion
3-4 cups sauté veggies (I used zucchini and pattypan squash; but peppers or mushrooms would be great)
2-3 cups chopped tomatoes (or about a pint of halved grape tomatoes....or more)
1 tub bocconcini, chopped into bite-size pieces (optional)
large handful of basil, roughly chopped
1 jar of pesto (I used Classico, which is about 1 cup or so)
1 lb dry pasta (I used large shells....penne, farfalle, etc. would totally work)

1.  While meatballs are baking, put large pot of water on for pasta.
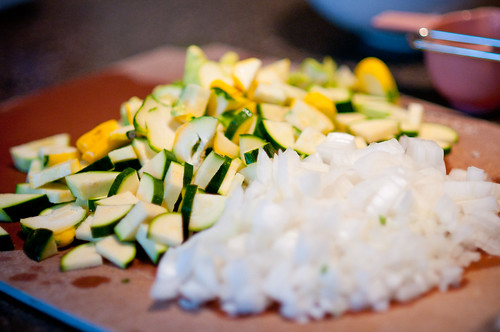
2. Chop your onion and sauté veggies.
DSC_5789

3. In a large skillet, heat olive oil and cook onion and veggies for about 10 minutes or so (until they reach your desired softness).
4. Cook pasta according to package directions (and meanwhile, chop your tomatoes, basil and bocconcini).
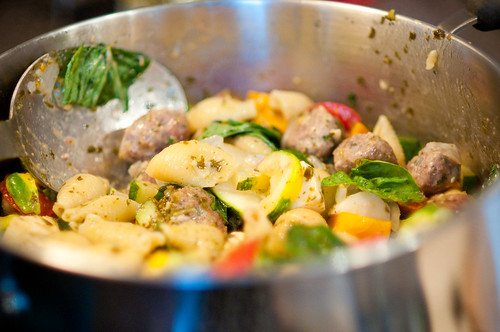
5. Drain pasta (don't rinse).  Return to large pot (turn burner off).  Combine pasta, pesto, meatballs and sautéed veggies.  Gently stir in tomatoes, bocconcini and basil.

DSC_5793

Enjoy.

Because it's freaking AWESOME.  I had two servings.  Hubs had two servings.  Lil Z also had two servings, and there are still 5 containers of leftovers left.  This easily would serve 8 hungry people.  I just loved the heartiness of the pasta and the meatballs, with the freshness of the heirloom tomatoes and basil.  And the chewy melty bites of bocconcini were just the perfect little treat.  If you didn't have bocconcini, you could just grate some of your favourite aged cheese overtop (grana padano, parmigiano, etc.).

Sunday, November 01, 2009

November is NaBloPoMo! how many days do you think I'll last???

Pin It Now!

DSC_3192
For years, I've been hearing about NaNoWriMo (National Novel Writing Month), where participants attempt to write a 50 000 word novel during the month of November. Given that I suck at fiction (and also at lying...as hubs will attest, I am the world's WORST liar), I've never even given participation a second thought. Any novel I would write would be awful. The very idea reminds of the times where I took writing classes in high school. I love writing, but I'm just not all that creative when it comes to plot and character and all the schtuff. I could do description like nobody's business, but just didn't have the creativity to come up with plotlines, etc., that would captivate.

However, the latest thing, if you will, is NaBloPoMo (National Blog Posting Month), which is much more up my alley. As the archives of this blog will attest, I am, at best, an infrequent poster. It isn't to say that I don't want to post, or that I don't have anything to say, but I just seem to have a hard time getting stuff from table to web site, if you catch my drift. So I'm going to give this a try. I certainly won't promise that you'll have photos and lovely descriptions every day, because I don't really cook THAT often. But I'll keep you abreast on what I'm eating, where it came from, and whether or not I liked it. Tonight, I made a pot roast for dinner. It sucked. I'm not posting it.

But my dinner earlier this week was FANTASTIC. Like, you know my aversion to leftovers?

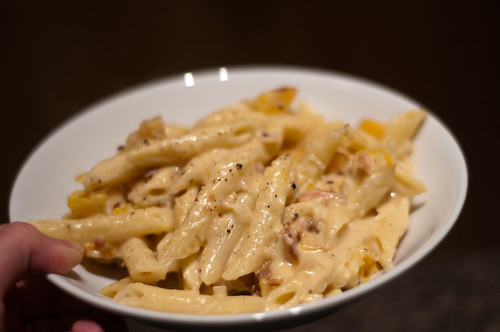
I ate this for lunch THREE days in a row (I stole it from hubs!). It was that good. It's so hearty and delicious and wonderful and yummy that you will all be rushing out to make it. I stole the recipe from Cooking Light, but modified it to make it better. It's awesome. Z loved it, hubs loved it and everyone who saw the pic on facebook demanded the recipe. MMMMMMMMMMMMMMMMM...yummy. I doubled the recipe and baked in a 13x9

Roasted Butternut Squash and Bacon Pasta


Yield: 5 servings


Ingredients
3/4 teaspoon salt, divided
1/2 teaspoon dried rosemary
1/4 teaspoon freshly ground black pepper
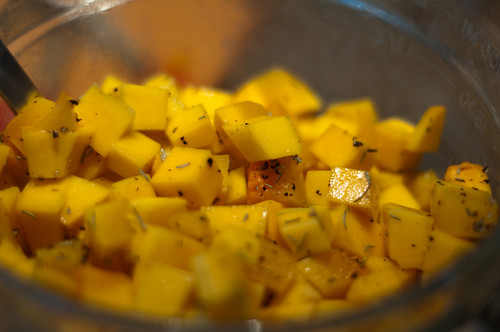
3 cups (1-inch) cubed peeled butternut squash (for a doubled recipe, I used 2 small squash and it worked just about perfectly)
Cooking spray
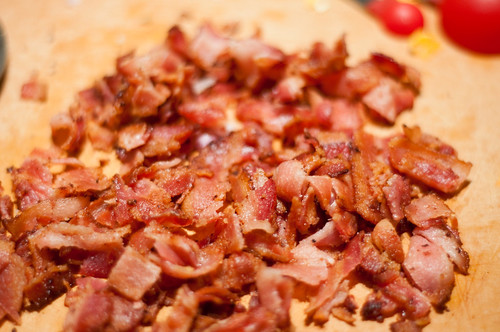
6 sweet hickory-smoked bacon slices (raw)
1 cup thinly sliced shallots
8 ounces uncooked mini penne (tube-shaped pasta)
1/4 cup all-purpose flour
2 cups 2% reduced-fat milk
3/4 cup (3 ounces) shredded sharp provolone cheese (I used 5-year-aged cheddar)
1/3 cup (1 1/2 ounces) grated fresh Parmesan cheese
Preparation
Preheat oven to 425°.

1. Combine 1/4 teaspoon salt, rosemary, and pepper. Place squash on a foil-lined baking sheet coated with cooking spray; sprinkle with salt mixture. Bake at 425° for 45 minutes or until tender and lightly browned. Increase oven temperature to 450°. This will make your house smell AMAZING.

DSC_3170

2. Cook the bacon in a large nonstick skillet over medium heat until crisp. Remove bacon from pan, reserving 1 1/2 teaspoons drippings in pan; crumble bacon.

DSC_3180

Increase heat to medium-high. Add shallots to pan; sauté 8 minutes or until tender. Don't throw out your bacon fat yet!!!

DSC_3179

3. Cook pasta according to the package directions, omitting salt and fat. Drain well.

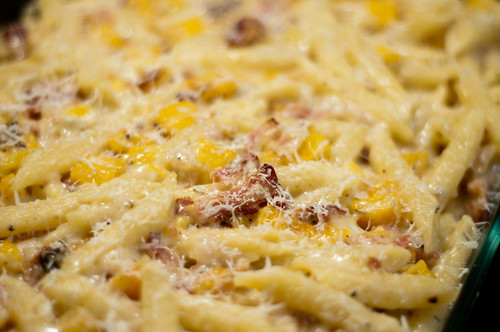
4. Add another 2 T of bacon fat to your shallots (yum!). Combine flour and 1/2 teaspoon salt and add to the shallots over medium-high heat. Let it cook for a couple of minutes. Gradually add milk, stirring constantly with a whisk; bring to a boil. Cook 1 minute or until slightly thick, stirring constantly. Remove from heat. Add provolone (cheddar is better!!!), stirring until cheese melts. Add pasta to cheese mixture, tossing well to combine. Add bacon and squash and stir gently (or you will mash the squash) Spoon pasta mixture into an 11 x 7-inch baking dish lightly coated with cooking spray. Sprinkle evenly with Parmesan cheese. Bake at 450° for 10 minutes or until cheese melts and begins to brown.

DSC_3184

It's so good. YUM. The squash is so rich and with the savoury addition of the rosemary and the smokey bacony goodness...this is the PERFECT fall comfort food. You definitely want to make this ASAFP.

So, here's to day one of NaBloPoMo. Hope we have another fruitful 29 days.

DSC_3195

Tuesday, September 15, 2009

going all martha on you

Pin It Now!

DSC_2293

There are a number of things that I have always found super duper intimidating. They are things that other people do....not things that I could ever (generally) contemplate doing. Things like pickling, preserving, growing and such. And scariest in this list of things that other people do is pasta making.

Why would anyone endeavour to make their own pasta? It brings together all sorts of things that cause me no end of trouble...WHY in the world would I want to roll my own dough. And really, why would I want to expose myself to more dough frustrations than are strictly necessary?

But there were a few pasta making incursions into the edge of my consciousness, leading me to believe that maaaaaybe, just maaaaybe, pasta wasn't going to be this impossible thing I would never be able to achieve. Most specifically, I'm utterly addicted to Iron Chef America. I love this show for so many reasons (not so much the battle: offal that I'm watching right now...yuck!!! YUCK YUCK YUCK. What I love about this show is not just the crazy intense pace, but the fact that you see real chefs at work in the kitchen with real food. There's no magic going on - lots of knives, boards, bowls and grills. They use the same ingredients, and even the same equipment I do. I was entranced when I saw someone (sorry, can't remember who!) just piling flour on the counter and deftly nestling eggs right in the middle to create a perfect pasta. And of course, I saw them using the same mixer I have (actually, mine's nicer than theirs...) to make pasta. And they're doing this AND four other dishes in an hour. It almost seems like I'd imagined that real chefs had some sort of alchemy they were working in the kitchen; like it wouldn't ever be possible for me to cook the same types of things they were cooking. Besides, I adore eating out, so why would I want to imitate the snazzy eats I so enjoy.

Of course, then I started paying for day care. And paying for bus passes again. And all of those myriad expenses that go with returning to work. Net result is a temporary moratorium on meals out. And lots and lots of home cooking.

So....about making pasta.

Normally, I wouldn't. Make pasta, that is. And for this reason, I'd resisted picking up the pasta maker attachment for my beloved kitchenaid. I wasn't sure I would ever use it, and given my dough phobia, I thought it perhaps not the wisest investment for me (I've got the meat grinder already and it's FABULOUS and I've been eyeing the ice cream maker, but until I have more than two pairs of pants that zip...that's also on hold).

Buuuut....the nice people at kitchenaid were kind enough to send a pasta maker attachment to me (full disclosure here, peeps!), so I'll let you know what I thought. Though I can't say that I'll be making pasta all the time now, my pasta actually turned out much better than I thought and I will, in fact, be using it again. Many times. :) Hopefully for a looooong time to come.
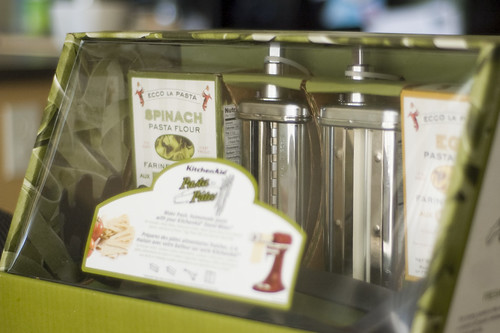
I was actually sent not just the pasta maker, but a complete kit (view below):
DSC_2268

It includes a roller and a cutter (for fettucine), a couple of utensils, two pasta mixes and an instruction manual/recipe book. It's an attractive package, though a bit of a beeeotch to get out of the packaging. The very first time I used it, I do confess to making one of the mixes. It turned out perfectly. But really, if you're going to go to the trouble of making your own pasta, why the heck would you make it from a just-add-water mix? Pasta is NOT that complicated - flour, eggs, salt, water. So don't use a mix. It's like making a perfect, beautifully decorated wedding cake and then the cake underneath is from cake mix. Why labour for hours and give Duncan Hines (or someone else) all the credit????? Weakness.
Anyway, yeah, the mix turned out perfect and was easy to make and tasted great. Not knocking the mix at all. Just the idea of the mix, hehe.

So I've got pictures of my second go at making my own pasta. Step by step. Witness my transition from dough phobic to mistress (dominatrix?) of all things starchy.

I'm going to talk you through the process of actually making the pasta, and I"ll include the recipe at the end. Because I wanted to be as authentic as possible (come on, I was making my OWN PASTA!), I decided to use semolina flour, rather than all-purpose. Semolina is a high protein flour made from durum wheat. Apparently, it's better than regular flour for pasta because it creates a stronger gluten structure. Since I haven't actually made all-purpose flour pasta, I couldn't really tell you the difference.

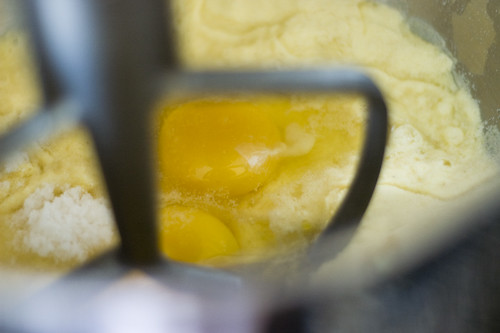
Anyway....you start by mixing the eggs, water, oil, semolina flour and salt (speed 2 with regular beater).

DSC_2276

Then you use the dough hook for a couple of minutes. Then you need it by hand a couple of times too. Then you divide it into eight (aw crap, I read the wheat directions, which have you dividing it in four...that explains why my pasta sheets were like four feet long, lol).

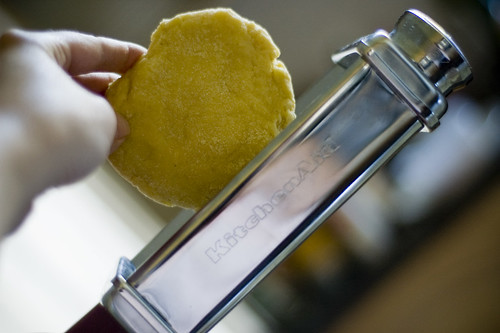
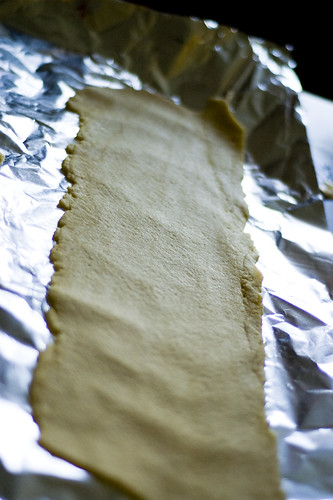
Then the fun begins. With each small piece of dough, roll it out a bit. The instructions said to flatten slightly, but I didn't have a lot of luck with that. I rolled it out to about 1/2" thick. You have to set the roller at the widest setting (number one) and then stick your dough there, turn the speed to 2 and hope something works.

DSC_2277

Mine worked not bad (witness, below):
DSC_2278

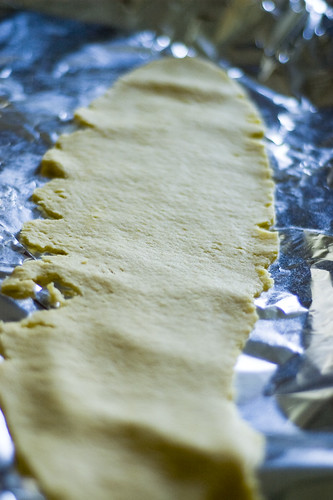
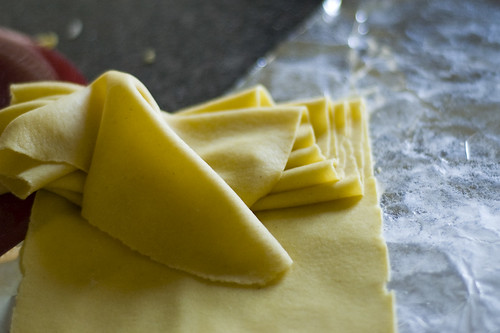
For this first pass through, obviously the dough looks like poop. Ragged, uneven, etc. So you fold it in half and put it through again. You do this a few times until it looks somewhat squarish.

Mine's still a little uneven, but I was impatient, hehe.
DSC_2279

After this, you change the roller setting (one at a time) and keep rolling your pasta until it hits the desired thickness. For fettucine, I like thickness four - something substantial. Plus, it's easier to work with.
DSC_2281

I confess to being transfixed at the watching the sheets stretch and pass through the roller. It was cool.

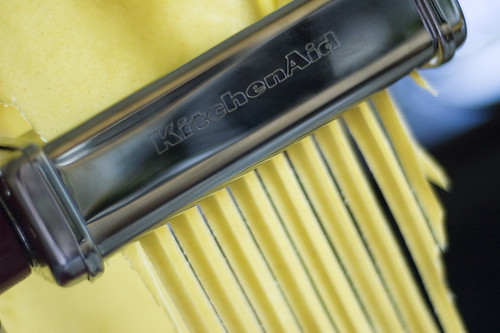
After that, I switched attachments and put the cutter on. Because I was a tool and only divided my dough into 4, my sheets were crazy long. Like longer than Lil Z. I cut them in half before putting them through the cutter. I used speed 2 again. I also had a lot of fun getting this pic (holding pasta in one hand, camera in the other, and just crossing my fingers that my freakishly long arms were long enough for my lens to focus):
DSC_2285

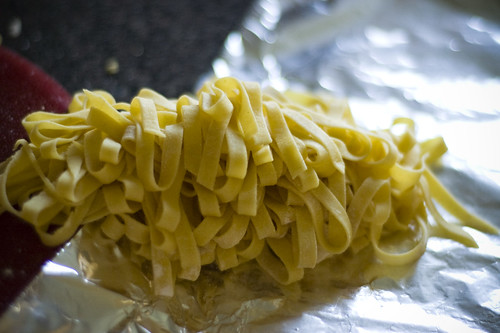
Looks like this coming out:
DSC_2286

I toss in LOTS and LOTS of flour. I couldn't quite figure out how to get my pasta stretched back out, so the flour kept it from becoming a gooey gluey mess before I had a chance to cook it.

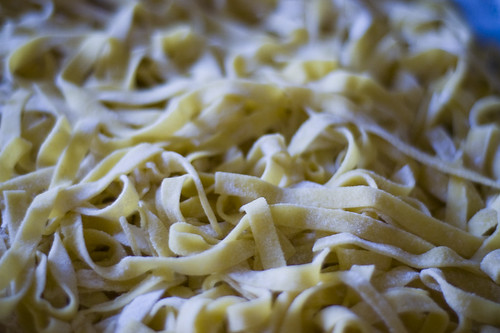
Miles and miles of pasta....
DSC_2289

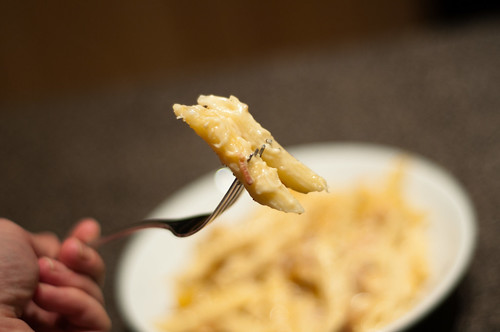
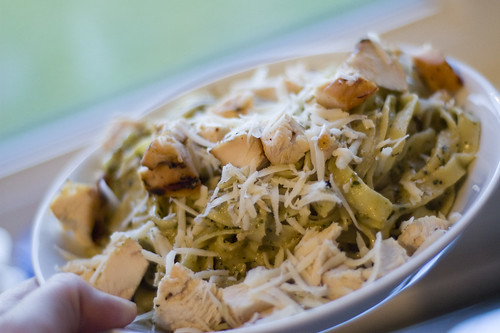
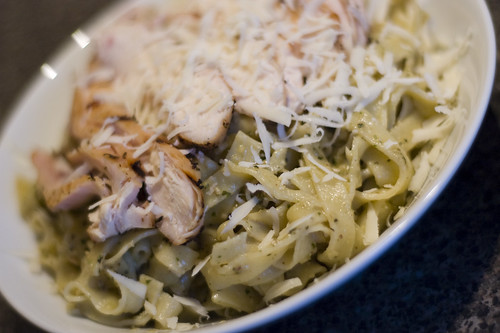
The pasta itself cooks in a snap (about 3 mins - start checking at 2 mins and drain when it hits your desired firmness. After all the work of making my own pasta, I didn't want to drown it in a heavy tomato sauce, so I decided to have a simple pesto cream sauce with grilled chicken. Recipe below.

Pesto Cream Fettucine with Chicken
1 recipe semolina egg pasta, cut into fettucine (below)
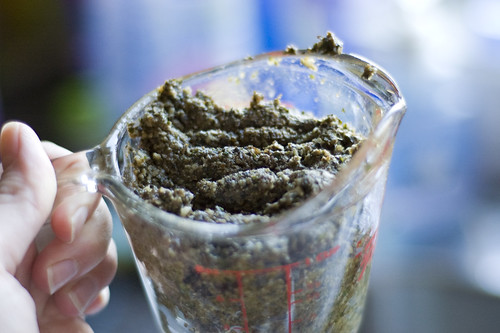
1 cup pesto (my recipe: bunch of basil, 1/3 c pine nuts [i had pecans], 4 cloves garlic, 1 cup parmesan, 1/3 c olive oil, process in food processor. season to taste)

DSC_2290

1 cup creamy stuff (I used evaporated skim milk..no, it's not as good as heavy cream, but it's not bad and high in calcium...light sour cream might work
4 chicken breasts (I brine mine in a mixture of salt, steak spice and sugar for about an hour, then grill)

1. Cook pasta 2-5 minutes.
2. While pasta is cooking, heat pesto and creamy stuff together.
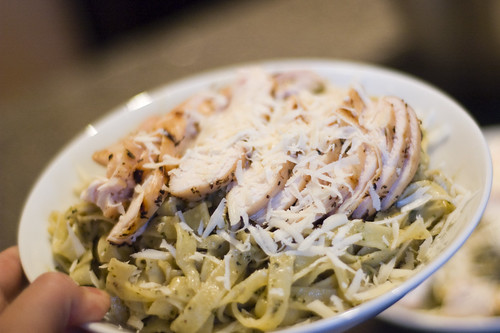
3. Grill chicken, let rest 10 minutes, then slice. Hubs and I are divided on slicing style.
His:
DSC_2297

Hers:
DSC_2299

4. Mix sauce with pasta, serve and top with chicken.

Semolina Egg Pasta
4 eggs (7/8 cup)
2 T water
1 T oil
3 1/3 c. semolina flour
1/2 t salt

1. Place eggs, water, oil, flour and salt in mixer bowl. Attach bowl and flat beater. Mix 30 seconds on speed 2.

2. Change to dough hook. Knead 2 mins on speed 2. Remove from bowl and hand knead for 1-2 mins. Divide into 8 pieces and roll as I explained above.

3. Cook 2-5 minutes in boiling salted water.

DSC_2292

(PS - If you have no machine, you could still make your own pasta. It can definitely be mixed by hand. Check out this link for more instructions: http://recipes.variousstuff.net/technique/Pasta%20by%20Making%20Pasta%20by%20Hand.html ) It certainly wouldn't be my cup of tea, but it is possible. You could also mix by hand and then get a hand-powered pasta roller to roll out your pasta. Labourious, but substantially cheaper than investing in a mixer and pasta roller attachment (they ain't cheap!).

Overall, I would totally recommend this to someone who is looking to add a little more cachet to their cooking arsenal. It was surprisingly easy to use, much less disastrous than I anticipated it would be and the pasta was really good! You do have to be careful not to overcook it as it gets a little too glutinous and soft rather quickly (my first batch was perfect, but I actually overcooked this by a bit). You can find the pasta kit for sale in a few spots, should you be interested (nope, I don't get kickbacks...I already got my kickback, hehe) -
Americans - kit is $149.99 here. Canadians - you can find it here for $199.99.

And as I said, I did receive it as a gift, but hopefully you guys have been reading long enough that you know I'd only give you an honest account of this...bs and pr ramble free. :)
Thanks for reading! My next little project is to use the sheets to make a lasagna and to find rennet tablets somewhere so I can make my own homemade mozzarella....any ideas Ottawa peeps?


Related Posts with Thumbnails