Photobucket - Video and Image Hosting
Showing posts with label easy. Show all posts

Sunday, January 08, 2017

epic easy homemade balsamic dressing

Pin It Now!

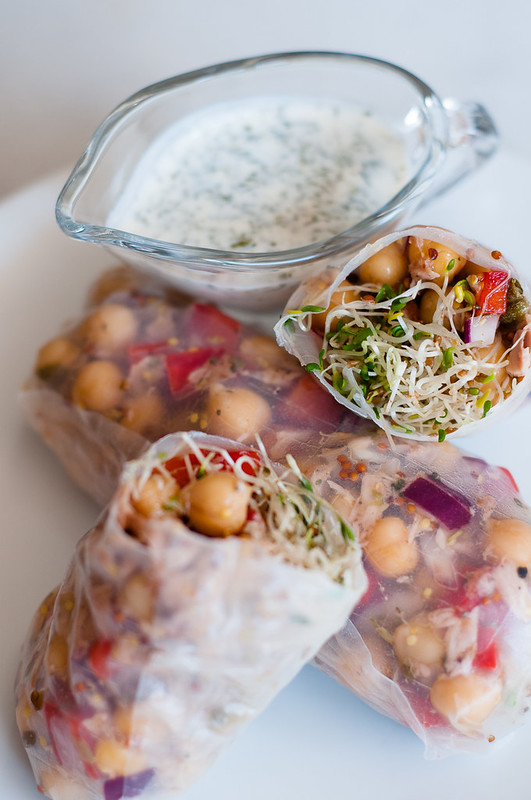
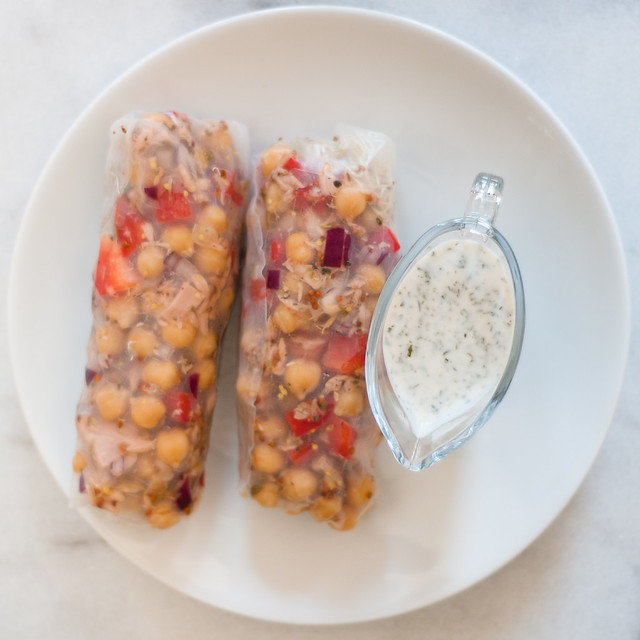
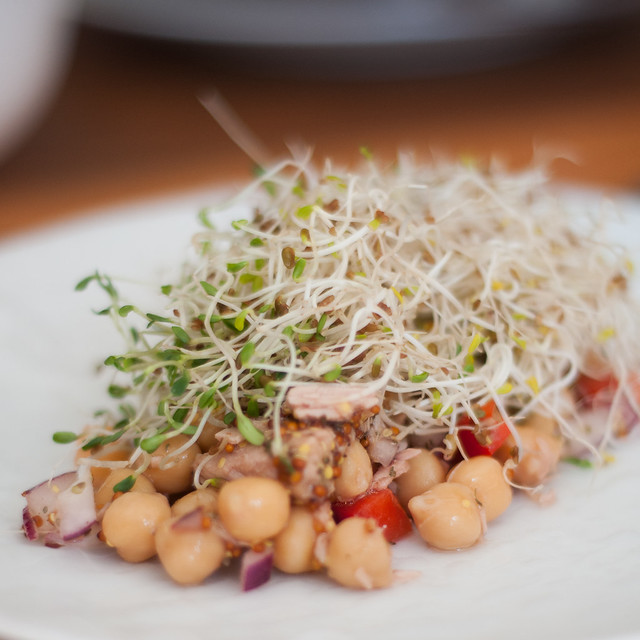
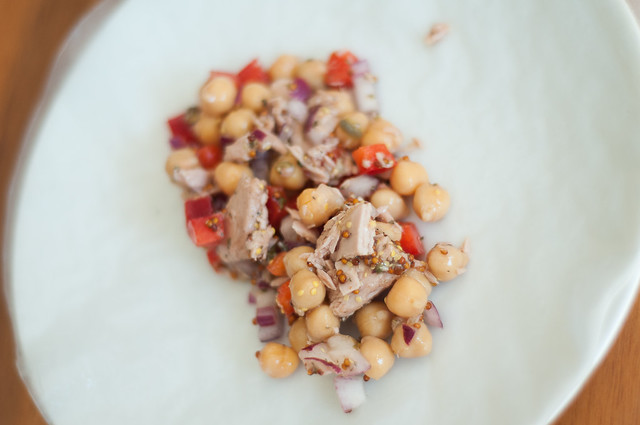
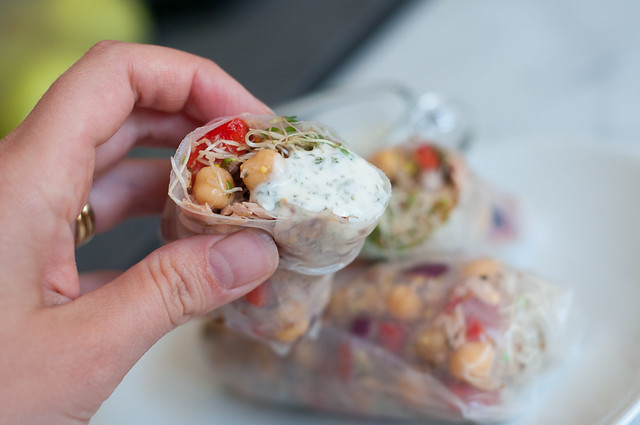
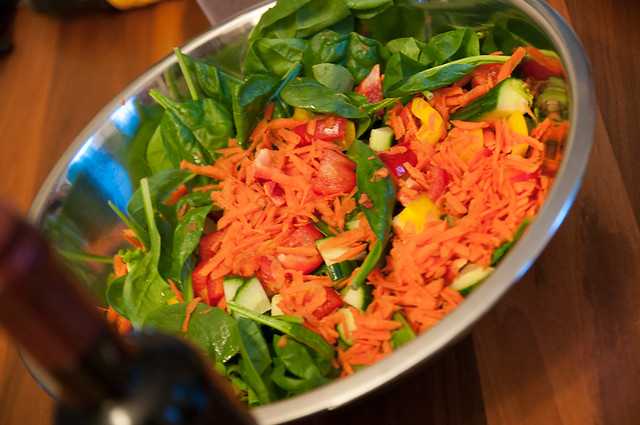
So it's January, and many among us are trying to eat a healthier, more wholesome diet.  And this usually means adding the odd salad (either as a side, or as a meal unto itself).  I actually love giant salad meals, and bulk them up by adding seeds, nuts, beans, tuna, eggs, cheese, etc.


The thing that can often trip you up with salad is the dressing.  So many purchased dressings are full of low-quality, filler ingredients.  Now that lil Z is reading, one of the things we do together is look through nutritional labels, and even at 8, she understands that a long list of ingredients, full of things she can't pronounce, probably isn't the best choice.

Case in point, we took a look at the label on her favourite ranch dressing and sure enough, sugar figured prominently, as did all sorts of fillers and other ingredients.

When I don't have time or energy to make my own dressings, I really love the dressings from my local Farm Boy because they have very simple ingredients and taste great (the no-sodium Greek and the Mediterranean are my favourites, but they are all fabulous).

But when I have my act together, this is by far my favourite salad dressing recipe.  It whisks up fabulously, stays emulsified, and best of all, it tastes amazing with fresh crisp vegetables.  It doesn't take long to make and doesn't require too many ingredients.  It also scales up well (if you really loved it, you could make a bigger batch and keep it in a jar in your fridge) so you could make it ahead, or make it for a crowd.

The quality of your initial ingredients does make a difference - make sure you use a vinegar and an oil that you actually really like, as those are the flavours that will come out in this dressing.


Epic Easy Homemade Balsamic Dressing
(single batch is good for a side salad for four people)

1 T balsamic vinegar
sea salt
pepper
3 T extra virgin olive oil (one you really like the flavour of)
1 T dijon mustard (you can go more generous on this if you like mustard, but I find you need at least 1 T for emulsification)

option: 1 t grainy mustard/moutarde à l'ancienne
option: 1 T minced shallot
option: change up the vinegar and oil for a different flavour profile, but do be sure to keep the 3:1 ratio of oil to vinegar

1. Measure the balsamic vinegar into a small bowl or cup.  Add a sprinkle of sea salt (I use a salt grinder, but I'd estimate I add about 1/4 t).  Give it a quick stir to dissolve the salt (it won't dissolve in oil).  Add some fresh cracked black pepper.  If you're adding shallot, add it now.

2. Add the oil and the mustard(s).  Use a fork or small whisk to combine until it thickens and is emulsified.  If you're doing a larger batch, go ahead and use a mason jar and shake it.

3.  YUM.  Give it a taste and see if it needs more salt or other seasoning.  If it's a bit thick, you can add either some vinegar, or water to thin it out.

Once you've mastered the basic vinaigrette, feel free to experiment with flavoured oils and vinegars, but again, make sure they are flavours you like (i.e., don't use a stale or yucky-tasting oil because you won't like the result).  I don't use super high-end products, but a nice fruity olive oil is totally worth it here.  :)

Tuesday, December 27, 2016

quick and easy breakfast casserole with ham, peppers, potato pancakes and cheese

Pin It Now!


Hard to believe that it's been a year since my last post...I have to confess there have been many occasions when I've been tempted to just shutter the whole blog idea.  I'm still cooking a lot, but with kids, work, and life in general, something just really had to give and it was the blog.  I'm going to try to post more often in 2017 (though I'm sure I've said that before).  Part of my strategy is that I'm going to try to make things a bit easier on myself...I just got a new phone, and it takes pretty decent photos.  So you'll probably see more posts with phone photos.  Not the same as the DSLR, but it's also WAY less hassle for me.


Anyway, back to this recipe.  I actually feel compelled to share it, because I've made it three times in the last month.  And for anyone who knows me, this is a truly, truly exceptional circumstance. It's just really good and really simple, and could not be more perfect for busy holiday times.  

There are a million different breakfast casserole ideas out there, and this one is not hugely groundbreakingly different, but here are the reasons that I like this one:

1. You can throw it together in about 15 minutes.  No pre-frying, nothing complicated.  Some chopping, but not a crazy amount.
2.  The secret ingredient potato pancake crust gives this casserole a little bit of indulgence.  It's not super healthy, but it's so tasty.  An alternative could be to shred your own potatoes and pre-saute them with some grated onion, salt and pepper. But trust me on the potato pancakes.
3. It uses a dozen eggs.  Many of the other casserole recipes out there only use 6-8, so I find they aren't as hearty and filling as this one.  This makes 12 legit servings.
4.  You can either bake this right away or let it sit overnight, which makes it great for either a last minute brunch or for one where you need to plan ahead.  It reheats well too.  The first time I made it, I just cooked it Sunday night and then hubs and I ate it for breakfast all week.  Yum!

I took this photo on my phone!!!!  Not bad, eh?

quick and easy breakfast casserole

12 servings

1 package McCain Potato Pancakes (I'm linking so you can see the package - this post is not sponsored.  I just really like these - 2022 notes, McCain downsized the package so I now buy 2 packages and use 5-6 from the second package as well)
1 onion, diced
1 red pepper, diced
2-3 cups ham, cubed
2 c. shredded cheese (aged is better!!! - 2022 note - Farm Boy Fiesta shredded cheese is amazing in this.
1 dozen eggs
1 c milk
2 T dijon mustard
1/2 t salt
pepper

To assemble:
1. Lightly oil a 9x13 pan.  Line it with the potato pancakes.  I like to have them go up the sides, because the top bit gets extra brown during baking.

2. Sprinkle the diced onion, diced red pepper and ham over top. (An optional step here is that you can saute the onion and peppers, then add the ham and saute it to get some of the excess liquid out. Not necessary, but does improve the results.

3. Put the grated cheese on top.

4. In a large bowl/pitcher, crack the eggs, add the milk, dijon mustard, salt and some pepper.  I like to use my immersion blender here to make things perfectly smooth.  You'll have best results with a well-blended custard mixture.

5. Pour the egg mixture over the casserole.  You can either bake right away or let it sit in the fridge overnight.

To bake:
1. Put the casserole in a cold oven and turn the oven to 325F (this may just be paranoia on my part, but when taking a cold glass pan from the fridge, I prefer to place in a cold oven to avoid sudden temperature changes).

2. Bake about 1 hour-1h15, uncovered.  I like to bake mine in the top third of my oven, because that way the bottom doesn't get super brown, but the top does.  

3. IMPORTANT: The casserole is done when the egg mixture is set, but you shouldn't eat it right away.  Let it cool for at least 15 minutes.  When you cut in right away, it will be watery.  But if you let things settle and cool for a bit, it's perfect.

We had it on Christmas morning and it was great - super easy for me to just pop in the oven and we let it bake while the kids opened their gifts.  :)  


Tuesday, September 22, 2015

six SUPER IMPORTANT reasons you need rice paper wraps in your life (chickpea-tuna rice paper wraps)

Pin It Now!

 I pondered a little bit before settling on my click-baity title.  I'm not sure the world really needs a listicle about rice paper wraps, but I'm feeling relatively inspired about them, so there you go.  For the uninitiated, you can usually find these wraps in the slightly culturally-appropriative "ethnic" aisle of the grocery store.

chickpea tuna rice paper wraps with sprouts

They come in two sizes, with the largest being destined for cold salad rolls (like these ones I posted a few years ago), and the smallest being typically destined for fried spring rolls.  These are two absolutely excellent uses of rice paper, though I have to confess to being completely terrified of deep-frying (I'm still not over a minor kitchen fire incident that included spontaneous ignition of sesame oil [only a couple of tablespoons] a few years ago).  Make-your-own salad rolls are one of my favourite summer dinners.  The kids love them too!  The grocery stores around me stock the Y&Y brand - it seems to be pretty popular.

chickpea tuna rice paper wraps with sprouts

But they can be so much more than that, if you only let them.  I hope you'll forgive the continued theme of cultural appropriation as I try to convince you of why you need these.

So from least to most important, here are the five SUPER IMPORTANT reasons you need rice paper wraps in your life:

1. Rice paper is inexpensive.  A 400g package of rice paper runs about $3. I haven't actually counted how many are in a package, but the Nutrition Facts Table tells me that 3 wraps are 20g, which my super-awesome math skills extrapolate to 60 wraps per 400g package.  That is a tiny fraction of the price of tortillas.  Can't beat that!

chickpea tuna rice paper wraps with sprouts

2. Rice paper doesn't go bad.  Assuming you seal the package, it will last for ages and ages.  Case in point, the package I used for these beautiful wraps had been hiding in my cupboard for at least a year.

chickpea tuna rice paper wraps with sprouts

3. Rice paper only takes about 15 seconds to soften, taking you from questionably-brittle to supple and sticky in mere moments.  This makes itreally quick to use, and a great pantry staple to keep on hand.

4. You can eat lots of it! The nutrition facts don't lie.  Three rice paper wraps contain 70 calories and 105 mg of sodium.  I certainly wouldn't say these are a nutritional powerhouse, BUT the thing about wraps (for me at least), is that it's the flavourful filling that should be the star.  A large wrap has about 200 calories and 300 mg of sodium, and to be honest, I usually want to eat more than one.  One of the things I love most about rice paper wraps is that I can maximize the calories of the tasty fillings (which are usually more nutritious anyway!) and not waste all my calories on bread.

chickpea tuna rice paper wraps with sprouts

5. The texture of rice paper is fantastic.  I've always loved the slightly squishy, slightly chewy feel of biting into a rice paper wrap.  There's something almost magical about the typical basil-vermicelli-shrimp-peanut sauce combination.  They are well-known and popular for a reason.  If you haven't tried them, I highly recommend it!!!

And last, but most important.....

chickpea tuna rice paper wraps with sprouts

6. You can fill rice paper wraps with anything.  As mentioned in reason five, the traditional ingredients of a salad roll are fantastic, and you can't go wrong.  But I decided to have a little fun with mine.  Go nuts and explore.

I mixed together a quick and easy chickpea-tuna salad, paired it with alfalfa sprouts (and as always, a caveat about sprouts and vulnerable populations.....sprouts are definitely a high-risk food and not appropriate for everyone...but I love them, and still enjoy them from time to time.  I also had this fantastic quick homemade greek yogourt salad dressing, and the creamy tanginess was a perfect contrast with the chickpea-tuna salad and the sprouts.  This was a fantastic (but also quick) lunch.  Even if this salad isn't to your taste, I highly, highly encourage you to grab a pack of rice paper and experiment and see what you can do with it.  :)

chickpea tuna rice paper wraps with sprouts

rice paper wraps with tuna-chickpea salad, sprouts and greek yogourt ranch dressing

chickpea-tuna salad

(inspired from this Eating Well salad)

chickpea tuna rice paper wraps with sprouts  1 15- to 19-ounce can chickpeas
1 can water-packed chunk light tuna, drained and flaked
1 large red bell pepper, finely diced
1/2 cup finely chopped red onion
1 t italian seasoning
4 teaspoons capers, rinsed (chop them if they are large) 
2 T lemon juice
1 T extra-virgin olive oil
1 T grainy dijon mustard
Freshly ground pepper, to taste
Salt, to taste

1. Combine the chickpeas, tuna, pepper, onion, italian seasoning, capers, lemon juice, olive oil and mustard.  Taste, then add salt and pepper until satisfied.

Note: this salad is awesome on its own, or over a bed of greens.

greek yogourt ranch dressing
(lightly modified from Cupcakes and Kale Chips)
this recipe is great because it doesn't require a million fresh herbs, so if you have yogourt and a pantry, you can probably make it.  A nice, much-healthier alternative to store-bought ranch!
chickpea tuna rice paper wraps with sprouts
1 c plain greek yogourt
2 T apple cider vinegar
1 T olive oil
salt (to taste)
1/2 t onion powder
1/4 t garlic powder
1 T dried parsley
1 t dried dill
fresh ground pepper (to taste)

1. Combine all the ingredients.  Ideally, wait for a bit for flavour to develop, but even if you can't, this dip is still fantastic.

To assemble the rolls, there are a lot of tutorials out there already, but here are my tips:


  • Only dip the paper in warm water for a few seconds.  It can still be quite stiff when you take it out of the warm water, because the water that remains on it will continue to soften it.  It's a lot easier to work with slightly stiff paper than super duper sticky squishy paper.

  • When wrapping, fold as you would any wrap (fold the ends in, then roll), but with rice paper, you can have a *little* bit of tension as you roll, and get a nice, tight wrap.  If you pull too hard, it will tear, but the good news is, (as mentioned in number 1 above), they are pretty cheap, so you can try again.  You will get the hang of it.
Above all, enjoy!!!  What are your favourite fillings for rice paper?


chickpea tuna rice paper wraps with sprouts

Thursday, January 01, 2015

Thai red curry red lentil-pumpkin soup

Pin It Now!


Thai Red Curry Lentil-Pumpkin Soup

I made this soup a few months ago, and I've been meaning to post it ever since.  This is one of those recipes that came about organically, because I had some extra pumpkin puree to use up (classic result of muffin recipes that use 1 c of pumpkin and cans that hold 3 c of pumpkin).

Thai Red Curry Lentil-Pumpkin Soup

It's a really simple soup, but has great flavour and makes a nice hearty meal.  As always, you can adjust the flavours to suit your palate (2T red curry paste may be a bit spicy for some people).  I really think that the use of fresh herbs elevates the flavour, but it isn't 100% necessary if you don't have them on hand.

thai red curry red lentil-pumpkin soup

Thai Red Curry Lentil-Pumpkin Soup

2T thai red curry paste
1 can coconut milk
1.5 c pumpkin puree (could substitute squash or sweet potato)
1 c red lentils
3 c water/stock
1 package bouillon (if not using stock)
2 T fish sauce
2 T maple syrup
1 T lime juice
3 T fresh basil
3 T cilantro
salt to taste (if needed)

1. In a large pot over medium heat, combine the red curry paste and the coconut milk.

2. Add the pumpkin puree, lentils, water/stock, bouillon (if not using stock) and fish sauce.

3.  Bring to a boil and let it simmer for 15-20 minutes (until lentils are soft).  You may need to add water if it's a bit thick.

4. Add the fresh basil and cilantro, and puree with an immersion blender (or blender or food processor, but IMHO the immersion blender offers the best bang for your buck if you can only have one of these appliances).

5. Taste.  If you love it, don't change it.  I found mine needed a bit of sweetness, so I added some maple syrup (honey or brown sugar would also work), and it needed some acidity (lime juice) and some salt.

This soup is fantastic and is a great way to bring together some relatively inexpensive ingredients into something SUPER delicious.  If you don't have Thai curry paste, you could also use an indian curry powder; no question, it will change the flavour of the soup, but it would still be pretty delicious.

I love freezing my extra soup to have for lazy meals in the future....just make sure to leave some space at the top of your jar, and I would also recommend refrigerating before freezing. I haven't had any issues with jars breaking.

 Thai Red Curry Lentil-Pumpkin Soup

Monday, December 29, 2014

the perfect gift in a jar - curried lentil soup

Pin It Now!

mason jar gift - curried lentil soup

Most good bloggers have wonderful editorial schedules where they publish stuff like this at a time when it will actually be useful (i.e., before Christmas).  I am not one of those bloggers.  Like so many people, I spend the weeks leading up to Christmas running errands, gift shopping, gift wrapping labeling (hubs does the wrapping), making food for the umpteen million potlucks and meals, and attending the zillions of Christmas gatherings.  So I focus on doing rather than writing/posting about doing.

Now that things have calmed down a bit, and I have a few minutes, I wanted to share a gift that I've made for friends/family/co-workers for the last two years.  These soups in a jar are great for so many reasons.

mason jar gift - curried lentil soup

I've done gifts in a jar before (these cowgirl cookies at Christmas a few years ago) and while they are cute, I feel like they aren't the greatest gift to give because they are more about making ME look good than doing something nice for the recipient.  Because making cookies in a jar is actually work, and you need to buy more ingredients (i.e., eggs, butter, milk), and do work.  I don't want to make work for busy people.  I want to SAVE them work.

And also, frankly, the last thing people need after Christmas is more sugar-laden baking.

So enter lentil soup.  I came across the initial recipe on the Good Housekeeping website, but the proportions didn't work right for any of my jars, and it was way too salty.  So I adjusted the proportions a bit and have come up with a great adjustment to the recipe that fits perfectly in 500 mL/2 cup mason jars.  You can easily double it for 1L mason jars, but then it makes a lot of soup, and in keeping with the idea where I want to make people's lives easier, I want to give them just enough to enjoy, but not so much they are overwhelmed with a huge amount of leftovers.

This recipe is awesome.  It's very simple, with no super-processed ingredients.  It's suitable for many different dietary needs (it is naturally gluten-free and nut-free, as well as vegan...though I purchase my ingredients at Bulk Barn, so I would not personally guarantee that *MY* jars are nut-free; if allergens are a concern, you should purchase sealed packages of ingredients that are labeled appropriately).

But best of all, the soup is completely easy for the recipient to make and it tastes fantastic.  I made 17 jars last year.  This year I made 39.  Who knows what next year will bring?

IMG_20141213_235056
I seem to have this terrible habit of unintentionally destroying printers, so I hand-wrote all my labels, and then just decorated the jars with some butcher twine.  It's simple and rustic, and I think it looks nice.  You could go full-Martha on this if you had the time and inclination.

mason jar gift - curried lentil soup

Lentil Soup Mix in a Jar (this will perfectly fill a 500 mL mason jar)
(modified slightly from Good Housekeeping)

6 oz green lentils (just under a cup)
1 T curry powder
3 T dried minced onion
1/2 t garlic powder (I brain-farted and put 1t in all of mine....they are still good!)
1 T dried parsley
1 t kosher salt
5 oz red lentils (just under a cup)
2 T chopped dried apple

 1. Layer ingredients.  I like to put green lentils on the bottom, followed by seasonings, then red lentils, then as much chopped apple as I can fit under the lid.

mason jar gift - curried lentil soup

 2. Cooking instructions - add three jars of water and simmer 30 minutes (this instruction works no matter how you scale the recipe - 6 cups of water for a 500 mL mason jar, or 12 cups for a 1L mason jar).

Some lentils may need to simmer a bit longer, and people may want to puree the soup a bit (or add more water if they want a thinner soup).  But the basic instruction is so simple and requires no extra ingredients and just one pot.

TIP: dried apples rings are a pain in the butt.  I drop mine into a running food processor a few at a time.  If you aren't making a zillion jars, you could just hand chop them, but they are TOUGH.

If curry is not to your liking, here are a few alternate suggestions (omit the curry for all of these):

classic French - 2 t herbes de provence

italian - 1 t italian seasoning (or mix of basil, rosemary and oregano), 2 T chopped sundried tomatoes in lieu of apples

moroccan - 1/2 t cinnamon, 1/4 t cardamom, 1/2 T cumin, dried cilantro in lieu of parsley, dried raisins and apricots in lieu of apples

southwest/mexican - 1 T chili powder, dried cilantro in lieu of parsley.  Omit apples

So better late than never.  Pin this one for next year!  Or just make up a couple of jars for yourself to keep in the pantry for busy nights.

And might I suggest you pair the soup with a quick salad and this fantastic five-minute focaccia for a deliciously satisfying meal.


mason jar gift - curried lentil soup

Monday, October 20, 2014

ghoulish monster pasta - fast and easy hallowe'en dinner

Pin It Now!


ghoulish monster pasta

For the last few weeks, I've become more and more interested in the blog and forum surrounding Mr. Money Mustache (I added a link, so you could go check it out).  While I'm unlikely to ever consider myself mustachian (and frankly, probably also too materialistic), I've really found a lot of sense in his advice and commentary about consumer spending.

ghoulish monster pasta

And that in turn has led me to examine my own spending a little more closely.  And I've realized that, just like so many others, that I do a lot of impulsive and completely unnecessary spending (exhibit A, my shoe collection, exhibit B, my dress collection, and exhibit C, my extensive kitchen gadget and serveware collection.

ghoulish monster pasta

So I'm trying to be a lot smarter about expenditures.  I don't have any dreams of retiring at 40 and being financially independent at that point (read the MMM blog for more of that type of inspiration, because you are unlikely to find it here), but I just wanted to talk about some of the smaller decisions I've made lately to reduce impulsive and unnecessary spending.  :)

ghoulish monster pasta

I've been in contact with Raise.com regarding Hallowe'en related post that mentioned their service, and I was kind of scratching my head as to how to link both Raise.com (a gift card buy and sell site) and Hallowe'en, and also rationalize this under my newfound frugality.  I'm not sure I'm succeeding, but anway. (As an aside, I will start with a bit of bad news first, for my Canadian readers, Raise.com is not currently able to process international orders (that said, you can check out the similar Canadian service of CardSwap.ca)).

I actually find this idea quite frugal - essentially, if you find yourself with a gift card you can't use, rather than buying something you don't actually need, you can sell it.  Likewise, if you're planning to spend money in a given store, you can acquire a giftcard for that store at a discount (which, combined with whatever other offers you can find for that store, can offer you a pretty great deal, particularly when it's money you planned/needed to spend anyway).  I spot a TON of Home Depot gift cards on the site, and saving an additional few per cent off home improvement materials strikes me as a good deal for sure.

ghoulish monster pasta

Of course, it's not a great deal if you spend money you either don't have or didn't plan on spending.

Anyway, so how exactly do we link this to Hallowe'en??? Well, the thing is, I had some ideas for a fun Hallowe'en dish; one that would be super simple to put together and quick enough to get on the table between getting home from work/school and trick or treating, but that would also offer a little bit of fun.

ghoulish monster pasta

This black monster pasta was a HUGE hit with our entire household.  I happened to have the black pasta on hand already (President's Choice Black Label), but will admit it was a total impulse purchase and quite expensive compared to typical pasta; this dish would work equally well with white or whole grain pasta, though I did find the black noodles especially ghoulish.  I also had some of my favourite pesto from Costco on hand, so I used that up (though again, a tomato sauce or cream or rose sauce would also work just as well).  But you have to admit that the green pesto on the black noodles is great for that extra gruesome touch.

ghoulish monster pasta

The 'magic' of this dish is in the eyes.  And initially, I thought I would just purchase some of that thinly sliced cheese (the type sold for sandwiches) and maybe pick up a cookie cutter of some sort to cut it out.  And this is where I heard the voices of frugality in my head.  Pre-sliced cheese is INSANELY expensive (especially when you look at the cost by weight).  And it's ridiculous to buy a cutter for the sole purpose of making a single dish.

ghoulish monster pasta

So I just used mozzarella I had on hand (it was a bit of a pain to cut, as evidenced by the slightly ragged edges) and I cut it with a round tablespoon measure.  And you know what?  It totally worked, and though my photos are maybe not quite as cute as they otherwise could have been, the kids sure did love this pasta.  Pesto is almost always a hit in our house, and the bit of fun with the eyeballs and mouth completely made them giggle and the kids were super excited to eat it.

ghoulish monster pasta

I think they had the most fun talking about the various expressions of the monsters, and experimenting with the various positions of the red pepper mouth.

ghoulish monster pasta

For balance, I served with a nice green salad.  Because vegetables.

ghoulish monster pasta

monster pasta
serves 4-6 (it served our family of four, plus two generous lunches)
ghoulish monster pasta

1 450-500g package pasta (ideally black, but any kind will work)
olive oil
salt
pepper
1/2 c pesto (or other sauce)
white cheese
capers
red pepper

1. Cook pasta according ot package directions.

2. Meanwhile, take thin slices of the cheese, and cut out two circles for each serving.  You want the circles to be about 1" in diameter.  Give or take.  Slice rings from your red pepper, and cut each in half.  I left some of the inner white portion attached because I liked how it gave the monsters character.  I think I may have put too much thought into this.

3. Once you drain the pasta, you can toss it with a touch of olive oil, salt and pepper.  I like to, but it's not necessary.

4. Add the pesto and stir it in.

5. For each serving, top with two circle eyeballs, and then add a caper on top of each.  I made sure that hubs' monster was rolling its eyes. Art imitating life and all that.

6. Add a pepper slice for the mouth.

And you're done.  It's crazy easy.  I know there are much fancier hallowe'eny meals out there, but the beauty of this one is that you actually have the time and ingredients to make it.  Or you can improvise (don't have capers?  Don't buy them just for this.....use olive rings or pickle slices, or anything you can find that gives your monster just that perfect haughty expression.  You could even use tofu instead of cheese, if you wanted).

So all this to say, I'm trying to quiet that little voice in my head that makes me want to go all spendy, and though I made only a couple of small choices regarding this dish, those are the types of small choices that can keep adding up.

ghoulish monster pasta

I think a service like Raise.com (or Cardswap.ca for my Canadian readers) is a great way to get money for something you don't need, and also to get a great deal on your planned spending.

I'm also going to go one step farther and recommend you try to find your local Buy Nothing group.  These are great hyper-local gifting communities - so far I've found that it's a fabulous way of getting rid of things I no longer need, but that are not likely to sell, and you never know what you might come across (though I'm still looking to see if anyone's wanting to get rid of an old tortilla press.....I've banned myself from buying additional gadgets that will be infrequently used, but hey, if someone has one gathering dust......).

ghoulish monster pasta

Cheers - happy selling and gifting and trick or treating.  :)


Thursday, October 16, 2014

orzo with shrimp, feta, summer squash and vermouth

Pin It Now!

shrimp and orzo bake with feta

This is a super simple dinner that I made a while back.  I had meant to share this ages ago, but life being what it is, I got distracted and didn't get to it.

shrimp and orzo bake with feta

So now is the time.

shrimp and orzo bake with feta

This dinner came about because I had some shrimp, feta and fresh organic vegetables from Bryson Farms that needed to be used, and in my googling/pinteresting, I came across this recipe from epicurious, that looked like a great base.

shrimp and orzo bake with feta

The original doesn't call for much in the way of vegetables, which is honestly a problem that I find with a lot of casseroles.  Personally, if I'm going to get everything together in a big dish and bake it, I want to have enough vegetables contained within it that I don't feel guilty if I can't muster my schmidt together enough to make a salad or veggies on the side.  So I almost always add more veggies, and it almost always works out well.

shrimp and orzo bake with feta

In this case, I used fresh tomatoes in lieu of canned, and also added mushrooms and summer and pattypan squash.  They were great!  And the whole casserole had fantastic flavour, so I would recommend this.  Orzo could easily be substituted with rice or quinoa or millet if you preferred.  I have a weakness for orzo though.

shrimp and orzo bake with feta


Orzo with shrimp, feta, zucchini and vermouth
modified from epicurious
serves 6

shrimp and orzo bake with feta

8 ounces orzo (rice-shaped pasta - this is about a 1/2 package)
6 tablespoons olive oil
1 cup crumbled feta cheese
1/4 cup freshly grated Parmesan cheese
2 T dried basil (fresh would be better, but I didn't have any)
1/2 lb mushrooms, chopped
1 lb summer squash/zucchini, diced
1 pound uncooked medium shrimp, peeled, deveined
2 garlic cloves, chopped
14 1/2-ounce can diced tomatoes in juice (I just weighed out 16 ounces of chopped fresh tomatoes)
1/2 cup dry vermouth (or white wine)
2 teaspoons dried oregano

1. Preheat oven to 400°F. Brush 11x7-inch glass baking dish with oil.

2. Cook orzo according to package directions. (when I have time, I like to toast the orzo first --> you can see the technique in this recipe). Drain well and return orzo to same pot. Add 2 tablespoons olive oil, 1/4 cup feta cheese, Parmesan cheese, and 1 T basil and stir.

3. Arrange orzo mixture in casserole dish.

4.  Heat 2 tablespoons oil in large skillet over medium heat. Add shrimp and sauté until slightly pink, about 2 minutes (shrimp will not be cooked completely). Arrange shrimp on top of orzo.

5. Add remaining 2 tablespoons oil to same skillet. Add mushrooms and summer squash/zucchini, garlic and sauté over medium-high heat for 2-3 minutes. Add tomatoes with juice; cook 1 minute. Stir in vermouth and oregano and remaining 1T basil.

6. Simmer uncovered until the tomatoes start to break down about 5-7 minutes. Season sauce to taste with salt and pepper; spoon over shrimp. Add a sprinkle more parmesan.

7. Bake orzo until heated through, about 10 minutes. Sprinkle with remaining feta.

shrimp and orzo bake with feta

This is so simple to make and is delicious.  It could easily be modified to suit what you have on hand - chicken would work (though make sure it's cooked first), and you could mix up the vegetables to include peppers, fennel, eggplant, etc.  This would also be good with goat cheese instead of feta (if you like goat cheese.....which I don't), and I think black olives would probably be a great addition too.

Hope you enjoy!  Thanks for reading.  :)

Thursday, October 09, 2014

peanut butter cookie dough bites from Oh She Glows

Pin It Now!

Ever since I discovered these chocolate chip cookie dough bites, I have been hooked on the concept.  These things are so simple to make (essentially, drop everything in a food processor, combine, mix in some chocolate chips, then roll), and they are incredibly delicious.

vegan peanut butter cookie dough balls

And when you look at the ingredient list, you can actually feel pretty good about enjoying a ball or two with your afternoon coffee - the perfect little pick-me-up to get you through to dinner.

vegan peanut butter cookie dough balls

This recipe is not my own (though I did change the method a bit due to my laziness) - it actually comes from the Oh She Glows cookbook, which is a fantastic book from one of my favourite bloggers.  I am normally hesitant to add to my already too-extensive cookbook collection (especially when the internet is rife with recipes), but I received this one as a birthday gift.

And I have to say, it's an awesome addition that deserves every to be on every shelf.  I've tried quite a few recipes (tex-mex casserole and glo bars) and they have all been fantastic.

These cookie dough bites were a HUGE hit with my mini-foodies and with me too.  Delicious flavour and a wonderful treat to have with an afternoon coffee.

peanut butter cookie dough bites
(from Oh She Glows cookbook; method modified due to laziness)

peanut butter cookie dough bites
1 1/2 cups rolled oats
2 T coconut oil, melted
2 T smooth natural peanut butter
1/4 cup maple syrup
1 t vanilla extract
 1/2 cup almond meal
 1/4 tsp sea salt
 2 tbsp dark chocolate chips

1. Blend the oats in a food processor until they have a flour-like consistency.

2. Add the coconut oil, peanut butter, maple syrup, vanilla, almond meal and salt, and process until the mixture is combined (you don't have to go crazy to make it perfect - just get it to combine.

3. Scrape the batter out of the food processor and into a bowl, then add the chocolate chips. Fold them in to combine.

vegan peanut butter cookie dough balls

4. Roll into balls (I made mine smaller and it made about 25).  Freeze bites for 5-10 minutes (until firm) and store in the fridge.  You can store in the freezer, but they are a bit hard to eat.

So yummy!!!!!!


Related Posts with Thumbnails