Photobucket - Video and Image Hosting

Monday, October 29, 2007

bostini cream pie...daring bakers

Pin It Now!

DSC_3782

For noobs, the Daring Bakers are a group of intrepid food bloggers who tackle a new culinary challenge every month.

This month, we tackled the fun and funky bostini cream pie, hosted by the lovely Mary of alpineberry.

There were parts of this recipe that I really liked, and other parts I wasn't a fan of.

I LOVED the chiffon cake....I would make it again and do it up as a layer cake - orange chiffon is really lovely and delicate and very very yummy.

Don't know as I'd pair it with dark chocolate again. I love dark chocolate, but unless you have something pretty aggressive, it ends up dominating anything you pair it with.....I loved the chocolate glaze, but it didn't really do anything to improve the dessert, I thought.

And last....the custard....I think I goofed 'er up somehow. Like maybe I killed it. It was grainy. Other people didn't really seem to have the same issue, so I'm pretty sure it was me....hehe.

Anyway....here are is my take on this fun new treat - and I halved the recipe and lost (somehow!) all my photos of the making of the custard. But since I sucked at it, I guess that's no big deal, eh? hehe

Bostini Cream Pie
(from Donna Scala & Kurtis Baguley of Bistro Don Giovanni and Scala's Bistro)
Makes 8 generous servings

INGREDIENTS:

Custard

3/4 cup whole milk
2 3/4 tablespoons cornstarch
1 whole egg, beaten
9 egg yolks, beaten
3 3/4 cups heavy whipping cream
1/2 vanilla bean
1/2 cup + 1 tablespoon sugar

Chiffon Cake

1 1/2 cups cake flour
3/4 cup superfine sugar
1 1/3 teaspoons baking powder
1/3 teaspoon salt
1/3 cup canola oil
1/3 cup beaten egg yolks (3 to 4 yolks)
3/4 cup fresh orange juice
1 1/2 tablespoons grated orange zest
1 teaspoon pure vanilla extract
1 cup egg whites (about 8 large)
1 teaspoon cream of tartar

Chocolate Glaze

8 ounces semi or bittersweet chocolate
8 ounces unsalted butter

INSTRUCTIONS

To prepare the custard:

Combine the milk and cornstarch in a bowl; blend until smooth. Whisk in the whole egg and yolks, beating until smooth. Combine the cream, vanilla bean and sugar in a saucepan and carefully bring to a boil. When the mixture just boils, whisk a ladleful into the egg mixture to temper it, then whisk this back into the cream mixture. Cook, stirring constantly, until the mixture is thick enough to coat the back of a spoon. Strain the custard and pour into 8 large custard cups. Refrigerate to chill.

To prepare the chiffon cakes:

Preheat the oven to 325°F. Spray 8 molds with nonstick cooking spray. You may use 7-ounce custard cups, ovenproof wide mugs or even large foil cups. Whatever you use should be the same size as the custard cups.

(I didn't have cute little cake molds, so I baked my halved recipe in a 9x9 pan, and I cooked it for less time). I would like to make it in 2 9x9 pans next time and make an orange cream layer cake. WOOT!

Also - photographic proof that I squeezed my own orange juice...
DSC_3771

Sift the cake flour, sugar, baking powder and salt into a large bowl. Add the oil, egg yolks, orange juice, zest and vanilla. Stir until smooth, but do not overbeat.

It always scares me a little when someone tells me to make something smooth, but not to overbeat it....
DSC_3772

Beat the egg whites until frothy. Add the cream of tartar and beat until soft peaks form. Gently fold the beaten whites into the orange batter. Fill the sprayed molds nearly to the top with the batter.

I was enamoured of my frothy egg whites.
DSC_3773

And even more so with my cake...
DSC_3775

Bake approximately 25 minutes, until the cakes bounce back when lightly pressed with your fingertip. Do not overbake. Remove from the oven and let cool on a wire rack. When completely cool, remove the cakes from the molds. Cover the cakes to keep them moist.

I think I ended up baking my cake for about 18-20 minutes. I started checking early because I keep burning things!
DSC_3776

My much-abused spiegelau wine balloons served me well yet again....one of these days I'll stop using fine crystal as a cookie cutter....
DSC_3778

Also, I know the chiffon cake kicks complete ass because I got to eat these bits...mmmmmmmmmmmmmmmmmmmmmmmmmmmmmmmm
DSC_3777


To prepare the glaze:

Chop the chocolate into small pieces. Place the butter in a saucepan and heat until it is just about to bubble. Remove from the heat; add the chocolate and stir to melt. Pour through a strainer and keep warm.

To assemble:

Cut a thin slice from the top of each cake to create a flat surface. Place a cake flat-side down on top of each custard. Cover the tops with warm chocolate glaze. Serve immediately.

I didn't have to cut anything from my cakes, as they were already quite flat, and perfectly sized to my custard ramekins...
DSC_3780

And then I poured the chocolate over top, garnished with orange zest....and proceeded to eat all the cake, but leave my grainy narsty custard. I want more cake. And perhaps someday I will learn how not to destroy custard....

DSC_3787

Thanks so much for reading! I'm so behind in all my posting - I seriously have like 200 photos I haven't even gone through yet, because life has just been so busy lately. I miss you guys!

Anyway, if you'd like to see other (likely more successful!) renditions of the bostini cream pie, check out the daring bakers blogroll here: http://daringbakersblogroll.blogspot.com/

Saturday, October 20, 2007

thanskgiving chez dnm

Pin It Now!

more cheesecake!

When it comes to food, I'm not a big fan of the traditional. Just because you have been eating the same thing for the last 20 years doesn't necessarily mean that it is a great idea.

I always like to try new things (it can totally be an old recipe, as long as it is new to ME) and frequently tire of eating the same thing all the time....I just think that there is so much amazing food out there.....why always eat the same thing?

So you'll have to understand that when it comes to meals like Thanksgiving, I always feel like I'm stuck in a bit of a conundrum....in my neck of the woods, when the temperature drops, people expect turkey. And they expect the full-meal, roasted, sage-seasoned bird deal. No ifs, ands or buts.

Definitely nothing exciting or new.

So for a couple of years, I caved to expectations and made the bird the old-fashioned way. And to a certain extent, I still do that. There's nothing revolutionary or different about the way I make my turkey.

But one thing I always found absolutely maddening was the fact that you would have to slave away all day to make a super-rich, heavy meal, only to have the hordes descend and gobble it in less time than it took to set the table.

So I've altered the way I serve Thanksgiving without too much mucking around with the traditional flavours. It works out pretty well.

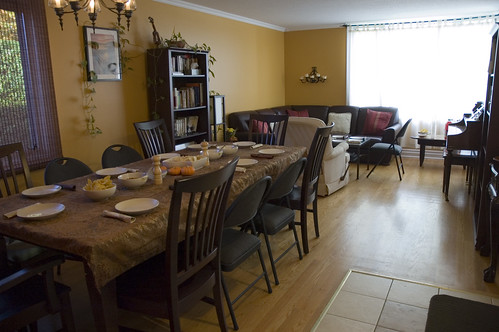
We were just a weeeee little group this year (only 5), but good conversation was there in abundance and I think we all ate our fill.....

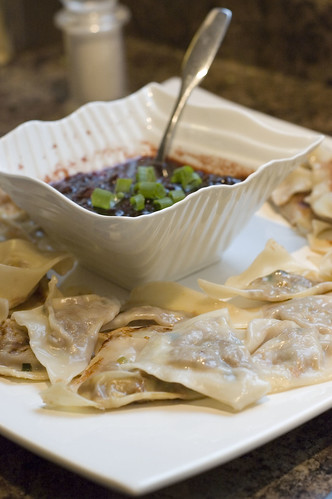
Appetizer: Turkey Dumplings with Cranberry-Soy Sauce
This was a nice light appetizer - good for snacking, good cold and easy enough to make up in advance. YUM.
turkey dumplings with cranberry soy sauce

1 tbsp (15 mL) vegetable oil
1/4 lb (125 g) lean ground turkey
1 1/2 tsp (7 mL) minced ginger
1 1/2 tsp (7 mL) sodium-reduced soy sauce
1/4 t pepper
3/4 cup (175 mL) shredded Savoy or Napa cabbage
1/2 cup (125 mL) shredded carrot
1/4 cup (50 mL) green onions
32 round dumpling or square wonton wrappers
Cornstarch for dusting

Sauce:
1 cup (250 mL) cranberry sauce
2 tbsp (30 mL) sodium-reduced soy sauce
1/2 tsp (2 mL)minced ginger
2 tbsp (30 mL) thinly sliced green onion


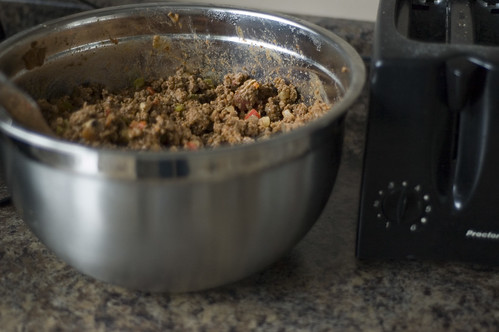
1. Heat 1 tsp (5 mL) vegetable oil in a large nonstick skillet set over medium-high heat. Crumble in turkey and brown well. Add the carrot, cabbage, green onions, ginger, soy sauce, salt and pepper.

2. Cook, stirring for 3 to 4 minutes or until the cabbage is wilted. Remove from heat; cool to room temperature.

3. Moisten two edges of each wonton wrapper with a little water. Place a rounded spoonful of the filling in the centre of each; fold to enclose, pressing to seal. Place on a baking sheet dusted with cornstarch to keep wontons from sticking. Cover with a damp towel. (You can layer them in a container if you put waxed paper between the layers. I made them up the day before).

To Cook:
1. Heat 1 tsp (5 mL) vegetable oil in a large nonstick skillet set over medium heat. Add a single layer of the wontons. Cook, without turning, for 2 minutes or until just golden on the bottom.

2. Add 1/2 cup (125 mL) of water to the skillet. Cover and steam for 6 minutes or until all the water is evaporated and dumplings are tender throughout.

3. Repeat with remaining dumplings, adding more oil to the pan as needed.

Sauce:
Meanwhile, whisk the cranberry sauce with the soy sauce in a small saucepan; set over medium heat. Cook, stirring often until the sauce comes to a boil and is smooth and glossy. Cool slightly; stir in the ginger and green onions.Makes 32 wontons.

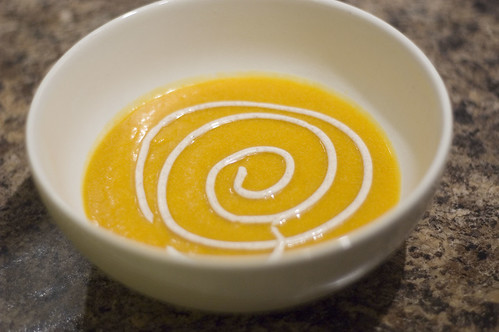
Soup: Roasted Buttercup Squash with Cinnamon Cumin Cream
(yeah, I know, you've seen that before! but it's so good!)
that darn squash soup again

Salad: Mâche with Balsamic Vinaigrette and Goat Cheese
mâche with balsamic and goat cheese

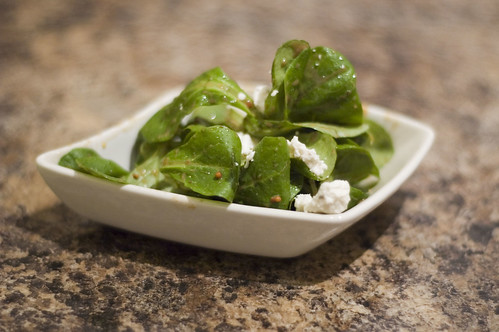
Pretty self-explanatory - take your favourite greens, your favourite vinaigrette (I like 3:1 oil to vinegar with enough mustard to emulsify) and crumble goat cheese over top. I had grand intentions of adding dried cranberries or fresh pomegranate seeds, but had no luck in finding either.)

Dinner: Turkey, Gravy, REEEEALLLY yummy Mashed Potatoes, Sweet Potato Decadence, Stuffing, Green Beans
this was my plate

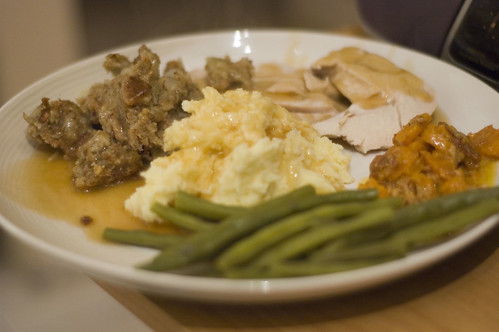
The one thing I don't really love about a turkey dinner is that it really isn't the prettiest thing you can make....colours are a little blah. It was deeeeeeeeeeeeeeeeeeeeeeeeeeeelish though. YUM.

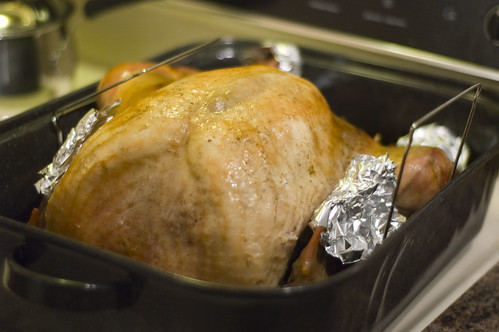
Roasted Turkey with Gravy
that bird is DONE

Ingredients:
1 giant turkey (fresh, preferably, and with giblets)
1/2 bottle dry white wine
2 onions, peeled and halved
3 carrots, cut into large chunks
2-3 stalks celery, cut into large chunks
1 cup chicken broth
1 turkey lifter (if you don't have one, BUY one - you want a rack you can put under your turkey, so when it's all cooked and falling apart, you can lift it out of your pan.....having a centre pin is an added bonus, as it will be easy to get it out from under your cooked bird)
1 meat thermometer (takes the guesswork out!)
oil/melted butter, salt, poultry seasoning and dried sage

1. Wash your turkey, inside and out. Remove any weird looking blobs from inside (aka giblets). Hang onto the giblets.

2. Take a big roasting pan. PUT THE LIFTER IN FIRST. Take your veggies and spread them around the outside of the pan.

3. Put the washed turkey on the roaster. Pour a little white wine into the pan juices, and add enough broth so that the bottom of the pan is covered.

4. If you're stuffing your turkey, fill 'er up. Place the giblets around the outside (along with the veggies). They help flavour the gravy.

5. Mix together your melted butter/oil, along with some of your favourite spices (poultry seasoning is a big hit here).

6. Turn your oven to 350F. Take out the top rack (probably don't have room for it).

7. If you want, you can spread some of the seasoned butter mixture between the skin and the meat. If you're icked out, just brush it on top. Your turkey will still be very good and you won't be up to your elbows in guts.

8. Cover all the exposed bony bits with foil (wings, legs), put the thermometer into the deepest part of the thigh) and then put the turkey in the oven.

9. Every 45 minutes, take the turkey out and baste. Check the temperature every time. Once you see the temperature hit 120F, it won't be long until your turkey is ready. If you still have a lot of time left until dinner, turn the oven as low as 250F (but no lower) to slow down the cooking process.

10. About half an hour before the turkey is to be evicted, take the lid off, brush with oil again, and turn the oven up to 400F so you can get nice, crisp brown skin.

11. When turkey hits the temperature you want (about 170-180F), take it out of the oven and let it rest a few minutes. Stick any potatoes/extra stuffing into the oven at this time....

12. Lift the big bird onto a rimmed platter. Carve as desired.

13. To make gravy, strain your pan juices into a large pot. If you're lacking in juice (probably not), add some wine/broth. In a small bowl, take about 1/4 cup of flour and whisk it together with more wine/broth....slowly whisk it into the gravy mixture and bring to a boil. If you want it darker, add a couple of dashes of soy sauce. Taste and add seasoning if it needs it.

The Best Mashed Potatoes EVER
This recipe is from the best of the best of bridge cookbook and it is awesome. The whole Best of Bridge series is great - things that are simple to make and big on impressing guests. It's not my usual style of recipe, but I'd heard such rave reviews I wanted to make it. I actually had to go out and buy onion salt for it, and it's DELICIOUS. You can make it up the night before and just heat it in the oven while your turkey is resting. The thinner the layer of potatoes in the casserole dish, the better.

Ingredients:
5 lbs. potatoes or 9 large 2.5kg
8 oz. low-fat cream cheese 250g
1 cup fat-free sour cream 250ml
2 tsp. onion salt 10ml
1 tsp. salt 5ml
pinch of pepper
2 Tbsp. butter 30ml

Instructions:
Cook and mash potatoes. Add all ingredients, except butter, and combine. Put into large greased casserole. Dot with butter. Bake, covered, at 350F (180C) for 30 minutes.If making ahead, cover and refrigerate or freeze. Thaw before baking. Serves 10-12

Sweet Potato Decadence
This is really, really bad for you.

2-3 pounds sweet potatoes, peeled and sliced into rounds
6-8 ounces cheese (I like to use gruyère)
3 shallots, minced
3 cloves garlic, minced
2 T butter
2 T flour
1.5 cups whipping cream

1. In a slow cooker (or casserole dish if you are lucky enough to have oven space for this!) sprayed with cooking spray, layer the potatoes with grated cheese.

2. In a small saucepan, melt the butter. Add the shallots and garlic. Cook 3 minutes or so. Add in the flour and whisk together.

3. In a slow stream, add the whipping cream. Bring to a boil.

4. Pour over sweet potato mixture. Cook on low about 4 hours. If you cook longer, the sweet potatoes fall apart (like mine did!). It still tastes great, but presentation is not so nice.

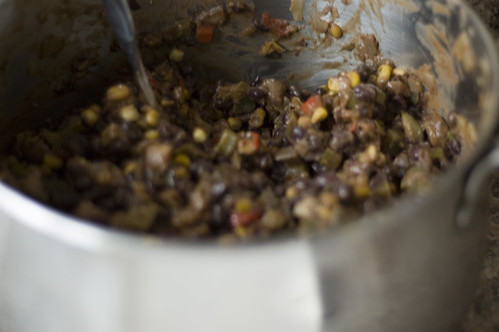
Stuffing - Easy and Old Fashioned
The whole idea that people use boxed stuffing absolutely flabberghasts me. DON'T FREAKING DO IT. EW. I mean....EW.

Stuffing is easy and impossible to mess up. And even if you do somehow mess it up....just drown it in gravy. But please don't use the instant stuff....it's a pretty sad statement on society when people can't even make soggy bread..... hehe

2 loaves bread (1 brown, 1 white), processed into coarse crumbs, or torn into small pieces
3 onions, chopped
3 stalks celery
6-7 cloves garlic
1/2 cup butter (1/4 pound or 1 stick)
chicken broth
poultry seasoning
dried sage
pepper

1. In a skilled, melt the butter. Add the onion, celery and garlic. Cook until vegetables are soft. Add 1 T poultry seasoning and 2 t dried sage.

2. Stir this mixture into the bread (if you like, sprinkle more dried spices over the bread - it's okay to use a lot of spice in this recipe, because it's supposed to be highly aromatic).

3. Add enough broth so the whole mixture is moist. You want it to stick together, but not be sopping wet.

4. You can put it in the bird, or cook it in a casserole dish at about 350F for 20-25 minutes to heat.

This is just plain-jane old fashioned stuffing. It's SUPER easy to make and very yummy.

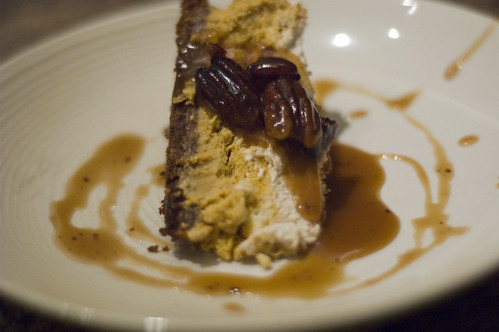
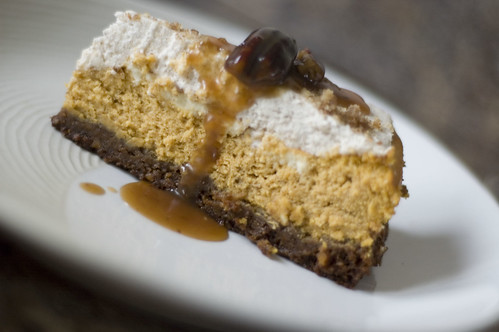
Dessert: Pumpkin Swirl Cheesecake with Whipped Cream and Pecan-Bourbon Caramel Sauce
pumpkin cheesecake with pecan bourbon caramel sauce
INGREDIENTS
1 1/2 cups crushed gingersnap cookies
1/2 cup finely chopped pecans
1/3 cup butter, melted

2 (8 ounce) packages cream cheese, softened
3/4 cup white sugar, divided
1 teaspoon vanilla extract
3 eggs
1 cup canned pumpkin
3/4 teaspoon ground cinnamon
1/4 teaspoon ground cloves
1/4 teaspoon ground nutmeg
1/4 teaspoon ground cardamom

DIRECTIONS
1. Preheat oven to 350F. In a medium bowl, mix together the crushed gingersnap cookies, pecans, and butter. Press into the bottom, and about 1 inch up the sides of a 9 inch springform pan. Bake crust 10 minutes in the preheated oven. Cool.

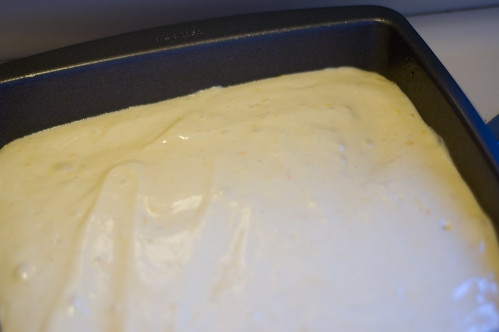
2. In a medium bowl, mix together the cream cheese, 1/2 cup sugar, and vanilla just until smooth. Mix in eggs one at a time, blending well after each. Set aside 1 cup of the mixture. Blend 1/4 cup sugar, pumpkin, cinnamon, and nutmeg into the remaining mixture.

3. Spread the pumpkin flavored batter into the crust, and drop the plain batter by spoonfuls onto the top. Swirl with a knife to create a marbled effect.

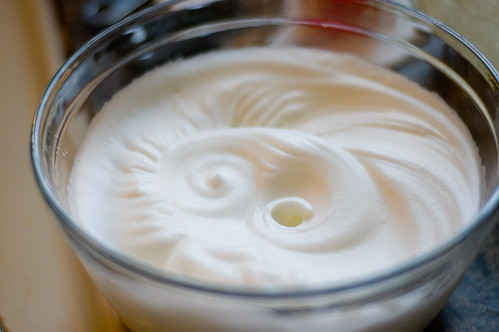
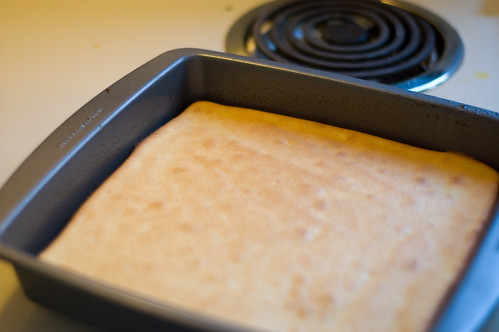
4. Bake 55 minutes in the preheated oven, or until filling is set. Run a knife around the edge of the pan. Cool and remove rim. Chill before serving. ***Personally, my cake was WAY overcooked at 55 minutes. I would start checking it at 45 minutes or so. Mine cracked in the worst way. I ended up covering it up with spiced whipped cream (3/4 cup whipping cream, 2-3 T sugar, 1/2 t cinnamon and 1/4 t ginger). Then sprinkling it with more chopped pecans.

Pecan-Bourbon Caramel Sauce
(this stuff is AWESOME). Definite make again.
1 cup (packed) dark brown sugar
1/2 cup whipping cream
6 T unsalted butter
1/4 c corn syrup
1/2 t salt
3-4 T bourbon
1 cup pecans, toasted

1. Bring sugar, cream, butter, corn syrup and salt to a boil in a deep medium sauce pan. (Whisk until sugar dissolves).

2. Reduce heat to medium, boil 1 minute without stirring. Remove from heat. Stir in bourbon, then pecans.

3. Cool, stirring occasionally.


Thanksgiving dinner kicked ass. I ate so much. Then I ate a lot of turkey in the week that followed - turkey panini (with dijon, chopped shallots and aged cheddar), turkey fried rice, turkey nachos....you name it.

Thank you for reading! Hope all my Canadian readers had a great thanksgiving....and hope this might serve as a bit of inspiration for some of my American friends.....

Sunday, October 14, 2007

crowdsourcing mass cookery

Pin It Now!

There's been a lot of buzz lately about the infinite power of crowdsourcing. While the word is generally a neologism associated with the online world, it can, like so many things, be applied to other aspects of our lives.

Like dinner. :)

I was introduced to this whole concept when asked if I would be interested in helping out with a progressive dinner being planned for some local university students. This involved having 3 successive sessions of 15+ hungry students stopping into my house for some main course.

Or, in the unforgettable words of Queen Ant, "they come, they eat, they leave."

Always eager for new challenges, I accepted. And then I started thinking....wtf. You've all seen photos of my paltry little kitchen...not exactly the stuff of which mass production is made. And I wasn't even sure if it was a place where mass production could be made...you see, I don't even have a huge pot. My biggest pot is a 6qt. Which contains precisely (if you fill it to the brim and don't stir) 24 cups of liquid. And if you start doing the math....24 cups for 50ish people is not really going to satisfy.

So my mind was set aflurry with what exactly I could feed these people. In a group that size, you're bound to have the intersection of all sorts of likes, dislikes, allergies and ideologies.

I had a few thoughts cross my mind (briefly considered lasagna, but it always seems like such a cop-out, and people end up eating way too many bad lasagnas in their lives anyway....I didn't want to go there).

So I came up with burritos. And it worked PERFECTLY. Here are a few of the kick-ass attributes of the burrito:
- it's easy to make
- you can easily make several kinds (hence negating the need for one giant pot for filling)
- trays of burritos are stackable (key when one has only a single fridge)
- you can make the filling in advance
- you can round out the meal with a pot of refried beans and some mexican-seasoned rice
- chips and salsa on the table fill in the blanks

Platters with beef burritos:
that's a lot of burritos

Other things I learned:
- 2 kg of rice was way too much. I filled 3 3-qt corningware casseroles with rice and didn't even go through one. It's a good thing we like rice.
- 5 pounds of ground beef will make 70 burritos (who would have thought?)
- chicken burritos are the most popular, followed by beef, then trailing way behind is bean (even though they are really good!)
- people love fruit punch
- I kinda have fun hosting that many people in a night
- it's faster and easier to make 140 burritos, 6 qts of refried beans and 12 qts of rice than it is to throw a dinner party for 4
- 15 x 24 inch aluminum roasting pans kick ass
- university students are, for the most part, very polite and lovely people (not that I was anticipating otherwise, but it was still nice)
- hubs is the best sous-chef ever (I think he chopped almost everything!)
- the grating function of the food processor is possibly the best thing ever - I grated about 3 pounds of cheese in five minutes!
- labelling everything and listing ingredients might be geeky, but it's appreciated nonetheless
the menu

Timing was overall pretty short between the groups of people (15 minutes) so hubs and I developed a great system for making sure food was hot, safe and fresh....

1. As people arrived, I directed them to serve themselves drinks from a table I had set up (assortment of pop, juice and ice tea).

2. Then they would grab their plate and head in to the kitchen....I would serve their choice of burrito to them (because I could tell them all apart), then they would serve themselves rice and beans.

Platter of beef (topped with red salsa) and chicken (topped with green) burritos:

lots of burritos

Platter of chicken and bean burritos (bean were whole wheat shells):
more burritos


3. As soon as I served the last person, I would take out the next 2 platters of burritos, top them with their respective sauces, dress with cheese and put in the oven at 350F. I would switch positions after 15 minutes. The beans would go back on their burner. The rice would get nuked again (no more space in the oven).

4. As soon as the group left (and most were kind enough to bring the dishes into the kitchen!), hubs would wash the plates (I am lucky enough to have about 40 small dinner plates), I would distribute napkin/flatware (I tasked hubs to rolling up a knife and fork in pretty fall napkins beforehand....made setting the table very quick).

Here is the LR/DR set-up:
the set-up

other spectrum of living room set up

5. Put out all the plates, top up the condiments as needed (hot salsa, milk salsa, sour cream, guacamole and taco chips). I would also add more drinks and ice too.

6. Start the process over again with each group.

So....should any of you ever get a hankering for mass producing a big ole pile of burritos, here are some recipes:

Beef Burritos - this was me catering to the MPV eaters....not spicy, nothing weird in it)
(makes about 70, using 6-inch shells)
5 lbs of ground beef....

5 pounds lean ground beef (I admit it...I caved and bought the stuff that comes in a tube....gross, eh? It actually smelled really good while it was cooking though, so not so bad as I suspected it might be....)
who knew beef came in a tube?  ew

6 cloves garlic
3 cups chopped onion
3 T chili powder
2 cups mild salsa
1 red pepper, chopped
1 green pepper, chopped
2 cups chopped mushrooms

1. In two batches, cook the ground beef THOROUGHLY in a large, deep skillet. When it's mostly cooked, add half the garlic, onion, chili powder, red pepper, green pepper and mushrooms. Cook until meat is really really cooked.

2. Drain in a strainer (oily burritos are NASTY).

3. Dump into a very large bowl (seriously, the bigger the better.....I think my bowl is almost 10 qts).

4. Repeat with remaining beef and veggies.

5. Stir in enough salsa so the mixture is moistened (I bought my salsa in half gallon jugs).

6. I made the filling the day before and just popped the bowl in the fridge.

7. To make burritos, gather your shells, and use about 2 spoonfuls of filling per shell (I was using a regular flatware spoon and scooping). Roll up and place in a pan. (if you're using larger shells, you can fold them properly, but with six-inch shells and making 140 of them all told, I wasn't going to fuss with that).

8. They can be frozen like this, or refrigerated and stacked. To bake, top salsa and cheese (I like to put both in a line down the middle, because it's easier to separate them when they aren't completely glued together with cheese). Bake at 350F for about half an hour.

Chicken and White Bean Burritos with Salsa Verde (for the more adventurous eater)
makes about 33 burritos
chicken, white bean and cheese filling

3 lbs of chicken breast, cooked and chopped into small cubes
2 cans white beans, drained and rinsed
1.5 blocks of light cream cheese, softened
Salsa verde:
24 oz (about 3 cups) of salsa verde (Herdez brand)
3/4 c. coriander
6 cloves garlic
3 cups onions

1. Place the salsa verde, coriander, garlic and onions in the blender and blend away.
2. Mix the chicken, beans, cream cheese and 1.5 cups of the green stuff together.
3. Roll as per beef burritos.
4. To bake, top with the rest of the green stuff, and a bit of cheese. Bake at 350F for 30 minutes.
These ones are a HUGE hit. I've made them before and I'll make them again.

Black Bean and Veggie Burritos - for vegetarians and people who just like food....these are really good!
makes 40-45 burritos
bean burrito filling

3 cups onion, chopped
6 cloves garlic
4 cups chopped mushrooms
2 chopped zucchinis
1 green pepper, chopped
1 red pepper, chopped
3 cans black beans
2 cups corn
1 can red enchilada sauce
1/2 cup chopped coriander
1 T steak spice
1 T cumin
1 t oregano
a few shakes of ancho chile powder
chipotle hot sauce
3-4 T olive oil

1. In a large pot (6 qt!), heat the olive oil over medium heat. Add onion and garlic. Cook until softening. Add the mushrooms, zucchini, and peppers. Cook until the mushrooms are releasing their liquid.

2. Add the beans, corn, enchilada sauce and spices. Continue to cook until almost all of the liquid has evaporated (if your filling is liquidy, you will have soggy, watery burritos....gross).

3. Wait for your filling to cool and stuff burritos.

4. To bake, top with more red enchilada sauce, and then cheese. Bake at 350F for 30 minutes.

Mexican Rice Overdrive
This stuff is okay. Not the best thing in the world, but tasty, and will fill people up. If you were making biiiiiiig burritos, it would be a tasty addition. But feel free to scale it down, eh?

2 kg parboiled rice, uncooked
1 can diced tomatoes
1 T onion salt
2 T chili powder
1 t celery seed
1 T cumin
1 small jar of processed cheese food (aka cheeze whiz....I know...GROSSS....but trust me when I say it gives the rice a really pleasant texture.....I do now how gross it is)
1 T olive oil
1/2 package onion soup mix

1. Cook rice (I did it in two session in my rice cooker).
2. Meanwhile, in a medium sauce pan (3 qt), combine remaining ingredients. Bring to a boil until cheez melts.
3. Mix together with cooked rice (in a GIANT bowl).

Makes about 9 quarts.

Refried Bean Bonanza
3-4 T olive oil
6 onions, chopped
8 cloves garlic
6 cans black beans, drained and rinsed
1 can diced tomatoes
1/2 cup chopped coriander
5-6 chipotle chilies in adobo sauce
1 T cumin
salt

1. Cook onions and garlic thoroughly in a 6 qt pot.
2. Add remaining ingredients. Heat thoroughly and partially mash with a potato masher. You can make them really smooth, but I prefer mine at a 'bean dip' consistency. Taste the mixture and season accordingly.

These beans are very tasty and slightly spicy.

So now I will be eating burritos for the next month.

YUM.

Sorry for the big long break between posts. Thanksgiving chez DNM is up next though.....

Thanks for reading and sticking with me!

Related Posts with Thumbnails