i'm still trying to figure out...
...why we insist on indulging to the point of utter frivolity during this time of year. Think about it....not only are there more parties and outings than at any other time, but there is a redonkulous amount of shopping to get done (I'm totally not done...a proactive more martha-esque type might have been clicking away and online shopping during November...but I'm just not that smart)...and we compound all the family juggling fun by also insisting on baking a huge quantity of a great variety of things that we really don't need to eat.
And colour me guilty.
I did just that. I'm really not much of a baker...I don't have the time or patience for fancy rolled cookies (plus, I HATE pastry) or really anything that's very finicky or multi stepped. I either want something that is a smooth batch process or a quick dump and pour.
I made four different things this year - 2 varieties of eggless cookies (for no reason in particular, other than the fact that I was right out of eggs on the night I decided to cook) and two different types of candy. None of this is difficult, and it's pretty tasty.
For the cookies, I was first inspired by the fragrant lavender I picked up a couple of weeks ago. I made a very simple butter cookie and scented it with lavender. However, to make life simpler for myself, I actually doubled the cookie DOUGH recipe and then divided it in two. The first half, I made into lavender cookies, and the second half, into white chocolate macadamia nut cookies. It's not too much extra work and you end up with more variety - win-win in my books.
They're both decent ocokies. Not like super-duper amazing rave-worthy cookies, but solid, decent cookies. No complaints.
The next two though, EVERYONE will be clamouring for the recipe (or perhaps I flatter myself in thinking this). I made peanut butter cups (yep, just like Reese's) and everyone is always utterly baffled that they can be homemade and they fit neatly into the batch process idea. They are messy to make (my kitchen was totally covered in chocolate), so I like to quadruple the recipe to make it worth my while. Everyone loves them and they are not tough at all.
Last, I made a maple walnut fudge...I'll admit that the maple flavour is totally artificial...and even though I normally despise all things artificial (ESPECIALLY maple)...it's honestly really good. As far as fudge recipes go, I've made this one four times, and I've yet to eff it up. It seems to be foolproof. And the best thing about it is that it's actually a real fudge recipe...I find a lot of people say they are making fudge...but it's totally NOT fudge...it's usually some heinous marshmallow squishy concoction that bears no resemblance whatsoever to fudge.
This is fudge...when I make it, it's a bit on the drier side, and slightly sugary, so it may not be everyone's allegorical fudge...but then again, one really must allow a bit of leeway anyway when applying form theory to creations of a culinary nature.
So all that said, let's get to the recipes. This is going to be a loooooong post.
Eggless Butter Cookie Dough
this is a double batch that will make about 60 cookies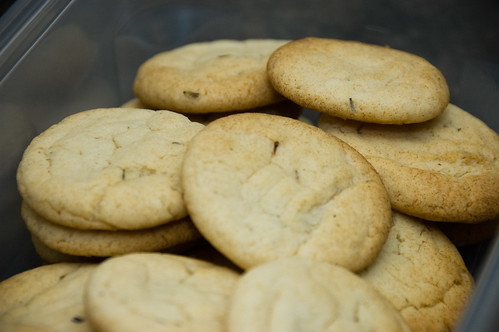
1 cup butter (at room temperature!)
2 cups sugar
1/2 cup sour cream
1 teaspoon vanilla essence
3 cups flour
1/2 t salt (if using unsalted butter)
4 t baking powder
1. Hopefully, you have some sort of electric mixer, or a really strong arm, to help you cream the butter and the sugar together.
2. Beat in the sour cream and the vanilla.
3. Dump in the flour, salt (if using) and baking powder. Purists will tell you that you should sift them all together (blah, blah blah), but trust me, it works just fine (for this recipe, at least) if you just dump and save yourself an extra bowl.
Your dough will be very thick and quite dry (it should stick together, but it won't actually be STICKY).
Now, divide your dough in two. Here, you now have the option to make two (or more) different types of cookies. You could add in things like cinnamon, raisins, chocolate chips, nuts, toffee bits, coconut...whatever you like. I did lavender.
Lavender cookies - add 1.5 t dried lavender that's been lightly pulverized (I used the snazzy new mortar and pestle that my mom passed along to me).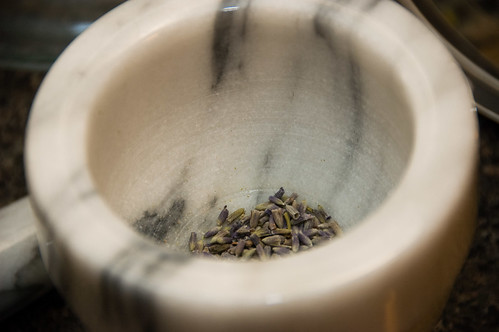
White chocolate macadamia cookies - add 1 cup white chocolate chips and 1 cup lightly toasted macadamia nuts
To make cookies:
1. Preheat oven to 375F. Drop by teaspoons onto a greased baking sheet (I use a silpat). I found the lavender cookies spread out fine on their own, but with the white chocolate cookies, I found it worked better when I flattened them out a bit first).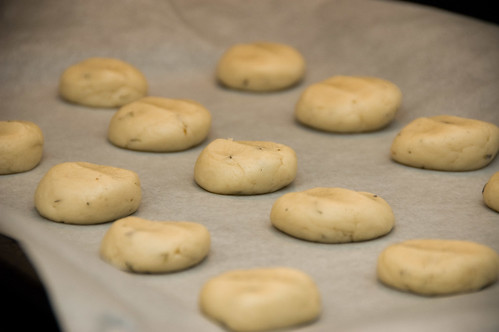
2. Bake for 11-13 minutes (start checking at about 9 minutes though, as this will depend on your oven). I thought I would try to be smart and use the convection feature on my oven, but I clearly have a little learning to do, as all I managed to accomplish was overly browning one side of my cookies.
I totally hate baking.
So that's why the other stuff I made did NOT involve the oven. Everybody makes cookies at Christmas, so that's why it's nice to change it up with something fun like PB cups or fudge.
Homemade Peanut Butter Cups
I quadrupled this recipe and made 100 small ones.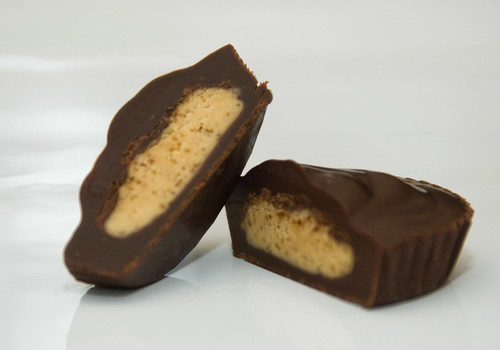
Peanut Butter Mixture:
½ c. peanut butter (natural is best for the most strong peanutty flavour!!)
¼ c. brown sugar (golden is best...I used demerara and do NOT recommend it...too crunchy!)
½ c. icing sugar
1 ½ T. butter (softened)
½ t. vanilla
* if you are using all natural peanut butter and salt-free butter, add a bit of salt too - about 1/4-1/2 t
Chocolate Mixture:
1 300-350g bag of chocolate chips (I used semi-sweet “The Decadent” by PC, but milk
chocolate would work!)
2 T. oil (canola or other flavourless oil)
1. Mix the peanut butter mixture together (this can take a while, it’s quite stiff - if you have a mixer, USE IT). The mixture should stick together, but not be sticky (like a cookie dough). If you find it too dry, add a another scoop of peanut butter.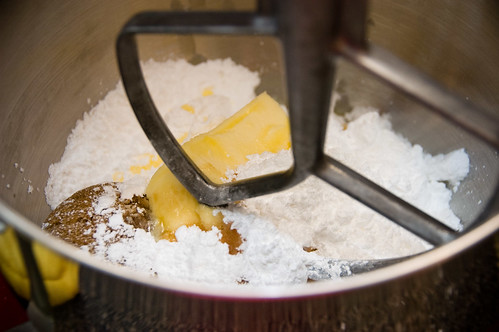
2. Melt the chocolate and oil together. I like to melt chocolate in the microwave, on 50% power. My stove is really bad at low heat (as in, it doesn't really have a LOW setting...everything boils!), so I prefer the control I have with my microwave.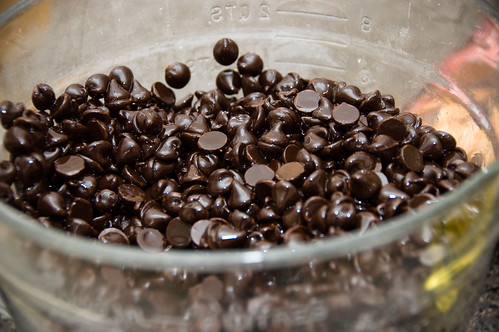
3. While the chocolate is melting, line muffin tins with the paper muffin cups. (this is only if you'r using large paper cups. I personally prefer this recipe using smaller candy cups - it's a better treat size, and they have more structural strength than a paper cup, so you don't need to put them in a muffin tin).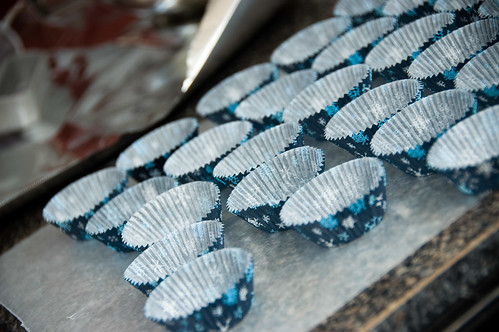
4. Once chocolate is melted, place some chocolate in the bottom of the
cup, using only enough to cover the bottom. I have this snazzy Wilton Icing Gun and I love using it for this - it's so quick and way less messy than using a spoon. You can use a spoon or pour though; hopefully you'll be neater than I am!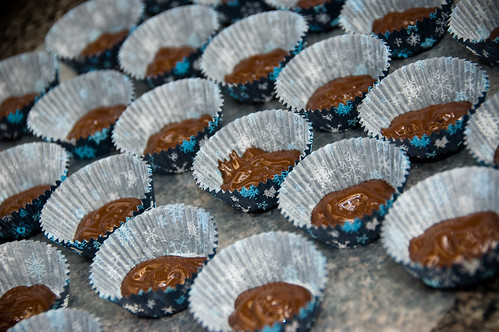
5. Form the peanut butter mixture into patties using your hands, and place these on top of the chocolate. They don't have to be perfect...just decent.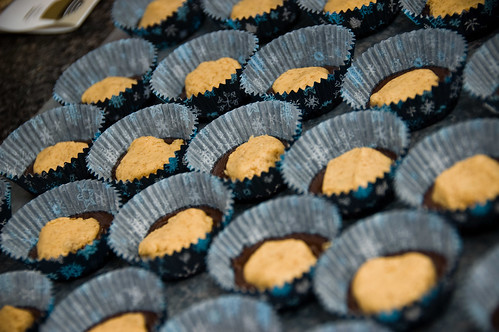
6. Pour chocolate over the peanut butter, enough to cover.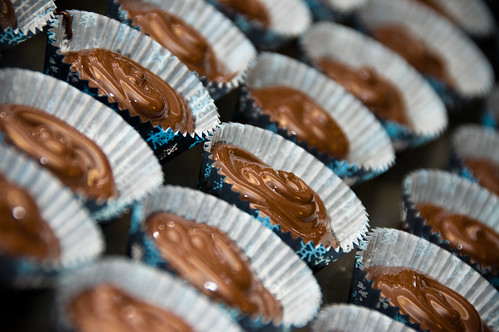
7. Place in fridge to chill for at least 20 minutes (it’s chilled when the chocolate is no longer shiny).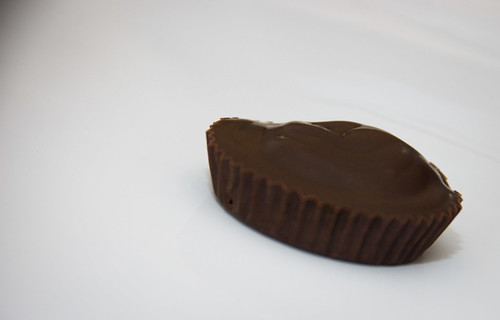
Keep chilled, because the oil in the chocolate lowers the melting point of it by quite a lot. If you are a little more confident in the kitchen, you could forgo the oil, and instead temper the chocolate. I'm way too lazy and this way works just fine. I'm just sayin'
Makes 12-24, depending on how big you like them!
Perfect Maple Walnut Fudge
This recipe is completely stolen from here: http://www.christmas-cookies.com/recipes/recipe377.perfect-maple-walnut-fudge.html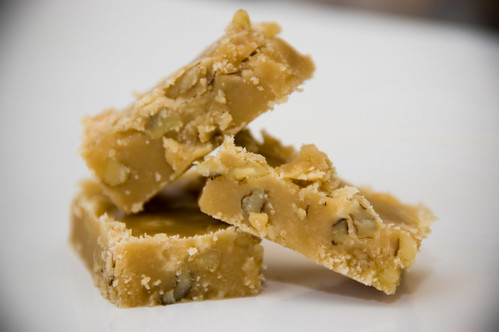
It's so yummy. I could eat it all the time. Every day, even.
I always double it because it's so easy to double and so easy to eat that doubling is practically a necessity. YUM.
2 cups packed brown sugar
half of a 10 oz can evaporated milk - not condensed!
1/2 pound butter (if unsalted, add a pinch of salt)
2 cups powdered (confectioners') sugar
1 cup walnuts
1/2 teaspoon vanilla
1/2 teaspoon maple flavoring (if desired)
1. Butter a 9x13-inch pan and set aside. I have determined lining the pan with foil or paper and buttering that makes cutting and removing much easier.
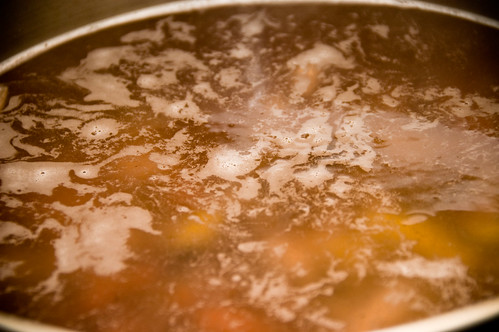
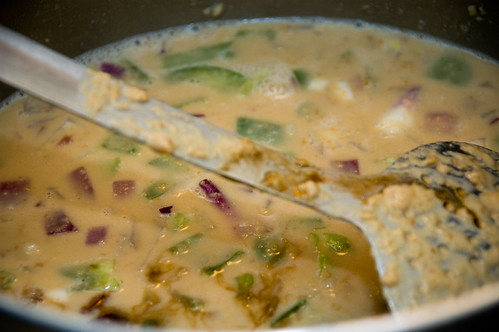
2. In a medium saucepan, combine sugar, butter and milk. Bring to a boil over medium heat. Reduce heat very slightly and boil 10 minutes while stirring constantly. No longer! 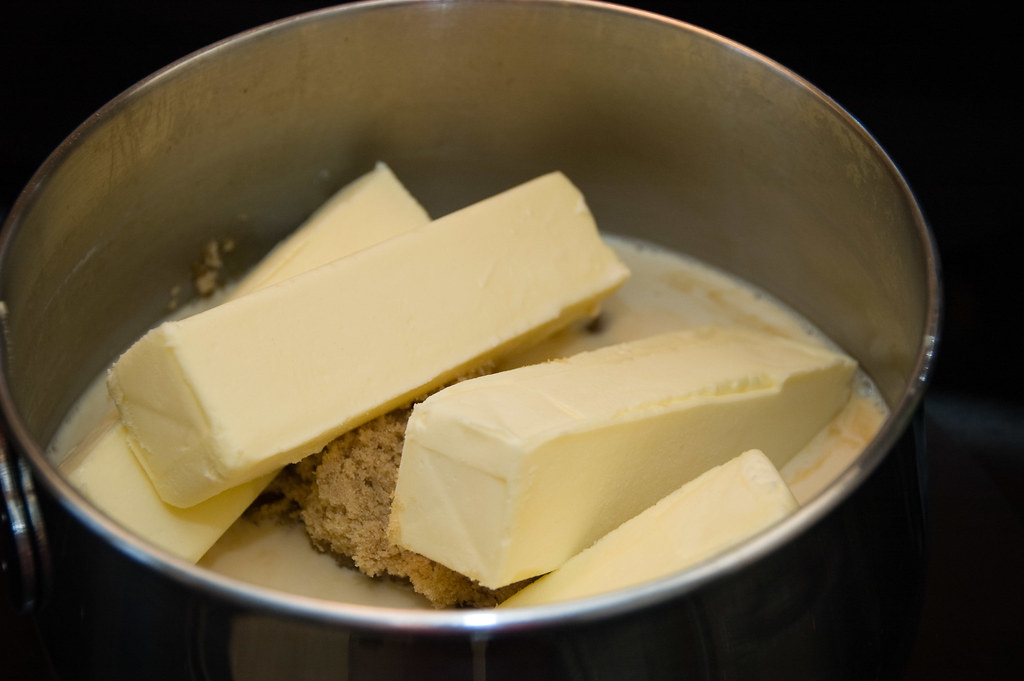
Hopefully you are smarter than I am...I used a 3 qt pan for doubling the recipe, forgetting that boiling sugar tends to grow in volume. I had to transfer to my 6qt pan most of the way through the boiling process. That wasn't pretty, and I have the burns to prove it! Learn from me, kids. You can see here, the sugar is already starting to eke its way closer to the edge....(oh, and cleaning burnt sugar off a smooth top stove REALLY sucks...ughhhhhhh)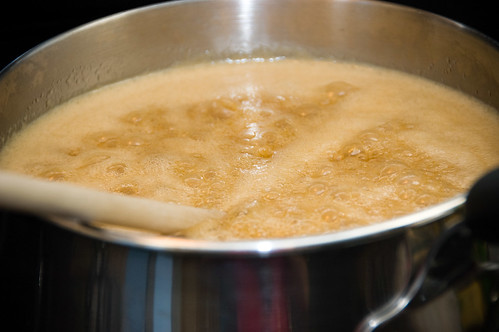
While the sugar is coming to a boil, it's good to put your other ingredients in place so you don't have to fumble or rush later: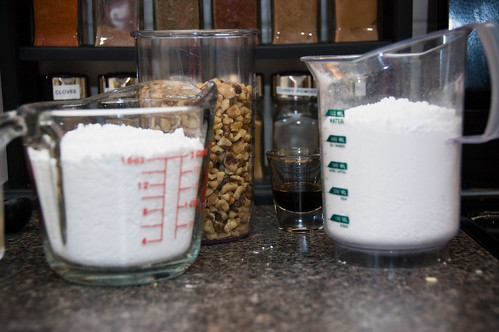
3. Remove from heat and add icing sugar, vanilla and maple flavoring (if using). Mix thoroughly with hand mixer on medium until thick and glossy - just a couple of minutes. 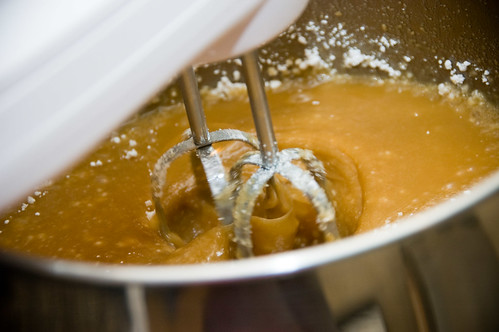
Fold in walnuts and pour in prepared pan.
Refrigerate until set. This keeps perfectly well in the freezer and makes a great gift.
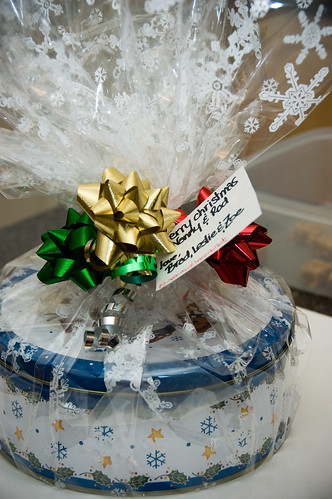
I love giving baking - people are always happy to receive it and the other nice thing about it is that unlike a wrapped gift, it doesn't impart the same sense of "aw-crap-i-didn't-get-you-anything" to its recipient. Golden.
I packaged some up like this: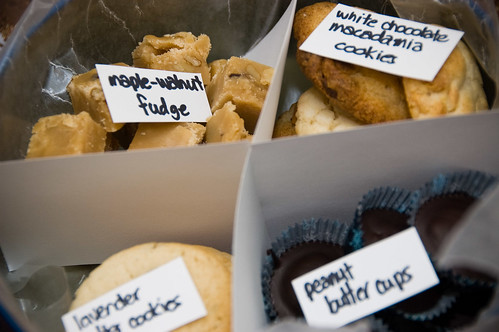
And some, for a few friends, like this (yeah, tthey are already in the fridge):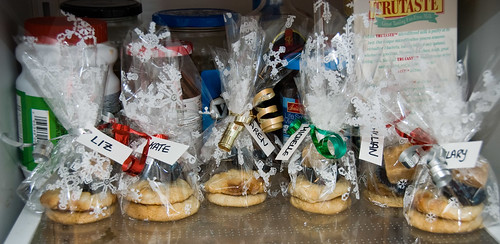
Fun, eh?
Next up on my plate...dinner for 27 at my house. Should be good times. I'm not making everything (that would be crazy!!! I have a four month old, people!), but hopefully my contributions will be successful....
Thanks for reading!