Photobucket - Video and Image Hosting

Friday, June 29, 2007

huge on the internet

Pin It Now!

As I alluded in my strawberry tart entry, I had ulterior motives for selecting a strawberry dessert this past weekend......I have had the good fortune to be recruited to write the odd guest post for the Food for Thought blog (at foodtv.ca). My first entry is now up and running.

Check out my post here: http://www.foodtv.ca/BLOG/archive/2007/06/29/guest-blogger-ottawa-strawberries.aspx

Since I now know what pics they are using, I'll share a few of the other photos I took in my quest for fresh local strawberries.

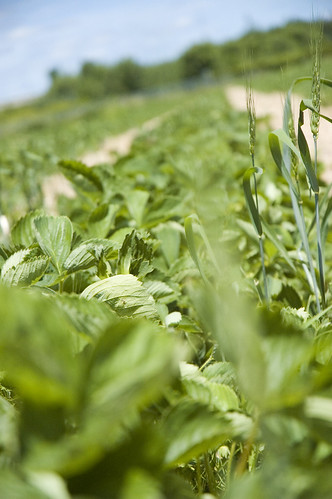
Lovely fields of strawberries:
strawberry fields forever

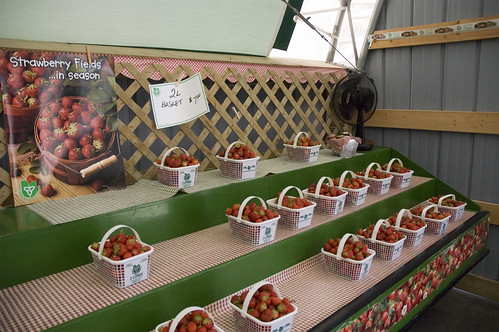
Baskets of taaaasty berries:
strawberries for sale!

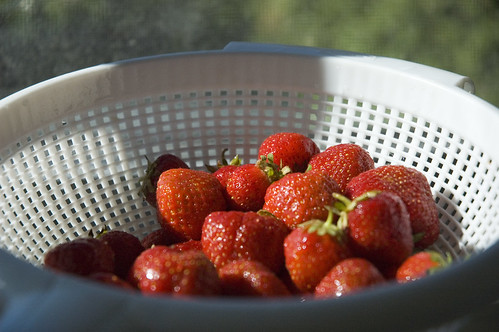
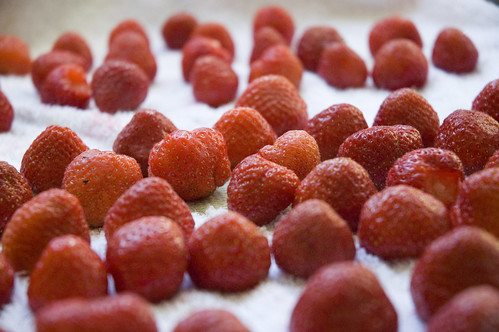
And some freshly washed berries, sparkling in the sunlight....
strawberries in sunlight

So now you should all support your local farmers and buy some. :) And you should also look forward to an upcoming post on the birthday cake I made for myself....1 pound of dark chocolate, 1 pound of butter, 2 cups of whipping cream and 9 eggs. This had better be good......the post should be up on Sunday.

Thanks for reading!!!!!! :)

Thursday, June 28, 2007

now, officially, a DARING BAKER...

Pin It Now!

orangelogo

So this post is a day late, but you have to forgive me because it's my birthday. :)

The Daring Bakers is a group of intrepid food bloggers who, every month, follow a chosen recipe to a TEEEEEEEEEEE and make some crazy, complex carbohydrate laden craziness.

This month, we made bagels. I've made bagels before, using Mark Bittman's recipe. They were awesome a beautifully bagelly.

Sadly, *my* bagels this time were really not at all what a bagel should be. I personally found the recipe a little lean in terms of salt, and the instructions were a bit to vague in terms of how much flour should be used (stating 6-8 cups......unless one uses at least 8 cups, the dough is too bready to really be a true bagel).

Also, I found the yield to be a bit off.....the recipe stated that it would yield 15 (and several of the DB crowd purport to have succeeded here, so clearly this is just a ME thing), but I ended up with FORTY.

I live with just my husband. I don't really eat refined carbs.

So what could I do, but bring all of these lovely little bagels to work.....I ended up with onion, cinnamon and plain bagels and all of them were relatively quick to disappear from my bin. So even though they weren't the best bagels ever, it certainly didn't seem to impede people from eating them.

So here is a little documentary-style footage of my path....

I was quite impressed at the 4T of yeast called for in this recipe!
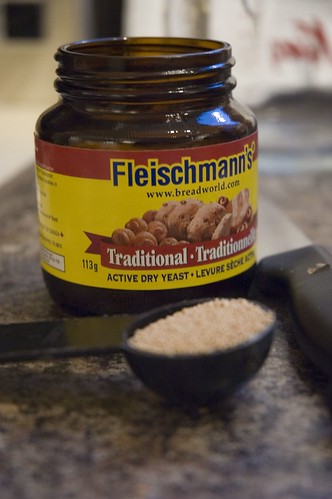
how much yeast again?

I got RIGHT into that dough...DB style!
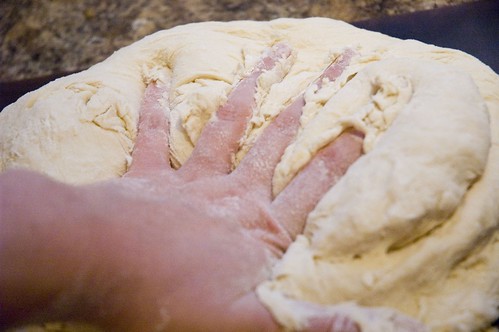
smoooooooooooooosh that dough

Of course, I got antsy and put too many bagels in the pot.....
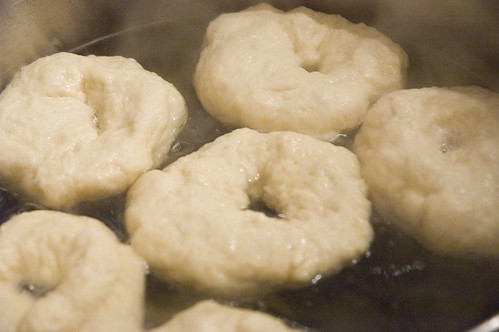
i put too many in the pot

Boiled bagels (at least mine) are not terribly attractive....
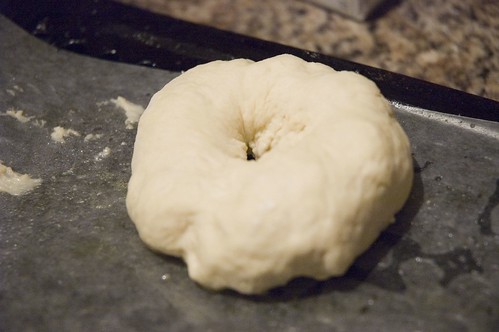
boiled bagel

Some plain and onion bagels on the Silpat (onion didn't turn out very attractive, but was mighty tasty with some garden veggie cream cheese!)
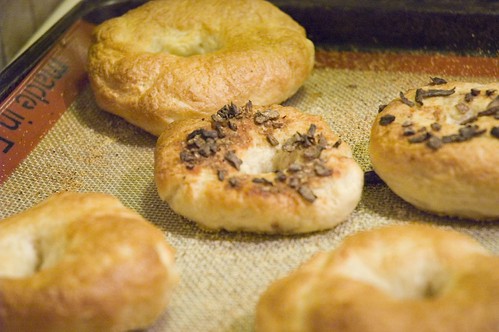
bagels and silpat....they even stuck a bit - i was shocked

And some more tasty bagels!
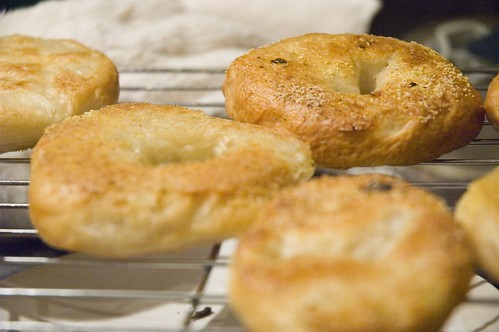
somewhat bagel-y bagels

This has officially been the busiest month....I don't think I've had two seconds to sit down! Is it bad that I just want to crawl into bed and sleeeeeeeeeeeeeeeeeeeeeeeeeeep for the whole long weekend?

Without further ado, here is the fameuse recipe...follow at your peril, for it takes a far more daring baker than I to successfully attain bagel nirvana....and definitely check out some of the blogs on the Daring Baker blogroll!!!!!

Real Honest Jewish Purist's Bagels
Daring Bakers Challenge #7: June 2007

Post Date: Wednesday, June 27th


Allowed Modifications:


Topping of your choice, savory recommended, for the outside of the bagels only. No added ingredients or flavours inside the bagels.
Filling or spread of your choice for the outside of the bagel. (i.e. flavoured cream cheese or peanut butter)
Recipe ingredient exception allowed only if allergy or an ingredient not available or cost prohibitive in your region
Recipe Quantity: Fifteen (15) large, plain, Kosher bagels
Ingredients:


6-8 cups bread (high-gluten) flour
4 tablespoons dry baking yeast
6 tablespoons granulated white sugar or light honey (clover honey is good)
2 teaspoons salt
3 cups hot water
a bit of vegetable oil
1 gallon water
3-5 tablespoons malt syrup or sugar
a few handfuls of cornmeal
Equipment:

large mixing bowl
wire whisk
measuring cups and spoons
wooden mixing spoon
butter knife or baker's dough blade
clean, dry surface for kneading
3 clean, dry kitchen towels
warm, but not hot, place to set dough to rise
large stockpot
slotted spoon
2 baking sheets
How You Do It:


Step 1- Proof Yeast: Pour three cups of hot water into the mixing bowl. The water should be hot, but not so hot that you can't bear to put your fingers in it for several seconds at a time. Add the sugar or honey and stir it with your fingers (a good way to make sure the water is not too hot) or with a wire whisk to dissolve. Sprinkle the yeast over the surface of the water, and stir to dissolve.

Wait about ten minutes for the yeast to begin to revive and grow. Skipping this step could result in your trying to make bagels with dead yeast, which results in bagels so hard and potentially dangerous that they are banned under the terms of the Geneva Convention. You will know that the yeast is okay if it begins to foam and exude a sweetish, slightly beery smell.

Step 2- Make Dough: At this point, add about three cups of flour as well as the 2 tsp of salt to the water and yeast and begin mixing it in. Some people subscribe to the theory that it is easier to tell what's going on with the dough if you use your hands rather than a spoon to mix things into the dough, but others prefer the less physically direct spoon. As an advocate of the bare-knuckles school of baking, I proffer the following advice: clip your fingernails, take off your rings and wristwatch, and wash your hands thoroughly to the elbows, like a surgeon. Then you may dive into the dough with impunity. I generally use my right hand to mix, so that my left is free to add flour and other ingredients and to hold the bowl steady. Left-handed people might find that the reverse works better for them. Having one hand clean and free to perform various tasks works best.

When you have incorporated the first three cups of lour, the dough should begin to become thick-ish. Add more flour, a half-cup or so at a time, and mix each addition thoroughly before adding more flour. As the dough gets thicker, add less and less flour at a time.


Step 3- Knead Dough: Soon you will begin to knead it by hand (if you're using your hands to mix the dough in the first place, this segue is hardly noticeable). If you have a big enough and shallow enough bowl, use it as the kneading bowl, otherwise use that clean, dry, flat counter top or tabletop mentioned in the "Equipment" list above. Sprinkle your work surface or bowl with a handful of flour, put your dough on top, and start kneading. Add bits of flour if necessary to keep the dough from sticking (to your hands, to the bowl or counter top, etc....). Soon you should have a nice stiff dough. It will be quite elastic, but heavy and stiffer than a normal bread dough. Do not make it too dry, however... it should still give easily and stretch easily without tearing.

Step 4- Let Dough Rise: Place the dough in a lightly oiled bowl, and cover with one of your clean kitchen towels, dampened somewhat by getting it wet and then wringing it out thoroughly. If you swish the dough around in the bowl, you can get the whole ball of dough covered with a very thin film of oil, which will keep it from drying out.

Place the bowl with the dough in it in a dry, warm (but not hot) place, free from drafts. Allow it to rise until doubled in volume. Some people try to accelerate rising by putting the dough in the oven, where the pilot lights keep the temperature slightly elevated. If it's cold in your kitchen, you can try this, but remember to leave the oven door open or it may become too hot and begin to kill the yeast and cook the dough. An ambient temperature of about 80 degrees Fahrenheit (25 Centigrades) is ideal for rising dough.

Step 5- Prepare Water for Bagels: While the dough is rising, fill your stockpot with about a gallon of water and set it on the fire to boil. When it reaches a boil, add the malt syrup or sugar and reduce the heat so that the water just barely simmers; the surface of the water should hardly move.

Step 6- Form Bagels: Once the dough has risen, turn it onto your work surface, punch it down, and divide immediately into as many hunks as you want to make bagels. For this recipe, you will probably end up with about 15 bagels, so you will divide the dough into 15 roughly even-sized hunks. Begin forming the bagels. There are two schools of thought on this. One method of bagel formation involves shaping the dough into a rough sphere, then poking a hole through the middle with a finger and then pulling at the dough around the hole to make the bagel. This is the hole-centric method. The dough-centric method involves making a long cylindrical "snake" of dough and wrapping it around your hand into a loop and mashing the ends together. Whatever you like to do is fine. DO NOT, however, give in to the temptation of using a doughnut or cookie cutter to shape your bagels. This will push them out of the realm of Jewish Bagel Authenticity and give them a distinctly Protestant air. The bagels will not be perfectly shaped. They will not be symmetrical. This is normal. This is okay. Enjoy the diversity. Just like snowflakes, no two genuine bagels are exactly alike.

Step 7- Pre-heat Oven: Begin to preheat the oven to 400 degrees Fahrenheit.

Step 8- Half Proof and Boil Bagels: Once the bagels are formed, let them sit for about 10 minutes. They will begin to rise slightly. Ideally, they will rise by about one-fourth volume... a technique called "half-proofing" the dough. At the end of the half-proofing, drop the bagels into the simmering water one by one. You don't want to crowd them, and so there should only be two or three bagels simmering at any given time. The bagels should sink first, then gracefully float to the top of the simmering water. If they float, it's not a big deal, but it does mean that you'll have a somewhat more bready (and less bagely) texture. Let the bagel simmer for about three minutes, then turn them over with a skimmer or a slotted spoon. Simmer another three minutes, and then lift the bagels out of the water and set them on a clean kitchen towel that has been spread on the counter top for this purpose. The bagels should be pretty and shiny, thanks to the malt syrup or sugar in the boiling water.

Step 9- Bake Bagels: Once all the bagels have been boiled, prepare your baking sheets by sprinkling them with cornmeal. Then arrange the bagels on the prepared baking sheets and put them in the oven. Let them bake for about 25 minutes, then remove from the oven, turn them over and put them back in the oven to finish baking for about ten minutes more. This will help to prevent flat-bottomed bagels.

Remove from the oven and cool on wire racks, or on a dry clean towels if you have no racks. Do not attempt to cut them until they are cool... hot bagels slice abominably and you'll end up with a wadded mass of bagel pulp. Don't do it.

How To Customize Outside of Bagels: After boiling but before baking, brush the bagels with a wash made of 1 egg white and 3 tablespoons ice water beaten together. Sprinkle with the topping of your choice: poppy, sesame, or caraway seeds, toasted onion or raw garlic bits, salt or whatever you like. Just remember that bagels are essentially a savory baked good, not a sweet one, and so things like fruit and sweet spices are really rather out of place.
Wednesday, June 27, 2007

and last but not least….

Pin It Now!

dinner time

The main course! This is the final installment in the ‘birthday dinner for two’ series! As mentioned previously, hubs and I couldn’t decide what we wanted for dinner……beef or fish? After a little banter back and forth (the problem was that we both wanted both……) we decided to just get both. :) Easy-peasy.

Both tuna and fillet mignon are such that not a lot needs to be done. You don’t need a lot of fancy sauce, or complex marinades to get the best out of these ingredients. In keeping with our theme of simplicity, I opted to buy the best quality ingredients I could, and just let them speak for themselves. And they did. It was fantabulous.

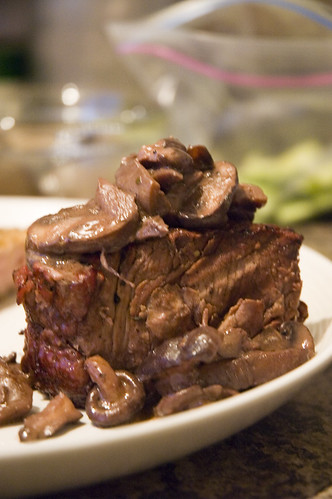
Fillet Mignon with Truffled Wild Mushrooms
1 fillet mignon (I had a giant one – nearly a pound!)
6 oz mixed mushrooms
1 T olive oil
2 t garlic (or 2 cloves)
½ c. red wine
½ c. beef broth
¼ c. light cream
½ t truffle oil
steak spice (salt free)

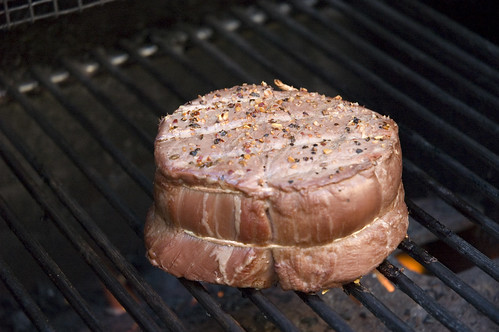
1. Sprinkle steak spice on fillet. Grill fillet to desired doneness (ours took a heck of a long time……..). Do not overcook it as it will become very tough.
giant fillet mignon

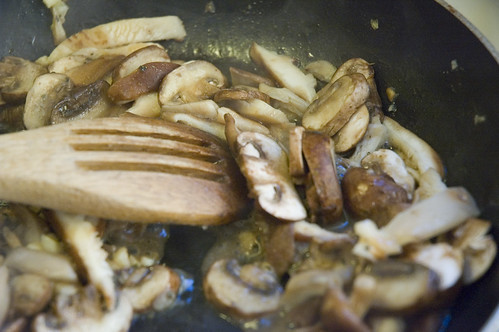
2. Meanwhile, head olive oil in a small skillet over medium heat. Add garlic and mushrooms. Let mushrooms cook about 7 minutes, until they are almost finished releasing their juices.
mixed wild mushrooms

3. Add wine and broth. Allow to simmer until almost evaporated.

4. Stir in cream and truffle oil (you could use whipping cream, but I’m trying to be healthy……)….

5. Top fillet mignon with mushrooms. YUM.
perfectly grilled tenderloin

Sesame-crusted tuna with wasabi drizzle
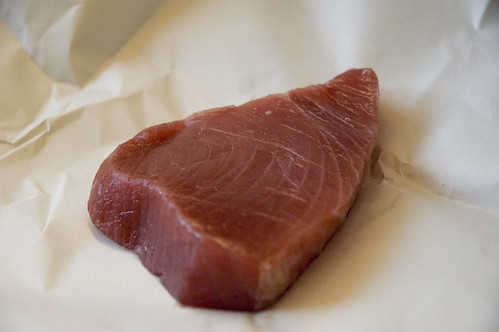
tuna steak

1 large tuna steak (sushi-grade – it should be a deep, deep pink)
sesame seeds (black ones would be even better)

Sauce:
1.5 T wasabi powder
¼ c. water
1 t sesame oil
1 T canola oil
2 T honey
1 t minced ginger
2 T soy sauce

1. Combine wasabi powder with water until well blended.

2. Whisk in sesame oil, canola oil, honey, ginger and soy sauce.
honey going into wasabi sauce

3. Preheat a grill pan to medium-high heat. Oil the pan.

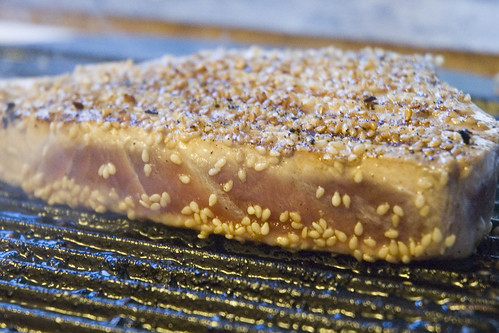
4. Cover one side of tuna with sesame seeds.

5. Place tuna on grill pan, sesame side down. Sprinkle seeds on top of the tuna.

6. After 4-5 minutes, flip tuna.
seared tuna

7. Tuna should be left medium-rare to get maximum flavour. Mine ended up a little more well-done than that as I was trying to keep it warm while the tenderloin cooked!
tuna....not as perfect

Grilled Veggies
2 summer squash
2 zucchini

Vinaigrette:
¾ t salt, ½ t pepper
¼ c. olive oil
2 T lemon juice
1 T coarse mustard
1 t sugar

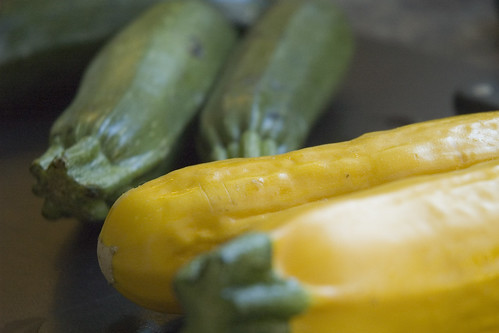
1. Wash and cut zucchini and summer squash into large chunks.
zucchini and summer squash

2. Combine vinaigrette ingredients.

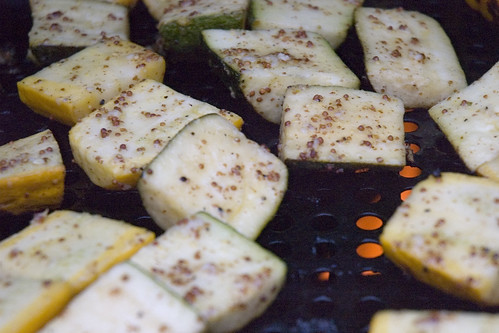
3. Toss squash in vinaigrette, then grill for about 10 minutes (flipping often) to desired doneness. You can brush more marinade as you cook, but beware that the olive oil makes it a bit flammable………
grilling zucchini and summer squash

This is such a smokey and summery dish. It’s fantastic. Easy, quick and doesn’t heat up your house.

Overall, both of us stuffed ourselves silly with this. It’s delicious, relatively quick and oh so tasty. I think everyone should treat themselves to a split entrée once in a while!

Tuesday, June 26, 2007

i <3 strawberries

Pin It Now!

I LOVE LOCAL STRAWBERRIES.

amaaaaaaaaaaaaaaaazing tart

When I was coming up with a menu for Saturday’s dinner, I knew for sure that the dessert would include fresh, local strawberries. Not just because I was writing about them for foodtv.ca, but also because they are just awesome.

I didn’t want to go for strawberry shortcake, as I was looking for a little more sophistication.

In this tart, I found it. This was un-freaking-believable. I mean, I had a few missteps along the way, and the final product didn’t quite present as nicely as it maybe could have…..but the taste absolutely made up for it. I don’t think I’ve ever eaten a more wonderful dessert.

I started by using my Better Homes and Gardens cookbook, as it had served me well in the past for things like foccacia and other sundry baking items. So I thought that for pâte sablée (basically a shortbread cookie! Woot!) and pastry cream, it would serve me well.

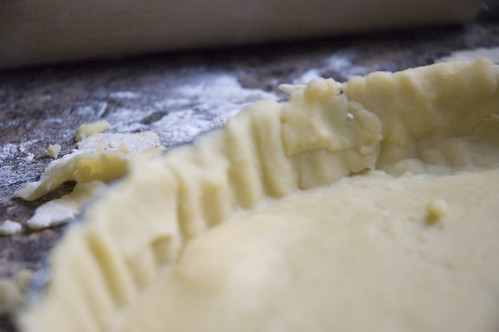
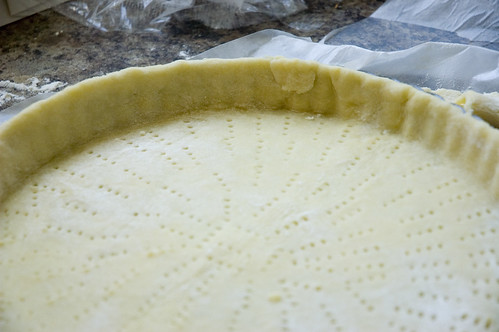
And so it is with great regret that I must inform you that I was woefully disappointed in this manner. First, the crust was a bitch to work with. It stuck to everything, and by the time I finally wrestled it into the pan, it looked awful. REALLY awful. As I’ve mentioned many times before, I suck at pastry. But this was even worse than my average effort…..behold….

this crust sucked hard

Nice eh? REALLY promising.

Folks, it didn’t get better from there……

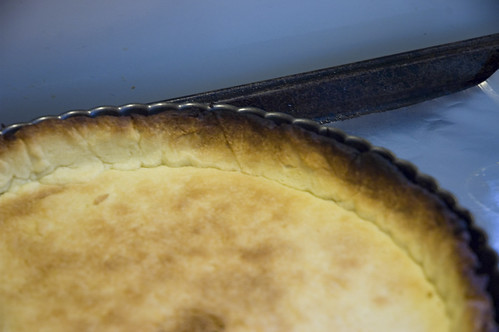
i suck at pastry

BAHAHAHA. Is that sad or what? Even though I don’t ever pretend to be a patissière of any sort, I just couldn’t live with that burnt wreck. So I ate part of it (ack!) and then tossed it to start over. I ended up using Mark Bittman’s crust recipe, which was far superior and didn’t fail me at all. I should never have cheated on Mark!

The pastry cream wasn’t much better – it tasted fabulous, but it was a little runny. Funny enough, when I looked up Mark’s recipe for pastry cream, he was using twice the cornstarch. So I bet that one wouldn’t have been runny. I didn’t feel like making over my pastry cream though, as despite its runniness, it really did taste amazing. But for future reference, I would up the cornstarch to 2 Tablespoons. And use one egg instead of two egg yolks. But oh well.

Anyway, any of you who are fortunate enough to have fresh local fruit, you should use this recipe and make yourself a tart – any berries would be fantastic, as would peaches or any other summer fruit. You could cut the fruit in thin wedges, or leave berries whole (like I did….don’t leave peaches whole though, that would be weeeeird). You can also melt apricot jam/jelly with a bit of liqueur to glaze the top – it adds a touch of formality, but isn’t necessary.

I’m drooling just thinking about the awesomeness that is this tart. A perfect summer dessert. So simple, so fresh and so amazing.

Strawberries and Cream Tart
(I advise starting with pastry cream as it takes the longest to chill!)

Pastry Cream
(you’ll notice method is very similar to crème brulée)

½ c. sugar
4 t cornstarch (I strongly suggest using 2 T)
¼ t salt
2 c. light cream (you can even use whole milk)
1 vanilla bean (PLEASE spring for a vanilla bean for this one)
4 beaten egg yolks

1. In a heavy medium saucepan stir together 1/2 cup sugar, 4 teaspoons cornstarch, and 1/4 teaspoon salt.

2. Gradually stir in 2 cups half-and-half or light cream. If desired, add 1 vanilla bean, split lengthwise, with seeds scraped out into milk mixture.
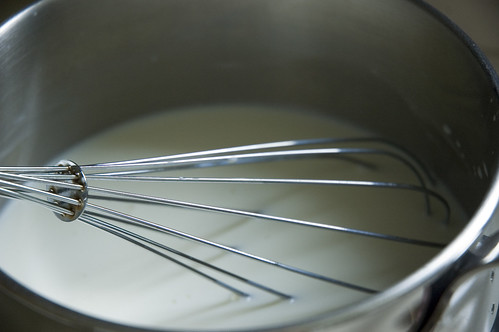
the beginnings of pastry cream

3. Cook and stir over medium heat until thickened and bubbly. Cook and stir for 1 minute more.

4. Gradually stir half of the hot mixture into 4 beaten egg yolks. Return all of the egg yolk mixture to saucepan. Bring to a gentle boil; reduce heat. Cook and stir for 2 minutes.

5. Remove from heat. Remove vanilla bean. Strain into a bowl. If not using vanilla bean, stir in 1 teaspoon vanilla (but PLEASE use a vanilla bean – you won’t regret it).

6. Place bowl of pastry cream in a bowl of ice water; chill for 5 minutes, stirring occasionally. Cover surface with plastic wrap. Chill 4 hours or until cold; do not stir. Makes 2 cups.
chilling the slightly-runny pastry cream

Pâte Sablée
1 ½ cups flour
10 T butter (1 stick plus 2 T)
¼ c. sugar
pinch salt
2 egg yolks
3 T ice water

1. In a food processor, combine the flour, sugar and pinch of salt (one or two pulses).
2. Cut the butter in 10 pieces and drop in the food processor. Pulse 3-4 times, until the butter is relatively finely chopped.
3. Drop in the two egg yolks and run for about 10 seconds, so egg is well combined.
4. Scrape mixture from food processor into a bowl. Sprinkle with 3 T of ice water. Combine using either a wooden spoon or your hands until it can be formed into a ball.
5. Wrap the ball in plastic wrap, form into a disc and freeze for 10 minutes (or refrigerate for 30-60 minutes).
To parbake the crust…..
1. Take out a 10 inch removable-bottom tart pan (you CAN make it in a pie pan, but a removable bottom is definitely your friend. You could alternatively try a springform pan, though you won’t end up with fluted edges).
2. Take the dough out of the freezer and place on counter (I put it on floured waxed paper). I also like the trick of topping it with a sheet of plastic wrap, as this avoids the endless fun of picking bits of dough off your rolling pin and trying to squish them back onto the crust.
3. From the centre, roll out into a 12-inch circle. If you find the dough starting to get too sticky, put it back in the fridge for a few minutes.
4. Gently transfer the dough into the tart pan (I like to pick up my waxed paper, which my dough has inevitably clung to, and flip it over the pan….this helps avoid stretching).
5. Press dough into pan and trim edges with a knife. Try not to let edges be thinner than the rest of the dough or they will burn beyond all recognition (see picture above!). Prick all over with a fork.
better crust

6. Preheat oven to 425F. Line dough with a layer of foil, and then fill with some sort of weight. I used brown rice….if you have pastry weights, go for it, but any sort of dry bean/grain will work.
7. Bake for about 12 minutes, covered.
8. Reduce oven temperature to 350F and remove the foil/rice/beans.
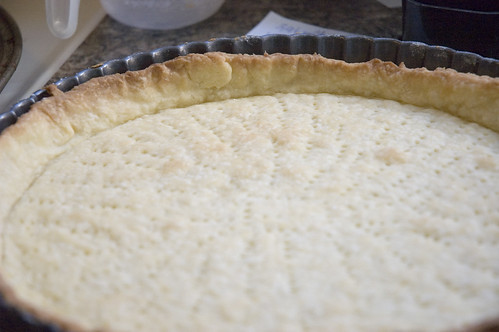
9. Cook another 15 minutes (checking every five minutes!!!!!) until crust is browned but not blackened.
better crust

10. Allow crust to cool.

To assemble tart:
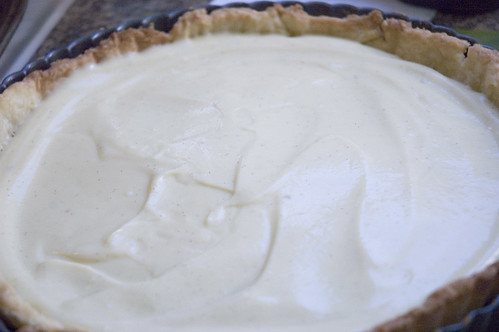
1. Spread pastry cream in tart pan. See those little black flecks? That's the vanilla peeps!
vanilla-flecked pastry cream in butter crust

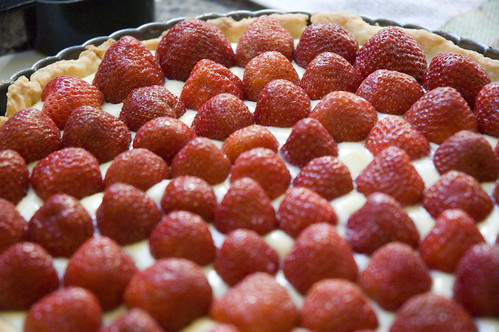
2. Put fruit on top (about 2 cups or so….). Arrange it fancy, make it simple, however you like. I chose simple for this, because I just wanted pure, delicious, almost rustic taste. You can have various fruits of different colours….use your imagination. I sorted my strawberries from large to small to make it look prettier.
sorted from smallest to largest

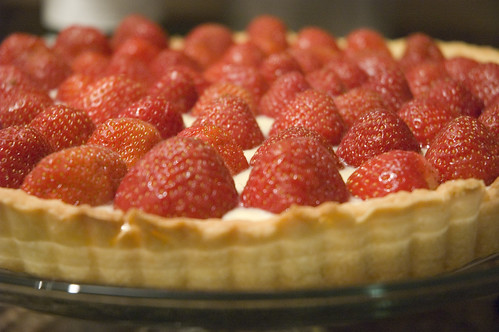
So simple, yet so goooooood
strawberry cream tart

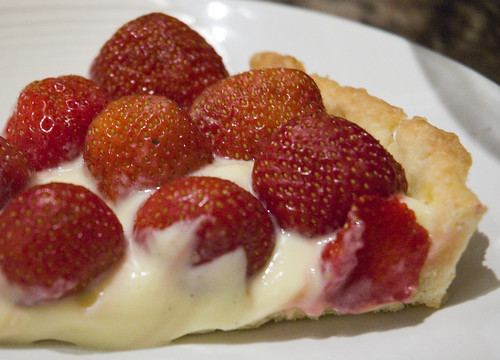
3. BUT MAKE THIS NOW. IT’S THAT GOOD. You can see my runny pastry cream here....but if you up the cornstarch, you can fix this problem and end up with a tart that looks as pretty on the plate as it did in the pan!
this is the most amazing thing i've ever eaten

Sunday, June 24, 2007

orange! doctor, i smell BURNT ORANGE

Pin It Now!

Probably only my Canadian readers will get my veiled Heritage Minute reference in the title....but it made me laugh....

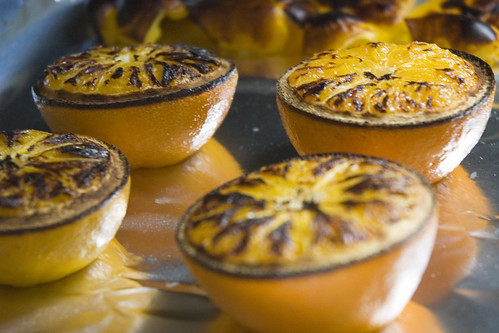
And I really did smell burnt orange with this recipe. This was a soup involving both roasted oranges and roasted yellow pepper.....and in order to get the oranges to roast, you needed to cut a bit off the bottom to ensure their continued uprightness in the oven.....but this had the oh-so-lovely effect of making them leak orange juice all over the baking sheet. This juice proceeded to both caramelize and smoke under the intense heat of the broiler.

So that kinda sucked.

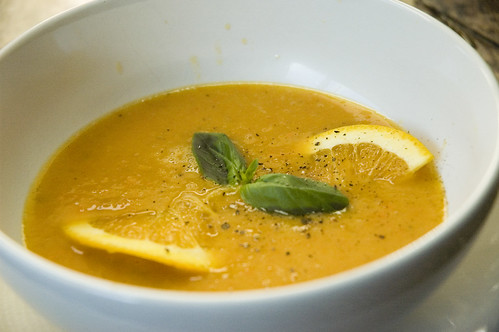
But thankfully, the soup didn't suck. It was very good! I changed the recipe up quite a bit, adding at least twice the juice originally called for and I really thought it was quite nice. I also enjoyed the paprika flavour, though I do think it took away from the fresh summery taste of the soup, giving it more of an autumn appeal. This isn't a bad thing, it just wasn't quite what I had originally envisioned for a nice summer meal.

I would think that this recipe would double or triple quite easily if you wanted to make it for more than an intimate à-deux.

Roasted Orange-and-bell-pepper Soup
2 navel oranges
1 large yellow bell pepper
2 t olive oil
1/2 c. chopped onion
1/3 c. grated carrot
1.5 t flour
1/2 c. milk
1 c. chicken broth
fresh ground black peper
1/4 t paprika (optional)
garnish - orange slices and fresh basil

1. Cut oranges in half cross-wise. Slice a sliver from the bottom of each so it will sit flat. Cut yellow pepper in half lengthwise, and discard seed and membranes.

2. Place orange halves, cut size up, and pepper halves, skin side up, on a foil-line baking sheet (note - make sure it's REEEALLY lined with foil, as the oranges will release sticky juice).
yellow pepper and orange - unaware of their iminent roasting

3. Broil for about 10-15 minutes (mine were a bit further away from the broiler and took 15 minutes).
charred orange

4. Place pepper halves in a ziploc bag. Let stand 20 minutes, peel. Squeeze juice from oranges into immersion blender container (if you don't have an immersion blender, go get one, but in the meantime, just squeeze straight into a regular blender). Place peeled peppers into the same bowl and blend.

5. Heat oil in a small saucepan over medium heat. Add onion and carrot.
grated carrot

6. Sauté 12 minutes, until carrot is tender. Meanwhile, combine flour, broth and milk in a bowl (use a whisk). Add to onion/carrot mixture in pan. Add pepper/orange mixture. Bring to a boil and simmer 5 minutes. Add pepper and paprika (optional) - or add something like fresh basil or mint. That would probably be tasty.

7. Blend with immersion blender. Garnish with slices of orange and basil leaves, if desired. Serves 2.

soup time

(yep, some of mine splattered, because I had the un-martha-like audacity to pour straight from the pan.....).

Enjoy! Thanks for reading. :)

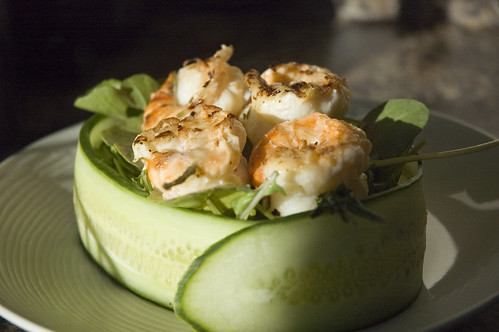
rosemary grilled jumbo shrimp in an arugula-filled cucumber bowl

Pin It Now!

For our celebratory feast, this was both salad and appetizer in one.....a fresh, delicious way to entice our appetites and build anticipation for the meal to come.....

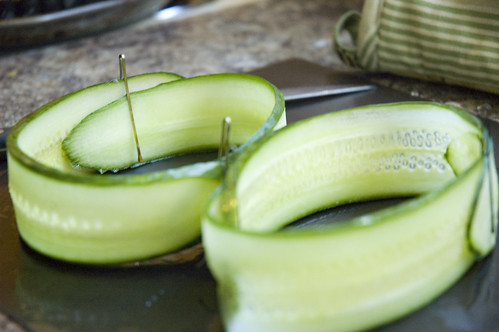
I had been wanting to make cucumber bowls for quite some time, but hadn't really had the excuse to waste that much cucumber on something that could only have dubious possibilities of success (I have no mandoline, so here, I'm relying on my own somewhat limited knife-wielding skills....).

It mostly worked. I ended up having to use bobby pins (washed, don't worry!!!!!) to coax the cucumber into their rounded state, and even then had to resort to one measly little toothpick to keep things in check.

yes, i washed the bobby pins first

The salad in the cucumber bowl was just a very simple combination of arugula and a red wine vinaigrette (due to dieting status, I royally cheated here and use a red wine salad spritzer to help keep the calories down - it would be better with a real vinaigrette, but this was still great).

The shrimp were very simple - I bought the size of shrimp where the are 8-12 per pound, but that isn't to say that it couldn't work with smaller shrimp. I think it would also be fabulous with seared scallops. Or even something like tofu if you're not into shellfish.

Presentation is lovely for this recipe and it's so light and simple.....provided you have a mandoline....

Rosemary Shrimp Skewers
2 T white wine
1 T fresh lemon juice
2 t olive oil
fresh black pepper
2 clove garlic, minced
2 t snipped fresh rosemary
6 rosemary sprigs
1 pound jumbo shrimp, peeled and raw (about 12)

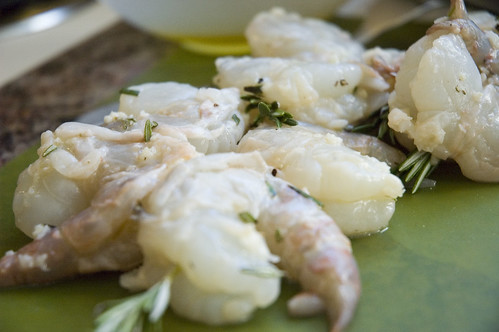
1. Combine white wine, lemon juice, olive oil, pepper, garlic and rosemary in a ziploc bag. Add peeled shrimp to bag and marinate for about 30 minutes.

2. One sprig at a time, strip all but that last inch of the leaves off each sprigs. Repeat with remaining skewers. Thread 2 shrimp onto each skewer.
super jumbo shrimp on rosemary skewers

3. Heat a grill pan (I don't recommend BBQing this because your rosemary sprigs will catch fire!) over medium high heat. Coat pan with oil.

4. Cook 3-4 minutes per side, until shrimp are done (if you use smaller shrimp, they will cook more quickly).

Arrange on top of arugula-filled cucumber bowl like so:
grilled rosemary shrimp with arugula in a cucumber bowl

Yum. This serves two, possibly three if you don't eat as much shrimp as we do! :)

it's about freaking time, eh?

Pin It Now!

Sorry about the delay peeps. Let's just say that having a night class twice a week, combined with having every weekend filled up with social obligations, makes for not a lot of time for cooking or blogging.

I shudder to think of my fast food intake over the last couple of weeks. It was all the healthier choices, mind you, but still gross amounts of sodium and chemicals that i just really don't ever need.

AND, hubs b-day was last Sunday, and mine is this coming Thursday, so birthday celebrations with the various parental units mean less cooking for me too......

Normally, hubs and I would go out for a blow-out birthday dinner. But seeing as this year, we were getting so spoiled by the parents, and seeing as I have no money, we decided to have a blow-out birthday dinner in this year. So spent some time conniving and planning and scheming and came up with the following menu...

1st course - rosemary grilled jumbo shrimp atop a cucumber bowl filled with baby arugula

2nd course - grilled orange (like the fruit) and bell pepper soup with smoked paprika

3rd course - a split entrée - i) seared sesame crusted tuna with wasabi soy glaze and ii) grilled fillet mignon with truffled mushroom ragout, along with lemon mustard grilled zucchini and summer squash

4th course - strawberry cream tart made with the most delectable fresh local strawberries and vanilla bean pastry cream. YUMMMMMMM.

So I'm hoping to redeem my lapsitude tonight.....as I embark on a blogging marathon of the greatest proportions......

Monday, June 11, 2007

the vegan diaspora

Pin It Now!

As a child of the digital age, I can't even begin to enumerate all the reasons the internet is awesome. Sure, there are the drawbacks, and there are issues, and there are a lotta freaky peeps out there, but there are so many cool things about it.

For starters, it has a remarkable ability to demarginalize those who reside at the outer reach of their day-to-day societies. It's like a great gathering place (for a whacked out video, check this out) and the enormous power is that it can take individuals who are scattered everywhere (i.e., the diaspora) and bring them together. You can start by talking about ex-pats of various countries, and all the various communities that exist online for them to commisserate and trade stories....but what really piques my interest is not only the extent of the vegan diaspora, but its power and popularity.

You see, at best guess, there are not a heck of a lot of vegans in the western hemisphere. I've heard guesses ranging from 5 to 10 per cent of folks being vegetarians (primarily lacto/ovo), but of the vegetarians, only about 5% are actually vegan. So when you compare the number of vegans out there (maybe 0.5%?) to the number of vegan food websites.....you just have to wonder.

This is something that struck me when I was looking through the listings on blogtopsites (if you scroll all the way to the bottom of my blog, you can see that I'm part of this ranking, and I seem to range anywhere from 100 to 175th, depending on the time of week and how much I've posted). Take a look at the top 15 sites, and 2 of them are vegan. And there are tons of vegan sites in the top 100 sites. Waaaaay more sites than one would have expected, given their proportional representation in the online populace. I can only surmise that like so many other communities, vegans have discovered the real gathering and convivial power of the Internet. And that's cool. I get a lot of hits on this blog coming from people either directed from vegan web sites, or different google searches.

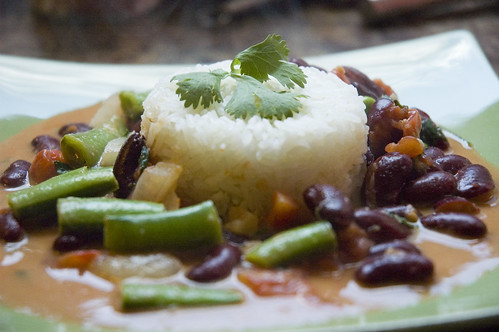
I don't have a lot of conclusions to draw from this, all I can do is add to the diaspora ;) So this entry is a vegan offering. Like the shrimp skillet, this is also very quick, pretty healthy and darn tasty. Hubs gobbled down two plates and I thoroughly enjoyed my own serving. Even better, this recipe serves 6 so there's lots left for my lunches this week.

Green Curried Kidney Beans with Coconut Milk

1 onion, chopped
cooking spray
2-3 garlic cloves, minced
1-2 T thai green curry paste (I used 2. It was spicy, but not ridiculous)
1-14.5 ounce can diced tomatoes, undrained
2 cans kidney beans, rinsed and drained
1 can coconut milk
1 lime (grate zest, then juice it)
2 T brown sugar (or a little more)
1 T soy sauce (use fish sauce if you aren't vegan/vegetarian)
1 cup sugar snap or snow peas, trimmed and halved
1/3 c. chopped coriander
4 cups cooked jasmine rice

1. (Put rice on to cook). Sauté the chopped onion in a large skillet coated with cooking spray (medium heat). Add garlic and sauté 1 minute.

2. Add curry paste, sauté 1 minute. Slowly whisk in the coconut milk. Gotta love the easy canned goodness of this recipe.
more fast food hehe

3. Add kidney beans, diced tomatoes, lime juice, lime rind, sugar and fish sauce.
black beans, canned tomatoes, coconut milk

4. Bring to a boil. Let simmer for a few minutes (take this time to prep your peas!). Add coriander and snow peas. Let simmer for about 2-3 minutes (I like the peas to be crunchy!). Serve over basmati rice. :)
tasted as good as it looked

This was reaaaaallly tasty. I'm normally a little ambivalent with kidney beans, but this was a great use of them. Yummy. The sweet creaminess of the coconut milk was fabulous with the bite of lime and heat. And I LOVE coriander, so that was good too. You could equally substitute basil and it would be terrific. You could also use red curry paste (incidentally, that was my initial plan, but I was out of it).
And I'm also loving the big pile of leftovers.
leftovers are awesome

(hehe - hubs likes more rice and I like more stuff....can you guess whose lunch is whose?).

Thanks for reading! :)

shrimpy quickie

Pin It Now!

I love fast food. Not so much the from-a-drive-thru variety, but more the variety where I get home from work, and scurry about the kitchen and dinner is ready pronto.

That kind of fast food.

This isn't to lessen the importance of slow-food, but more to have a real world perception on what a person can and cannot do. Being as we are in the twenty-first century, I not only have a job, but I go to school, and try to maintain at least somewhat of a social life. Most people are like this - most people just don't have the time to devote hours to cooking every day.

The slow food movement is a great idea, and while I do think we should embrace the wonders of creating in the kitchen (hello - I have a FOOD BLOG), at the same time, people are busy. There are a lot of demands on our time, a lot of things going on, and just a general sense of instant gratification....when I get home from work, there's no way I'm waiting 3-4 hours to eat.

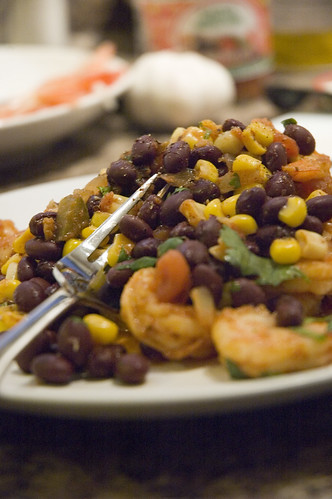
So that's where dishes like this come in. It's something that's quick, that makes use of not-too-bad for you processed foods, and that let you get a really tasty meal on the table in a matter of minutes. I didn't start out timing this, but I'd say it took no more than 15 minutes from start to finish.

It's got lots of protein, fibre and all those good things, and even the sodium isn't crazy out of this world. This is definitely becoming a staple in our kitchen. I loved it so much I ate it for brekkie the next morning. Cold (hubs was grossed out). Hubs took it to work today, instead passing me money to buy my lunch. I was actually sitting at work (eating my purchased lunch), when he messaged me to tell me yet again, how awesome this was.

SO....for those of you who don't have three seconds to sit and breathe, put this on your list. You won't regret it and your tummy will thank me.

Or, more accurately, they should thank Cooking Light, July 2005. CL serves up another winner. I just tweaked it a bit. :)


Black Bean, Corn, and Shrimp Salad

1 T chili powder (this is north american chili powder, which is a mixture of cayenne, paprika, cumin, oregano, etc.....not straight chili powder!)
1/2 t garlic salt (um...yeah....did you read my last post? I skipped the salt and used real garlic, 3 cloves of it)
1 1/2 pounds shrimp, peeled and deveined (I had about a pound. It worked out.)
cooking spray
1 1/2 cups frozen corn
3/4 c salsa (I used hot herdez salsa)
1/4 c. chopped fresh coriander
1 can black beans, rinsed, drained

1. Heat a large skillet over medium heat. Spray with cooking spray. Add garlic and shrimp (I used pre-cooked.....another modern convenience).
shrimp - yep, pre-cooked

2. Add cumin and chili powder and toss to coat the shrimp.
cumin and chili powder

3. Add 1 T lime juice. Add corn to pan, sauté 1 minute.
corn!

4. Stir in salsa, coriander and beans. Cook 2 minutes or until thoroughly heated. Stir in the last tablespoon of lime juice.
dinner time

This stuff rocks. And it's good for you. Makes 4 servings, 354 calories, 4.8 grams of fat, 43.3 grams of protein, 34.9 grams of carbs (9.1 g fibre).

So yeah. Make it. Make it now. :)

Thanks for reading!!!!! I have a tasty vegan dish coming up.....hopefully up within the hour.....

Wednesday, June 06, 2007

garlic rocks my world

Pin It Now!

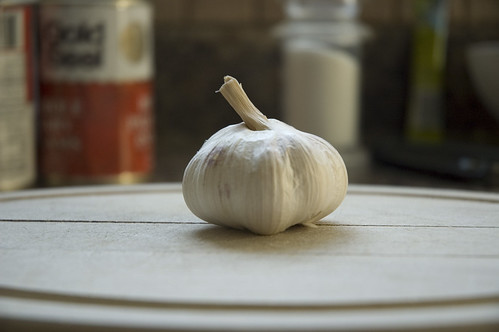
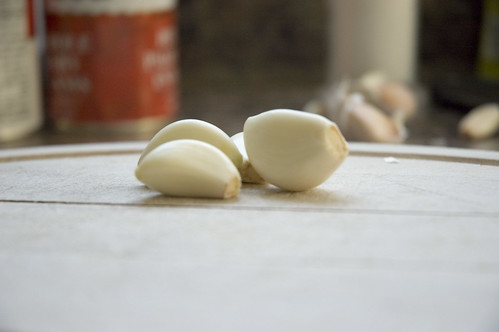
i heart garlic


A most devastating thing happened to me earlier this week.

I.
Ran.
Out.
of.
Garlic.

The horror. The bland food tasteless mushy horror.

Thankfully, the situation was promptly rectified today with a quick visit to my friendly neighbourhood grocery store. It was a tense few days, but somehow, I made it through. Because garlic is important. It seems that no matter which cuisine strikes my fancy, garlic is front and centre of the dish. Want Indian? Get yer garlic. Want thai? Definitely garlic. Italian? Hello....you NEEEEED garlic. I'm beginning to suspect I may have been Egyptian in a past life.....turns out ancient egyptians worshipped at the altar of the garlic bulb.

Funny enough (or maybe it's not funny?), Americans eschewed the venerable root until the mid-twentieth century. Of course in this respect, if you look at primordial north American cuisine, the utter uninspired blandness comes as no surprise. No garlic= BLAAAAAND.

And peeps. We need the real deal. I bought 5 heads of garlic tonight at a monumental cost of 59 cents. There is zero excuse for resorting to powder. As I've oft mentioned when it comes to parmesan, any food that has been reduced to powder form is definitely NOT going to be good.

Natural state means natural food. Natural food means that it will have pure, strong flavour. And that's a goooooood thing. :)

So of course now I have to backtrack and admit that a good portion of my dinner came from a can....canned clams. In my defense, however, at least food in a can was preserved at the height of freshness....and to be frank, I'd rather opt for clams from a can (that I *know* won't wreak havoc on my system) than the sad saggy looking seafood one is able to obtain mid-continent.

I really enjoyed this dinner. It met all the weeknight criteria - it was fast (20 minutes - kick ass!), it was easy (practically zero chopping!) and it tasted great (because, folks, garlic ROCKS MY WORLD). I served it with a simple salad and it made for a 400 calorie dent in my daily allowance. Not too shabby. Best of all, I have leftovers for my lunch.

Apologies in advance for some of the shite pictures.....not sure why they aren't in focus, but of course by the time that came to my attention, the dinner was residing comfortably in my tummy, so no retakes. This are the hazards of live blogging. :)

Linguine with Garlicky Clams and Peas
shamelessly stolen from the June 2007 Cooking Light, which you should all promptly buy
(I think this would also be good with shrimp or chicken)

1 package fresh linguine (or about 8-10 ounces of dried)
1-2 T olive oil
3-4 minced cloves of garlic (original recipe calls for bottled, but I shudder...)
3 6-ounce cans chopped clams, undrained
1 cup veggie broth (I actually just kept all the clam juice)
1/4 c dry white wine (I probably used half a cup....when in doubt....add more wine!)
2 T fresh lemon juice (plus grated zest, if you desire)
pepper
1 cup frozen green peas
1/2 c. shredded parmesan cheese
1/4 c. shredded fresh basil

1. Cook pasta according to package directions (omitting salt). Drain and keep warm.
linguine nests

2. Heat oil in a large nonstick pan over medium heat. Add garlic to pan. Sauté 1 minute. Feel free to double garlic.

go garlic go
(heh - funny story, somehow, right after I snapped this picture, I managed to snap my wooden cutting board clear in two. GRRRRRR)

3. Drain clams, reserving 1/2 cup juice (I reserved all). Add clam juice, broth, lemon juice, wine and pepper to pan. Bring to a boil. Reduce heat and simmer five minutes, stirring occasionally.

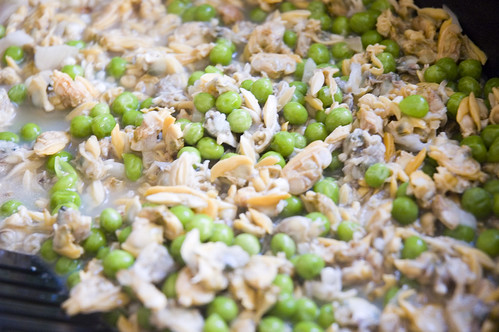
4. Add clams and peas to pan. Cook 2 minutes or until peas are no longer frozen.
mmmm....garlicky sauce

5. Add pasta to pan; toss well. Sprinkle with cheese and basil. Makes 4 servings.

Nutritional content - 368 calories, 11.9 g fat, 19.8 g protein, 46.5 g carbs, 4.3 g fibre, 1.9 mg iron, 961 mg sodium, 166 mg calcium.

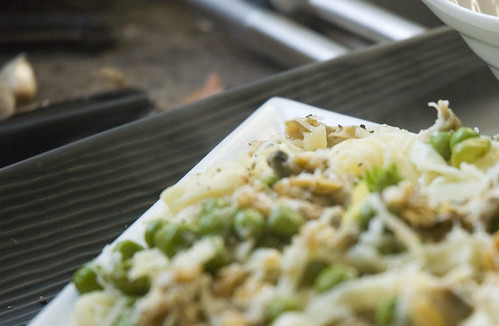
dinner....with shitty focus
(apologies for this.....my ISO was too low....GRRRRR). Trust me that it looked cute. I also think this sauce would be great if it were a little creamy - perhaps 1/2 c. of sour cream would be a nice addition (1/2 c. of whipping cream would be even better, but my butt can definitely live without that!).

I served this with baby arugula, topped with strawberry, blackberry and apricot. I dressed it with my favourite lazy new discovery - Hellman's Salad Spritzers. These are great - 15 calories for a salad that actually tastes good and ISN'T the ubiquitous light Italian that I've so come to hate.
fruits and veggies are good for you


Thanks all for the reads and the comments. :) I'm debating right now whether I should finish this bottle of wine and sob my way through this miserable excuse of a game, or if I should strap on my shoes and run away my sorrows. I'm thinking number two might be better.....

Related Posts with Thumbnails