Photobucket - Video and Image Hosting
Showing posts with label overindulgence. Show all posts

Tuesday, April 08, 2008

because I couldn't sleep without sharing the chocolate joy

Pin It Now!

Again, I should REALLY be in bed. My preggo butt will be T-I-R-E-D tomorrow.

Especially considering I'm in a new job and should really be trying my utmost to impress all and sundry.

But I can't sleep without sharing this cake.

So here it is....from the Best of the Best of Bridge, this is what I craved. I was all set to make a much healthier dessert (a very good one!) from Self magazine. It's a lovely apple caramel strudel in phyllo, done with a creamy caramel sauce. As long as you eschew the cooking spray for butter, it's a GREAT dessert.

But then I saw this one. And it was like the helpless moth, fluttering blindly, yet oh so lovingly, toward the flame.

Must. Have. Chocolate.

This chocolate raspberry torte is really more of a cake than a torte...but it's a delicious cake. Relatively easy to make (as much as a four layer cake can be easy) and very easy to work with. Texture of the cake itself is nice and light and soft, and the chocolate sour cream ganache icing is WONDERFUL to work with. Can't go wrong with this. You can make the cake the day before, but as the filling and icing need to be refrigerated, you should probably either make sure you have lots of fridge space or do the assembly the day of.

Chocolate Raspberry Torte - from Best of Bridge
DSC_5393

Cake:
2 cups all-purpose flour, sifted 500 mL (I used cake flour)
2 tsp. baking soda 10 mL
1/2 tsp. salt 2 mL
1/2 tsp. baking powder 2 mL
3 squares (1 oz. / 30 g size) unsweetened chocolate 75 g
1/2 cup butter 125 mL
2 cups light brown sugar,packed 500 mL (I only had dark brown and was out of vanilla, so I used 1.5 cups dark brown sugar and 1/2 c. vanilla bean sugar)
3 eggs
1 1/2 tsp. vanilla
3/4 cup sour cream 175 mL
1/2 cup strong coffee 125 mL (used decaf)
1/2 cup coffee flavoured liqueur 125 mL (but, awful preggo that I am, I still used the booze!)

Filling:
1 cup whipping cream 250 mL
2 Tbsp. icing sugar 30 mL
1-12 oz. jar raspberry or strawberry jam 340 mL (thankfully had most of a jar of seedless raspberry jam in the fridge - woot!)

Chocolate Sour Cream Icing:
1 1/2 cups chocolate chips 375 mL (I splurged and bought slightly more expensive chocolate chips - it's worth making sure your chocolate chips are tasty enough to actually eat. I can attest to their tastiness, seeing as during the writing of this post, I finished off the bag....)
3/4 cup sour cream 175 mL
dash of salt
fresh raspberries or strawberries
***I used 2 cups of chocolate chips and about 1 1/4 cups of sour cream. I HATE not having enough icing. 2 cups of chocolate chips was actually too much....


1. Preheat oven to 350F. (180 degrees C).

2. Grease and flour two 9 inch (1.5 L) layer cake pans.

3. Sift dry ingredients. (Seriously, does anyone do that? I don't...)

4. Melt chocolate and let cool.

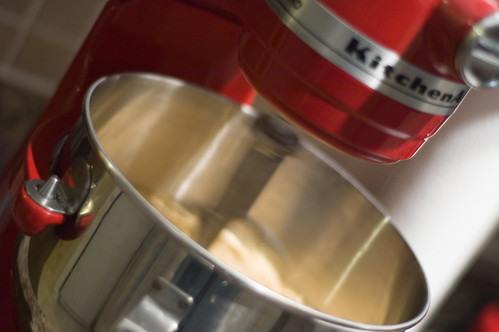
5. In a large bowl beat butter, brown sugar, and eggs at a high speed until mixture is light and fluffy, about 5 minutes.
DSC_5370

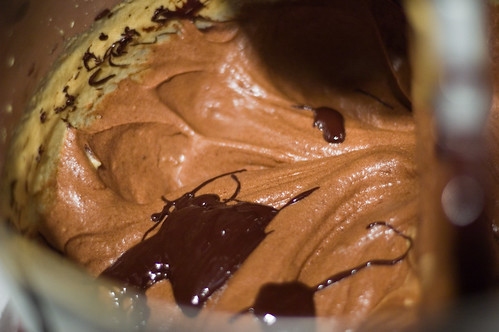
6. Beat in melted chocolate and vanilla.
DSC_5371

7. At low speed, beat in flour mixture (in fourths), alternating with sour cream (in thirds). Add coffee and liqueur, blending until smooth.

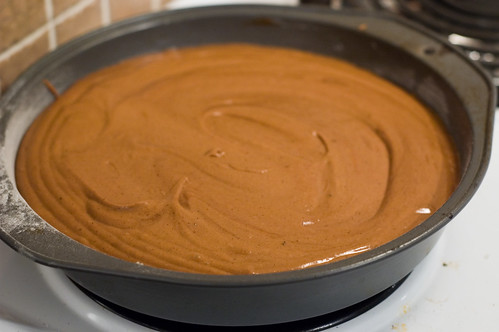
8. Pour batter into pans and bake 30 to 35 minutes or until surface springs back.
DSC_5374

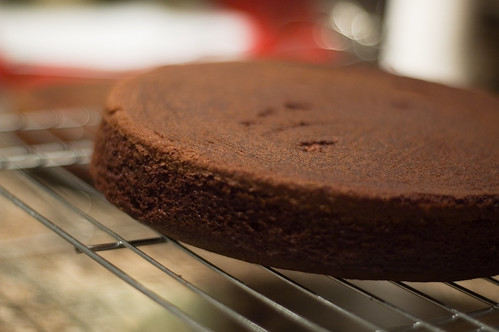
9. Cool in pans for 10 minutes, then remove from pans and cool on wire racks.
DSC_5379


Filling:
1. Beat cream with icing sugar until stiff. Refrigerate.

2. Slice cake layers in half horizontally to make four layers. (Hint: Cake layers slice more easily if frozen first, though I actually found they sliced really well after having sat overnight! Trust me, if this knife-incompetent fool can do it, you can too!)

3. Place one layer, cut side up, on cake plate.

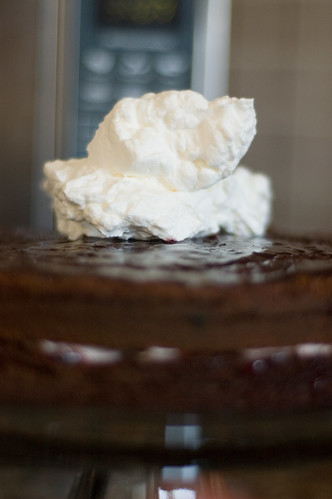
4. Spread with 1/2 cup (125 mL) raspberry jam and 1/2 cup (125 mL) whipped cream mixture.
DSC_5391

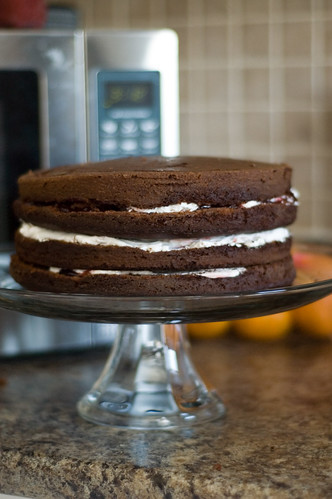
5. Repeat with remaining layers, ending with top layer, cut side down.
DSC_5392

Icing:
1. Melt chocolate chips in top of double boiler (I used the microwave. I don't have a double boiler and was clean out of pots.)

2. Add sour cream and salt and beat until icing is creamy and smooth. Ice top and sides of cake before it sets. Liberally indulge in excess icing.

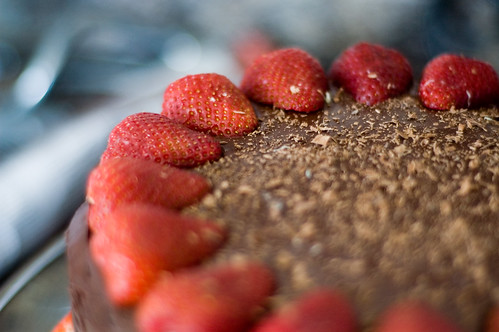
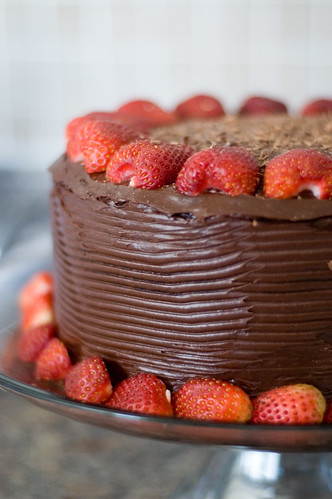
To decorate cake....yeah, I had this vision of having a beautifully frosted cake, replete with raspberries, drizzly white chocolate and lucious curls of chocolate.

I couldn't find any raspberries so I had to sub strawberries.

My "drizzly" white chocolate looked like....um, actually, I'm not going to repeat what it looked like. It was EXTREMELY unattractive, obscene and gross looking. Blobs of white goopy stuff strewn across the cake. *ew* I waited until it cooled and picked it off (yes, it was that bad......).

I was using cheap chocolate to make curls and it would only flake. No curl whatsoever.

DSC_5394

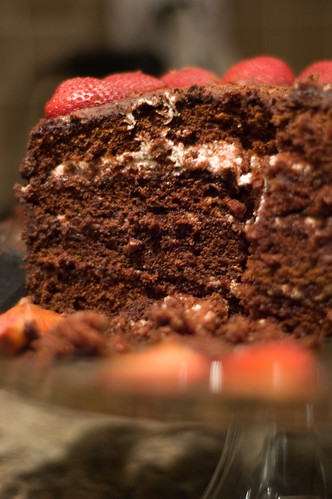
But hey, at least the icing was good! The final product looked pretty nice though, I will say, even if it wasn't *quite* what I planned out. And I can't say enough about the value of an icing comb - it dresses up the look of your cake....and like pizza AND chocolate, even when it's bad....it still looks pretty good! :)

DSC_5403

Thanks for reading!

Monday, March 24, 2008

back in time for easter!!!!!!!!

Pin It Now!

I know, I know.

WORST. BLOGGER. EVER.

But you have to understand, since my last post, I've been slowly going a bit insane. I finished renovating my house. I sold my house. I went to Cuba. I bought another house. I got a new job. and I'm having a GIRL!

So yeah, it's been a little busy!

But, things are starting to calm back down, the brand new kitchen we renovated is starting to get a little use, FINALLY.

My mother in law was kind enough to host Easter dinner, so I thought that the least I could do would be to offer to bring my dessert (especially given that I got out of making turkey and all the trimmings - a good thing considering I'm not supposed to lift anything!).

Anyway, since there were to be 11 people for dinner, many of whom had given up dessert for Lent, I thought I'd give people a bit of an option....something that seemed "light" (but TOTALLY wasn't) and something intensely decadent (you know my style, hehe).

So this is what I ended up making....

Raspberry Lemon Layer Cake
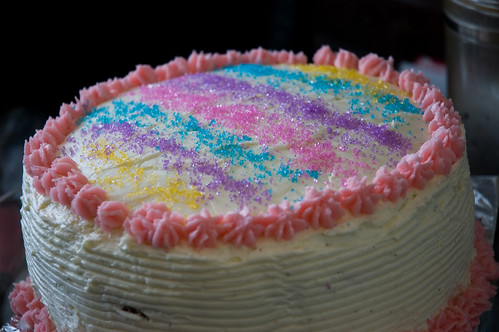
lemon raspberry layer cake

Cake: 3 cups cake flour
2 teaspoons baking powder
1/2 teaspoon baking soda
1/2 teaspoon fine salt
1 1/4 cups sour cream
1/4 cup freshly squeezed lemon juice (about 1 1/2 lemons)
1 tablespoon pure vanilla extract
1 cup (2 sticks) unsalted butter, room temperature, cut into small pieces
2 cups sugar
1 tablespoon finely grated lemon zest (zest of 1 lemon)
5 large eggs, room temperature

Icing and Filling:
1 1/4 cups sugar
5 large egg whites
1 1/2 teaspoons freshly squeezed lemon juice
1/4 teaspoon cream of tartar
Pinch fine salt
1 1/2 cups (3 sticks) unsalted butter, room temperature, cut into small pieces

1/2 cup seedless red raspberry jam
1/2 cup lemon curd (or purchased lemon spread....for the lazy!)

For the cakes:
1. Position a rack in the lower third of the oven and preheat to 350 degrees F.

2. Lightly brush 2 (9-inch) round cake pans with shortening or butter. Line bottoms with buttered parchment paper and dust with flour. BTW, has anyone figured out WHY you can't buy rounds of parchment paper? I drive myself mental everytime, trying to trace the slippery stuff, and then trying to make sure I've cut off all the pen!

3. Sift the flour, baking powder, soda, and salt into a medium bowl; whisk to combine evenly. Sift - HAHHAHAHAHHAHAHAHAH! I don't sift. This could be my problem, but I just don't do it.

4. Stir the sour cream, lemon juice and vanilla together in a liquid measuring cup, and set aside.

5. Beat the butter in a standing mixer with the paddle attachment on high until light and creamy, about 2 minutes. Stop and scrape butter off the sides of the bowl. Continue beating while gradually adding the sugar-- it should take a couple minutes to add all the sugar. Continue beating until very light and fluffy, about 3 to 4 minutes more.

6. Scrape down the sides of the bowl and beat in the lemon zest.

7. Add the eggs, 1 at a time, beating well after each addition.

8. At low speed, add the flour mixture in 3 parts, alternating with the sour cream in 2 parts, beginning and ending with the flour. Scrape the sides of the bowl and mix for 15 seconds longer.

9. Divide the batter evenly between the prepared pans and smooth the top with a knife. (Lightly tap the pan on the counter so the batter settles evenly.)

10. Bake the cakes until a toothpick inserted in the center comes out clean, about 35 to 40 minutes. Cool in the pan on a rack for 20 minutes; then turn cakes out onto the rack to cool completely. I baked my cakes for about 30 minutes, and they ended up a touch overdone. I don't know if I need new pans, a new oven or both.....

For the Icing:
1. Bring a few inches of water to a boil in a saucepan that can hold a mixer's bowl above the water.

2. Whisk the sugar, the egg whites, lemon juice, cream of tartar, and salt in the bowl by hand.

3. Set the bowl above the boiling water and continue whisking until the mixture is hot to the touch and the sugar dissolves, about 1 to 2 minutes.

4. Transfer the bowl to a standing mixer fitted with the whisk attachment and beat the whites at medium-high speed until they almost holds a stiff peak and are cool, about 10 minutes.

5. Beat in the butter, a little at a time, until the icing is smooth and spreadable. (If the icing separates, just keep beating and it will come back together.)

**Note - I was lukewarm about this icing. First, the recipe didn't really make enough to nicely ice the cake. It made enough to cover the cake, but (as you'll see in the final photo), there wasn't enough for it to be really smoothable on the sides. The taste was okay....I used vanilla sugar, but I think I just don't really like buttery icing. I think it should have been a lot fluffier....it was quite dense. BUT, I was thanking my lucky stars for the kitchenaid....if I'd had to stand with a stupid hand mixer for 15 minutes, the icing would have been tossed!


To assemble the cake:
1. Slice each cake in half horizontally with a serrated knife, to make 4 even layers, taking care that they are as flat and straight as possible. Believe it or not, the cake actually sliced really well. I was nervous, but the cake was easy to cut and stayed together pretty nicely. No complaints there.

2. Set a large flat plate on a large inverted bowl or bottom of a salad spinner (of course, if you have a cake stand, use that), dabbing a little frosting on the bottom of the plate to secure it. Seriously, I can't imagine trying to balance a plate on top of a wee little bowl.....I have a glass cake stand...it doesn't rotate or anything, but it works pretty well for this.

3. Place a cake layer top side up on the plate. Using an offset spatula, spread about half of the raspberry jam in a thin layer over the first cake layer, leaving about 1/4-inch border along the outside. On the top cake layer, spread a thin layer of the lemon spread/lemon curd. I bought the E.D. Smith stuff. It's tasty!

4. Lay the second cake layer on top, stacking it as straight as possible. Using an offset spatula spread about 1 cup of the icing on the top layer.

5. Place a third cake layer on top. Spread remaining red raspberry jam over the cake layer, then spread the lemon curd over the fourth layer. Place the final layer on top, pressing down lightly to secure all 4 layers together. Spread about 3/4 of the remaining icing around the sides with a knife or offset spatula, then ice the top of the cake.

6. Use an offset spatula to smooth icing as much as possible. I have a nifty icing smoother thingamabob that I got to use for the first time. Of course, this is AFTER hubs stole it to use for tile adhesive....who knew kitchen implements could be so versatile???? He swears he washed it well. I washed it again, just to be safe. I kinda bungled up the icing a bit (there wasn't quite enough, and I just kinda suck at it anyway). I happened to have some pink buttercream in the freezer (froze it on a whim just to see if it would freeze). I defrosted it and used it to make the cake look snazzier. I think I need an icing course, but it still turned out cute! Canadian ladies, bulk barn is your friend for cake decoration stuff - it's cheap, you can buy only as much as you need and they have fun colours!

The final result: Looks - despite my mediocre icing job, it turned out really cute! Taste - BUT, I found the cake texture to be too hard and too dense. I think I am still in search of a nice moist, soft cake recipe. Preferably one that doesn't come out of a box. Let me know if you find one!

So yeah, that cake was a bit of a labour of love. It served REALLY well though - four layers always makes you look like a ktichen genius. Definitely WAY more work than the second cake. This second cake is chocolatey indulgence at its best. If you are someone who loves a rich, dark chocolate cheesecake.....this is for you. It is rich, silky and just incredible. Hubs is not a fan, but that makes my preggo butt happy, because there is all the more for me. :)

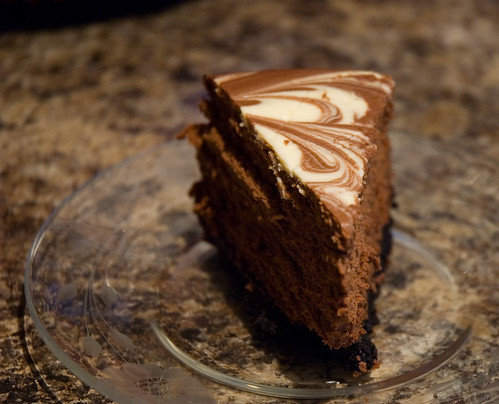
The technique might seem a bit weird at first, but it works really well, and it's my first cheesecake without a fissure the size of the grand canyon!!!!!!

Double Chocolate Cheesecake
(stolen and lightly adapted from www.epicurious.com)
double chocolate cheesecake

For crust:
1 9-ounce box chocolate wafer cookies
6 tablespoons (3/4 stick) unsalted butter, melted

For filling:
1 1/2 cup whipping cream
1 rounded teaspoon instant coffee powder
12 ounces dark chocolate, finely chopped (I used a bar of 70%, a bar of 85% and one of 60%)

2 8-ounce packages cream cheese, room temperature
3/4 cup sugar
1 tablespoon cornstarch
1 cup sour cream
2 T kahlua
3 large eggs

Make crust:
1. Preheat oven to 350°F.

2. Wrap outside of 9.5-inch-diameter springform pan with 2 3/4-inch-high sides with double thickness of foil (this recipe would be fine with a 10 inch pan too - the cake was quite high)

3. Spray bottom of pan with vegetable oil spray. Finely grind cookies in food processor. Add butter and process until blended. Press mixture onto bottom (not sides) of prepared pan. Refrigerate while preparing filling. I liked that, FOR ONCE, there was actually enough crust to easily cover the bottom of the pan. I like to use a flat bottomed potato masher to squish it all down evenly....I always bugger it up with my fingers.

Make filling:
1. Combine cream and coffee powder in medium saucepan.Stir over medium heat until coffee powder dissolves. Reduce heat to low. Add chocolate; whisk until chocolate melts and mixture is smooth. Cool 10 minutes.

2. Using electric mixer, beat cream cheese and sugar in large bowl until well blended.Beat in cornstarch.

3. Add sour cream and kahlua; beat well.

4. Add eggs 1 at a time, beating just until blended after each addition.

5. Whisk 1 cup cheese mixture into chocolate mixture. ***IF you want to make a pretty, swirly top, take about 1/3 cup of the white cheese mixture in a measuring cup and just set it aside. Swirls are pretty and make you look like a superstar and they take ZERO talent to actually do. :) Totally my style.

6. Return chocolate mixture to remaining cheese mixture; whisk until smooth.

7. Pour batter into crust. ***If you're making swirls, take a small spoon and drip/dollop the white cheese mixture over the chocolate mixture. Use a butter knife and swirl it all around. Don't try to be too orderly - this stuff swirls really nicely by just using a random pattern!

8. Place springform pan in large baking pan. (I had to use my turkey roaster)
Add enough hot water to baking pan to cone halfway up sides of springform pan. Bake cheesecake until softly set and slightly puffed around edges, about 1 hour.

9. Turn off oven. Let cake stand in oven 45 minutes. Transfer springform pan t0 rack and cool. Cover; chill cake overnight.

***IF I am somehow a cheesecake goddess and if for some reason your cake cracks, there are a few tried and true tactics - 1. Cover your cake with whipped cream, then melt some chocolate and drizzle artistically. 2. Melt an equal amount of whipping cream and chocolate (1/2 cup cream, 4 oz chocolate) to make a ganache. Pour it over and let it set for 1-2 hours.

Using a knife, cut around sides of pan to loosen cake.Remove pan sides. Cut into wedges and serve.

This cake totally rocks. It looks nice, but tastes absolutely AMAZING. YUMMY.

Thanks so much for reading! Who knows, if I get a few comments, you may even convince me to post a preggo pic.... :) I'm nearly 22 weeks now!

Tuesday, August 07, 2007

a few things....

Pin It Now!

1. I'm a lazy poop. I've cooked, but I didn't take any pictures, so I haven't posted.

2. I am now even more in love with my kitchenaid. I just made my first batch of French bread with it. OMG. SO EASY. SO yummy. Granted, my loaves were more than a little mutant looking, but the taste and texture were fabulous and the fact that I didn't have to spend 10 minutes cursing and swearing at the dough made it all the better. If you have a kitchenaid, you must make bread with it. I am going to be HUGE.

The recipe is in this PDF, on page 61 - http://kitchenaid.com/assets/pdfs/product/ZUSECARE/9708307.pdf. It's freaking good. You could halve it though, and still get two tasty loaves.

3. I ate way too much this weekend. From home-smoked ribs to ultra-tasty homemade PB ice cream (not mine, sadly! I SO need an ice cream maker!), I think (actually, correct that, I KNOW) that I gained a few pounds this weekend. Meh.

4. I don't often make the same recipe twice, but there is one manicotti recipe that is just so tasty, I keep coming back to it. I never take pictures because manicotti is one of those dishes that, in theory, is beautifully stuffed pasta, awash with a zesty sauce....but in practice, I usually make a big mess when I take it out of the pan. Not so pretty.

But it's REALLY good and worth the labour. So you should make this. It freezes wel land makes enough to feed 6 hungry people. Also, it's tasty. And an excellent accompaniment to bread.

Chicken Vegetable Manicotti
This recipe is stolen and modified from one of the Looneyspoons books. Can't remember which one, but you should buy all of them anyway.

Ingredients
1 clove garlic, minced (I usually use 3-4)
1/2 cup finely chopped onions
3 boneless, skinless chicken breast halves, cut into small pieces (I use my food processor - I cut each breast into 3-4 pieces, and then pulse 2-3 times. It's finely chopped and a lot easier than cutting up icky raw chicken by hand...the one time I tried it, it took nearly an hour. So I recommend the food processor route).
1 cup each grated carrots, grated zucchini, and finely chopped mushrooms (*if* the grater attachment of my FP still worked, I would have used it.....I did chop the mushrooms in the FP though)
3 tbsp minced, fresh basil, or 1-1/2 tsp dried (go with fresh!)
1 tbsp minced, fresh oregano or 1 tsp dried (I usually just dump in some italian seasoning)
1/4 tsp black pepper
4 ounces light cream cheese, cut into cubes
1 cup part-skim ricotta cheese
1/4 cup grated Parmesan cheese
12 manicotti shells, uncooked (I find it fills more like 14)
3 cups of your favorite low-fat, tomato-based pasta sauce (that would be one can....I usually use nearly two, because I like lots of sauce!)
1/2 cup shredded, part-skim mozzarella cheese (2 ounces)

Instructions
To make filling:

1. Spray a large, non-stick skillet with non-stick spray. Add garlic and onions. Cook and stir over medium heat until softened, about 2 minutes. Be careful not to burn them.

2. Add chicken, increase heat to medium-high, and cook until no longer pink. Add carrots, zucchini, mushrooms, basil, oregano, and pepper. Cook for 3 more minutes. Add cream cheese and stir until melted. Remove from heat. Stir in ricotta and Parmesan cheeses. Transfer filling to a large bowl and refrigerate for 20 minutes.
While filling is chilling, cook manicotti according to package directions. Rinse with cold water and drain well. (do yourself a favour and undercook the manicotti - as soon as they start getting soft, take 'em out. If you fully cook them, good luck stuffing them!)

3. Using a small fork, stuff shells equally with filling. Spread a thin layer of pasta sauce over bottom of a 9x13 baking dish. Arrange stuffed manicotti (it's a tight squeeze). Pour remaining sauce over manicotti and sprinkle with mozzarella.


4. Cover with foil and bake at 350 degrees F. for 40 minutes. Let cool for 5 minutes before serving. Garnish with chopped parsley, if desired.

Yield: 6 servings
Per serving: 404 calories, 10.9 grams fat, 6.1 grams saturated fat, 33.3 grams protein, 43.6 grams carbohydrates, 1.4 grams fiber, 65.6 mg cholesterol, 586.8 mg sodium, percent of calories from fat: 24

Notes: Chicken is easier to cut into small pieces if it's partially frozen. It's easier to stuff manicotti shells if they're slightly undercooked. This also makes them less likely to tear. Drain the cooked shells and rinse them with cold water to stop the cooking process and to keep them from sticking together. Use a teaspoon to stuff them. If you prefer, you can substitute lasagna noodles in this recipe and make lasagna roll-ups, or you can use 24 jumbo pasta shells.

So, no pictures, but you've all seen manicotti before...this looks pretty much the same, but tastes REALLLLLY good. I love this stuff. Can't enough, actually.

Thanks for reading! Hope you didn't eat as much on the long weekend as I did!

Wednesday, August 01, 2007

vegetable-free zone

Pin It Now!

No green veggies anyway. Perhaps chlorophyll-free zone would be an apter title. Or so hubs told me.

Whatevs.

I was all set to make a nice wholesome black bean soup tonight (so maybe now I'll make it tomorrow), but hubs was having none of it. I think his soupy wisdom tooth extraction recovery has turned the poor man off all soups. He wanted fish and chips.

So of course, once he mentioned the idea, *I* also wanted fish and chips.

But I don't deep fry.

EVER.

So I had to get a little creative, and being that it is still 'eating for free' this week, I wanted to venture a little deeper into the cupboards to investigate what could be had.

The result was actually amazing. This was better than going out for pub grub. This was a little exotic, a touch of fusion and all over an extremely tasty meal.

I definitely should have had veggies, but my fridge is emptying out and I didn't really have too many veggies, so I just didn't make any. I guess one of the advantages of being a pseudo-grown-up is that if I don't want to make any veggies, I just don't have to. (Granted, I would have liked veggies, but must confess to getting a bit of a thrill out of forgoing them). Maybe thrill isn't exactly the right word.

At any rate, this was a little bit of experimentation, but both dishes are wonderful. It's a fun combo together, but either would be fabulous paired with other sides.

Fish&Chips - Fusion Style
seared tilapia with oven fries

Chips...aka Cumin-Spiced Potatoes with Curry Dip
1 large sweet potato
5 large regular potatoes
1/4 c. vegetable/olive oil
1 T cumin
1 t ancho chile powder
1 t thyme
2 cloves garlic, minced
1 T mrs. dash extra-spicy
salt
pepper

1. In a ginormous bowl, combine oil and spices. Add some salt and pepper.

2. Peel the sweet potato and cut into desired fry size. For the regular potatoes, don't peel them (peel has fibre and vitamins and would be a shame to toss it). Just cut 'em up.

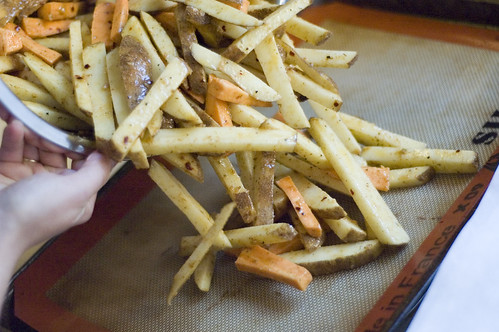
3. Toss potatoes in oil/spice mixture. I like to cook my fries on a silpat because it browns them REALLY nicely without making them stick. Otherwise, you could use parchment paper (works well, doesn't brown quite so much) or well-greased foil (but be careful, because the fries ALWAYS stick to the foil and you lose the nice browned bits!!!!!).
oven fries are so good

4. Bake in a 400F oven for 45-50 minutes, stirring/flipping every 15-20 minutes. The longer you bake them, the crispier they will be. The silpat is great for this.

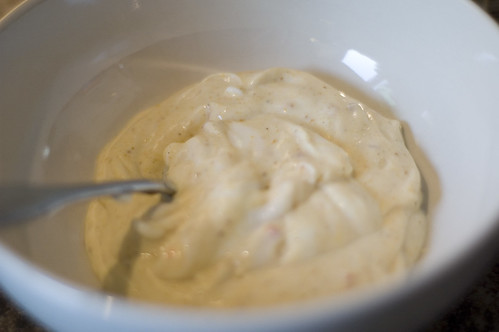
5. Serve with a curry dipping sauce - I like to mix a bit of hot pepper jelly and curry powder into either low-fat sour cream or fat-free plain yogourt. This time, I used sour cream because that's what I had.
curry sour cream sauce

Fish...aka Wasabi-Crusted Tilapia with Honey Garlic Wine Sauce

4 large tilapia fillets
1 egg
1/3 c. milk
1-2 T light soy sauce

1 c. dried plain breadcrumbs
1-2 T wasabi powder
1 T steak spice
1 T mrs. dash extra-spicy

canola oil

1/3 c. madeira or other sweet wine (could use marsala, sherry or even sake....substitute broth and a bit of honey otherwise)
1/3 c. honey garlic sauce (I used v-h brand....you could alternatively use teriyaki sauce)
1/4 c. minced coriander (could use green onions, mint or basil)

1. Cut fish into serving-sized portions (my tilapia comes in almost double-fillets, so I like to cut them down the middle).

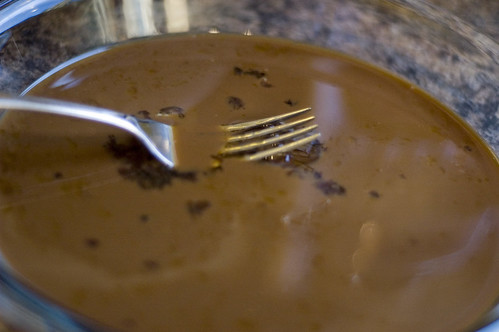
2. In a pie plate, combine egg, milk and soy sauce.
egg milk and soy sauce for fish

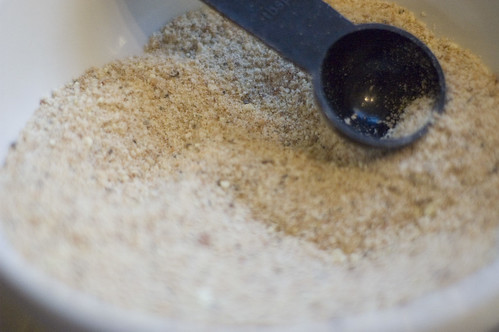
3. In a bowl, combine bread crumbs, wasabi powder and spices.
plain breadcrumbs, wasabi powder, spices, salt, pep

4. In a large skillet, heat a generous amount of oil. The more oil you use, the better it will taste ;). You don't have to cover the bottom of the pan at all, but 2-3 T is a good start. Heat over medium-high heat.

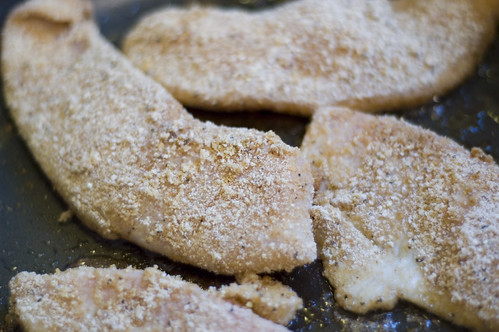
5. Pat the fish dry with paper towel. Dip in egg mixture, then cover with bread crumbs. Place in pan and brown about 3 minutes on each side. (You can do about 4 pieces at a time). If you have to do it in batches, place the cooked fish in a pan lined with parchment paper (put it over the warming vent on your stove, if you have one). Repeat with remaining fish as necessary, adding more oil for the second batch.
tilapia

6. Once the fish is all cooked, place pan in oven and reduce temperature to 250F (don't want it to overcook and dry out while you make the sauce). In the still hot (and not cleaned) pan, add in wine, sauce and coriander. Bring to a boil and reduce a bit. Pour hot sauce into a small bowl for serving.

madeira, honey garlic and coriander

7. Serve fish with the honey garlic wine sauce, and fries with the curry dip.

YUMMMMY. I want more. Is that bad?

Wednesday, July 04, 2007

chocolate birthday wishes for me

Pin It Now!

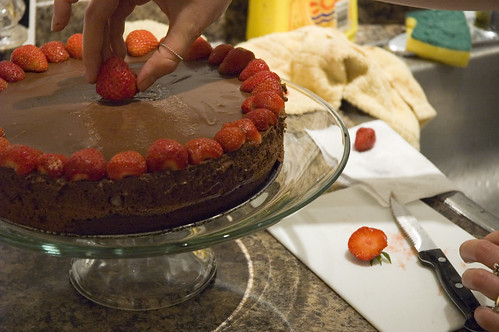
First, I wanted to thank everyone for their birthday wishes, and second, I wanted to share with you the chocolate pile of decadence that I'd like to call my birthday cake. One POUND of butter, one POUND of chocolate and 9 eggs. This is definitely good news.

mmmmmmmmmmmm.....strawberries and chocolate

I had a great (and busy) long weekend for Canada Day and I'm looking forward to the rest of this month as I am now DONE night classes and have FREEEEEEEEE weekends, which excites me beyond all comprehension.

So yeah, I'm at work (on lunch though....), but life is good, much chocolate has been had and now I'm back to my much leaner day-to-day subsistence. I can't say this past weekend of indulgence (cheese, bread, chocolate, hotdogs [veggies ones], marshmallows, tacos, boooooooooooooooze) has left me unscathed, but the mere pound I gained is, I suppose, somewhat of a pittance to pay for all the fun that was had.

Friday night, my dad took us out for dinner to a local favourite - Absinthe Café and dined on mucho amounts of local delicacies - seared halibut, steak-frites, salmon rillete, jerked frog legs, escargot, kir royal.....we had it all.

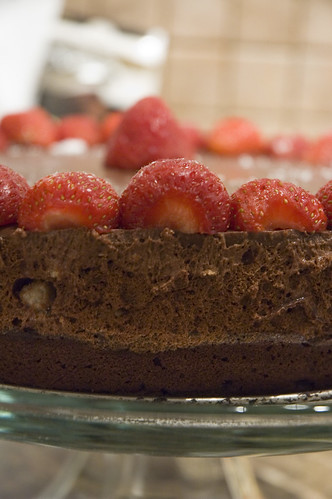
But perhaps the best part was saved for last, when we all came back to my place for a wee little taste of the chocolate torte I had prepared. This is pure and ultimate chocolate decadence. It doesn't look as pretty as the mousse torte did, but it's less sweet and more chocolate, and I wouldn't have it ANY other way. MAN was this good. Perfect with a nice hot espresso, or a rich, black coffee, there is no better way to cap off the night than chocolate.

Methinks too, that it would have been at least a little better had I STOPPED at chocolate....but nooooooooooooope.....we bought a bottle of bubbly and a bottle of Hypnotiq and I will confess that the combination of those two was nearly as potent as the namesake of the restaurant we went to. Ouch. Won't be doing that again........

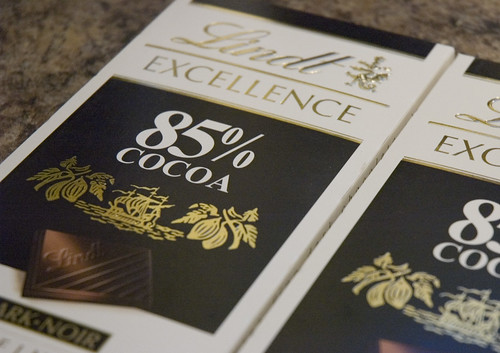
Anyway, onto the chocolate. I stole this recipe from Jennifer at Domestic Goddess and it was fabulous. I would make a couple of small changes in retrospect, but nothing interfered with the dark, voluptuous deliciousness of chocolate. This is goooooooooooooooooooooooooooooooooooooooood. If you are a chocoholic like I am, you should make this. But it is strongly suggester (read: ORDERED) that you invest in some decent quality chocolate. If you wouldn't eat the chocolate, then I would not advise on putting it in your cake. This particular cake really depends on the chocolate for its flavour, so shell out a little extra to get good stuff. Lindt is by no means the best available, but it's widely available where I am and I find it gives great results. If you've got Varlhona, by all means, USE IT, but definitely try to find some good stuff.

Ultra-Dark Chocolate Mousse Torte
oops - is that egg white i see?

Ingredients:

Cake
cocoa powder for dusting the pan (or confectioner’s sugar)
200 g dark chocolate, chopped (2 100-g bars of 85% Lindt here)
1 cup unsalted butter
1 cup sugar
5 large eggs
1 tablespoon coffee liqueur
¼ teaspoon salt
¼ cup all purpose flour

Mousse
½ cup unsalted butter, cut into pieces
4 large eggs, separated
½ cup whipping cream
1 tablespoon coffee liqueur
200 g dark chocolate, chopped (2 100-g bars of 70% Lindt here)
½ cup sugar

Chocolate Ganache Topping
*In retrospect, I found that the solid texture of the ganache impeded the lightness of the dessert (and my ability to cut and serve). If I were to make this again, I would use a layer of whipped cream, perhaps with a bit of strawberry purée to lighten it up. I just didn't think this extra layer was necessary, though it was tasty!

1 cup whipping (heavy) cream
1 tablespoon light corn syrup
100 g dark chocolate, chopped (1 85% Lindt bar)
1 tablespoon unsalted butter, room temperature


Directions:

Cake:
1. Preheat oven to 325 F. Butter a 10” springform pan, dust with cocoa powder (or confectioner’s sugar), wrap the outside with two layers of foil (so it doesn't leak) and set aside.

the darker the better

2. Melt chocolate with the butter in a large heavy saucepan over low heat, stirring continuously. Once melted, set aside to cool to lukewarm.

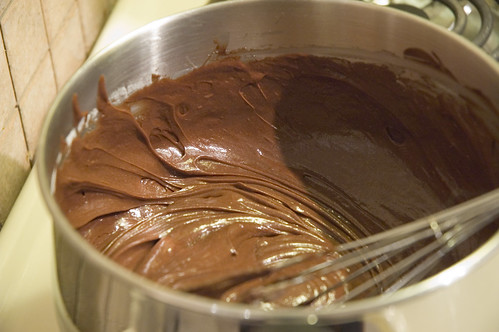
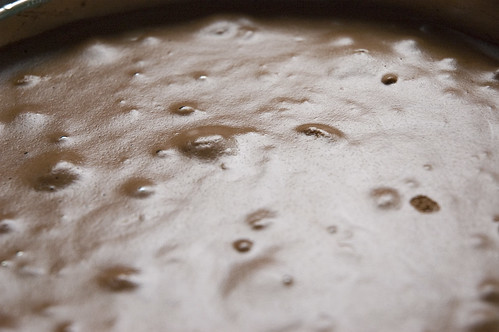
chocolate torte batter

3. Whisk in sugar, then whisk in eggs 1 at a time, blending well after each addition. Mix in coffee liqueur and salt, then add flour and combine. Pour batter into pan.

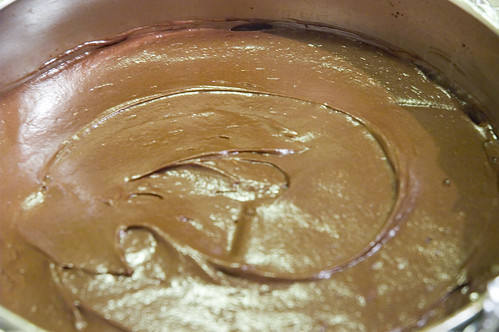
torte batter about to go in the oven

4. Bake until cake just rises in center (tester inserted into center will not come out clean), about 35 - 40 minutes. Cool completely in pan on rack. Cover; chill while making mousse. (Just a word to the wise - the torte shrinks slightly as it cooks, so you will have a tough time getting a really perfect edge to your mousse layer. Lack of perfection has never stopped me though!)

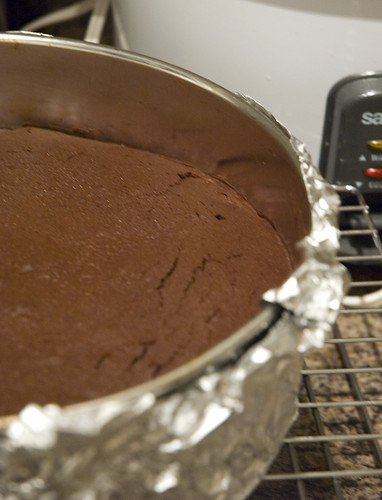
baked chocolate torte

Mousse:
1. Melt butter in a double boiler (water in bottom should be simmering). Whisk yolks, cream and coffee liqueur in a small clean bowl to blend.

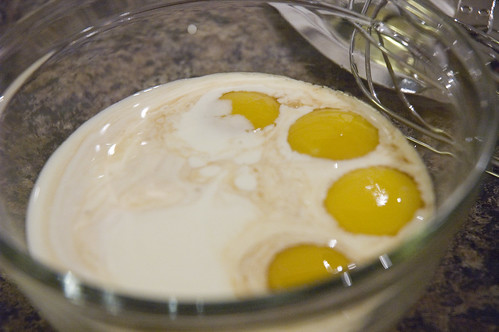
the beginnings of mousse!

2. Gradually whisk yolk mixture into bowl with melted butter. Whisk constantly over simmering water until thermometer registers 150°F, about 6 minutes (mixture might appear broken). (I didn't have a candy thermometer, but my meat thermometer seems to have worked just fine....I also don't have a double boiler and a glass bowl over a simmering pan of water seems to have done the trick)

3. Remove from over water; add chocolate and stir to melt.

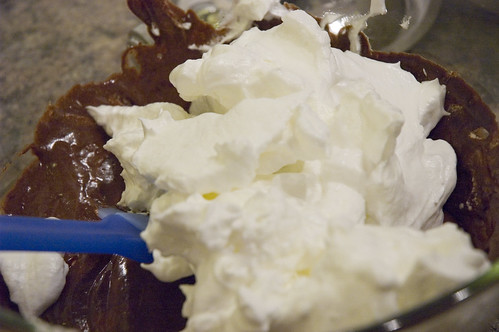
mousse!

4. Set aside. Beat egg whites and ½ cup sugar in large bowl to medium-stiff peaks. Whisk ¼ of beaten egg white mixture into warm chocolate mixture to lighten. Fold in remaining egg white mixture.

fold in those egg whites!

5. Pour mousse over cake in pan; smooth top. Chill torte until mousse is set, at least 6 hours and up to 1 day. (Um.....I suck at mixing.....there were a few little bits of meringuey egg white in my mousse layer....I was terrified of deflating it! No complaints though, funny enough) Also, my mousse actually SET. This was a happy, happy day, folks!

So it's a little lumpy....so sue me....
cake in the morning


Chocolate Ganache Topping
*Again, I recommend subbing sweetened whipped cream for this layer. Just a personal choice. The ganache layer was a little thick for my liking, and the weight of it caused the cake to sloooooowly self-destruct after the springform sides had been removed for a while!

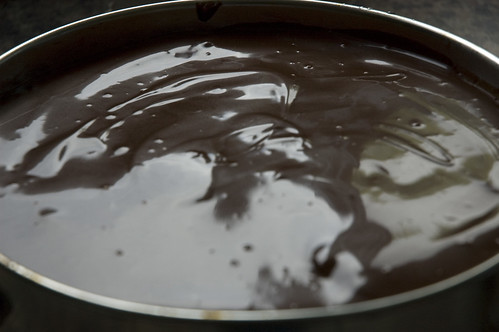
1. Bring cream and corn syrup to boil in a heavy small saucepan. Remove from heat. Add chocolate and butter; whisk ganache topping until smooth and allow to cool until just pourable. (Due to timing, I cooled ganache overnight, and just nuked it in the morning to pour over my set mousse)

2. Carefully pour or spoon chocolate ganache atop mousse and smooth with an offset spatula. Refrigerate just until ganache sets, about 45 minutes (Can be made 1 day ahead.)

Doesn't this look decadent and delectable?
ganache on the cake

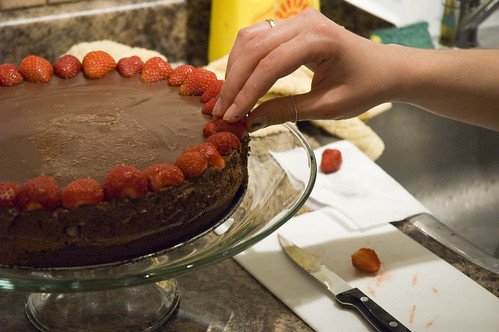
Serve topped with strawberries or raspberries! I think some very high quality vanilla ice cream would go nicely with this as well.

I put berries on mine! Sadly, my plastic wrap over the cake caused a bit of a condensation issue, so the top didn't look quite as perfect as I would have liked....but it's CHOCOLATE....so who cares, right?
the last strawberry....

Again....the chocolatude speaks for itself....
cake is so good

Monday, April 09, 2007

a chocolate dipped century

Pin It Now!

So this is my hundredth post. And...uh....it seems it took me two weeks to get my ass in gear to write it. I officially suck. So thanks for sticking with me, and I promise you, this is absolutely worth the wait.

I give you here a chocolate torte with not one, two or even three layers of chocolatude. We have FOUR full layers of chocolate bliss, on top of which are three more layers of evil delicious and sinful chocolate. We're talking a pound and a half of some of the most delicious stuff on the planet. And probably about sixty billion pounds on my butt.

I had a full house for Easter Dinner (actually, the house has in general been quite full lately; I can offer this only as a partial explanation for my absence) and since I'd found myself making alot of the same-old, same-old lately, I wanted something completely off the wall indulgent. Last weekend, I actually had two dinner parties (one big, one small), and while they both went great....they were boring. Nothing new or adventurous or exciting. And I NEED food to be new, adventurous and exciting.

So what better time to experiment than Easter dinner (talk about a same-old, same-old kind of meal.....). Since I'm all about being backwards and doing things my way, I'm going to start with dessert first.

I wanted to make something so lusciously and singularly chocolatey. Something so full of all the good stuff. Something so heart-stoppingly rich that you can only have a tiny little piece.

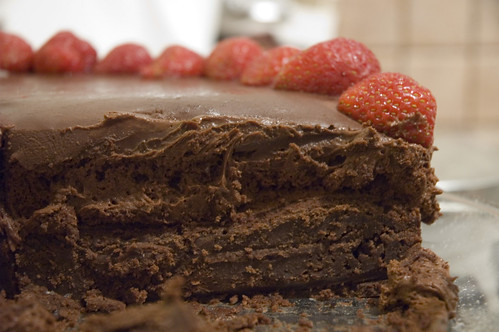
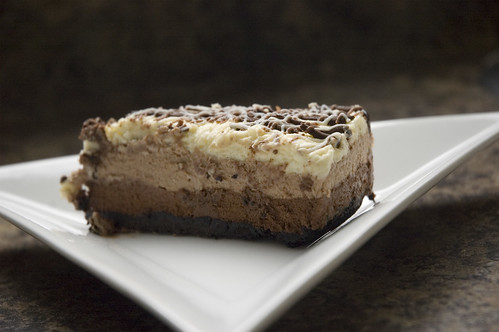
And I found this something, thanks to my friend epicurious. A triple chocolate mousse torte. And I made it. But as I said, mine actually had seven layers of chocolate.

This recipe is fabulous. It has great presentation (particularly if you fancy yourself more of a patissier than I......mine looks pretty good, but someone with talent could really do a lot with this!). It's a bit time consuming to make (especially as you have to wait for each layer to firm up before adding the next), but it's not terribly difficult and if you're busy doing other things, the time goes by pretty quickly.

Triple Chocolate Mousse Torte
(adapted from Epicurious.com)

1 1/4 c. chocolate cookie crumbs (I bought Oreo crumbs - you could make your own in the processor)
1/4 c. melted butter

1. Combine crumbs and melted butter.
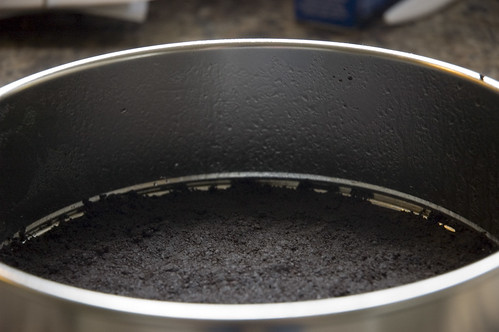
2. Press into the bottom of an 8 or 9-inch springform pan that has been oiled. Chill while you do the rest of the chocolate stuff.

Oreo crumb crust

Vegetable oil
120 grams bittersweet (not unsweetened) or semisweet chocolate, chopped (plus extra for drizzling)
120 grams milk chocolate, chopped (plus extra for drizzling)
120 grams good-quality white chocolate (such as Lindt or Baker's), chopped (plus extra for drizzling)
I had 2-100g bars of each kind of chocolate. I bought Lindt because it's easy to find here and it's reliably yummy. I personally don't like Baker's because it tastes like ass (sorry, but if I wouldn't eat it, I don't really want to melt it down into cake!)
product placement
1/4 cup cold water
1 tablespoon unflavored gelatin
5 large egg yolks
1/4 cup sugar (if I made this again, I would omit the sugar)
1 cup half and half

1 3/4 cups chilled whipping cream

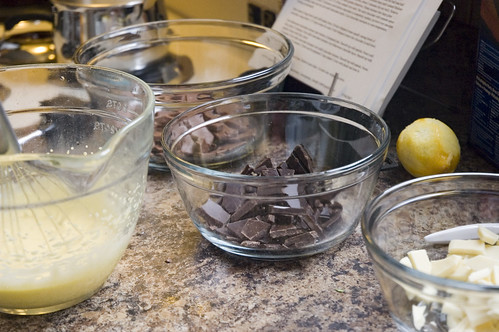
1. Place each chocolate in separate medium bowl.

2. Combine 1/4 cup water and gelatin in small bowl. Let stand until gelatin softens, about 10 minutes.

3. Meanwhile, beat yolks and sugar in large bowl until mixture is pale yellow and very thick, about 5 minutes. Bring half and half just to simmer in heavy large saucepan.

4. Gradually whisk hot half and half into beaten egg mixture. Return mixture to same saucepan. Stir over medium heat until custard thickens and leaves path on back of spoon when finger is drawn across, about 3 minutes (do not boil) I think I might have boiled it. Oops!

5. Remove custard from heat. Add softened gelatin; stir until gelatin dissolves. (NOTE: Mine never dissolved totally....or it could have been bits of egg yolk....at any rate, my custard wasn't totally smooth. Straining seemed to help a lot though!)
chopped chocolate and custard

6. Strain mixture into large glass measuring cup. Immediately pour 1/3 of hot custard over each chocolate. Stir each chocolate with separate spoon until melted and smooth. If mixture cools before chocolate is completely melted, set bowl over saucepan of simmering water and stir just until chocolate melts (NOTE: I found white chocolate melted very easily, but dark and milk needed to be heated over water). Cool chocolate mixtures to room temperature, stirring occasionally.
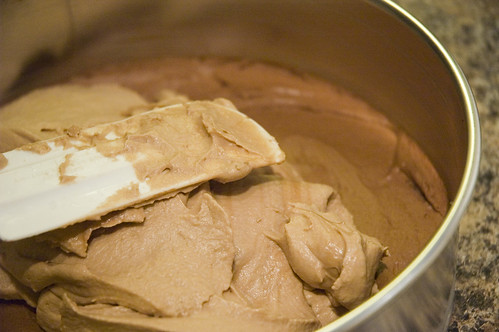
chocolatey custards

7. Beat whipping cream in large bowl until stiff peaks form. Divide whipped cream equally among bowls of chocolate, using about 1 1/3 cups cream for each. Fold whipped cream into chocolate in each bowl.

8. Pour bittersweet chocolate mixture into bottom of prepared pan. Smooth top with spatula. Freeze until firm, about 15 minutes. Pour milk chocolate mixture over bittersweet chocolate layer. Smooth top with spatula. Freeze until firm, about
15 minutes. Pour white chocolate mixture over milk chocolate mixture. Smooth top with spatula. Freeze until firm, about 15 minutes.
milk chocolate mousse layer

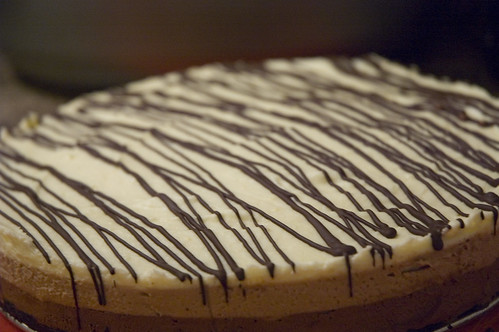
9. Run sharp knife around sides of pan. Remove pan sides. At this point, I melted my reserved chocolate and drizzled it over top. All I did was crumble the chocolate, and microwave it for about 1 minute and stir until melted. Then I spooned it into a small ziploc, snipped the corner and drizzled away. This is optional, but it makes it look fancier and covers up the fact that I can't level a cake to save my life. :)

Here's the dark chocolate layer (I think it actually looks pretty snazzy with just the one layer):
drizzly dark chocolate

And then the milk chocolate layer:
milk chocolate drizzle layer

And just because I could, here is the white chocolate layer:
white chocolate drizzle layer

I kinda made a bit of a mess with the chocolate.

But so worth it. Seven layers of chocolate is no mean feat......but as I said, this is REALLY rich, and were I to make it again, I would omit the extra 1/4 c. of sugar - I think the chocolate is sweet enough on its own. This is the perfect treat for the chocoholic (i.e., ME and my father-in-law). Thanks for reading! I will soon be back with the rest of dinner, including my flaming attempts at turkey roasting.......

yum

Serves 12.

Friday, December 29, 2006

The big 5-0

Pin It Now!

Woohoo! This is my fiftieth post on this blog! Thanks to everyone for all the comments and encouragement....I love that there are people from across the globe coming to visit here - in the last few weeks, I've seen that there are people from Australia, Madagascar, Turkey, all through Europe, Mexico, the US and of course fellow Canucks from coast to coast. There is nothing cooler than this. :)

SO thanks to all of you for visiting.

I actually have two posts worth of stuff, though I think I'll save half for tomorrow morning. :) Laziness, procrastination and all that, you know.

I've done so little this week that I'm almost ashamed of myself. I have spent so much time surfing the net, snoozing, drinking (yikes) and eating (even more yikes) and now I'm through almost an entire week of leisure with very very very little to show for it...

But it is lovely. And once things pick up again in January, I will at least have my week as a bonbon-crunching lady of leisure (à la Peggy Bundy, but minus the stirrup pants) to look back on with nostalgia.

So....lazy.

I did at least make dinner tonight (for MPV type brothers) and it while it was a bit homey feeling, the taste was fabulous.

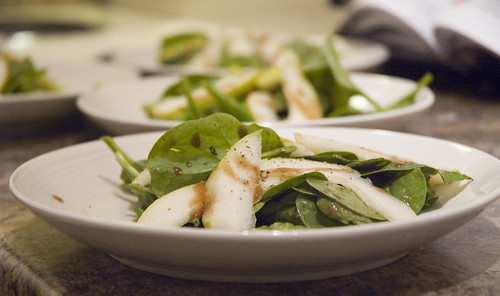
The first course was a very simple salad. I simply took baby spinach (gambling my life on US imported stuff...if I'm not back next week.....) and tossed it in my favourite purchased salad dressing - Renée's wellness balsamic fig dressing. This dressing actually tastes good and is relatively low in all the bad stuff. Two thumbs up. I then topped the salad with some thinly sliced pear (you could call me creative, but really they were just going to get too ripe and get moldy soon, so it was a choice of both strategy and desperation......). Drizzled with a little more dressing.

And voilà...


Nice, eh?

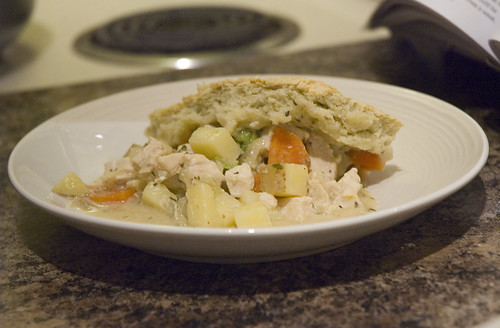
For the main course, I made my absolute favourite chicken pot pie recipe. In fact, before I tried this recipe, I actually hated chicken pot pie. To me, meat and pastry was just the most nasty match I could imagine. But then the Podleski sisters introduced me to an herbed biscuit crust. I was sold. You will be too. This recipe is that good. It's from Looneyspoons, which everyone should own. Several people have been kind enough to post this recipe on the net, so I invite you to check out "Starvin' Guy Chicken Pie." Yum. It's so full of flavour and so NOT gross...and it's relatively simple to make.

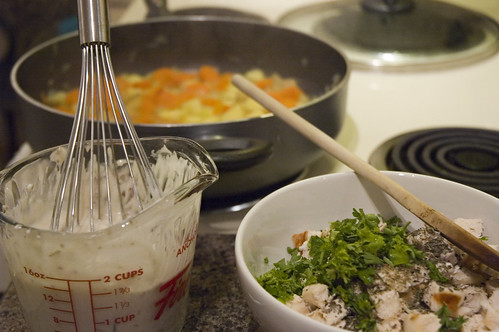
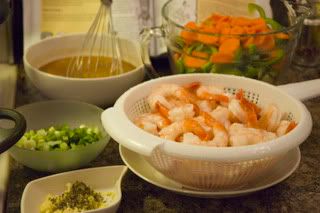
One thing I do try to do before I make any recipe is to have all the ingredients chopped and ready so I'm not scrambling like mad (though it still often happens). It makes for better pictures for you, less hectic kitchening for me and overall the only negative are the massive piles of prep bowls I end up with. I did the dishes tonight...eh...really....okay...maybehnoididntdothemyet...

Bah.


I (as always) will confess to being lazy and just cooking it in my deep dish pan, but this recipe doubles easily, and once it's cooked, you can freeze it too. Once I've mixed in all the ingredients, I just flatten it down and roll out the crust to be best of my abilities. (my rolling abilities are minimal....perhaps even negative. No pics of the sad scraggly uneven edges for you!)

But at least I can flatten not too badly! Here's all the filling, just waiting for a crust.


Quick tip for those of you who don't think you have an oven-proof pan.....pretty much any pan can be made oven proof to 350F. All you have to do is cover the handles with foil. Don't cook at any higher than 350F, but for those times when you just really don't want to dirty yet another pan, this works quite well. Everyone should have a deep italian sauté pan with a lid. It's great for SO many things.

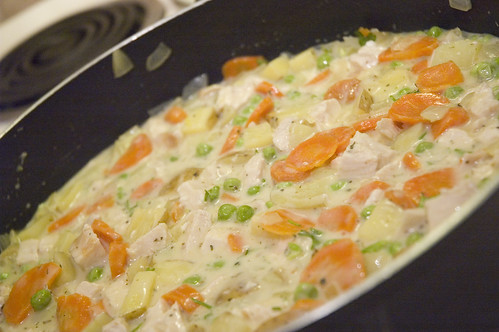
And here is the final tastiness, about 2 minutes before I scarfed it down. Yummmmmmah!


Enjoy. Have a lovely night, cook lots, and make sure you eat your fill before January 1!

Wednesday, December 27, 2006

Thai-ing not to eat like an overstuffed pig

Pin It Now!

But it's not working so well. Man, Christmas and the scale are just not good friends of mine right now! I really should just stop getting on the scale...my lovely hubby was so kind as to move it upstairs so I can now have the daily pleasure of seeing quantitative results of my overindulgence. Yikes.

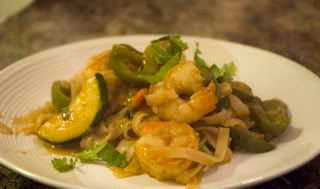
In light of this new knowledge, I opted for a more healthy dinner attempt tonight - inspired from "Thai it! You'll like it!" from Looneyspoons - a peanutty shrimp pasta dish.

Here is my modified version....
1 pound package of rice noodles (I had medium width, about 5-6mm)
1 cup chicken stock
1 T sesame oil
1/4 c natural peanut butter
3 T low-sodium soy sauce
2 T rice vinegar
1/4 c sweet soy sauce (nam pla)
1 T hot pepper sauce
1/2 t hot pepper flakes
1 T fresh ginger, grated
2-3 garlic cloves, minced/pressed
1/2 t dried basil
1 large zucchini, sliced
1 green pepper, sliced
1 carrot, sliced (was going to use 2, but got tired of chopping veggies, so passed it on to my two fat and happy rabbits)
1/2 c green onion, chopped
1.5 pounds cooked shrimp
fresh coriander

1. Set hot water to boiling while you prep the sauce.
2. Combine the chicken stock, peanut butter, sesame oil, vinegar, soy sauce, sweet soy sauce, hot sauce and pepper flakes in a bowl. Set aside. Chop/prep garlic, ginger and veggies.
3. Cook noodles according to package directions (usually about 4-5 minutes), drain and rinse twice in cold water to keep from sticking, esp. if your dinner guests are late like mine. ;) This comes together quickly so it's best if you have everything ready to go before you start throwing things on the stove!


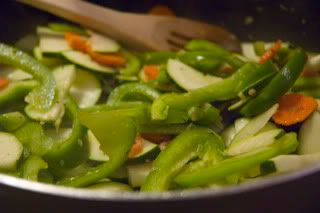
4. Heat a dash of olive or sesame oil in a large large pan. Add the garlic, ginger and dried basil. Cook until fragrant (about 2-3 minutes). Add carrots and cook for another minute or two. Add the zucchini, green pepper and cook until desired softness.


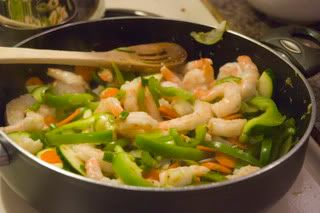
5. Add green onion and shrimp - cook until shrimp are heated through, and then add your sauce. Bring to a boil.


6. Add noodles (I like to use tongs to add them in little piles throughout the pan - it's easier to mix this way than if you dump the whole lot in!)

To serve, garnish with some fresh coriander (or fresh basil). Yumminess. This was a little bit sweet, a little bit spicy and yummy peanutty goodness. Highly recommend.


I can only hope the orgy of Christmas consumption will end soon (all self-induced, I can assure you....as I sit here with my glass of 2001 vintage, a bag of skittles and a can of pirouline....)

So much for healthy dins, eh?

Anyway, my little bro is dropping by tomorrow so I'm planning a nice sirloin tip roast (um....yeah....hope it's tender-ish and not shoe leather-ish) and more wasabi mashed potatoes. Will update tomorrow with pics and reviews!

Thanks for reading! :)

Saturday, December 09, 2006

Bah. Humbug.

Pin It Now!
So................I was all set to upload a pic I took of my kitchen's current state, but hubs wouldn't go for it. Something along the lines of airing dirty laundry and all that.

Though I argued that it was actually dishes and not laundry, it was to no avail. ;)

Most un-goddess-like tonight. I ordered in a massive pizza from Gabriel Pizza, drank nearly a litre of coke and did not clean a darn thing.

That said, Gabriel Pizza has, IMHO, the best darn north-american-style pizza in the city. If you want thick crust, tasty toppings, real ingredients, you can't beat Gabe's.

Will have to whip myself into shape tomorrow....I'm off to brave the insanity of the December mall. If I"m not back, it's because I've been arrested for going postal on my fellow Christmas shoppers.

Season's greetings, my butt.

Friday, December 01, 2006

Food Porn*

Pin It Now!

A momentary spark of light in my eternal domestic struggles has now been overshadowed by yesterday’s horrific transgressions against all that is real food and proper nutrition. The last couple of days have been terrible, food habit-wise, influenced in no small part by a busy spurt at work….it’s kind of a feast or famine job. When work is feasting, the workers are ‘famining’ and vice versa.

My system has been a bit wonky for the last few days, and that hasn’t helped either. Now, it’s also important to remember that I actually did have real food at my fingertips – on Wednesday, I had brought a bit container of homemade spicy chicken chow mein, so there was no excuse for the horror that was yesterday.

I skipped breakfast.

Lunch was two cookies (both white chocolate macadamia nut – the best cookie ever!).

Afternoon snack was two more cookies (one white chocolate macadamia nut and the other double chocolate).

Because I had a class after work yesterday, I couldn’t cook, but really, there is so much choice at the food court that I had no business eating what I did! I got an A&W teen burger, onion rings, chubby chicken strips (more like chubby thigh strips for me…..) and a diet coke. Which, of course, redeems the entire deep-fried, sodium laden artery blocking disaster.

Terrible. I would have been better off not eating! Okay…maybe not, I was getting woozy, but still. What makes people choose this fatty grossness instead of healthy alternatives????? I could have had a fresh sandwich, a nice salad, shawarma, teriyaki, etc. I could have had any number of things. But I didn’t.

I hope to redeem myself today. Brekkie was a relatively sane bagel with cheddar, lunch was the aforementioned prodigal chow mein and tonight is our romantic dinner à deux.

I browsed around through epicurious, looking for something that would be relatively quick to prepare. Also….I have to confess that I still have to do Wednesday’s dishes…..so dinner prep will be delayed by a few minutes while I clean (something I should have done Wednesday). The table is also a little worse for wear…..the flower arrangement from my dinner party two weeks ago has now come to a sad, yucky, fuzzy end (although the fuzz only came yesterday). Time for that to hit the dust.

Anyway, I happened upon a lovely Valentine’s menu for two. I know we’re nowhere close, but it sounded like it would be a nice treat for hubs and I. I was seduced by the amazing colour of the beet soup. Hubs hates beets. I bought beets a while ago. I’ve now convinced him that he won’t die if he tries to eat beets, so hopefully he will enjoy this soup! I love beets – the gorgeous fuschia colour of this soup is like nature’s middle finger to artificial colouring…(perhaps directed at me after the tomato soup incident two weeks ago….!) I’m excited. I’ll try to duplicate the heart, but we’ll see….I’m discovering that the key to having any shape stay is that the consistency of the drizzle must be congruent with the consistency of the soup. If it’s thicker, it sinks, and if it’s thinner….somehow it also disappears. Anyway, even if hubs doesn’t like it, the recipe only makes two servings, so I will lap up bowl 2 tomorrow.

The next course (the Dungeness crab) should be delicious. I’m going to follow their suggestion of a salad accompaniment….no tarragon in the dressing though. I despise tarragon for some reason or another. I just find it such an aggressive, icky flavour….though I know there are many who would say the same of coriander, which is one of my favourites! That said, I’m not sure we’ll be using Dungeness crab….as lovely as it would be, I might opt for something a little more economical….will have a looksee and figure it out then (perhaps scallops or jumbo shrimp would work). The bread will be a must, though I don’t have time to make my own tonight.

Last, the chocolate pots de crème sound delicious….very excited.

Will update tomorrow with pics. :)

* For the record, and before anyone points it out, I am fully aware that I stole this moniker from the brilliant folks at the Nutrition Action Healthletter - this is a great read, and one I should be forced to memorize after yesterday!

Sunday, November 19, 2006

What goes up, must come down

Pin It Now!

After such a luscious evening of overindulgence and rich cuisine, there really was, culinarily speaking, nowhere to go but crashingly, horrifically, down.

I'm of the opinion that you can't always be "ON" when it comes to your martha-esque attempts. Consistently trying to outdo yourself day after day is just not a good idea. It's exhausting.

Not to mention expensive....I think I spent about $130 in groceries for dinner last night, not to mention an additional trip to the liquor store. But it's always so enjoyable.

But the food today was perhaps not as universally enjoyable.....

One of hubs' favourite snacks is roasted pumpkin seeds, and I'd like to think I make some pretty darn awesome roasted pumpkin seeds....every Hallowe'en, we clean out the pumpkin, wash the seeds, and then I toss them in olive oil, cajun seasoning, hot sauce, garlic, pepper and worcestershire sauce. Bake at 350F for about an hour, stirring every ten minutes. They are AMAZING.

But since hubs was still craving pumpkin seeds, and pumpkin season was long over, I thought I would try to "fake" it. I bought the plainest pumpkin seeds I could find (just plain roasted ones from Bulk Barn), thinking that I would do the same thing, and just re-roast them. So I tossed a whack of them in EVOO and seasonings, and put in the oven at 350F for 10 minutes.

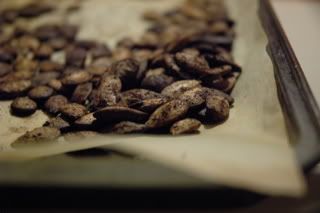
When I came back to the kitchen, it was filled with smoke! I managed to absolutely burn the crap out of the seeds....so very very sad. It's been 5 hours and it still stinks.

Photobucket - Video and Image Hosting

I know they look like coffee beans, but they're actually charred, smoky, nasty pumpkin seeds. So sad.

Spurred on by my minor disaster, I just didn't really feel like making real food (also, while I've done a couple of dishwasher loads, I've yet to do any handwashing). I desperately wanted to go out and have Mexican, but hubs wouldn't go for it. Meanwhile, I was secretly imagining the delight of a yummy burrito, draped in luscious melty cheese surrounded with pools of refried beans and other such yummy goodness.

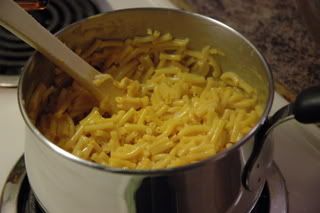
And I had KD. I will confess to adding half a chopped shallot and some grated extra-old cheddar, but it was still KD in its packaged, powdery glory. Yum.

The funniest thing is that I never had it growing up (mom's homemade mac&cheese being a family favourite), but now that I am supposed to be a 'grown-up' I often revert to the perennial childhood favourite. Not sure why it has such an appeal, but it somehow does.

Photobucket - Video and Image Hosting

Look at that. All shiny and orange, and most definitely unnatural....but enjoyed nonetheless. :) I ate a whole box.

Found out today that my mom will be dropping by tomorrow....so I have a little more tidying to do tonight....meh.

Anyway, I'll leave you with a picture of Darwin, because he was cute and wanted to say hi. He too, has dreams of being an internet star. hahahaha

Photobucket - Video and Image Hosting

Related Posts with Thumbnails