now, officially, a DARING BAKER...
So this post is a day late, but you have to forgive me because it's my birthday. :)
The Daring Bakers is a group of intrepid food bloggers who, every month, follow a chosen recipe to a TEEEEEEEEEEE and make some crazy, complex carbohydrate laden craziness.
This month, we made bagels. I've made bagels before, using Mark Bittman's recipe. They were awesome a beautifully bagelly.
Sadly, *my* bagels this time were really not at all what a bagel should be. I personally found the recipe a little lean in terms of salt, and the instructions were a bit to vague in terms of how much flour should be used (stating 6-8 cups......unless one uses at least 8 cups, the dough is too bready to really be a true bagel).
Also, I found the yield to be a bit off.....the recipe stated that it would yield 15 (and several of the DB crowd purport to have succeeded here, so clearly this is just a ME thing), but I ended up with FORTY.
I live with just my husband. I don't really eat refined carbs.
So what could I do, but bring all of these lovely little bagels to work.....I ended up with onion, cinnamon and plain bagels and all of them were relatively quick to disappear from my bin. So even though they weren't the best bagels ever, it certainly didn't seem to impede people from eating them.
So here is a little documentary-style footage of my path....
I was quite impressed at the 4T of yeast called for in this recipe!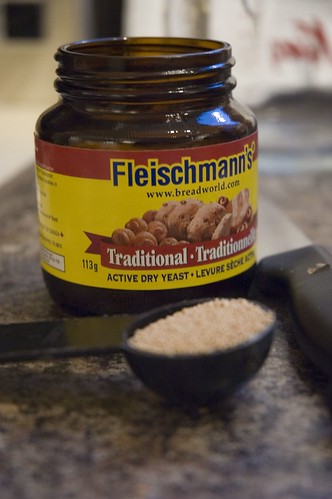
I got RIGHT into that dough...DB style!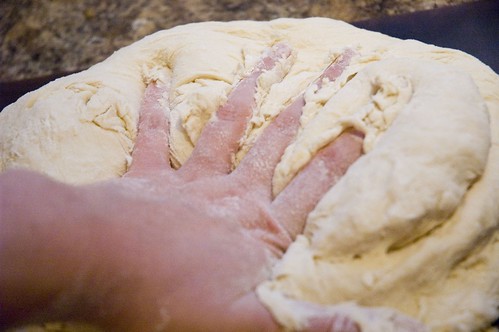
Of course, I got antsy and put too many bagels in the pot.....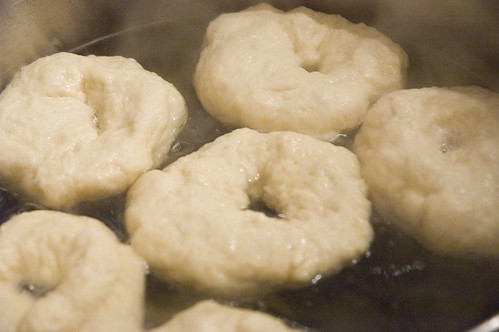
Boiled bagels (at least mine) are not terribly attractive....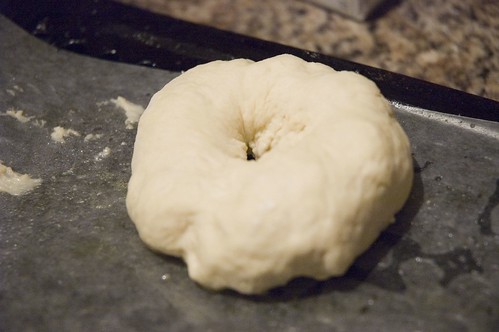
Some plain and onion bagels on the Silpat (onion didn't turn out very attractive, but was mighty tasty with some garden veggie cream cheese!)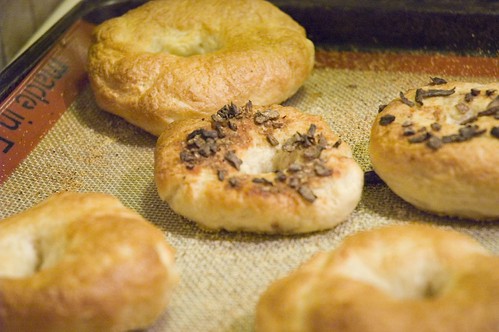
And some more tasty bagels!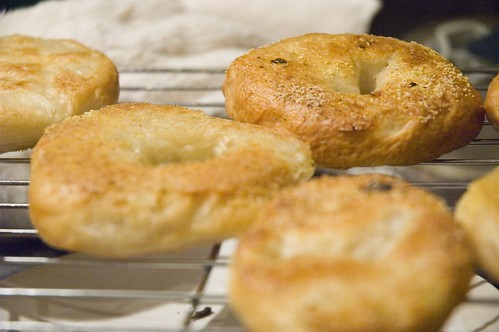
This has officially been the busiest month....I don't think I've had two seconds to sit down! Is it bad that I just want to crawl into bed and sleeeeeeeeeeeeeeeeeeeeeeeeeeep for the whole long weekend?
Without further ado, here is the fameuse recipe...follow at your peril, for it takes a far more daring baker than I to successfully attain bagel nirvana....and definitely check out some of the blogs on the Daring Baker blogroll!!!!!
Real Honest Jewish Purist's Bagels
Daring Bakers Challenge #7: June 2007
Post Date: Wednesday, June 27th
Allowed Modifications:
Topping of your choice, savory recommended, for the outside of the bagels only. No added ingredients or flavours inside the bagels.
Filling or spread of your choice for the outside of the bagel. (i.e. flavoured cream cheese or peanut butter)
Recipe ingredient exception allowed only if allergy or an ingredient not available or cost prohibitive in your region
Recipe Quantity: Fifteen (15) large, plain, Kosher bagels
Ingredients:
6-8 cups bread (high-gluten) flour
4 tablespoons dry baking yeast
6 tablespoons granulated white sugar or light honey (clover honey is good)
2 teaspoons salt
3 cups hot water
a bit of vegetable oil
1 gallon water
3-5 tablespoons malt syrup or sugar
a few handfuls of cornmeal
Equipment:
large mixing bowl
wire whisk
measuring cups and spoons
wooden mixing spoon
butter knife or baker's dough blade
clean, dry surface for kneading
3 clean, dry kitchen towels
warm, but not hot, place to set dough to rise
large stockpot
slotted spoon
2 baking sheets
How You Do It:
Step 1- Proof Yeast: Pour three cups of hot water into the mixing bowl. The water should be hot, but not so hot that you can't bear to put your fingers in it for several seconds at a time. Add the sugar or honey and stir it with your fingers (a good way to make sure the water is not too hot) or with a wire whisk to dissolve. Sprinkle the yeast over the surface of the water, and stir to dissolve.
Wait about ten minutes for the yeast to begin to revive and grow. Skipping this step could result in your trying to make bagels with dead yeast, which results in bagels so hard and potentially dangerous that they are banned under the terms of the Geneva Convention. You will know that the yeast is okay if it begins to foam and exude a sweetish, slightly beery smell.
Step 2- Make Dough: At this point, add about three cups of flour as well as the 2 tsp of salt to the water and yeast and begin mixing it in. Some people subscribe to the theory that it is easier to tell what's going on with the dough if you use your hands rather than a spoon to mix things into the dough, but others prefer the less physically direct spoon. As an advocate of the bare-knuckles school of baking, I proffer the following advice: clip your fingernails, take off your rings and wristwatch, and wash your hands thoroughly to the elbows, like a surgeon. Then you may dive into the dough with impunity. I generally use my right hand to mix, so that my left is free to add flour and other ingredients and to hold the bowl steady. Left-handed people might find that the reverse works better for them. Having one hand clean and free to perform various tasks works best.
When you have incorporated the first three cups of lour, the dough should begin to become thick-ish. Add more flour, a half-cup or so at a time, and mix each addition thoroughly before adding more flour. As the dough gets thicker, add less and less flour at a time.
Step 3- Knead Dough: Soon you will begin to knead it by hand (if you're using your hands to mix the dough in the first place, this segue is hardly noticeable). If you have a big enough and shallow enough bowl, use it as the kneading bowl, otherwise use that clean, dry, flat counter top or tabletop mentioned in the "Equipment" list above. Sprinkle your work surface or bowl with a handful of flour, put your dough on top, and start kneading. Add bits of flour if necessary to keep the dough from sticking (to your hands, to the bowl or counter top, etc....). Soon you should have a nice stiff dough. It will be quite elastic, but heavy and stiffer than a normal bread dough. Do not make it too dry, however... it should still give easily and stretch easily without tearing.
Step 4- Let Dough Rise: Place the dough in a lightly oiled bowl, and cover with one of your clean kitchen towels, dampened somewhat by getting it wet and then wringing it out thoroughly. If you swish the dough around in the bowl, you can get the whole ball of dough covered with a very thin film of oil, which will keep it from drying out.
Place the bowl with the dough in it in a dry, warm (but not hot) place, free from drafts. Allow it to rise until doubled in volume. Some people try to accelerate rising by putting the dough in the oven, where the pilot lights keep the temperature slightly elevated. If it's cold in your kitchen, you can try this, but remember to leave the oven door open or it may become too hot and begin to kill the yeast and cook the dough. An ambient temperature of about 80 degrees Fahrenheit (25 Centigrades) is ideal for rising dough.
Step 5- Prepare Water for Bagels: While the dough is rising, fill your stockpot with about a gallon of water and set it on the fire to boil. When it reaches a boil, add the malt syrup or sugar and reduce the heat so that the water just barely simmers; the surface of the water should hardly move.
Step 6- Form Bagels: Once the dough has risen, turn it onto your work surface, punch it down, and divide immediately into as many hunks as you want to make bagels. For this recipe, you will probably end up with about 15 bagels, so you will divide the dough into 15 roughly even-sized hunks. Begin forming the bagels. There are two schools of thought on this. One method of bagel formation involves shaping the dough into a rough sphere, then poking a hole through the middle with a finger and then pulling at the dough around the hole to make the bagel. This is the hole-centric method. The dough-centric method involves making a long cylindrical "snake" of dough and wrapping it around your hand into a loop and mashing the ends together. Whatever you like to do is fine. DO NOT, however, give in to the temptation of using a doughnut or cookie cutter to shape your bagels. This will push them out of the realm of Jewish Bagel Authenticity and give them a distinctly Protestant air. The bagels will not be perfectly shaped. They will not be symmetrical. This is normal. This is okay. Enjoy the diversity. Just like snowflakes, no two genuine bagels are exactly alike.
Step 7- Pre-heat Oven: Begin to preheat the oven to 400 degrees Fahrenheit.
Step 8- Half Proof and Boil Bagels: Once the bagels are formed, let them sit for about 10 minutes. They will begin to rise slightly. Ideally, they will rise by about one-fourth volume... a technique called "half-proofing" the dough. At the end of the half-proofing, drop the bagels into the simmering water one by one. You don't want to crowd them, and so there should only be two or three bagels simmering at any given time. The bagels should sink first, then gracefully float to the top of the simmering water. If they float, it's not a big deal, but it does mean that you'll have a somewhat more bready (and less bagely) texture. Let the bagel simmer for about three minutes, then turn them over with a skimmer or a slotted spoon. Simmer another three minutes, and then lift the bagels out of the water and set them on a clean kitchen towel that has been spread on the counter top for this purpose. The bagels should be pretty and shiny, thanks to the malt syrup or sugar in the boiling water.
Step 9- Bake Bagels: Once all the bagels have been boiled, prepare your baking sheets by sprinkling them with cornmeal. Then arrange the bagels on the prepared baking sheets and put them in the oven. Let them bake for about 25 minutes, then remove from the oven, turn them over and put them back in the oven to finish baking for about ten minutes more. This will help to prevent flat-bottomed bagels.
Remove from the oven and cool on wire racks, or on a dry clean towels if you have no racks. Do not attempt to cut them until they are cool... hot bagels slice abominably and you'll end up with a wadded mass of bagel pulp. Don't do it.
How To Customize Outside of Bagels: After boiling but before baking, brush the bagels with a wash made of 1 egg white and 3 tablespoons ice water beaten together. Sprinkle with the topping of your choice: poppy, sesame, or caraway seeds, toasted onion or raw garlic bits, salt or whatever you like. Just remember that bagels are essentially a savory baked good, not a sweet one, and so things like fruit and sweet spices are really rather out of place.


26 comments:
Happy birthday Leslie! Congrats on completing the challenge! I too ended up with a whole lot and I sliced and froze them. They seem to be ok after a trip to the toaster.
I love the action shot of your hand in the dough...nice.
Well done.
Happy Birthday! and your bagels are just perfect. Nice photo's too!
I found the amount of yeast astonishing too. I froze most of my bagels since it's just me and the hubbie. Happy Birthday!
Happy Birthday! And the bagels do look good even if you did not find them so great. I only got 12 bagels with mine that's weird!
Well done Leslie and Happy Birthday! I did the same as Helen and sliced mine in half and froze them, I now have tasty toasted bagels at my fingertips!
Happy Birthday Leslie! So many different results from the same recipe . . . makes you wonder. This yeast was a lot. I'm sure wanting to try another recipe. I've been looking at Cook's Illustrated. I'll have a look at Bittmans.
Congrats on the challenge well done.
The photo with your hand in the dough is great! I will make bagels again and I think I'll follow Maggie Glezers recipe. Less yeast, less bready.
First, Happy Birthday! Your meal looked fantastic. As did your bagels! Nice work, fellow DBer!
You did great with your bagels, Leslie! And have a happy birthday!
Happy Birthday Leslie! Congrats on your first challenge like me! It was a difficult one and we survived! The cinnamon bagels sound de-lic!
Happy Birthday! That is daring to do bagels. They looked yummy.
Since I live about 2 blocks from Kettleman's this is one I won't try. ;-)
Mary Ann
Happy Birthday and well done on the bagels.
Happy Birthday and great job on the bagels :)
You got how many bagels? You obviously made neat ones instead of the giant troll fodder ones words we made! HAPPY BELATED BIRTHDAY!
I agree, the cinnamon ones sound fantastic - I bet a little brown sugar would have been nice too!Congrats on your completing your first DB challenge - here's to many more!
And Happy Birthday!
Happy birthday and congratulations on completing your first Daring Bakers challenge. You did a great job.
I'm sorry the bagels weren't to your liking, but glad you joined us in the challenge!
(Oh and I live a 20 minute drive away from a Kettleman's, and even closer to another good bagel shop, so I don't blame Mary Ann for wanting those instead!)
Happy birthday, Leslie!
Congrats on the bagels.. all eleventy billion of them. hee =)
Glad you shared with the co-workers, they come in handy sometimes, don't they? ha!
Love the pictures and the lil bagels look gorgeous!
xoxo
Leslie,
Congratulations on your first challenge! I love the photo guide and I found your take on the recipe very interesting.
Oh and belated happy birthday!
Happy Birthday! Lucky coworkers!
Happy Birthday!!! I love the sound of cinnamon bagels. Lucky co-workers.
mmmmm... bagels. I'm almost tempted to give this a try - I love a "yeasty" challenge. :)
Oh wow 40 bagels! I think they turned out great, your coworkers must have been been very happy. Happy birthday!
hello
vous pouvez mettre vos infos sur jewisheritage.fr
shalom
Post a Comment