Photobucket - Video and Image Hosting

Tuesday, May 20, 2014

2-ingredient nutella popsicles

Pin It Now!

Do you remember being a kid, and going to the ice cream cart (or corner store/camp store) and looking over the enticing array of popsicles in the freezer?  I remember them all - from the tart and tangy rocket, to the rich (and oh-so-expensive) drumstick....but my favourite was pretty much always the fudgesicle.  It was chocolatey and cold and just....perfection.  There was truly nothing better on a hot summer day, especially after an afternoon spent at the beach, biking or playing in the sun.
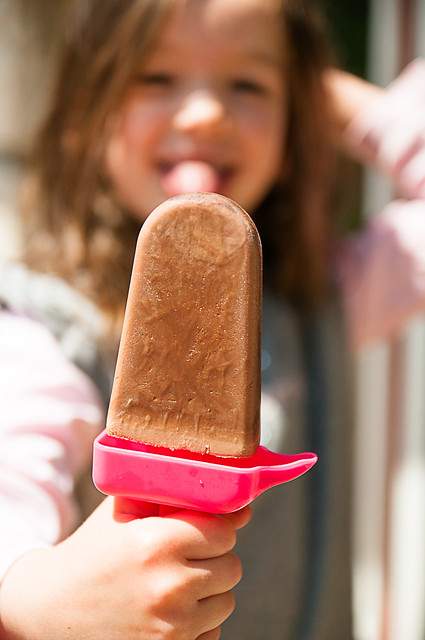
nutella peanut butter popsicles

I can only hope to foster those warm and fun kinds of memories in my kids too.  

nutella peanut butter popsicles

We just had a near-idyllic long weekend.  And it was perfect in that we really didn't do much of anything - the kids played, the weather held up wonderfully...there was a lot of sand and sidewalk chalk and BBQ food, eaten al fresco.  In short....perfect.
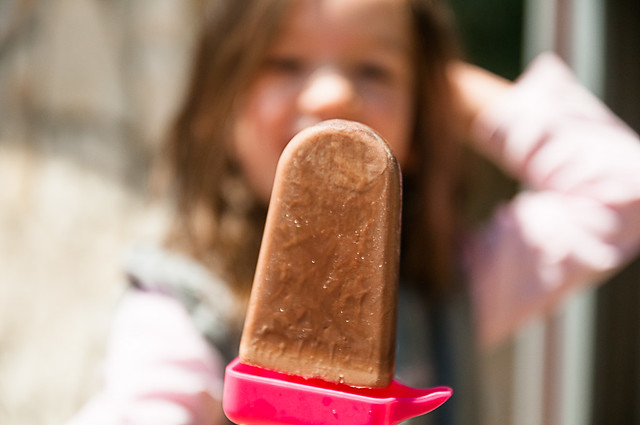
nutella peanut butter popsicles

I came across this recipe last year (from a site that is now defunct, which is a TRAGEDY), and I'm telling you, if you don't have a popsicle mold, NOW is the time to get one.  This is not the homemade popsicle of your memories (i.e., a frozen solid block of juice).  THIS, friends, is pretty much like a fudgesicle.  It's rich and creamy and chocolatey and delicious.   Any popsicle mold will do - I have a snazzier one (pictured) that makes larger popsicles and has a little trough to help you sip up the melted bits.  I also have a cheaper one that makes rocket-shaped pops and is actually way better sized for kids (these ones are a little too big and result in colossal mess of melted chocolate stickyness).

nutella peanut butter popsicles

I love just how simple this is, and the results are so TOTALLY worth it.  All you need is nutella and milk.  I usually only buy nutella to use in recipes, so when I checked (because I'm a super pro-star at advance prep), I was actually a bit short of nutella (I was making a double batch).  I just added some natural peanut butter and chocolate syrup to make up the correct amount.  This isn't health food - it's pure summer fun.
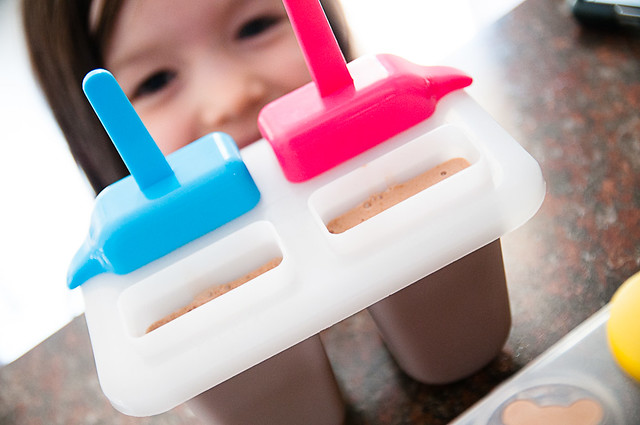
nutella peanut butter popsicles

So what I photographed and what I'm telling you to make are not exactly the same thing this time, because of the aforementioned peanut butter and chocolate syrup substitution.  But I will say, this sub totally worked and the peanut butter/chocolate/nutella combo was just as good as the pure nutella version.  One caveat - the longer you leave these, the icier they get.  They are best the first day frozen (i.e., after a few hours), because they have the BEST fudgey texture then.  They are still totally good for a few days after, but I would recommend eating them sooner rather than later.  Besides, once you have one, you likely will keep on going.  ;)  They are that good!
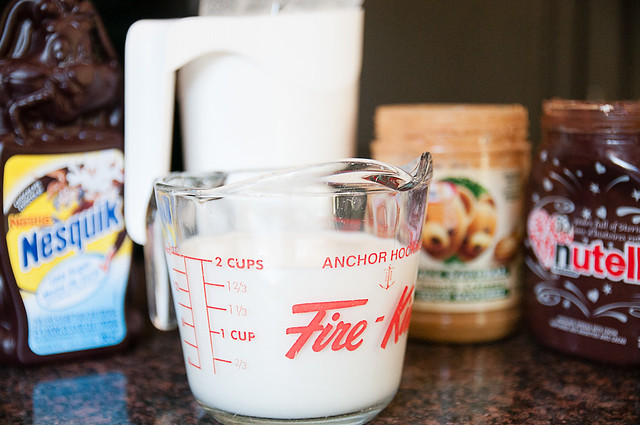
nutella peanut butter popsicles


2-ingredient nutella fudgesicles
(makes 4 large popsicles or 8 small - large popsicles pictured)
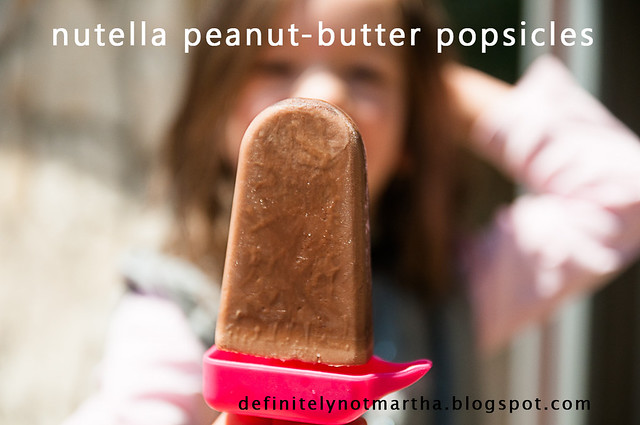
nutella-peanut butter popsicles

1/3 c nutella (or use less nutella and make up the difference with peanut butter and a touch of chocolate syrup)
1 c milk

1. Blend nutella with milk (I use a standard blender, but an immersion blender, magic bullet, food processor, or even good ole elbow grease would work - I'd recommend softening the nutella if you're doing it by hand!)

2. Pour into molds and freeze until frozen.

3. If you're reading this and are sad that you don't have popsicle molds....>GO GET SOME!!!!  I have a set from the dollar store that is great!  Just do it!  Or use cups and coffee stirrers.  Whatever it takes to get you a nutella popsicle.....just do that.  And thank me later.

Monday, May 19, 2014

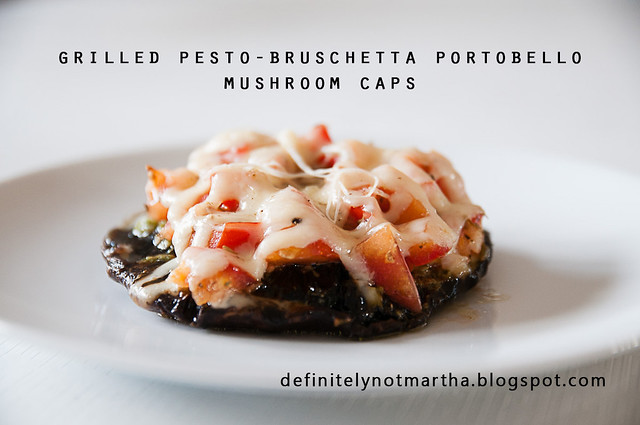
vegetarian grilling - pesto-bruschetta portobello mushroom caps

Pin It Now!

I hope everyone is having a glorious holiday weekend (Victoria day, here in Canada).  The weather in Ottawa has been pretty decent (20C, mostly sun) and we've really been enjoying our patio and the great outdoors.

DSC_9893_info

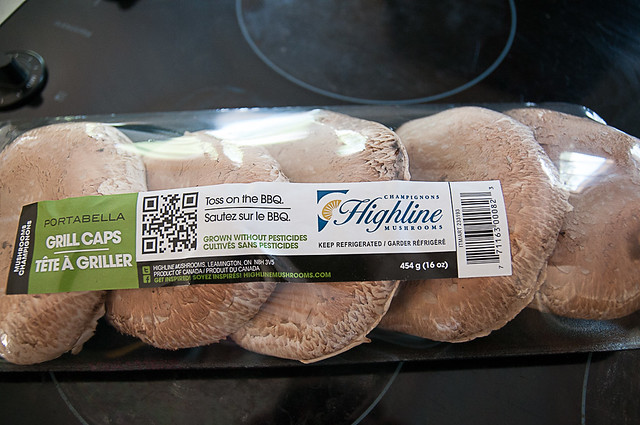
It's also grilling season - we've already been enjoying some beer can chicken, burgers and other meaty fare, but I thought I'd share a veg alternative today....delicious whether you are trying to serve up a creative vegetarian grilled dinner, or if you're looking for a hearty side dish.  I picked these portobello grilling caps up at Costco - they are SO good - they make a great burger patty (just marinate, grill and enjoy) and I thought they would be perfect for trying out this idea I had.

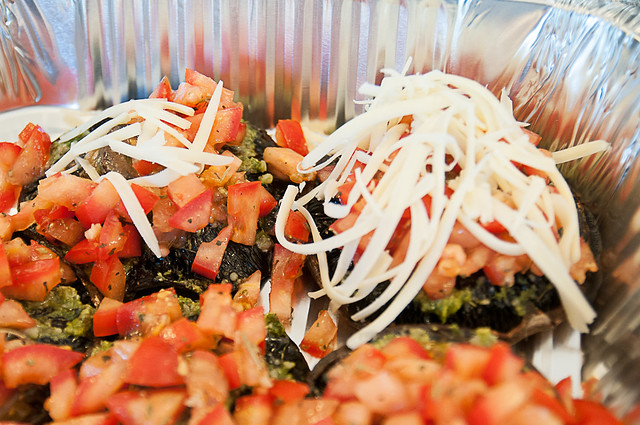
pesto-bruschetta grilled portobello mushroom caps

I also picked up pesto at Costco (I LOVE the kirkland signature brand pesto - it's bright green and fresher than most of the jarred alternatives, and it lasts a few weeks in the fridge - highly recommend it!).  Last, I had a couple of nice local tomatoes from my organic veggie delivery that I wanted to use up in something fabulous.

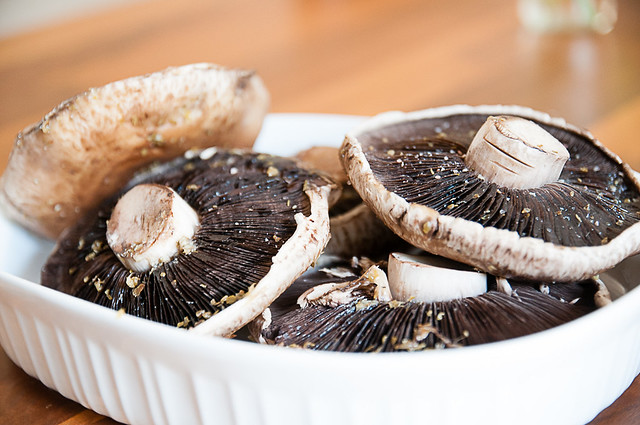
This is a little bit more involved than just grilling the mushroom caps, but it's not really a lot of fuss/work.  I just brushed the mushrooms with olive oil and sprinkled with salt and pepper, then had hubs pre-grill them for about 10 minutes - until they were partially cooked, but not completely done.

pesto-bruschetta grilled portobello mushroom caps

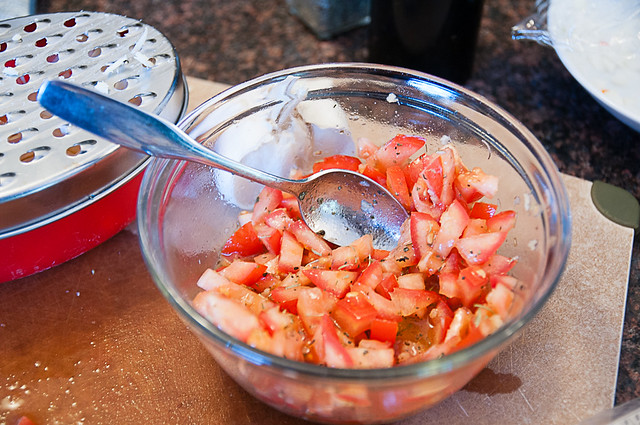
While he was grilling, I chopped up my tomatoes, added some fresh crushed garlic, olive oil and italian seasoning, and grated some mozzarella.

pesto-bruschetta grilled portobello mushroom caps

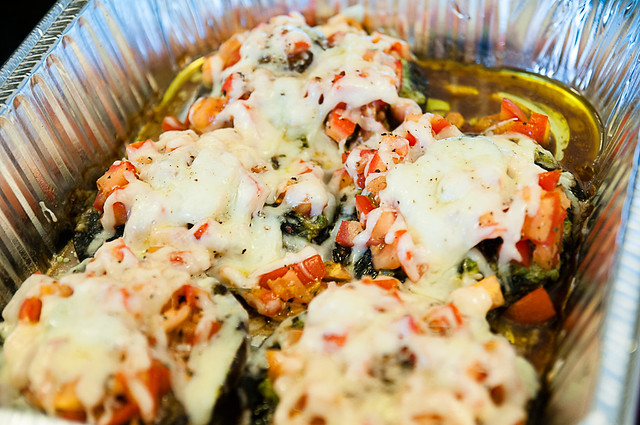
So when he brought in my 'pre-grilled' mushrooms, I placed them in a foil 9x13, topped them each with a scoop of pesto, divided up the tomato mixture, and topped with mozzarella and parmesan cheese (this dish could easily be made vegan through using vegan pesto, and using a cashew cream or vegan parmesan on top).

pesto-bruschetta grilled portobello mushroom caps

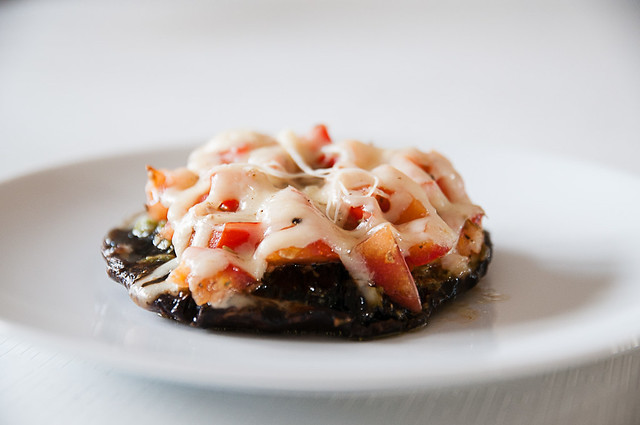
Back on the grill went the 9x13, for just enough time to finish cooking the mushrooms and melting the cheese.  If you're more ambitious than I, you could try putting the stuffed caps right on the grill, but it seemed like a recipe for disaster, so I went the easy route.  I had these as a side dish for grilled chicken and kale salad and it was delicious.

pesto-bruschetta grilled portobello mushroom caps


grilled pesto-bruschetta portobello mushroom caps

pesto-bruschetta grilled portobello mushroom caps
5-6 large portobello mushroom caps
1 T olive oil
salt, pepper

1/3 c pesto
2 medium tomatoes, diced
1 cloved garlic, minced
1/2 T olive oil
1/2 t italian seasoning
salt, pepper
1 c. grated mozzarella
1/3 c grated parmesan

1. Preheat the grill to medium (you could also roast at 450F if you don't have a grill) Clean mushroom caps and brush with olive oil, season with salt and pepper.

2. Grill caps for about 10 minutes (5 mins per side) until they feel mostly-cooked.  Do not overcook, because you'll be putting them back on to finish.

3. Meanwhile, dice your tomatoes and combine with olive oil, garlic, italian herbs, salt and pepper.

4. Once the mushrooms are grilled, place them in a grill-safe dish (I recommend a foil 9x13).  Top each mushroom with about 1 T of pesto.  Divide the tomato mixture among the mushrooms.  Top with mozzarella and parmesan.

5. Grill the mushrooms (in the dish) about about 10 minutes, until the tomatoes are heated through and the cheese is melted.


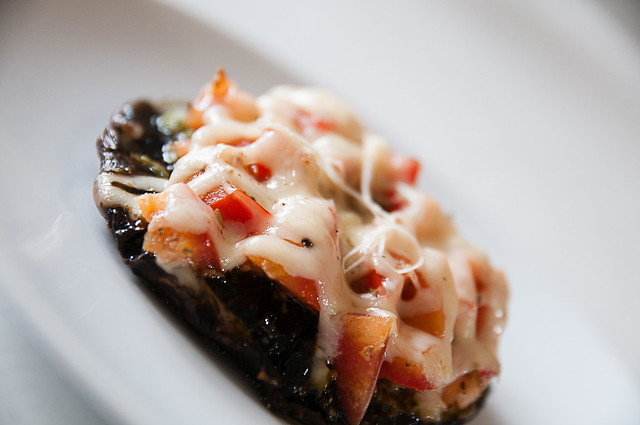
mmmmmmmmmmmmmmmmmmm delicious......

pesto-bruschetta grilled portobello mushroom caps

One of my other grill-faves is zucchini - I love it cut in half lengthwise, brushed with oil and sprinkled with montreal steak spice, then grilled to perfection.  It's so good!  What are your favourite vegetables to grill?

Tuesday, May 13, 2014

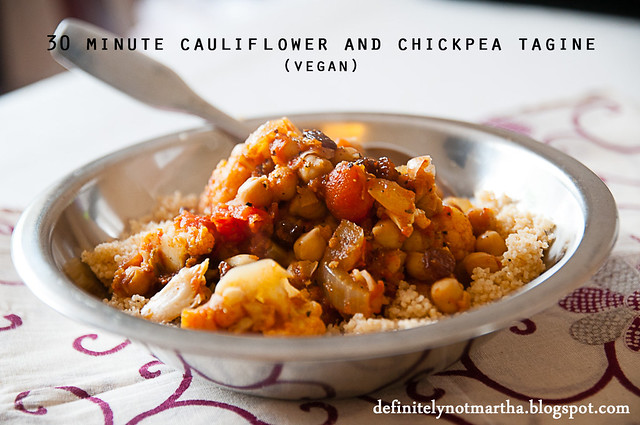
cauliflower and chickpea moroccan tagine

Pin It Now!

I meal plan most weeks...(how revolutionary, right?  Because NO ONE else in the history of the planet does this...).  Most weeks, I enjoy meal planning.  I like deciding things (most of the time).  I like eating and I like cooking.  And I also like shopping, and view grocery trips as the one time per week I can pretty much buy whatever I want (well, within reason.  And within sales.  And all that stuff).

DSC_9852_info

I don't know if you ever have these types of conversations, but every week when I'm doing my meal planning, I always ask hubs if there's anything he wants to have.  He usually responds with a non-committal grunt or a whatever you like.  Depending on my mood, I could be fine with this (due to aforementioned love of deciding things), or I might be just irritated, because I'm tired of deciding all the food, all the time.

(source: some ecards)

That said, it's not that hubs not interested, he's just genuinely not picky and enjoys food.  Wish I could say the same for the kids (my mini foodies are pretty adventurous, but they still turn their nose up every so often at my offerings...and by every so often, I mean like once a day.  Ugh).

Anyway....so when I asked hubs what he wanted this week, he responded that he'd really love if I could make something Moroccan with couscous.  I'm always up for that, so I figured I'd give it a go.  I usually do some sort of version of million dollar chicken, but I was out of chicken and also out of salsa, so I took a look through the cupbards and used what I had on hand.  My meal planning was a little bit altered this week because I'll be getting weekly veggie delivery starting on Wednesday, so I didn't really stock the veggie drawer the way I normally do.  I think any sort of tagine/stew dish is improved with use of nice fresh herbs like parsley or cilantro...but I didn't have them.

Brilliant being that I am, I did my mise en place photo before I made the dish, so I did change the recipe up a little bit from the photos.  As well, I'm recommending a bit more intense flavour, because while I wouldn't call mine bland, I do think there was room for more spice (this would also be great a lot spicier, but when cooking for tiny palates, I've learned to dial back the heat, and keep the sri racha on the table).


Speaking of tiny palates, Lil Z informed me that this dish was 'kind of not too bad.'  And then asked if she could have it in her snack.  So I'll call that a win.  And R happily gobbled until she ran out of raisins and chickpeas.


Any sort of stew/tagine dish is easily altered to use what you have on hand - sweet potatoes/carrot/squash would be delicious in this, and like I mentioned before, I think some cilantro or fresh parsley would be great to brighten the flavour as well.  I really enjoyed the saffron flavour, but if you don't have it on hand, you could just add some turmeric (wouldn't be the same, but would still be completely delicious).


All this to say, while I think this particular combination is delicious and healthy, don't let the ingredients be a barrier - use what you have and adapt and experiment.  Taste along the way and you can't go wrong.  I had this on the table in just over 30 minutes, which I think is great for a scratch, weeknight meal.  It makes a lot as well (8 servings), so it can either feed a crowd, or give you leftovers, the gift that keeps on giving. :)


Also, learn from my fail.  That beautiful Le Creuset braiser you see in the photos?  Yah....about that.  It was way too small for this recipe.  After I added the first can of chickpeas, I had to transfer to a larger pot.  So avoid doing double dishes and just make this in a large soup pot (mine was 6 qt....you definitely need at least a 4 qt pot for this).


This recipe is for a meal, so I'm writing this in a realistic way for you to prepare it.  Trust me, if you have your ingredients assembled (but not chopped), you can get this on the table in just over 30 minutes.  I recommend using stewed tomatoes for this because they have added onions/peppers and aren't as strongly tomatoey as diced tomatoes.  It's really up to you though - diced tomatoes will work.

30-minute cauliflower and chickpea tagine with couscous
(vegan)


1 onion
2 stalks celery
2 T olive oil
3 cloves garlic
pinch saffron
1.5 T cumin
1 T paprika
1 T ground coriander
3/4 t cinnamon
1/2 t salt (or to taste)
1/2 t black pepper
1 head cauliflower
1 can stewed tomatoes
1 c water
2 cans chickpeas
(2 c  couscous + 2 c water, salt and pepper)
1/2 c raisins (or other dried fruit like apricots)
optional: fresh chopped herbs, about 1/4 c

1. Put large, heavy-bottomed pot on the stove and heat oil on medium.

2. Meanwhile, chop onion and celery.  Once oil is hot, add celery and onions.  While they cook, chop your garlic and measure your spices (just measure them into a small bowl).  You can also start chopping the cauliflower at this point.  After about 3 minutes, add the garlic, stir for 30 seconds, then add the spices, and stir for another 30 seconds.  Your pan will be a mess, but this is okay.  Open up the can of stewed tomatoes, and pour it in the pot.  Add the water, and stir to deglaze the spices from the bottom of the pan.

3. While the tomato/water/onion mixture comes to a boil, finish chopping your cauliflower.  Add it to the pan (at this point, you should taste the broth in the pan to see if it's too your liking and adjust accordingly).

3. Open the cans of chickpeas and rinse and drain.  Add them to the pot.  Stir, bring to a boil, and cover.  Let it cook covered for 10 minutes, on medium/medium-low heat (you want it boiling, but not going crazy).  There's not a TON of liquid with this recipe.

4. Put some water in your kettle (you only 2 cups, so for expediency, just put what you need in the kettle).  Measure 2 cups of whole wheat couscous into a casserole dish or pot (basically, anything you can cover)  Add some salt and pepper.  When the water boils, pour 2 c boiling water on the couscous, stir and cover for five minutes.  Then fluff with a fork (yes, this is how easy it is to make couscous!).

5. Once the tagine has cooked for 10 minutes, remove the lid and check the cauliflower for doneness.  Once the cauliflower is done, add the raisins and then you're good to go!  Serve with hot sauce and chopped cilantro.


It's really delicious and so quick to pull together.  Hope you enjoy!

Tuesday, April 15, 2014

greek-ish phyllo chicken pie

Pin It Now!

Sometimes you come across a dish that is so pretty and so appealing that you just have to make it.

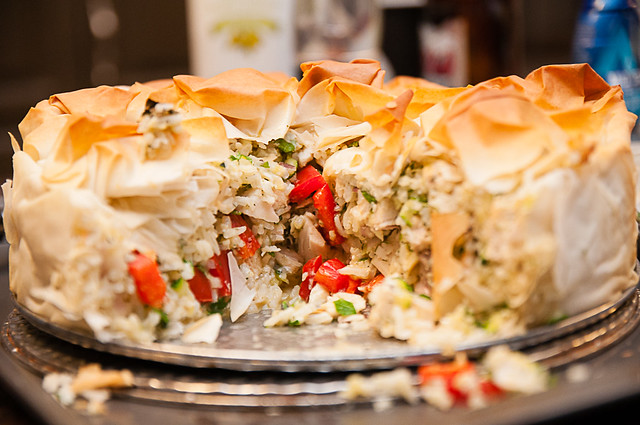
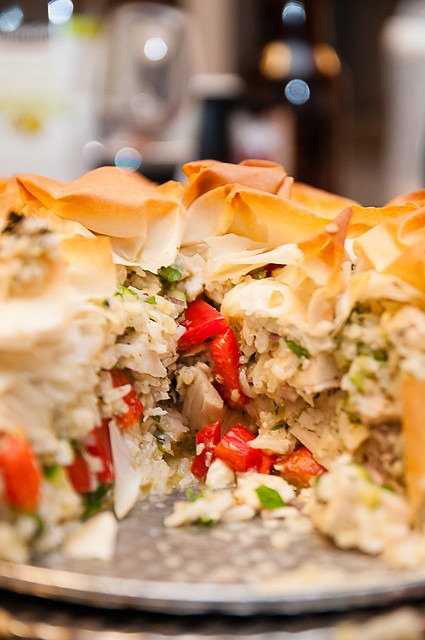
chicken and rice pie with phyllo This was one of those times.  I came across this spanakopita pie on the Steven and Chris website and it was just too beautiful not to attempt.  Of course, it would have been helpful if I had planned a little better and, you know, actually bought all the groceries needed.

But hey, necessity is the mother of invention, and I think my modified version turned out really well!

Just one note - I didn't find that 1 hr at 350F was enough to get the phyllo truly cooked, so I'd up the temperature to 375F (just use foil on top to keep the top from browning too much). You can see my pastry is a bit anemic here - I think an increase of temperature would do the trick for sure!

chicken and rice pie with phyllo - see how I should have baked it longer/at a higher temp?

This recipe is great because it's an all-in-one dinner and looks so pretty.  Mine didn't stay together quite as well as I would have liked, but I think that too would be rectified by both longer baking and longer resting, so I've adjusted the instructions accordingly.  This is a bit labour-intensive - even with having the chicken pre-cooked, and the rice pre-cooked, it took about 45 minutes to put together, and then an hour to bake.  So learn from my fail and don't try this on a weeknight.  :p  Otherwise you may or may not have to feed your hangry kids grilled cheese while the delicious dinner (which they then won't eat) ends up eaten only by you.  Did I mention this serves like 10 people? omnomnom, indeed.

greek-ish phyllo chicken pie
Makes 10 to 12 servings

chicken, rice and vegetable phyllo pie

2 ½ cups  cooked long grain rice (about 1 cup uncooked rice)
1 ½ lbs (750 g) cooked skinless, boneless chicken breasts or skinless boneless thighs, or a combination of both (I cooked some chicken the day before in the slow cooker, but whatever your favourite cooking method is would work - grilled, poached, etc.)
1 grated zucchini
1 chopped red pepper
1/2 c crumbled feta cheese
1 c grated aged cheddar
1T dried dill
¼ cup finely chopped fresh parsley
1 minced shallot
1 crushed clove garlic
3 large eggs
½ tsp salt
1 tsp freshly ground pepper
12 sheets phyllo pastry, thawed according to package instructions
¼  cup olive oil Directions

1. Preheat oven to 375F.

2. Oil a 9 inch (23 cm) spring form pan with oil and set aside. 

3. Place cooked rice into a large mixing bowl. Cut chicken into small bite size pieces and add to rice.

4. Grate zucchini and chop red pepper.  Add them, along with feta, cheddar, dill, parsley, shallot and garlic, to the chicken and rice.  Stir together.

5.  In a small bowl, whisk together the 3 eggs with the salt and pepper. Add eggs into bowl with rice mixture. Mix ingredients together until evenly combined. Set aside.

6.  Lay the thawed phyllo out onto a clean surface. Lightly brush one sheet with oil, on one side only.

7. Place phyllo sheet, oil side up, in prepared spring form pan so that one end is inside the pan (try to cover as much of the base as possible). The rest of the phyllo sheet will be hanging over, and outside the rim of the pan. Repeat this step 7 more times, rotating the pan a bit each time, so that you end up with 8 layers of phyllo lining the the pan, and so that the entire edge of the pan has phyllo pastry hanging over, and outside the rim of the pan

8. Before filling the pie, lift the overhanging edges and fold them into the pan, all around, so that you are creating a layered pastry lined wall of the pie. Press the pastry firmly into the sides of the pan to give the shell structure.

9. Turn rice and chicken mixture into pie shell.  Brush the remaining phyllo, one sheet at a time, with oil. Rip (or cut) each sheet into 4 pieces and gently crumple the pieces into a very loose ball. One by one, place the scrunched phyllo balls on top of the filling to cover the whole pie. Lightly brush the top with the remaining oil. Place a piece of foil over the pan.

10. Bake for 45 minutes. Remove foil and bake for 15 minutes more, or until the top is golden. Remove to a rack to cool slightly before releasing spring form ring. Serve in a platter. Use a sharp knife to cut into wedges.

I just loved how this looked in the pan, and the taste was great too!

Monday, April 14, 2014

it's not nutella on toast

Pin It Now!

I'm probably not alone when I admit a true affection for nutella.  There is something about the luxurious combination of chocolate and hazelnuts that just makes me crazy....it's so delicious.  My kids probably aren't alone in that they too love nutella (they've only had it a few times, but it was an instant classic with them).

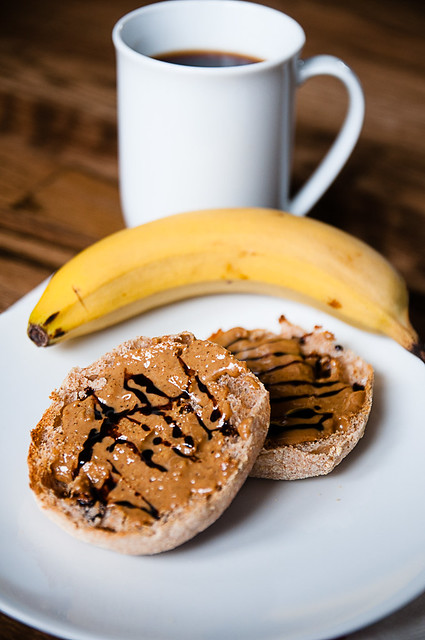
better than nutella breakfast

With that said, I don't normally buy nutella.  Not just because when it's in my cupboard, I develop an uncontrollable urge to DIP ALL THINGS in nutella (strawberries, marshmallows [hey - don't judge!], oranges, etc.)...but also because it's really not very good for you.  It's full of sugar, scant on nuts and just generally, not a very wholesome thing to eat. It's about as nutritious as chocolate frosting. So I don't have it on regular rotation.  Usually what happens is that I buy it to make popsicles (1/3 c nutella, 1 1/3 c milk, blend together and freeze in a popsicle maker...not healthy, but really, really delish).

So anyway....to get back on track, I would love to have nutella for breakfast.  My kids would also love to have nutella for breakfast.  But given that I try to be make sure we eat a mostly healthy diet, I just don't see nutella as an appropriate choice for everyday.

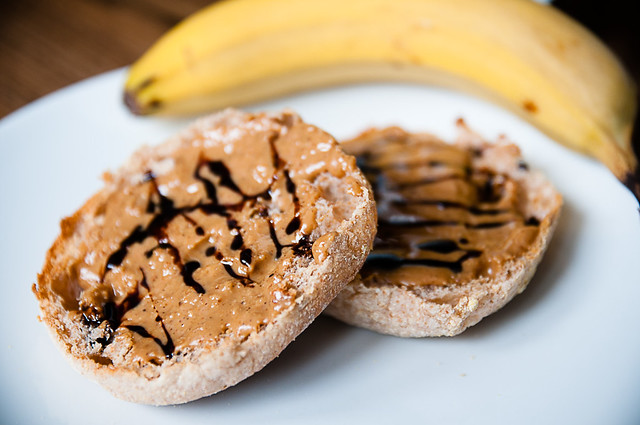
So I've got an alternative for you.  This is so simple, it barely counts as a recipe.  In fact, I don't think it counts as a recipe at all, because it certainly does not take a genius to slap a couple of things on toast.  But it's really good, and it (for me and the mini-foodies, at least) completely satisfies the nutella craving, while giving you a breakfast that won't send your blood sugar skyrocketing the way nutella would.

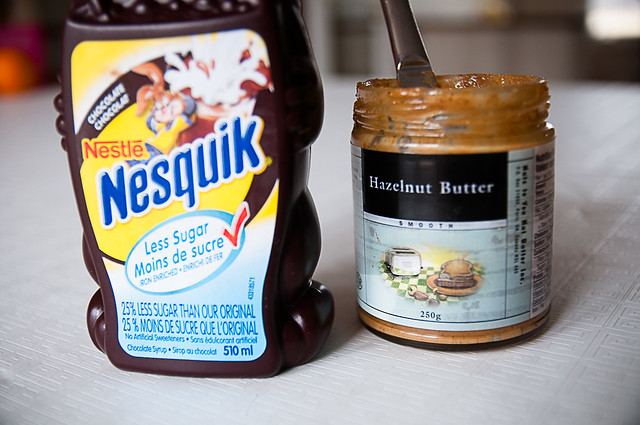
The secret is natural hazelnut butter.  You might have to hunt for it a bit - I love the stuff from Nuts to You - I can find it at my local Sobeys, but Canadian readers will also be able to purchase it from well.ca.  There are a number of manufacturers of hazelnut butter, but the key thing you want to look for is that the ingredients are 100% hazelnuts.  I will warn you, it's not cheap (quite a bit more expensive than nutella).  But there's a reason for that....this stuff contains 100% hazelnuts, which are not cheap.  nutella contains mostly sugar and oil, which are cheap (19g of nutella has 11g of sugar) - it only contains about 13% hazelnuts.

quik + hazelnut butter

(sorry for the blurry photo - apparently I shouldn't take photos before coffee)

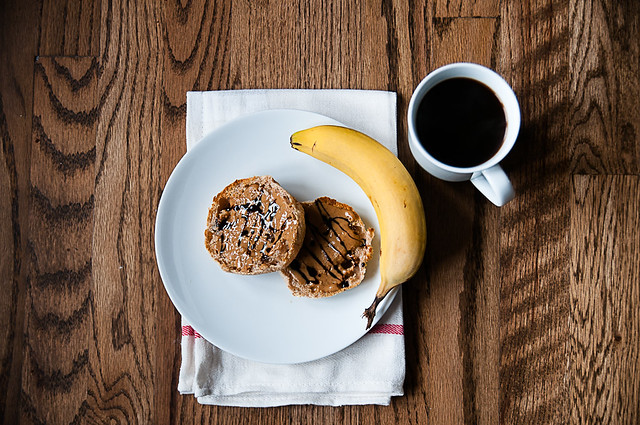
So once you have found hazelnut butter, all you need to do is spread your (whole grain) toast with hazelnut butter, and then drizzle with the tiniest amount of chocolate syrup.  A while back, hubs bought some Quik syrup, so I have that on hand, but the important thing is that the syrup be relatively thin, so you can just drizzle a tiny amount.  My English muffin (the two pieces together) has 3g of syrup...that's all it took to make me happy and give me a delicious blast of chocolate.  If you have a little more time, you could melt a tiny bit of dark chocolate, or even try this recipe for your own homemade chocolate syrup.  All that's really important (in terms of keeping it healthy) is that you just need a tiny bit of chocolate - roasted hazelnuts have a wonderful natural sweetness that goes.  Nutella might make you think you need a lot of sugar, but you really don't.

better than nutella breakfast

Mini-foodie one also enjoyed hers in a whole wheat tortilla, rolled up with sliced banana.  I think it would be even better with strawberries.

So this is how I satisfy nutella cravings for both me and the mini-foodies, while keeping things a bit more balanced.  Hubs thinks we are crazy because he does not understand the wonderful wonderful thing that is nutella.  ;)

it's not nutella on toast
(not really a recipe)

better than nutella breakfast

1 whole grain English muffin
1 T 100% hazelnut butter
1/2 t chocolate syrup

1. Toast bread.  Add nut butter.  Drizzle with syrup.

Thanks for reading!  What are your favourite mostly-healthy breakfasts?


Related Posts with Thumbnails