Photobucket - Video and Image Hosting

Tuesday, April 19, 2011

pork and muffins. not at the same time.

Pin It Now!
DSC_8962

In terms of food budgeting, today was medium.

It was GOOD because I brought and English muffin and toasted it at work (and topped with some peanut butter, which I keep in a jar at my desk. And which I do not ever eat with a spoon.)

Okay, that last sentence was a lie. :p I don't do it often though. And I don't double dip.

It was also good, because I brought my lunch and ate all of it. But then I was staaaaaarving partway through the afternoon. And when I reached into my lunch bag to grab the apple I totally thought I had brought....I came up empty-handed.

So of course I ended up at the caf and bought a boiled egg (0.55), a piece of cheese (1.00) and a medium coffee (1.50). Meh. It wasn't the craziest of snacks, but when I think that I can buy a DOZEN eggs for $3 (and water is almost free), I feel like a bit of a heel.

To be fair though, there was a strong possibility of going out for lunch, and I didn't go for it.

But Hubs is rubbing in the fact that not only did he not spend any extra $$ on food today, but he didn't really do so last week either. Meh. :p

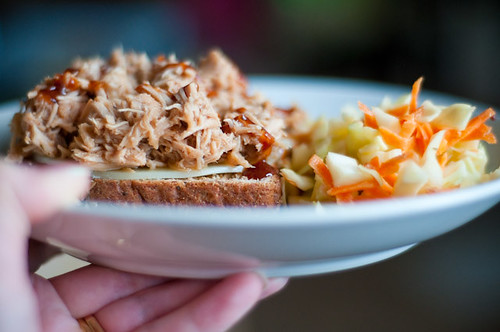
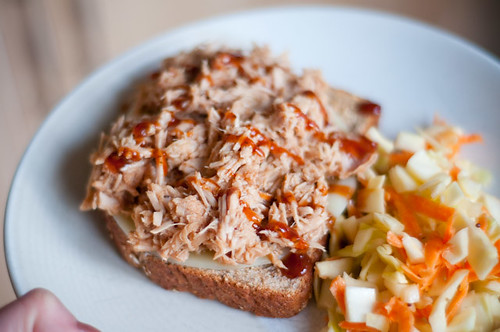
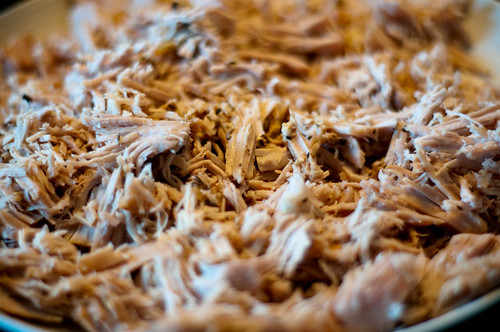
In terms of cooking, the planned meal for tonight was pulled pork on multi-grain toast with provolone, accompanied with a quick coleslaw. I really did a lot of mods to the pulled-pork recipe, so I can't fairly evaluate the Clean Eating version. But my version was good. And super easy.

Slow-cooker pulled pork with toast and coleslaw

1.5 pounds pork (I used a centre-cut roast - you could use tenderloin, chops, or a more traditional cut like shoulder or butt)
1 cup broth
sea salt, black pepper and thyme

1. In the morning, put the pork in the slow cooker on low. Put it fat side up, to keep it moist. The fat will render slightly during cooking and keep the pork from drying out. Pour broth around the pork, and sprinkle with salt, black pepper and a good bit of thyme.
(sorry, no pics...was too crazy with Monday morning madness to take photos)

2. When you get home, take the pork out of the slow cooker (I used a 2.5 qt cooker. This recipe is best suited to a small slow cooker. If you don't have a slow cooker, you could braise the meat in the oven - at about 275F - for 4ish hours). Don't try to quick cook your pork, or it won't shred.

My pork cooked from 8 am to 6 pm. This worked for me. The fat had rendered a little bit, but when I took the pork out, I was actually able to scrape most of the fat off. It's win-win, because, as mentioned, the fat keeps the meat moist, but then you can scrape it off, so you aren't stuck eating it.

3. Shred the pork with two forks. If it doesn't shred, you've probably either a) cooked it not long enough, or b) cooked it at too high a temperature. DO NOT COOK ON HIGH.

DSC_8957

4. Strain the juices from the slow cooker. If there is fat, skim it off the top. You can see here that there was very little fat in mine. ***I'm assuming that if you read my blog, you're probably trying to eat healthy. If I am mistaken, leave the fat in. It will only make things better. ;)

DSC_8958

5. Pour the juices in a pan, and boil to reduce by half. I added about 3 T cider vinegar, 1/4 c of sherry (it was hanging out in the cupboard...nobody here drinks that crap). I also added about 1/2 t chipotle powder, to add spice and smoke.

6. Mix the juices with the shredded pork. Taste. This is a pretty 'clean' version --> in order to be to your taste, you may need to add some sweetness (ketchup, bbq sauce, honey), some acidity (vinegar), some salt (worcestershire sauce, salt), or some heat (sri racha, cayenne). I added a little bbq sauce, and then drizzled some over top of our sammies.

Coleslaw

DSC_8965

1/4 head of cabbage, chopped
1 large carrot, grated
1 tiny onion, chopped
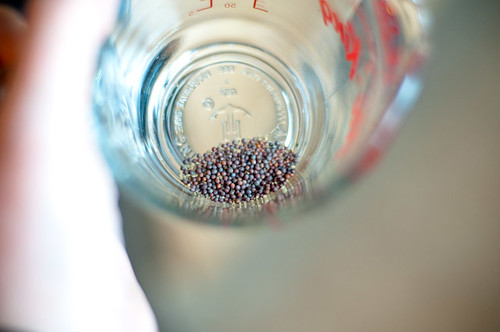
1/2 t mustard seeds
1/2 t celery seeds
2 T cider vinegar
1 T dijon mustard
1 T olive oil

1. Mix cabbage, carrot and onion.

2. Make dressing from mustard seeds, celery seeds (you can omit these if you don't have 'em), cider vinegar, dijon mustard and olive oil.

DSC_8960

3. Toss dressing with veggies. Taste and adjust accordingly (again, this is a clean recipe; you may be used to something sweeter and/or saltier).

Sammiches

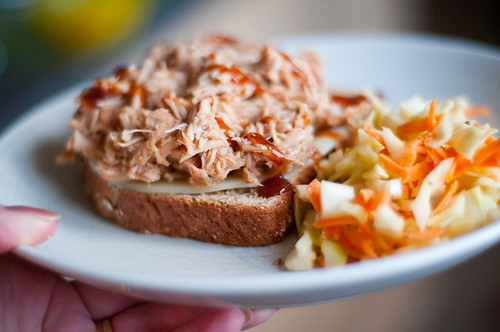
DSC_8967

multi-grain bread
reduced-fat provolone cheese slices
pulled pork
coleslaw

1. Toast bread. Top with cheese slice while still hot. Top with approximately 3 oz of pulled pork. Serve with coleslaw. I drizzled mine with bbq sauce.

Voila. This was awesome. Hubs devoured his (and then ate a plate of just pork, mixed with bbq sauce and sri racha). Lil Z thought it rocked and pounded it back.


After dinner, I cleaned up (unplanned visitors coming tomorrow) and then had to re-jig the week's menu. We're going to have company tomorrow, so rather than serve the ginger chicken soup (which only serves four and would be tight, leaving us with no lunches for Wednesday), I'm going to make a shrimp pasta carbonara dish. I have loads of frozen shrimp, a pound of bacon and some pasta. I think I"ll do a creamy sauce using shallots, garlic, evaporated skim milk and fresh-grated parmesan. It may end up short on veggies, but I think it will be good. And it will keep me on budget. :)

Last, I mixed up a batch of muffins. YES, in case you were wondering I did spend my entire evening physically in the kitchen tonight. I don't mind....it's one of my favourite places. Plus, hubs is monopolizing the TV (playoff hockey, *sigh*) so it's not like I have anything better to do anyway. :p

These muffins are from the April/May 2011 issue of Clean Eating. Pretty straightforward to make. I made a couple of modifications (shown in brackets).

Mango Spice Muffins
from April/May 2011 issue of Clean Eating

2 c whole wheat flour
1/2 c evaporated cane juice (or sugar...they are essentially the same)
2 t baking powder
1/2 t baking soda
1 t ground ginger
1/4 t ground cloves
1/2 t sea salt
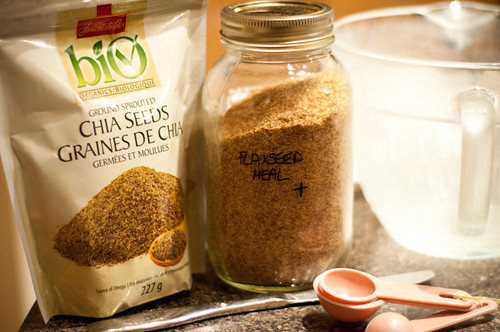
(2 T ground chia seeds (optional - they have fibre and omega 3s. I decided to add some))
(2 T ground flax seeds)

DSC_8978


1 egg
1/4 c oil (I used canola, CE recommends safflower)
1 c nonfat greek yogourt (I used non-fat regular yogourt that was 1 week past its due date. It smelled fine...)
1/3 c milk (1/2 c milk if using the flax and/or chia as they soak up liquid)
1 t vanilla

1 large mango, peeled and cut into 1/4 inch dice. Mine actually made about 1 1/4 c, just like the recipe said it would. (For anyone who does not know how to wrangle a mango, I've posted a how-to for you)
1/4 c raisins (I used walnuts instead. Lil Z gobbled all of my raisins)

2 T unsweetened flaked/shredded coconut

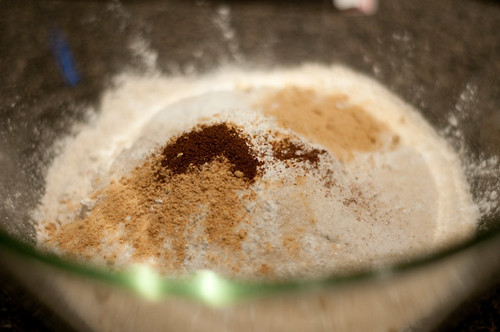
1. Preheat oven to 375F. Line a muffin tin with papers (or spray if you are a masochist, and enjoy scouring muffin tins). In a large bowl, whisk together flour, cane juice, baking powder, baking soda, ginger, cloves and salt (and chia/flax). In a separate large bowl, beat egg. Add oil, yogourt, milk and vanilla. Whisk to combine.

Dry ingredients:
DSC_8976

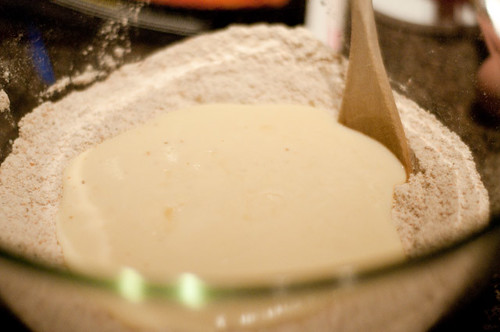
2. Add wet ingredients to dry ingredients and stir gently until flour is moist.

DSC_8985

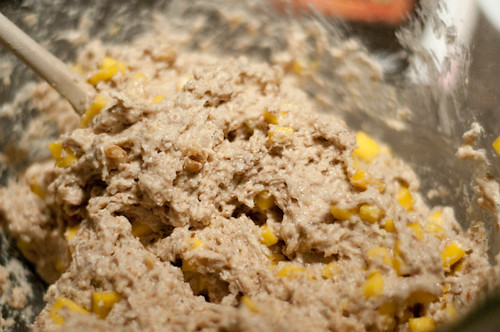
Fold in mango and raisins walnuts.

DSC_8986

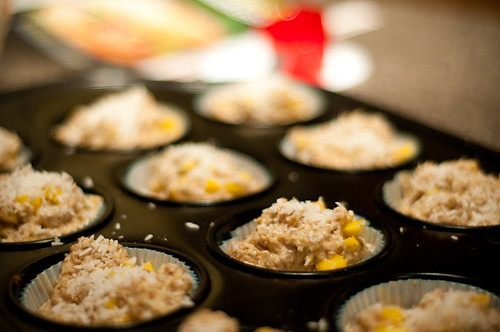
Spoon batter evenly into prepared muffin cups and sprinkle each muffin with 1/2 t coconut.

DSC_8987

3. Bake until edges are light golden brown and a tester comes out clean when inserted into the centre of a muffin...about 16-18 minutes. Let cool in pan for five minutes and then transfer to a cooling rack.

DSC_8990

Voila! Brekkie for the next couple of days. The rubber duckies are a bonus. ;)

Last, I wanted to leave you with a cheap night-time snack idea. Hubs is pretty much the king of night-time snacking...and going out to pick up a $3 bag of chips at the local convenience store/pharmacy can really add up. One thing that we've found awesome for those late night cravings (besides willpower....) is popcorn. Not the scary orange microwaved sludge, but simple air-popped popcorn with a bit of butter and salt. I have also been known to mist my popcorn with a bit of canola in a pinch. This is super tasty because it's all natural (no weird chemicals) and you can control how much salt and butter you end up putting on your popcorn. Popped corn is also a good source of fibre, and you can get kernels for dirt-cheap at bulk stores. Here is hubs in action.....

DSC_9009

So that's my day. And now it's really late, so I'm out. Thanks for reading!


Monday, April 18, 2011

prickly pears and mangoes....a how-to

Pin It Now!

Just in case you've never played with these two fruits. This is what you do.


I bought two prickly pears this week. They were on sale. I'd never had prickly pear before, so I gave it a try. Should you too be so curious, here's what to do.

1. Behold pear in all its prickly goodness. Be careful when handling. I was not careful. I got to spend a little time picking out the picky little 'pricks' of the pear from my fingers.

DSC_8968

2. Cut the ends off. Oooo...pretty.

DSC_8969

3. Make a slit the length of the pear.

DSC_8970

4. Peel off skin.

DSC_8971

5. Chop as needed. The pear is full of small edible seeds. It's got an interesting flavour...dunno if I'll go for it again, but surely all that fun fuschia colour means it's full of vitamins and antioxidants, right?

DSC_8972

Mangoes...how to get the most out of your mango...

I'm not sure if this is the be-all and end-all of mango cutting methods, but it works for me.

1. Stand your mango on end, and cut down one side, along the seed. The photo does a good job of showing the kind of cut you'll make....when you're cutting, you should kinda 'feel' the pit of the mango along one side of your knife. If your knife gets stuck at any point, you're too close to the pit.

DSC_8979

2. Do the same on the other side of the mango.

DSC_8980

3. Take one of the mango slices and place it, cut-side down, on your cutting board. Cut off the skin of the mango. *there are other ways to do this. I just try to minimize the simultaneity of holding both a slippery fruit and a super sharp knife. Repeat this on the other side.

DSC_8981

4. Chop as needed. You should also run your knife along the pit. You should be able to get a long piece from each side of the pit. Cut the skin off of it as well.

DSC_8982

So there you have it. Your fruit education of the day.

Sunday, April 17, 2011

fish and chips...all homemade-like

Pin It Now!

DSC_8920

I think I blew my kid's mind tonight.

I already shared my meal plan for the week and in order to decide what we were going to have for dinner today, I got Lil Z to pick the meal from the photos in the magazine (one of the advantages of planning from a beautifully-photographed magazine). She picked the fish and chips, which I found interesting, because I don't usually serve food like that at home. Maybe it's something she eats at daycare?

DSC_8924

At any rate, I'm pretty sure her mind was completely blown when she learned today that fish sticks are made from pieces of fish (at least mine are) and that chips are made from potatoes. Woah.

DSC_8926

As mentioned before, this week's meal plan is from the May/April issue of Clean Eating (my fave magazine in the whole world right now). Lil Z honed in on the tilapia fish sticks, with dill potato chips and coleslaw. The recipe had an optional tartar sauce that is pretty much the best thing I've ever had. Wow. It was not at all like a normal tartar sauce (i.e., uber sweet, cloying and crazy processed). This was sophisticated, tangy and delicious. And the beauty of using the menu from Clean Eating is that the ingredient that tend to go bad before being used up (in my fridge at least) are used for multiple recipes - cabbage, cottage cheese, etc. I like that, because I hardly ever go through a whole head of cabbage.

Of course, given the cabbage's gaseous properties on one's digestive system, I may like this less as the week goes on. ;)

tilapia sticks with potato chips and coleslaw
stolen and slightly modified from Clean Eating (April/May 2011)
DSC_8922

1 slice whole grain bread
1/2 lb yellow potatoes, scrubbed
2 T olive oil, divided
1/2 t sea salt
1 t dried dill

1/4 head cabbage, thinly sliced
1 large carrot, peeled and grated
(1 large apple, cut into matchsticks - I omitted because I knew it would brown)
1 1/2 t cider vinegar
1/2 t ground mustard
1 egg
3/4 lb boneless, skinless tilapia fillet
1/2 t dried garlic
1/2 t thyme

Sauce:
1/2 c 1% cottage cheese
2 t fresh lemon juice
1 T water
2 t capers, drained
1/2 t dried dill
1/4 c minced celery
fresh ground pepper

1. Preheat oven to 350F. Line a baking sheet with parchment paper and set aside. In a food processor, process bread into crumbs. Set aside.

2. Slice potatoes as thinly as possible (I used a mandoline).

DSC_8901

The fruits of my labours:
DSC_8904

Spread out evenly on baking sheet. Drizzle with oil (I was lazy and spayed with my Misto). Sprinkle with salt.

DSC_8906

Bake for 20 minutes, or until golden brown. As soon as they come out of the oven, sprinkle with dill and lightly toss to comine.

DSC_8914

3. Prepare slaw: In a large bowl, combine cabbage, carrot, radishes and (apple). In a small bowl, whisk together vinegar, mustard and 1 T oil. Toss with cabbage mixture.

DSC_8917

DSC_8923

4. Prepare fish sticks. I processed the tilapia briefly in my food processor (it was already dirty from the breadcrumbs).
DSC_8909

You can also chop very finely. Add chopped tilapia to egg and 1/4 c bread crumbs. Add 1/2 t dried garlic and 1/2 t thyme, as well as a sprinkle of salt and pepper. Use hands (or a silicone spatula) to thoroughly combine.

DSC_8910

5. Divide fish mixture into eight equal portions, shaping each into a rectangular stick about 2.5 inches long. Pour the remaining bread crumbs onto a deep plate. Dredge each stick in bread crumbs, pressing lightly to coat each side.

DSC_8912

6. (The original recipe said to saute. I am lazy - I baked. It worked great). Prehead oven to 400F. Arrange fish sticks on parchment paper (I re-used the same stuff from the potatoes). Spray fish sticks lightly with olive oil. Bake for about 16 minutes. I then broiled for two minutes to ensure optimum crunch.

DSC_8919

7. While the fish sticks are in the oven, mix together the cottage cheese, lemon juice and water in a blender/food processor (I used an immersion blender). Then add the capers, dill, celery and pepper.

Voila! Enjoy.

food prices, hunger and budgeting

Pin It Now!

So apparently food prices are set to go all bananas on us (I thought about linking to a similar New York Times article, but given that their content may not be accessible to all....due to their lovely paywall....I'm sticking with content everyone will be able to see).


We're definitely a little insulated from this in North America. In Canada, we spend an average of 10.2% of our income on food. In the US, it's about 10.1% (I took the food spending as a percentage of pre-tax income, so it would be comparable to the Canadian stats.). While there certainly is no shortage of food-insecure populations (i.e., people for whom the ability to buy food would be greatly affected by an increase in price), for a lot of us, we'll just do a little belt tightening and we'll be fine.

The Financial Times has an entire section dedicated to rising food prices. In poorer nations, the President of the World Bank warns that poor nations risk "losing a generation." I don't know about you, but that is pretty darn terrifying to me. The United Nations World Food Programme even has a Q&A on their site about how rising food prices may affect their ability to help the world's poorest.

When you look at how some developing countries could be facing mass starvation, it really does start to seem a bit petty to be whining about our own plight (OMG MIGHT HAVE TO CANCEL MY PREMIUM CABLE SO I CAN EAT ROAST BEEF). So I do want to let it be clear that I am in no way making light of the food situation, either here in Canada/North America, or abroad.

I donate monthly to my local food bank (which, btw, is much more effective than donating food.) Food banks can leverage your dollar FAR more than they can leverage the food you donate. I.e., if you donate $20 worth of food (at retail cost) it isn't nearly as much as if you donated $20 cash, that the food bank could then leverage at wholesale/donation prices to get more food (and feed more people) for the same amount of money. My local food bank says that every dollar donated distributes $5 worth of food in the community. A worthy investment indeed.

So I don't donate food to the food bank anymore....just $$. As the founders of the Ottawa Food Bank said, "hunger erodes human dignity, lessens human energy and impairs potential."

All this to say I thought it might be interesting to talk a bit more about the cost of food, groceries and how meal planning can help ease the pain of rising grocery prices (a much more microeconomic view of rising food prices than, say, the FT food prices section).

I was pretty lazy this week and took my meal plan straight from Clean Eating's Money-Saver Menu for April/May (sorry the only online content at this point is the shopping list). They listed the cost of the food items in question at $50. Mine rang in at $57.46...not bad considering the different in egg/dairy/meat prices between here and the states. To be clear though, that is NOT the weekly grocery budget, simply because I need to eat more than just dinner! We also had fruits, snacks, etc., that were not on the Clean Eating list.

So I'm going to share my grocery bill and plan for the week, and every day, I'll post about how well I did in my quest NOT to spend more money on food (have I ever mentioned my lazy lunch habit? ugh).

Fruit/Veg
- 5 lb russet potatoes - 2.47
- cabbage (1.77 kg) - 2.30
- 2lb carrots - 1.77
- 3 red mangoes - 2.64
- butternut squash (2.3 kg...it's a monster) - 6.51
- celery - 1.47
- bananas (1.36 kg) - 2.06
- pineapple - 1.67
- royal gala apples (9) - 3.40
- radishes - 1.47
- cantaloupe - 0.99
- green beans (1 lb) - 1.78
- 2 cactus pears - 1.00

Dairy/Meat
- 1% cottage cheese - 2.79
- r-f sliced provolone - 3.99
- 1 dozen eggs - 2.37
- pork loin roast (1.8 kg) - 16.00 (I'm going to cut this into small pieces)*
- sirloin steak medallions - 0.5 kg - 10.79*
- tilapia fillets - 0.65 kg - 10.35*

Grains
- whole wheat English muffins - 1.69
- whole wheat pitas - 1.29
- ancient grains bread - 2.99
- whole wheat tortillas - 1.50
- select bread (not sure what this is?) - 1.29

Grocery
- whole wheat pasta - 3 boxes @ 1.49 - 4.47
- Cheerios - 4.49
- light flake tuna - 6 cans @ 0.69 - 4.14
- corn meal - 0.99
- box of l-s chicken broth - 1.67
- ryvita crackers (to keep me from snacking at work) - 2.49

Non-Food
- plastic wrap - 0.99
- aluminum foil - 0.99

GRAND TOTAL: 105.07

*It's worth mentioning that I am picky about meat and will only buy it from the premium store where I have more confidence as to its origins. I generally no longer buy pre-ground meats (hoorah for my Kitchenaid Food grinder) as I prefer to know exactly what's in my food. I usually look for cuts that are on special, even if they aren't exactly what my recipes call for (the centre loin pork roast was on for $8.80 per kg, while the pork tenderloin was $15something per kilo).

It's also worth mentioning that I already had some staples - like milk - and if I run out, I'll pick up more later this week. I hate my fridge with the fiery passion of a thousand suns, as its layout does not offer a lot of room for things like milk (for the record, if you are considering the Kitchenaid KSRP22F, DON'T DO IT. This layout is super narrow. You can't fit a baking pan in the fridge side, and you can't fit a frozen pizza (yes, I know I hate them...most of the time) on the freezer side. It looks fancy, but it is horrible. And it came with my house, so I'm stuck with it until it dies.)

So the meal plan for this week is:
- pulled pork sandwiches with cole slaw
- gingered chicken soup with sweet potato dumplings, carrots and green beans (I already had chicken in the freezer, hence why it's not on the list)
- cornmeal dusted pork cutlets with balsamic drenched raisins and maple squash (my squash is easily 3x the size necessary. I will likely use the rest for soup or freeze it)
- tilapia fish sticks with dill potato chips and mustard slaw
- roasted sirloin steaks with twice-baked potatoes and roasted veggies

All of these meals will make enough for lunch for hubs and I for the next day. Lil Z gets fed at daycare, so I don't need to worry about her for lunch.

In terms of other foods, this week, I'll be making a batch of whole wheat mango muffins (from Clean Eating) and a tofu-egg breakfast casserole (I have tofu in the freezer). For snacks, we have things like tortillas, fruit, veggies, hard-boiled eggs, tuna, yogourt (already had it).

So, aside from the two 99 cent bags of chips hubs insisted on buying last night, it's a pretty balanced, healthy menu, on a reasonable budget. Do I think you (I?) could spend less? Absolutely. This is the start of an experiment. Next week, I'm going to try to design the least expensive, most nutritious meals I can...you can expect waaaay more legumes in that menu.

This is my plan for the week....I'm going to try to post and share every day, though I may not always have time for elaborate write-ups and photos.

Saturday, April 09, 2011

eat your leafy greens, dammit

Pin It Now!

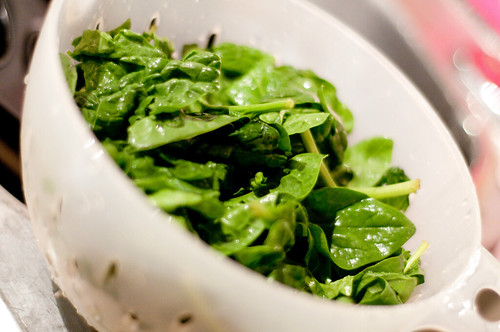
spinach

I can't even count the number of times I've read/heard the phrase "eat more dark green leafy vegetables."

It's everywhere. They form part of Canada's Food Guide. My favourite magazine, Clean Eating, is always touting their benefits. Most lists of so-called 'superfoods' (in quotation marks because this is not a licensed or regulated term, so always take it with a grain of salt) have spinach featured pretty prominently too.

It's a good thing.

BUT, there are a few issues that can come up with spinach (and other leafy greens).

First off, when eaten raw, it's hard to eat enough of these vegetables to really benefit from their nutrients. For example, 1 cup of raw spinach has 7 calories, 1 g fibre. It's a great source of Vitamin A (56% daily value) and Vitamin K (181% daily value). That's pretty good. When you compare with 1 cup of cooked spinach, you get 41 calories, 4 g fibre, 5 g protein (who knew???), and the news gets better with some of the other nutrients - 24% daily value for calcium, 36% daily value for iron [make sure you consume with a vitamin C source to optimize your absorption]. PLUS, 1 cup of cooked spinach is a pretty good sized serving. You won't feel at all satisfied with 1 cup of raw spinach, but the same size serving of cooked spinach will definitely help fill you up.

My other problem with spinach is that I end up buying a big plastic tub of it, and if I'm not cooking it, it ends up going bad, because we can't get through it quick enough. Cooking decreases spinach's volume by nearly 90%, so if you have slightly-sketchy spinach, just cook 'er up, eat it and you're good.

And this brings me to my last point about why cooked spinach is better...y'all might think that processed hamburgers might be one of the number one sources for e.coli....but spinach has also been the source of a surprising number of outbreaks. There are some tips here on how to safely handle spinach, but the reality is that you can't wash off e.coli. You can kill it by cooking though.

One other quick tip about spinach - it has been named as one of the 'dirty dozen' most contaminated vegetables. So if you can find organic spinach, it's probably a better choice. You can see the whole list of the most and least contaminated veg/fruit on the Organic.org website. Just something to think about.

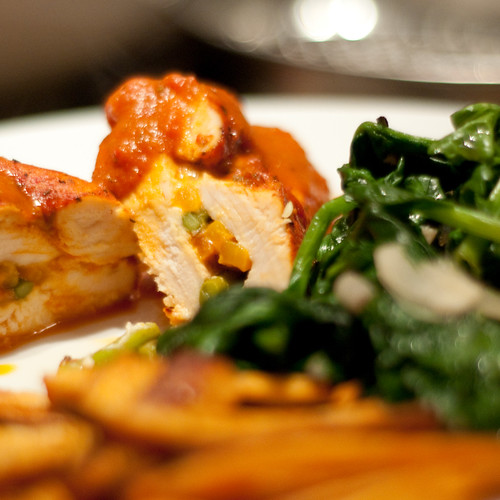
So....now that we've got all of the pleasantries (???) out of the way, let me tell you about dinner. Hubs and I didn't end up eating until 11 last night (Lil Z got some leftover beef stew, made from this Clean Eating recipe). I had *thought* we would be eating around 10, so my chicken was a little dry, and my parsnips a little tough....but they were still tasty, and the recipes are absolutely yummy, so I'm sharing, even though you can clearly see the dried-out execution of the meal on the plates (pics don't lie).

Just don't trust your hubs when he says he'll be home from hockey at 9:45. ;)

This chicken recipe is from (surprise, surprise) Clean Eating. A couple of small mods due to availability, but overall, the taste is great. I think the roasted pepper sauce would be amazing on pasta.

stuffed chicken with spicy roasted red pepper sauce
serves 2 (I made 3....this easily scales up)
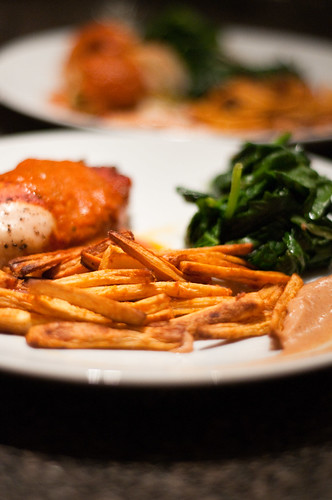
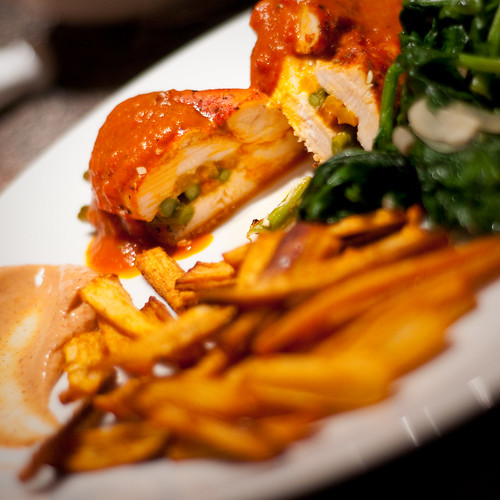
stuffed chicken, parsnip fries and spinach

3 red bell peppers (mine were very small, so I added a yellow and orange for good measure)
1 T olive oil
1 T balsamic vinegar
1 c low-sodium chicken broth (I absolutely love the Kitchen Basics no-sodium-added one)
2-3 cloves garlic, chopped
1/4-1/2 jalapeno pepper (I just used a good pinch of red pepper flakes)
1/2 t italian seasoning (I used herbes de provence)
sea salt and black pepper, to taste

2 boneless, skinless chicken breasts
2 T goat cheese (didn't have any and I hate it...I used finely grated 3 year-aged cheddar...next time I'll go for light laughing cow because it doesn't melt out of the chicken!)
2 asparagus spears per chicken breast, trimmed

1. Preheat broiler. Cut peppers in half, and arrange, cut side down, on a baking sheet.

ready to get burnt....

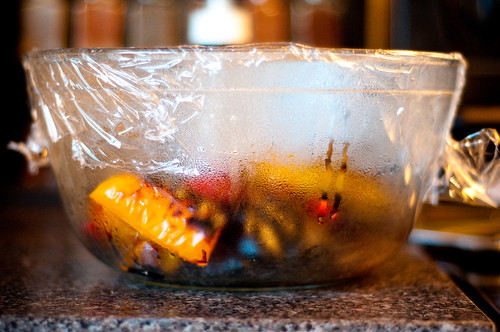
Place as close to the broiler as you can (don't be scared!). Broil for 10-ish minutes. You want them completely burnt. Start checking after 7 minutes. Once they start smoking, then they are probably ready. Immediately put them in a bowl and cover with plastic wrap. Let them steam themselves for about 10 minutes....this makes it easier to remove the skin. (NOTE: if you don't burn the heck of the peppers, the skin will be near-impossible to remove and you will hate me. So burn the peppers, k?).

steaming pile of peppers

2. Once the peppers are cool enough to handle, remove the skin. It's okay if there's still a little black on 'em though. That makes it yummier. (NOTE: If you are lucky enough to have a gas stove, you can do this stove top. Or you can do it on the bbq. Or you can use jarred peppers....really doesn't matter to me!).

3. Take 2-3 peppers and put them in the blender (as mentioned, my peppers were small, so I used 3 small peppers in the sauce. If yours are big, you'll only need two). At any rate, keep one pepper behind to use to stuff your chicken.

4. In the blender, add the oil, vinegar, broth, garlic and hot pepper. Blend until smooth. Put sauce in a small sauce pan over medium-low heat, add italian seasoning and black pepper (and salt to taste) and cook for about 10 minutes. This will take the edge off your raw garlic.

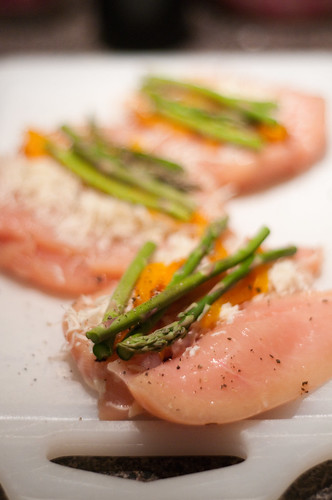
5. Meanwhile, lay the chicken on a cutting board. Using a sharp knife and with the palm of 1 hand holding the chicken, cut each breast in half horizontally (knife should be parallel to cutting board), so it opens like a book. Lay chicken breasts open and spread cheese onto half of each breast. Add asparagus spears, as well as red pepper strips. I used 2 spears per breast, along with 3-4 pepper strips. Close chicken by folding top half back over, sandwiching filling.

the lazy-man's way of stuffing chicken breasts

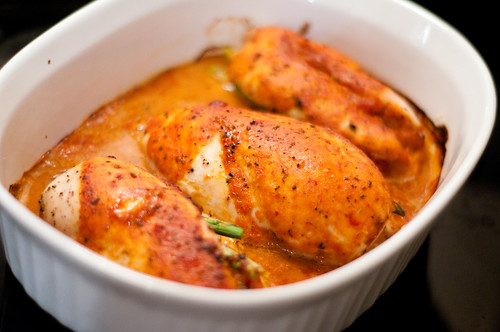
6. Carefully transfer stuffed chicken breasts to casserole dish. Pour about 1/2 c roasted red pepper sauce over chicken breasts and bake for 35-40 minutes (at about 375F) until chicken is cooked through. (I turned my oven waaaay down once I learned of hubs' tardiness, but mine still dried out, so check your chicken after 35 minutes and go from there).

cooked stuffed chicken

7. Serve chicken, and pour additional warm red pepper sauce over chicken.

Clean Eating nutritional info (per 1 breast and 1/4 cup sauce) - 323 calories, 13 g fat, 16 g carbs, 5 g fibre, 10 g sugar, 34g protein, 512 mg sodium, 77 mg cholesterol.

I served this chicken with spiced parsnip fries. Parsnips are one of the most under-appreciated veggies. I think they are SO delicious...and this is one of my favourite ways to cook them. It's easy and you can serve it as a side dish, or as an appetizer (they always disappear). My mom first made this recipe for my brothers and I when we were teenagers, and I'm pretty sure it lasted about 2 minutes on the table. It's really that good.

spiced parsnip fries
stuffed chicken, parsnip fries and spinach

1 lb parsnips
2 T canola oil
1 T thai red curry paste

1/2 c light sour cream
2 T indian curry paste

1. Preheat oven to 350F. Peel parsnips and slice into 'fries.'

white, virginal parsnips

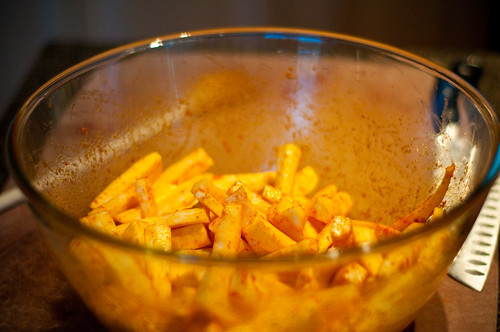
2. In a large bowl, use a whisk to blend the curry paste into the canola oil (the whisk is really the only way to get the dense curry paste to blend into the oil. This stuff is killer spicy, so you don't want clumps).

3. Bake parsnip fries for about 50 minutes, turning once. I like to put mine on parchment paper, because a) they don't stick, and b) I can toss it and I don't have to scrub a pan.

curry covered parsnips

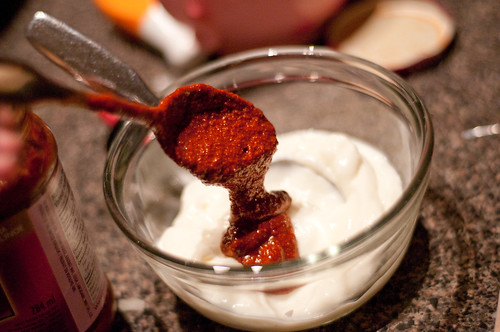
4. In the meantime, combine the curry paste and light sour cream. You can use any kind of curry paste - I used tikka this time, but I've used mild, hot, vindaloo...even curry powder, garlic and honey in a pinch.

sour cream and curry paste

5. Enjoy. Again, my fries are a little dried out and tough because of the extra 45 minutes in the oven. They are still yummy, but definitely better when you don't get a jaw workout eating them. :)

But hey, that's how you know this blog is real, right?

Last, here is the spinach recipe. This one is from Clean Eating and is deeelish.

garlicky spinach

don't forget to wash your spinach

2 t olive oil
1/2 cup chopped onion
4 cloves garlic, minced (I used my slicer because it's fun and I like it)
12-oz spinach (300g or so)
1 cup basil leaves
pinch sea salt, black pepper

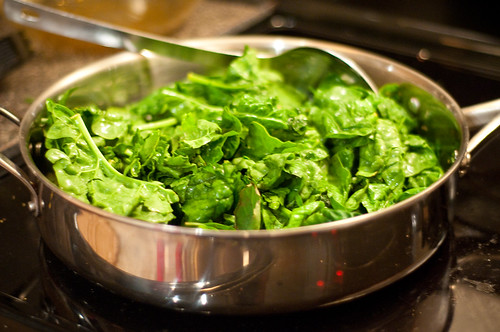
1. Heat a large sauté pan. Add oil, let oil heat up. Add garlic and onion and sauté until very slightly browned. Add spinach, basil, salt and pepper and toss for 2 mins (until spinach is wilted).

Voila. There you have it. This was a really yummy way to make spinach - the basil really brightened up the flavour and I'd highly recommend it. OMNOMNOM.

As a minor administrative note, I noticed that I've been getting some spam comments on the older blog posts....so I've instituted comment moderation on all posts older than a month. I'm not trying to censor anyone, I just don't really want my blog to become a spam haven....so if you comment that a 'recipe looks tasty,' but you link to a website hawking fake handbags or counterfeit viagra....sorry, that's not gonna happen. ;)

Other than that though...I do live and breathe for comments and feedback. :)

stuffed chicken, parsnip fries and spinach

Thanks for reading!


Related Posts with Thumbnails